Req 2 — The Archaeological Process
Archaeology is not just digging holes and hoping to find something cool. It is a structured, step-by-step scientific process. Every archaeological project follows the same basic sequence, and each step builds on the one before it. Let’s walk through each stage.
Step 1: Site Location
Before archaeologists can study a site, they have to find one. Sometimes sites are discovered by accident — a farmer plowing a field might turn up pottery, or a construction crew might uncover old foundations. But archaeologists also actively search for sites using several methods:
- Pedestrian survey — Walking across the landscape, scanning the ground for artifacts or features like mounds, depressions, or old walls.
- Aerial photography and satellite imagery — Patterns invisible from the ground often show up from above. Crop marks, soil discoloration, and shadow lines can reveal buried structures.
- LiDAR — Laser scanning from aircraft can “see through” forest cover and reveal ancient earthworks, roads, and building foundations hidden for centuries.
- Oral history and historical records — Local stories, old maps, and written accounts often point archaeologists to promising locations.
Step 2: Background Research and Research Design
Once a site is located, archaeologists do their homework before they ever touch a shovel. This step involves:
- Reviewing existing records — Has anyone studied this area before? What did they find? Are there historical documents, old photos, or previous archaeological reports?
- Studying the environment — What is the local geology? What plants and animals live in the area? What was the climate like in the past?
- Forming research questions — Good archaeology starts with a question. “Who lived here?” “What did they eat?” “How did they interact with neighboring groups?” These questions guide every decision that follows.
- Writing a research design — This is the project’s game plan. It spells out what the team wants to learn, how they plan to find out, what methods they will use, and how long the project will take.
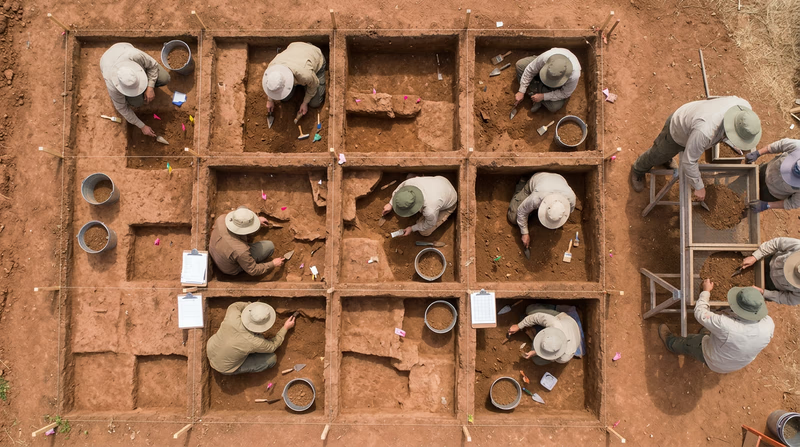
Step 3: Site Survey and Fieldwork
This is the part most people picture when they think of archaeology — the actual digging. But fieldwork is far more methodical than it looks on TV.
Survey comes first. The team maps the entire site, often using GPS and total stations (precision measuring instruments). They lay out a grid system — usually in one-meter squares — so every find can be pinpointed to an exact location.
Excavation follows. Archaeologists remove soil one thin layer at a time, using trowels, brushes, and even dental picks for delicate work. Every layer (called a stratum) is documented with photographs, drawings, and detailed notes. Soil samples are collected and screened through mesh to catch tiny artifacts like beads, seeds, or bone fragments.
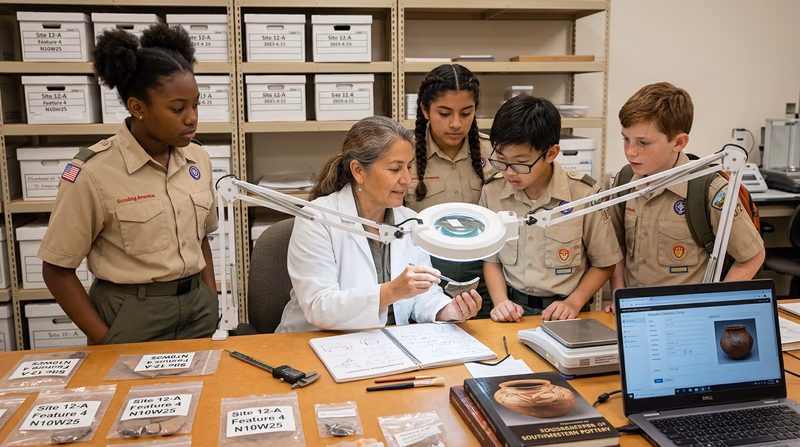
Step 4: Artifact Identification and Examination
After artifacts are removed from the ground, the real detective work begins in the laboratory. Each object is:
- Cleaned — Carefully washed or dry-brushed, depending on the material.
- Cataloged — Assigned a unique number and entered into a database with its exact location, depth, and associated features.
- Identified — What is it? A piece of pottery? A stone tool? An animal bone? What material is it made from?
- Analyzed — Specialists examine artifacts using microscopes, chemical tests, X-rays, and other technologies. A ceramics expert might identify which clay source was used. A lithics specialist might determine how a stone tool was made.
Step 5: Interpretation
Interpretation is where all the data comes together into a story. Archaeologists look at all their evidence — artifacts, soil layers, site layout, laboratory results, dating information — and ask: What does this all mean?
This step requires creative thinking and careful reasoning. A cluster of burned stones, charcoal, and animal bones might be interpreted as a cooking area. Dozens of arrowheads near a river crossing might suggest a hunting camp. But interpretations must always be supported by evidence, and archaeologists often propose multiple possible explanations.
Step 6: Preservation
Archaeology is inherently destructive — once a site is excavated, it can never be put back the way it was. That makes preservation essential at every stage.
- In-situ preservation — Sometimes the best decision is to not dig. Leaving a site undisturbed for future archaeologists with better technology is a responsible choice.
- Artifact conservation — Recovered objects must be stabilized and stored properly. Metal artifacts might need chemical treatment to stop rust. Organic materials like wood or textiles need controlled temperature and humidity.
- Record keeping — Detailed notes, photographs, maps, and databases ensure the information survives even if the artifacts eventually deteriorate.
Step 7: Information Sharing
Archaeology belongs to everyone. The final step in the process is sharing what was learned with both the scientific community and the public.
- Academic publications — Research papers and reports are published in journals so other scholars can review and build on the findings.
- Public outreach — Museum exhibits, public lectures, school programs, websites, and documentaries bring archaeology to life for non-specialists.
- Descendant communities — When sites are connected to living communities (especially Indigenous peoples), archaeologists have a responsibility to share findings and collaborate respectfully.