Archery Merit Badge — Complete Digital Resource Guide
https://merit-badge.university/merit-badges/archery/guide/
Introduction & Overview
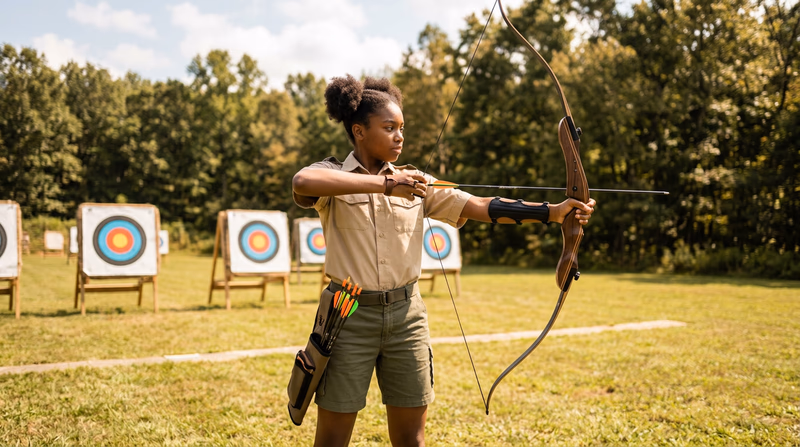
There is something deeply satisfying about pulling back a bowstring, aiming at a target, and releasing an arrow. Archery is one of the oldest skills in human history, and today it is a sport that rewards patience, focus, and discipline. Whether you are shooting at a paper target in a field, aiming at a foam deer in the woods, or competing on an Olympic-level range, archery connects you to a tradition that stretches back thousands of years.
The Archery merit badge teaches you how to shoot safely, understand your equipment, and test your skills on the range. By the time you earn this badge, you will know how to handle a bow with confidence and respect.
Then and Now
Then — The Bow as a Tool of Survival
For tens of thousands of years, the bow and arrow was one of humanity’s most important inventions. Ancient Egyptians used bows for hunting and warfare as early as 3000 BCE. English longbowmen changed the course of European history at battles like Crécy and Agincourt. Native American nations developed sophisticated bow designs perfectly suited to their environments — short, powerful bows for hunting bison from horseback on the Great Plains, and longer bows for woodland hunting in the East.
- Purpose: Hunting, warfare, survival
- Mindset: Accuracy meant food on the table — every shot counted
Now — The Bow as a Precision Sport
Today, archery is a global competitive sport featured in the Olympic Games and practiced by millions of people for recreation. Modern bows are engineered with advanced materials like carbon fiber and aluminum alloys. Sights, stabilizers, and mechanical releases help archers achieve incredible accuracy. Yet the core challenge remains the same: steady your body, control your breathing, and put the arrow where you want it.
- Purpose: Competition, recreation, fitness, personal challenge
- Mindset: Consistency and mental focus — archery is as much a mental sport as a physical one
Get Ready! Archery is a sport you can enjoy for a lifetime, whether you are 12 or 72. All you need is a bow, some arrows, a safe place to shoot, and the willingness to learn. Let’s get started!
Kinds of Archery
Archery is not just one activity — it is a whole family of shooting sports. Here is a look at the main types you might encounter.
Target Archery
Target archery is the style you see at the Olympics. Archers stand at a fixed distance from round, multi-colored targets and shoot a set number of arrows. Distances range from 18 meters indoors to 70 meters outdoors. It is all about precision and consistency — putting arrow after arrow into the center of the target.
Field Archery
Field archery takes you off the flat, open range and into the woods. Archers walk a course of targets set at varying distances and angles — uphill, downhill, across clearings, and through shadows. It tests your ability to judge distance and adapt your shot to changing conditions.
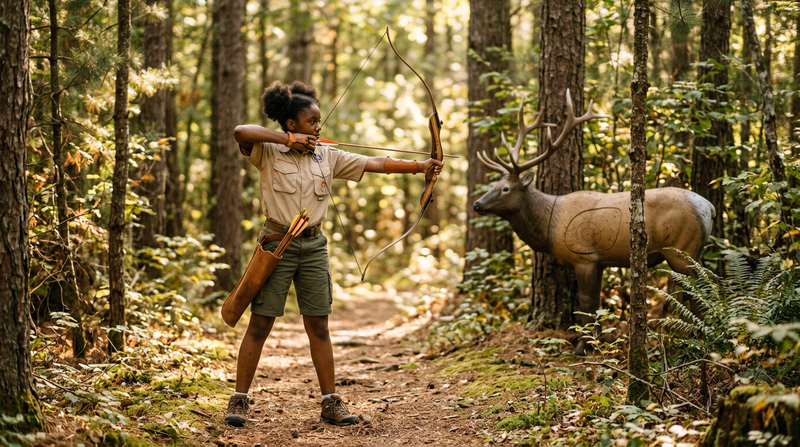
3-D Archery
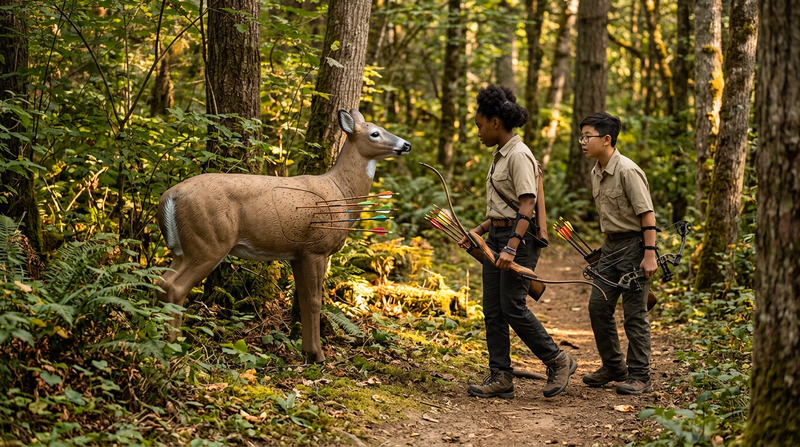
In 3-D archery, you shoot at life-sized foam animal targets placed along a wooded course. Each target has scoring rings on its side, and archers must judge the distance without any markers. It is the closest thing to a real hunting scenario without any animals involved, and it is a lot of fun.
Bowhunting
Bowhunting uses archery skills in a real hunting setting. It requires additional training, licensing, and a deep understanding of wildlife, ethics, and conservation. Many states have specific bowhunting seasons that are separate from firearm seasons.
Traditional Archery
Traditional archery means shooting with simple equipment — typically a longbow or a wooden recurve bow, with no sights, stabilizers, or mechanical aids. It is archery stripped down to its essentials: you, the bow, and instinct. Many archers find it deeply rewarding because every shot depends entirely on feel and practice.
Para Archery
Para Archery is competitive archery for athletes with physical disabilities. Archers may shoot from wheelchairs or use adaptive equipment. It is a Paralympic sport, and the skill level at the top is remarkable. Para Archery proves that this sport is truly for everyone.
Now that you know what archery is all about, it is time to learn the most important part — how to stay safe on the range.
Req 1a — Projectile Safety
What Is a Projectile?
A projectile is any object that is launched through the air by an applied force. Once that force sends it on its way, gravity and air resistance are the only things acting on it until it hits something. A thrown baseball is a projectile. A kicked soccer ball is a projectile. And an arrow shot from a bow is definitely a projectile.
What makes an arrow different from a ball? Speed, sharpness, and penetrating power. An arrow leaves a recurve bow at roughly 150 miles per hour — and it has a pointed tip designed to stick into whatever it hits. That combination demands serious respect.
Why Care and Respect Matter
Every device that shoots a projectile at high speed — whether it is a bow, a slingshot, or a rifle — shares one critical characteristic: once the projectile is released, you cannot call it back. There is no “undo” button. That is why archery equipment must always be treated with the same level of care and respect as any other shooting sport.
Here is what “care and respect” looks like in practice:
- Never aim a bow at another person, even if there is no arrow nocked. This builds a habit of safe muzzle — or in this case, safe bow — direction.
- Never dry fire a bow (release the string without an arrow). This can damage the bow and send broken parts flying.
- Treat every arrow as if it could cause harm, because it can.
- Always be aware of what is in front of and behind your target. Arrows can skip off the ground, pass through targets, or bounce off hard surfaces.
Approved Locations Only
You cannot set up a target in your backyard and start shooting without checking a few things first. Archery must be practiced in approved locations for several important reasons:
- Safety zones: Approved ranges have backstops, side barriers, and buffer zones that prevent arrows from leaving the range area.
- Controlled access: On a proper range, people do not wander into the line of fire. Access is managed so that archers and spectators stay safe.
- Supervision: Many ranges have trained range officers or instructors who enforce safety rules and can respond to emergencies.
- Legal compliance: Many cities and counties have laws about where you can and cannot discharge projectiles. Shooting in an unapproved location could be illegal, even on your own property.
Putting It Together
Understanding what a projectile is — and why archery equipment demands respect — is the foundation of everything else you will learn in this badge. Safety is not a set of rules to memorize and forget. It is a mindset that stays with you every time you pick up a bow.
USA Archery — Safety Official safety resources from USA Archery, the national governing body for the sport. Link: USA Archery — Safety — https://www.usarchery.org/participate/safetyReq 1b — Range Safety Rules
The Five Range Safety Rules
Every organized archery range follows a set of safety rules designed to keep archers, spectators, and range staff safe. These rules are not suggestions — they are absolute requirements. Learn them, practice them, and follow them every single time you step onto a range.
1. Always Keep Your Arrows in Your Quiver Until You Are Told to Shoot
Arrows stay in the quiver until the range officer gives the command to shoot. No exceptions. You do not nock an arrow, you do not handle an arrow, and you do not pull an arrow from the quiver until you are on the shooting line and the range is officially open for shooting.
This rule prevents accidental releases and keeps the range orderly. When everyone follows it, there is never a question about whether it is safe to be downrange.
2. Always Aim at the Target — Never at Anything Else
Your bow should only ever be pointed at the target. Never swing your bow to the side, aim above the backstop, or point your bow in any direction other than straight at the target in front of you. Even when adjusting your stance or practicing your form without an arrow, keep your bow oriented toward the target line.
3. Never Shoot Straight Up into the Air
An arrow shot upward will come back down — and you have no control over where it lands. Even at a slight upward angle, an arrow can sail over the backstop and travel hundreds of yards. Always shoot on a flat or slightly downward trajectory toward the target.
4. Be Sure of What Is in Front of and Behind Your Target
Before you shoot, confirm that the area around and behind your target is clear. People, animals, or property behind the target could be struck by an arrow that misses or passes through. On a well-designed range, backstops handle this for you — but you should still develop the habit of checking.
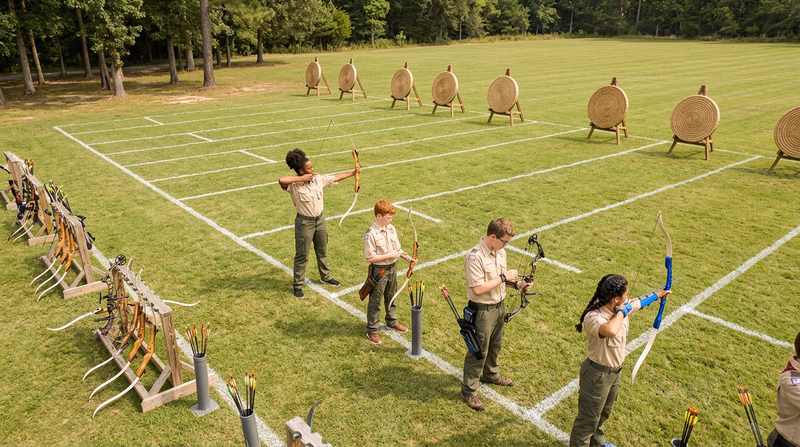
5. Only Shoot from the Shooting Line
The shooting line is a marked line on the ground where archers stand to shoot. You do not shoot from in front of it, behind it, or off to the side. Shooting from the same line ensures that all archers are at a consistent distance from the targets and that no one is accidentally downrange when arrows are flying.
Why These Rules Work
Notice that the five rules work together. If everyone keeps arrows in the quiver until told to shoot (Rule 1) and only shoots from the shooting line (Rule 5), then no one is handling arrows while others are downrange. If everyone aims only at the target (Rule 2) and checks what is behind it (Rule 4), stray arrows are virtually eliminated. And if no one shoots upward (Rule 3), arrows stay within the controlled range area.
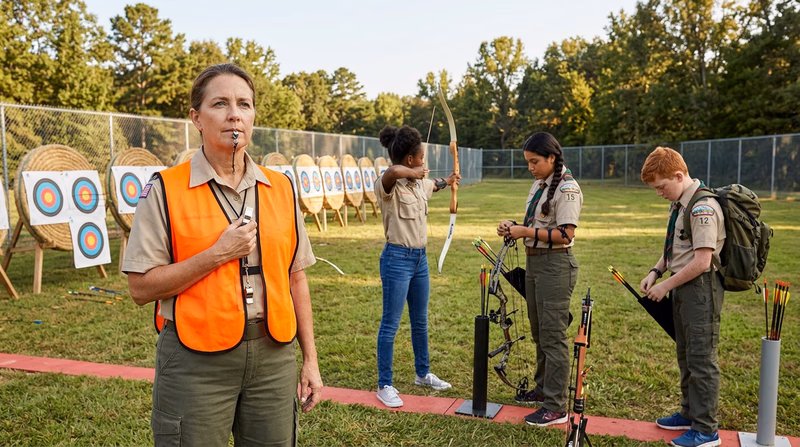
Req 1c — Whistle Commands
Why Whistles?
On a busy archery range, voice commands can get lost in the wind or drowned out by conversation. A whistle cuts through all of that. Every archer on the range can hear it clearly, no matter where they are standing. The whistle system gives the range officer a fast, unmistakable way to control the flow of shooting.
There are four standard whistle commands. Each one means something specific, and every archer must respond immediately.
The Four Whistle Commands
Two Blasts — “Archers to the Shooting Line”
Two short whistle blasts mean it is time to step up to the shooting line. Pick up your equipment, move to your assigned position on the line, and get ready. You may straddle the line or stand just behind it, depending on range rules — but you do not nock an arrow yet.
One Blast — “Begin Shooting”
One whistle blast means the range is live. You may now nock an arrow and begin shooting. This is the only time you should have an arrow on the string.
Three Blasts — “Walk Forward and Get Your Arrows”
Three whistle blasts mean shooting has ended and it is safe to walk downrange to retrieve your arrows. Before walking forward, place your bow on the bow rack or set it down safely. You should never carry a bow downrange while retrieving arrows.
Five or More Blasts — “STOP! Emergency!”
Five or more rapid whistle blasts mean there is an emergency. Stop what you are doing immediately:
- If you are at full draw, let down carefully — do not release the arrow.
- Place your arrow back in your quiver.
- Set your bow down.
- Wait for instructions from the range officer.
This signal is used when someone has entered the range unexpectedly, an injury has occurred, or any other dangerous situation develops.
The Flow of a Shooting Session
Understanding the whistles makes more sense when you see how they fit into the rhythm of a shooting session:
- Two blasts → Archers walk to the shooting line and prepare.
- One blast → Archers begin shooting their arrows (an “end”).
- When all archers have finished, three blasts → Everyone walks forward to pull arrows from the targets.
- Once arrows are retrieved and everyone is back behind the line, the cycle repeats.
This cycle of shoot–retrieve–shoot continues throughout a practice session or competition. If at any point something goes wrong, five or more blasts stops everything.
USA Archery — Getting Started Learn more about range procedures and how to get involved in organized archery through USA Archery. Link: USA Archery — Getting Started — https://www.usarchery.org/participateReq 1d — Retrieving Arrows
Why Arrow Retrieval Matters
Pulling arrows from a target might seem simple, but doing it wrong can result in broken arrows, damaged equipment, or even injury. Arrows that snap during removal can send sharp fragments flying. Arrows pulled at an angle can bend or crack. And rushing through retrieval puts you and the archers around you at risk.
Step-by-Step: Safe Arrow Retrieval
Before You Approach
- Wait for three whistle blasts before leaving the shooting line. Never walk downrange until the range officer signals that it is safe.
- Set your bow down on the bow rack or on the ground before walking to the target. You should never carry a bow to the target while retrieving arrows.
- Watch your step as you walk downrange. Arrows that missed the target may be lying in the grass or sticking out of the ground.
At the Target
Follow these steps to pull each arrow safely:
- Check behind you to make sure no one is standing directly behind you where the arrow will come out.
- Place one hand flat against the target face near the arrow to brace it. This keeps the target from tearing and gives you control.
- Grip the arrow shaft close to the target with your other hand. Grip it firmly but do not squeeze so hard that you bend the shaft.
- Pull the arrow straight back in the same direction it went in. Twisting or angling the arrow can bend or break the shaft and damage the target.
- Place the arrow in your quiver immediately after pulling it. Do not carry loose arrows in your hand — they can poke you or someone nearby.
Handling Stuck Arrows
Sometimes an arrow buries deep into the target and does not want to come out. Here is what to do:
- Do not yank it. Jerking a stuck arrow can snap the shaft and send the back half flying toward your face.
- Try twisting it gently while pulling straight back. A slight rotation can break the suction that holds the point in the foam or straw.
- Ask for help from the range officer or an experienced archer if you cannot get it out. Many ranges keep a small tool called an arrow puller — a rubber grip pad that gives you extra traction on the shaft.
Finding Lost Arrows
Arrows that miss the target can end up in the grass, dirt, or brush behind the target. Always look for missing arrows after each end. Here is how:
- Count your arrows before you leave the shooting line. If you shot six arrows, you should find six arrows.
- Walk the area behind and around the target carefully. Arrows lying in grass can be hard to see and dangerous to step on.
- Check the ground in front of the target for arrows that may have bounced or skipped off the surface.
Req 1e — Archery Laws
Why Laws Matter
Archery is legal in all 50 states, but the rules for where and how you can shoot vary widely. What is perfectly fine in a rural county might be illegal in a city neighborhood. Understanding your local and state laws before you start shooting is not just smart — it is your responsibility as an archer.
This requirement asks you to research the laws that apply to you, in your community. The information below will help you understand what kinds of laws to look for and where to find them.
Types of Laws to Research
State Laws
Most states regulate archery as part of their hunting and wildlife codes. Common state-level rules include:
- Minimum age requirements for bowhunting (often 10–12 years old, depending on the state)
- Bowhunting season dates and the types of bows allowed during each season
- Hunter education requirements — most states require completion of a hunter education course before purchasing a hunting license
- Equipment restrictions — some states specify minimum draw weights or arrow types for hunting certain animals
- Discharge laws — rules about shooting projectiles within certain distances of roads, buildings, or occupied areas
Local and Municipal Laws
Your city, town, or county may have additional rules that are more restrictive than state law. These often include:
- Discharge ordinances — many cities and suburbs prohibit shooting any projectile (including arrows) within city limits, even on private property
- Zoning restrictions — some areas only permit archery ranges in certain zones (commercial, agricultural, etc.)
- Noise and nuisance ordinances — while archery is relatively quiet, complaints from neighbors can lead to enforcement actions
- Parks and public land — most public parks do not allow archery unless there is a designated range
Private Property
Even on your own land (or your family’s land), there may be rules about shooting. In many suburban and semi-rural areas, you need a certain amount of acreage before you can legally discharge a bow. Some homeowners’ associations (HOAs) also prohibit archery in their covenants.
How to Find Your Laws
Here is a practical approach for researching your local and state archery laws:
Law Research Checklist
Steps to find your archery laws- Visit your state’s fish and wildlife agency website: Look for hunting regulations, bowhunting sections, and archery-specific rules.
- Check your city or county website: Search for discharge ordinances and recreational use of projectiles.
- Contact your local Scout council: They may already have a summary of local archery rules or can point you to the right resources.
- Ask your merit badge counselor: Your counselor likely knows the key regulations in your area and can help you find official sources.
- Call your county sheriff’s office or local police non-emergency line: They can clarify what is and is not allowed in your neighborhood.

Preparing for Your Counselor Meeting
Your counselor will want to hear you explain the specific laws that apply where you live. Do not just say “archery is legal in my state.” Be ready to talk about:
- Whether you can shoot in your backyard or need to go to a range
- What the minimum age is for bowhunting in your state (even if you do not plan to hunt)
- Whether your city has any discharge ordinances
- What licenses or education courses are required for bowhunting
Req 2 — Know Your Arrows
This requirement covers everything about arrows — their parts, types, shaft materials, and how to build, repair, and care for them.
Req 2a — Parts of an Arrow
Every arrow, regardless of its type or material, has the same basic components. Learning to name and identify each part is your first step toward understanding how arrows work.
The Parts
Point (or Tip): The front end of the arrow that strikes the target. Points come in many styles — field points for target shooting, broadheads for hunting, and blunt tips for small game. The point screws or glues into the shaft.
Shaft: The long, straight body of the arrow. This is the main structural component. Shafts are made from wood, aluminum, fiberglass, or carbon fiber (more on materials in Req 2c).
Fletching (or Vanes): The feathers or plastic fins near the back of the arrow. Most arrows have three fletchings spaced evenly around the shaft. They stabilize the arrow in flight by creating drag and causing the arrow to spin slightly, similar to how a football spiral keeps a pass on target.
Nock: The small plastic or horn piece at the very back of the arrow with a slit that clips onto the bowstring. The nock keeps the arrow in place on the string until you release.
Index Fletching (or Cock Feather): One of the three fletchings is a different color than the other two. This is the index fletching, and it faces away from the bow when the arrow is nocked. Proper orientation prevents the fletchings from hitting the bow as the arrow passes.
Crest: An optional painted band or pattern on the shaft near the fletchings. Crests help you identify your arrows from other archers’ arrows on the range.
Req 2b — Types of Arrows
Arrows are designed for specific purposes. The type of arrow you use depends on what you are shooting at and what kind of bow you are using. Here are some of the most common types:
Target Arrows
Target arrows are designed for accuracy on the range. They typically have field points (bullet-shaped tips) and are built for consistency — every arrow in a set should weigh the same and fly the same way. They are the most common arrows used in the Archery merit badge.
Field Arrows
Field arrows are similar to target arrows but are built slightly heavier and tougher to handle the varied conditions of a field archery course — uphill shots, downhill shots, and varying distances through the woods.
Hunting Arrows
Hunting arrows carry broadheads — wide, razor-sharp tips designed to harvest game humanely. They are heavier than target arrows and built to penetrate deeply. Hunting arrows must be matched carefully to the bow’s draw weight.
Flu-Flu Arrows
Flu-flu arrows have oversized, untrimmed feather fletchings that create a lot of air resistance. This causes the arrow to slow down quickly and travel a much shorter distance — usually no more than 30 yards. They are used for aerial targets or situations where you do not want the arrow to travel far.
Blunt-Tipped Arrows
These arrows have flat or rounded rubber or plastic tips instead of pointed ones. They are used for small game hunting (like rabbits) and for stump shooting — a casual practice where archers walk through the woods shooting at stumps, dirt mounds, and other natural targets.
Req 2c — Arrow Shaft Materials
The shaft is the backbone of the arrow, and the material it is made from affects weight, stiffness, durability, and cost. The four principal materials are:
Wood
Wood was the original shaft material and is still used in traditional archery. Cedar is the most popular choice because it is straight-grained, lightweight, and has a pleasant scent. Wood shafts must be carefully selected for straightness and spine (stiffness), and they require more maintenance than modern materials. They are required for use with traditional longbows.
Aluminum
Aluminum arrows are manufactured to very precise specifications and come in a wide range of sizes and spine weights. They are durable, consistent, and relatively affordable. Aluminum is a popular choice for beginners and is widely used in indoor target archery.
Fiberglass
Fiberglass shafts are extremely durable and virtually indestructible, which makes them a common choice for camp archery programs and beginners. They are heavier than aluminum or carbon and not as precise, but they hold up well to the abuse of young archers learning the sport.
Carbon (or Carbon Fiber)
Carbon arrows are lightweight, very stiff, and extremely fast. They are the top choice for competitive archers and bowhunters because of their consistency and speed. Carbon shafts are more expensive than other materials, and they require careful inspection — a cracked carbon arrow can shatter on release.
Req 2d — Make or Repair Arrows
For this requirement, you choose one option:
Option 1: Make a Complete Arrow
Building an arrow from a bare shaft teaches you how all the parts come together. You will need a bare shaft, a point, a nock, fletching material (feathers or vanes), and fletching glue or cement. The basic steps are:
- Cut the shaft to length based on your draw length (plus about an inch for safety).
- Install the point by gluing or screwing it into the front of the shaft.
- Install the nock on the back end of the shaft.
- Fletch the arrow by gluing three vanes or feathers evenly spaced around the shaft using a fletching jig.
- Inspect the finished arrow for straightness, proper alignment, and secure components.
Option 2: Demonstrate Arrow Repair
Arrow repair involves inspecting arrows for damage and replacing worn or broken components. You will need to:
- Inspect shafts for bends, cracks, or splinters
- Remove and replace at least three vanes (fletchings)
- Remove and replace one point
- Remove and replace one nock
You can spread these repairs across multiple arrows. The repairs can be done on wood, fiberglass, or aluminum arrows.
Req 2e — Arrow Care and Storage
Arrows are precision instruments. Treating them well means they will fly straight, last longer, and keep you safe.
Care
- Inspect arrows before every shooting session. Check for bent shafts, loose points, cracked nocks, and damaged fletchings.
- Flex-test carbon arrows every time you shoot. Bend them gently and listen for cracks.
- Replace damaged components promptly. A loose nock or torn vane affects accuracy and can cause an arrow to fly unpredictably.
- Clean arrows after use by wiping down the shafts with a damp cloth to remove dirt and target material.
Storage
- Store arrows in a quiver or arrow tube to protect them from bending, warping, and physical damage.
- Store arrows horizontally or vertically in a rack — never leaning against a wall at an angle, which can cause warping over time.
- Keep arrows away from extreme heat. Do not leave them in a hot car, which can soften glue and loosen components.
- Keep wooden arrows away from moisture. Wood shafts can absorb water, swell, and warp. Store them in a dry location.
Pre-Shoot Arrow Inspection
Check every arrow before you shoot- Shaft is straight with no visible cracks, dents, or bends.
- Point is securely attached and not loose or wobbly.
- Nock is intact and clips firmly onto the bowstring.
- All three fletchings are securely glued and not peeling or torn.
- Carbon arrows pass the flex test with no cracking sounds.
Req 3 — Accessories & Terminology
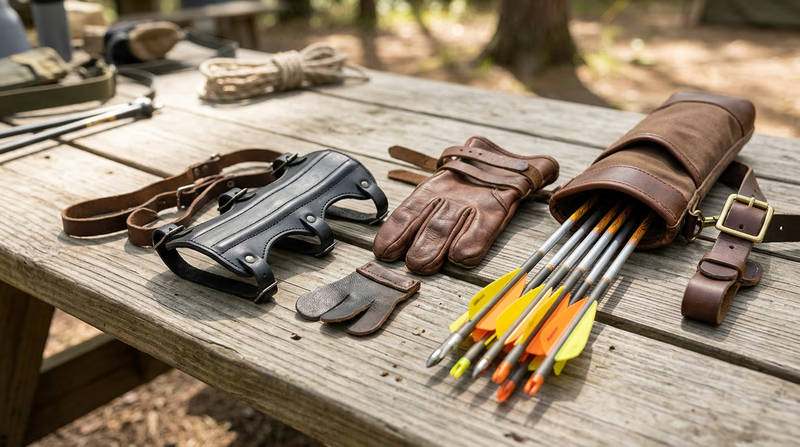
Req 3a — Archery Accessories
Archery accessories are not optional extras — they protect your body and keep your equipment organized. Here is what each one does and why you need it.
Finger Tab
A finger tab is a small piece of leather or synthetic material that fits over the fingers you use to pull the bowstring (usually the index, middle, and ring fingers). It protects your fingers from the repeated friction of the string and gives you a smoother release.
- Use: Place the tab over your drawing fingers before each shooting session. The smooth surface lets the string slide off your fingers cleanly.
- Why: Without a tab, the bowstring digs into your fingertips. After just a few shots, you will develop painful blisters that make it hard to shoot well.
- Care: Wipe down after use to remove sweat and oils. Leather tabs can be lightly conditioned to stay supple.
- Storage: Store flat in a dry place. Do not crumple or fold.
Arm Guard (Bracer)
An arm guard is a flat piece of leather, plastic, or composite material that straps to the inside of your bow arm (the arm holding the bow). It protects your forearm from being hit by the bowstring when you release an arrow.
- Use: Strap it to the inside of your bow arm before shooting. Make sure it covers the area from wrist to just below the elbow.
- Why: A bowstring slapping bare skin hurts — and it leaves a welt that can take days to heal. Even experienced archers wear arm guards because even good form occasionally produces a string slap.
- Care: Wipe clean after use. Check straps and buckles for wear.
- Storage: Store flat. Do not stack heavy items on top of it.
Shooting Glove
A shooting glove covers the three drawing fingers with individual leather or synthetic finger stalls. It serves the same purpose as a finger tab — protecting your fingers from the bowstring — but some archers prefer the feel of a glove because it stays in place more securely.
- Use: Slide it on your drawing hand before shooting. Each finger stall should fit snugly.
- Why: Like a tab, a glove prevents blisters and gives a consistent release. Some archers prefer gloves for cold-weather shooting because they also provide warmth.
- Care: Air dry after use. Leather gloves can be conditioned occasionally.
- Storage: Store flat with fingers extended, not balled up.
Quiver
A quiver holds your arrows safely and keeps them accessible. Quivers come in several styles:
Hip quiver: Hangs from your belt at your side. Most common for target archery.
Back quiver: Slings over your shoulder with arrows pointing up behind you. Traditional style, popular for field archery and historical reenactment.
Ground quiver: A stand that holds arrows upright next to the shooting line. Common at ranges.
Bow-mounted quiver: Attaches directly to the bow. Used mainly for bowhunting.
Use: Place arrows point-down in the quiver (hip or ground quiver) or point-up (back quiver). Always retrieve arrows from the quiver — never from the ground or your other hand.
Why: Loose arrows are a tripping and stabbing hazard. A quiver keeps them organized, protected, and ready to use.
Care: Check for worn stitching, broken clips, or bent supports. Clean fabric quivers periodically.
Storage: Store upright or hanging. Remove arrows before long-term storage.
Req 3b — Key Archery Terms
Understanding these four terms will help you communicate with instructors, shop staff, and fellow archers.
Draw Length
Your draw length is the distance you pull the bowstring back from the bow’s grip to your anchor point (the consistent spot on your face where you hold the string at full draw). It is measured in inches and is determined by your arm span and body proportions.
Draw length matters because it determines how long your arrows need to be and how the bow is set up for you. An arrow that is too short is dangerous — it can fall off the arrow rest and jam into the bow. An arrow that is too long is less efficient and harder to control.
Draw Weight
Draw weight is the amount of force (measured in pounds) required to pull the bowstring back to full draw. A 20-pound draw weight means you need to exert 20 pounds of pulling force to reach full draw.
For beginners, a draw weight of 15–25 pounds is typical. Competitive target archers may use 30–50 pounds. Bowhunters often use 40–70 pounds or more, depending on the game they pursue and state minimum requirements.
Using a draw weight that is too heavy causes fatigue, poor form, and even injury. It is always better to start light and build up.
Mechanical Release
A mechanical release (or release aid) is a handheld device that clips onto the bowstring and releases it with a trigger mechanism instead of your fingers. Mechanical releases are used almost exclusively with compound bows. They provide an extremely clean, consistent release that eliminates the inconsistency of a finger release.
Release aids come in several styles — wrist-strap triggers, handheld thumb triggers, and back-tension releases that fire when you expand your back muscles.
Barebow
Barebow is a shooting style where the archer uses a recurve bow with no sights, stabilizers, clickers, or other aiming devices attached to the bow. The archer aims using instinct, gap shooting (using the arrow tip as a reference point), or string walking (moving the finger position on the string to adjust aim for different distances).
Barebow is a recognized competition division in both USA Archery and World Archery events. It is considered one of the most challenging and rewarding styles because the archer relies entirely on skill and feel.
USA Archery — Equipment Rules Official equipment rules and division definitions from USA Archery, including barebow and other competition categories. Link: USA Archery — Equipment Rules — https://www.usarchery.org/resources/competition-rulesReq 4 — Formats & Scoring
This requirement covers four topics that every archer needs to understand:
- Ends and rounds — how shooting is organized
- Field, target, and 3-D archery — the three main formats
- World Archery five-color target scoring — the Olympic-style target
- NFAA target scoring — the field and indoor targets used in national competition
Req 4a — Ends and Rounds
These two terms describe how shooting is organized in archery competitions and practice sessions.
What Is an End?
An end is a set of arrows shot before the archer walks to the target to score and retrieve them. In most target archery, an end consists of three or six arrows. After shooting the arrows in an end, the archers stop, score their arrows, pull them from the target, and return to the shooting line.
Think of an end like an “at bat” in baseball — it is one turn at the line.
What Is a Round?
A round is a complete set of ends that makes up a full scoring event. A round defines the total number of arrows, the distance(s), and the target size. Different organizations and competition levels use different rounds.
For example:
- A USA Archery indoor round might consist of 20 ends of three arrows each (60 arrows total) shot at 18 meters.
- An NFAA field round might consist of 14 targets at various distances.
Think of a round like a “game” — it is the full competition from start to finish.
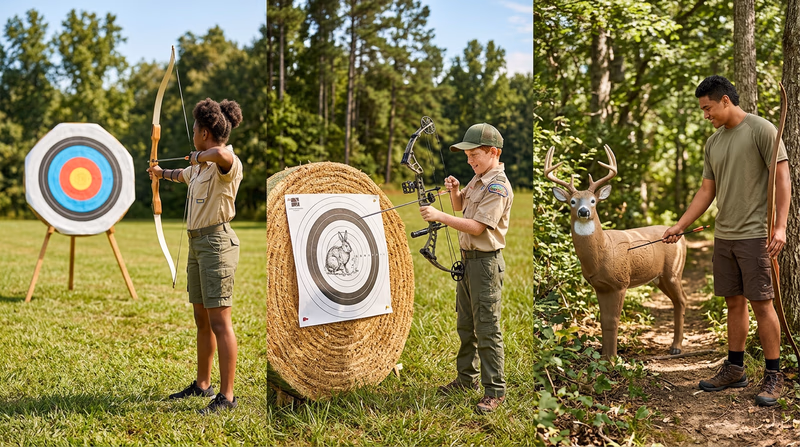
Req 4b — Field, Target, and 3-D Archery
Target Archery
Target archery is the most structured form of the sport. Archers shoot at round, multi-colored paper or cardboard targets from fixed, known distances on a flat, open range. Distances are clearly marked, and conditions are as consistent as possible.
- Setting: Flat, open range (indoor or outdoor)
- Targets: Round, concentric-ring targets (World Archery five-color or NFAA single-color)
- Distances: Fixed and known (e.g., 18m indoors, 30–70m outdoors)
- Key skill: Precision and consistency at a known distance
Field Archery
Field archery takes place on a walking course through varied terrain — typically woods, hills, and open fields. Archers move from target to target, shooting at different distances and angles. Some targets have marked distances; others require the archer to estimate the range.
- Setting: Wooded or hilly course, outdoor only
- Targets: Paper targets on foam or straw bales placed at various positions
- Distances: Varying, sometimes marked, sometimes unmarked
- Key skill: Distance judgment and adapting to terrain
3-D Archery
3-D archery uses life-sized foam animal targets placed along a wooded course, similar to field archery. Distances are almost always unmarked, and the targets are designed to simulate real hunting situations. Scoring rings are marked on the animal’s vital areas.
- Setting: Wooded course, outdoor only
- Targets: Three-dimensional foam animal figures
- Distances: Unmarked (archer must judge the distance)
- Key skill: Distance estimation and shot placement on a realistic target
Req 4c — World Archery Five-Color Target Scoring
The World Archery (WA) target is the one you see at the Olympics and most organized target archery events. It has five colors arranged in concentric rings, with each color divided into two scoring zones (an inner and an outer ring). This creates 10 scoring rings plus an inner “X” ring.
The Colors and Scores (from center outward)
| Color | Rings | Score |
|---|---|---|
| Gold (Yellow) | Inner ring (X/10) | 10 points |
| Gold (Yellow) | Outer ring | 9 points |
| Red | Inner ring | 8 points |
| Red | Outer ring | 7 points |
| Blue | Inner ring | 6 points |
| Blue | Outer ring | 5 points |
| Black | Inner ring | 4 points |
| Black | Outer ring | 3 points |
| White | Inner ring | 2 points |
| White | Outer ring | 1 point |
Scoring Rules
- An arrow that lands on the line between two rings scores the higher value.
- An arrow that hits the target face but is outside the outermost ring scores zero.
- The inner 10-ring (the “X” ring) is used as a tiebreaker — if two archers have the same total score, the one with more X-ring hits wins.
Req 4d — NFAA Target Scoring
The NFAA uses different target designs than World Archery. Here is how each one works.
NFAA Black-and-White Field Target
The NFAA field target has a black circle with a white center spot. It is a simpler design than the WA target, but the scoring is straightforward:
| Zone | Score |
|---|---|
| White center spot (X-ring) | 5 points (also used for tiebreakers) |
| Black outer ring | 5 points |
| Area outside the rings | 0 points |
On the NFAA field target, any arrow in the black or the white center scores 5 points. The X-ring (white center) serves as a tiebreaker only — it does not score higher than the rest of the black ring.
NFAA Blue Indoor Target
The NFAA blue indoor target (also called the “blue face”) has a blue target face with a white center. It uses a five-ring scoring system:
| Zone | Score |
|---|---|
| Inner white ring (X-ring) | 5 points (tiebreaker) |
| Outer white ring | 5 points |
| Blue inner ring | 4 points |
| Blue outer ring | 3 points |
| Outside scoring area | 0 points |
Key Difference from WA Scoring
Unlike the WA target, where scores range from 1 to 10, the NFAA targets use a narrower point range (0–5). This means that on an NFAA target, the margin between a good shot and a great shot is smaller, which puts a premium on consistency.
NFAA — Rules and Bylaws Official NFAA rules including target specifications, scoring procedures, and competition formats. Link: NFAA — Rules and Bylaws — https://www.nfaausa.com/rules World Archery — Rules The complete World Archery rulebook, including target specifications, scoring, and competition formats used at the Olympics. Link: World Archery — Rules — https://worldarchery.sport/rulebookReq 5 — Shooting Options Overview
Choose Your Path
Requirement 5 is where you put everything together and get on the shooting line. You will choose one of two options based on the type of bow you want to shoot:
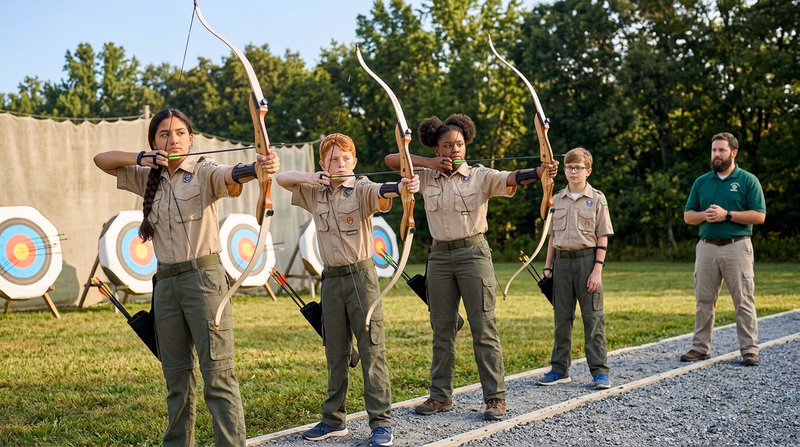
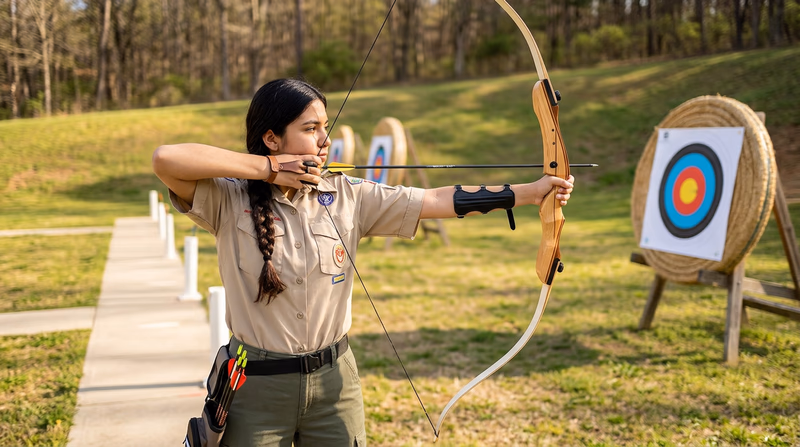
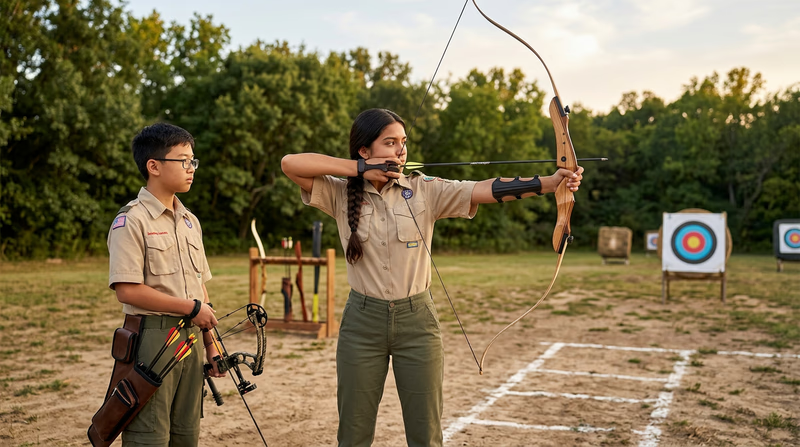
Option A — Recurve Bow or Longbow
The recurve bow is the most common bow used in Scouting programs and the style you see at the Olympics. It has gracefully curved limbs that sweep away from the archer at the tips. The longbow is the simplest bow design — a straight (or slightly curved) stave with a bowstring. Both are shot with a finger release.
If you choose this option, you will:
- Learn the parts of a recurve or longbow
- Demonstrate proper care and storage
- Learn and demonstrate the 11 Steps of Shooting
- String the bow yourself
- Mark the nocking point on the bowstring
- Shoot a scored round and meet a minimum score
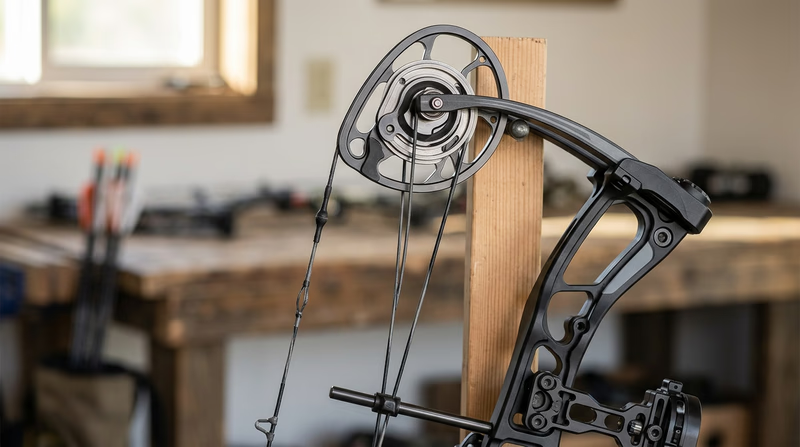
Option B — Compound Bow
The compound bow uses a system of pulleys (cams) and cables that reduce the holding weight at full draw, making it easier to aim steadily. Compound bows are the most popular choice for bowhunting and are also used in competition. They can be shot with either a finger release or a mechanical release.
If you choose this option, you will:
- Learn the parts of a compound bow
- Demonstrate proper care and storage
- Learn and demonstrate the 11 Steps of Shooting
- Understand why compound bow strings must be replaced by a pro shop
- Mark the nocking point on the bowstring
- Shoot a scored round and meet a minimum score
Qualified Supervision Required
Notice that Requirement 5 specifically says you must work under the supervision of a certified instructor. This is not something you can do on your own. The qualified supervisors are:
- A USA Archery Level 1 Instructor (or higher)
- A National Camping School (NCS) Range Activities Director
- A Rangemaster over age 18 who has been trained by one of the above
Your merit badge counselor can help you find a qualified instructor, or your local Scout council can point you to a camp or club with the right staff.

Ready to Choose?
Pick the option that matches the bow you will be shooting and dive in:
Or jump directly to Option B — Compound Bow if that is the path you are taking.
Req 5 — Recurve Bow or Longbow
Req 5a — Parts of the Recurve or Longbow
A recurve bow has these main parts:
- Riser: The center section of the bow where you grip it. The riser is usually made of wood, aluminum, or carbon and contains the grip, the arrow rest, and the sight window (a cutout section above the grip where the arrow passes).
- Upper Limb: The top limb of the bow, extending upward from the riser. The limbs store and release the energy that propels the arrow.
- Lower Limb: The bottom limb, extending downward from the riser.
- Limb Tips: The curved ends of each limb where the bowstring attaches. On a recurve bow, the tips curve away from the archer — this is what gives the “recurve” its name.
- Bowstring: The cord that connects the two limb tips. It is pulled back by the archer and releases the arrow when let go.
- Nocking Point: A marked spot on the bowstring where the arrow’s nock clips on. This ensures consistent arrow placement.
- Arrow Rest: A small shelf or device on the riser where the arrow sits before and during the draw.
- Grip: The part of the riser where your bow hand holds the bow. Proper grip is critical — you should use a relaxed, open hand to avoid torquing the bow.
A longbow is simpler. It typically has a one-piece design with a grip, upper limb, lower limb, string nocks (grooves cut into the limb tips for the string), and a bowstring. Most longbows do not have a separate arrow rest — the arrow sits on the shelf formed by the grip.
Req 5b — Care and Storage
Care
- Unstring the bow when not in use. Leaving a recurve or longbow strung for extended periods puts constant stress on the limbs and can cause them to lose their shape and power (this is called “following the string”).
- Inspect limbs regularly for cracks, splinters, delamination (layers separating), or twisting.
- Inspect the bowstring for fraying, broken strands, or worn serving (the wrapped thread around the center of the string where you nock the arrow).
- Wax the bowstring regularly with bowstring wax. This keeps the strands together, reduces friction, and extends the string’s life.
- Never dry fire the bow (release the string without an arrow). Dry firing sends all the stored energy back into the limbs instead of into an arrow, which can crack or shatter the limbs.
- Keep the bow dry. If it gets wet, wipe it down and let it air dry before storing.
Storage
- Store unstrung in a cool, dry place.
- Hang the bow horizontally on pegs or store it in a padded bow case. Do not lean it in a corner — this can cause warping.
- Avoid extreme temperatures. Never leave a bow in a hot car or in direct sunlight for extended periods.
- Wooden bows need extra care — wood can crack in very dry environments and warp in humid ones.
Req 5c — The 11 Steps of Shooting
USA Archery’s 11 Steps of Shooting break down the entire shot process into a repeatable sequence. Consistency is the key to accuracy — by following the same steps in the same order every time, you build muscle memory that leads to tight groups on the target.
The 11 Steps
Stance: Stand with your feet shoulder-width apart, straddling the shooting line or with your toes just behind it. Your body should be perpendicular to the target, with your non-dominant shoulder pointing at the target.
Nock: Place the arrow on the arrow rest and clip the nock onto the bowstring at the nocking point. Make sure the index fletching faces away from the bow.
Set Draw Hand: Place your drawing fingers on the string — index finger above the arrow, middle and ring fingers below. This is called a “split-finger” or “Mediterranean” grip.
Set Bow Hand: Place the bow grip into the web between your thumb and index finger. Your fingers should be relaxed and open — do not grip the bow tightly. A tight grip torques the bow and sends arrows off target.
Pre-Draw: Raise the bow toward the target with your bow arm while beginning to pull back slightly with your draw hand. Keep both shoulders down and relaxed.
Draw: Pull the bowstring back smoothly using your back muscles (not just your arm) until your draw hand reaches your anchor point.
Anchor: Your draw hand reaches a consistent position on your face — typically with the index finger touching the corner of your mouth or just below your jawbone. This is your anchor point, and it must be the same every single time.
Aim: With the bow at full draw and your anchor set, focus on the target and align your sight (or the tip of the arrow if shooting barebow) with where you want the arrow to hit.
Release: Relax your draw fingers smoothly and let the string slide off. Do not grab, pluck, or jerk the string. A clean release comes from simply relaxing.
Follow-Through: After the release, keep your bow arm up and your draw hand near your face. Do not drop the bow or pull your head away. Hold this position until the arrow hits the target.
Feedback: After the arrow lands, think about the shot. Did everything feel right? Where did the arrow hit? What would you adjust for the next shot? This mental review builds awareness and improvement.
Req 5d — Stringing the Bow
There are two common methods for stringing a recurve or longbow:
The Bow Stringer (Recommended Method)
A bow stringer is a cord with a pocket on each end. It is the safest and most reliable way to string a bow, and USA Archery recommends it for all archers.
- Slide the top loop of the bowstring onto the upper limb tip and let it rest partway down the limb.
- Seat the bottom loop in the lower limb’s string groove.
- Place the stringer’s pockets or saddles on the limb tips.
- Step on the stringer cord and lift the bow by the riser. This bends the limbs safely and evenly.
- Slide the top string loop into the upper limb tip’s string groove while the limbs are flexed.
- Carefully release the tension by lowering the bow. Check that both string loops are seated securely.
The Step-Through Method (Less Recommended)
Some archers use a step-through method where they step between the bow and the string, bracing the lower limb against their ankle and bending the upper limb with their hand to seat the string. While this works, it puts uneven stress on the limbs and carries a higher risk of the bow slipping and causing injury. Most instructors now teach the bow stringer method exclusively.
Req 5e — Marking the Nocking Point
The nocking point is the exact spot on the bowstring where the arrow’s nock clips on. Setting it precisely ensures that the arrow leaves the bow at a consistent angle every time.
How to Set a Nocking Point
- Attach a bow square (also called a T-square) to the bowstring. The bow square has a clip that attaches to the string and a ruler that extends to the arrow rest.
- Measure the position. The nocking point is typically set so that the arrow, when nocked, sits about 1/8 to 1/4 inch above a line perpendicular to the string at the arrow rest. Your instructor will help you determine the exact position.
- Mark the spot using one of these methods:
- Crimp-on nock set: A small brass ring that crimps onto the string above the arrow nock position. This is the most common and durable method.
- Dental floss or thread: Wrap several layers of dental floss or nylon thread around the string at the correct position and secure with a drop of glue. This is lighter than a crimp-on.
- Tape or other marker: Some archers use a small piece of tape or a tied-on indicator as a temporary nocking point during practice.
Req 5f — Shooting a Scored Round
For the final part of this option, you must shoot a scored round and meet a minimum score. You choose one of these paths:
Path 1: Shoot a Scored Round (Choose ONE)
Using a recurve bow or longbow with a finger release, shoot a single round of one of the following and achieve the minimum score:
| Round | Minimum Score |
|---|---|
| NFAA field round (14 targets) | 60 points |
| Scouting America field round (14 targets) | 80 points |
| World Archery/USA Archery indoor round | 80 points |
| NFAA indoor round | 50 points |
Indoor rounds may be shot outdoors if that is more convenient.
Path 2: Shoot at a Five-Color Target
Shoot 30 arrows in five-arrow ends at an 80-centimeter (32-inch) five-color target at 10 yards, using the 10 scoring regions, and make a score of 150 points.
That is an average of 5 points per arrow — which means consistently hitting at least the blue ring or better.
USA Archery — Find a Club Search for USA Archery-affiliated clubs near you where you can practice and shoot scored rounds under qualified supervision. Link: USA Archery — Find a Club — https://www.usarchery.org/find-a-clubReq 5 — Compound Bow
Req 5a — Parts of the Compound Bow
A compound bow looks more mechanical than a recurve, and that is because it is. Here are its main parts:
- Riser: The central frame of the bow. On a compound bow, the riser is typically made of machined aluminum or carbon and holds the grip, arrow rest, sight mount, and stabilizer mount.
- Upper Limb and Lower Limb: Shorter and stiffer than recurve limbs, compound limbs store energy through a cam-and-cable system rather than by bending dramatically.
- Cams (or Wheels): The round or oval pulleys at each limb tip. These are the defining feature of a compound bow. The cam system creates a mechanical advantage called “let-off” — once you pull past a peak weight, the holding weight drops dramatically (often to 20–15% of the peak), letting you hold at full draw more comfortably while aiming.
- Cables: Steel or synthetic cords that connect the cams and limbs. The cables work with the cams to create the let-off effect.
- Cable Guard/Cable Slide: A rod or roller system that routes the cables away from the arrow’s path so the fletchings do not hit them during the shot.
- Bowstring: The string that the archer pulls to draw the bow. On a compound bow, the string wraps around both cams.
- Nocking Point: The marked location on the string where the arrow clips on, just like on a recurve.
- Arrow Rest: A device on the riser that supports the arrow. Compound bows often use drop-away rests or whisker biscuit rests that fully contain the arrow.
- Grip: The handle section of the riser. As with a recurve, a relaxed, open grip is essential.
- Sight: Many compound archers use a pin sight — a bracket with one or more aiming pins set for specific distances. (Note: a sight is optional for merit badge work, depending on what your instructor provides.)
- Stabilizer: A weighted rod that extends from the front of the riser to reduce vibration and balance the bow during the shot.
Req 5b — Care and Storage
Care
- Leave the compound bow strung. Unlike a recurve or longbow, a compound bow is designed to stay strung at all times. The limbs and cams are engineered for constant tension. Do not attempt to unstring a compound bow yourself.
- Inspect the string and cables regularly for fraying, worn serving, or separated strands.
- Wax the bowstring with bowstring wax to keep it in good condition.
- Check the cams and axles for wear, alignment, and smooth rotation.
- Inspect the limbs for cracks or delamination.
- Never dry fire the bow. Dry firing a compound bow is even more dangerous than dry firing a recurve because of the higher forces involved.
- Check all bolts and screws periodically — the vibration from shooting can loosen them over time.
Storage
- Store in a hard-sided or padded bow case to protect the cams, cables, and accessories.
- Keep in a cool, dry place away from direct sunlight and extreme temperatures.
- Store vertically or horizontally — either is fine for a compound bow, as long as nothing is pressing against the cams or cables.
- Do not hang by the string or cables — use the riser or a proper bow hook.
Req 5c — The 11 Steps of Shooting
The 11 Steps of Shooting are the same sequence used for both recurve and compound bows. The core principles are identical, but a few steps have compound-specific details:
- Stance — Same as recurve: feet shoulder-width apart, body perpendicular to the target.
- Nock — Place the arrow on the rest and clip the nock onto the string at the nocking point.
- Set Draw Hand — If using a finger release, same as recurve. If using a mechanical release, clip the release aid onto the string loop (D-loop) or directly onto the string.
- Set Bow Hand — Same open, relaxed grip in the web of the hand.
- Pre-Draw — Raise the bow and begin the draw.
- Draw — Pull through the peak weight using your back muscles. You will feel the let-off engage as you pass the “wall” — the point where the cams roll over and the weight drops.
- Anchor — Bring the string to your anchor point. With a release aid, this is often the corner of your jaw or below your ear. With fingers, same as recurve.
- Aim — Align your sight pin with the target. The reduced holding weight at full draw gives you more time to aim steadily — this is one of the compound bow’s biggest advantages.
- Release — If using a release aid, squeeze the trigger smoothly with steady back tension. If using fingers, relax and let the string slide off.
- Follow-Through — Hold your position. Keep your bow arm up and draw hand in place until the arrow hits.
- Feedback — Evaluate the shot. Was the release clean? Did the pin stay on target?
Req 5d — String and Cable Replacement
Unlike a recurve or longbow, you cannot change the string on a compound bow by hand. Here is why:
- A bow press is required. To remove or install a string on a compound bow, the limbs must be compressed using a specialized device called a bow press. This safely releases the tension on the old string so it can be removed and the new one installed.
- The cam timing must be set. When new strings or cables are installed, the cams must be synchronized — if one cam rotates faster than the other, the arrow will not fly straight. An archery shop technician uses precise measurements and adjustment tools to time the cams.
- Incorrect installation is dangerous. If a string is installed wrong or at the wrong length, the bow can derail (the string slips off a cam), which can destroy the bow and injure the archer.
- Draw weight and draw length may need adjustment. New strings can change the draw weight and draw length. A pro shop technician will verify and adjust these settings after the replacement.
Req 5e — Marking the Nocking Point
Setting the nocking point on a compound bow follows the same principle as on a recurve — the arrow must leave the string at a consistent angle every time.
Many compound bows use a D-loop instead of a traditional nocking point. A D-loop is a small loop of cord tied onto the bowstring above and below the arrow nock position. The release aid clips onto the D-loop rather than the string itself, which protects the serving and provides a clean, consistent release.
Whether you use a crimp-on nock set, dental floss, or a D-loop, the process is the same:
- Attach a bow square to the string to find the correct height relative to the arrow rest.
- Position the nocking point so the arrow sits slightly above perpendicular (typically 1/8 to 1/4 inch).
- Secure the marker in place.
Your instructor will help you determine whether a traditional nock set or a D-loop is appropriate for your bow setup.
Req 5f — Shooting a Scored Round
For the final part of Option B, you shoot a scored round with a minimum score. Choose one of these paths:
Path 1: Shoot a Scored Round (Choose ONE)
Using a compound bow and arrows with a finger release, shoot a single round of one of the following and achieve the minimum score:
| Round | Minimum Score |
|---|---|
| NFAA field round (14 targets) | 70 points |
| Scouting America field round (14 targets) | 90 points |
| World Archery/USA Archery indoor round | 90 points |
| NFAA indoor round | 60 points |
Note that the minimum scores for compound bow are higher than for recurve, reflecting the compound bow’s mechanical advantages.
Path 2: Shoot at a Five-Color Target
Shoot at an 80-centimeter (32-inch) five-color target using the 10 scoring regions and make a minimum score of 160 points, accomplished as follows:
- 15 arrows in five-arrow ends at 10 yards
- 15 arrows in five-arrow ends at 15 yards
This tests your ability to maintain accuracy as the distance increases.
Archery 360 — Getting Started with Compound Bows Beginner-friendly resources for compound bow archers from the Archery Trade Association, including how to choose your first bow. Link: Archery 360 — Getting Started with Compound Bows — https://archery360.com/getting-started/Extended Learning
A. Introduction
Congratulations — you have earned the Archery merit badge! You have learned how to stay safe on the range, how arrows and bows work, how different archery formats are scored, and how to put arrows on target. But this is just the beginning. Archery is a sport you can enjoy and improve at for the rest of your life, from your backyard to a competition stage.
B. Deep Dive: Mental Focus and the Archer’s Mindset
Archery is sometimes called “meditation in motion,” and for good reason. At its core, every shot is a test of mental control. The best archers in the world do not just have strong arms and steady hands — they have trained their minds to stay calm, focused, and present on every single shot.
The challenge of consistency. In most sports, you react to something — a ball coming toward you, a defender closing in. In archery, there is nothing to react to. You create the action. This means every distraction — a gust of wind, the archer next to you, the thought “I need a 10 to win” — comes from inside your own head. Learning to manage those distractions is what separates good archers from great ones.
Shot routine as anchor. The 11 Steps of Shooting are not just a physical checklist — they are a mental framework. By doing the same thing in the same order every time, your conscious mind can relax and trust the process. Many Olympic archers describe their best performances as “automatic” — the body executes the shot while the mind simply observes.
Breathing techniques. Most competitive archers use controlled breathing to manage tension. A common pattern is to take a deep breath as you raise the bow, exhale half as you draw, hold briefly at anchor, and release on the natural respiratory pause. This reduces muscle tremor and steadies your aim.
Handling pressure. When the score matters — whether it is a merit badge round or a tournament — pressure builds. Experienced archers deal with this by focusing only on the current shot, not the score. They call this “one arrow at a time.” If you shot a bad arrow, it is gone. If you need a 9 to win, ignore that thought and focus on your process. The score takes care of itself when the form is right.
C. Deep Dive: Tuning Your Bow for Better Accuracy
Once you have solid form, the next step toward tighter groups is bow tuning — adjusting your equipment so that arrows fly as straight and consistently as possible. Even a perfectly executed shot will miss if the bow is not tuned to match your arrows.
Arrow spine matching. Every arrow shaft has a “spine” rating — a measure of how stiff it is. When the bowstring releases, the arrow actually bends around the riser before straightening out in flight (this is called the archer’s paradox). If the arrow spine does not match your draw weight and draw length, the arrow will wobble excessively and fly inconsistently. Arrow manufacturers publish spine charts that match shaft stiffness to draw weight — use them.
Paper tuning. One of the simplest tuning methods is to shoot an arrow through a sheet of paper stretched in a frame. A perfectly tuned bow produces a clean hole with three short vane tears evenly spaced around it (a “bullet hole”). If the tear is elongated in one direction, it tells you what to adjust — nocking point height, arrow rest position, or arrow spine.
Walk-back tuning. Shoot arrows at a vertical line on a target from increasing distances (10, 15, 20, 25 yards). If the arrows drift consistently left or right as the distance increases, your arrow rest needs a small horizontal adjustment.
Bare-shaft tuning. Shoot two groups — one with fletched arrows and one with unfletched (bare) shafts. If the bare shafts consistently hit to the left or right of the fletched group, the arrows are too stiff or too weak for your setup.
Tuning can seem technical, but even basic adjustments make a noticeable difference. Your local pro shop or club instructor can walk you through the process with your own equipment.
D. Deep Dive: Archery as a Competitive Sport
If you enjoyed shooting for your merit badge, competitive archery offers a path to push yourself further. There are opportunities at every level — from local club tournaments all the way to national championships and the Olympic Games.
USA Archery JOAD (Junior Olympic Archery Development). JOAD is the official youth development program of USA Archery. It is designed for archers under 21 and offers a structured progression of achievement pins and awards based on scored rounds. JOAD clubs meet regularly and provide coaching, equipment, and a supportive team environment. Many of America’s Olympic archers started in JOAD.
Scholastic archery programs. The National Archery in the Schools Program (NASP) introduces archery in school physical education classes and offers local, state, and national tournaments. NASP uses a standardized format — Genesis compound bows and NASP-approved arrows — so all students compete on a level playing field.
USA Archery tournaments. USA Archery runs a full national tournament schedule, including indoor nationals, outdoor nationals, and the U.S. Open. Events are organized by age group and equipment division (recurve, compound, barebow), so you are always competing against archers with similar equipment and experience.
World Archery and the Olympics. At the international level, World Archery governs the sport, and archery has been part of the Olympic Games since 1900 (with some interruptions). Olympic archery uses recurve bows exclusively, while the World Archery Championships include all divisions.
USA Archery — JOAD Program Learn about the Junior Olympic Archery Development program, find a JOAD club near you, and see how to start competing. Link: USA Archery — JOAD Program — https://www.usarchery.org/programs/junior-olympic-archery-developmentE. Real-World Experiences
Ready to take your archery off the range? Here are some real-world experiences worth seeking out:
Visit a Local Archery Pro Shop
Shoot a 3-D Archery Course
Attend a USA Archery Tournament as a Spectator
Try Archery at a Scout Camp
F. Organizations
These organizations can help you continue your archery journey:
The national governing body for the sport of archery in the United States. Offers clubs, tournaments, coaching certification, and the JOAD youth development program.
Organization: — https://www.usarchery.org
The largest field archery organization in the United States. Hosts field, 3-D, and indoor tournaments across the country with divisions for all ages and skill levels.
Organization: — https://www.nfaausa.com
The trade organization for the archery and bowhunting industry. Their consumer site, Archery 360, offers excellent beginner resources and a tool to find ranges and shops near you.
Organization: — https://www.archerytrade.org