Req 4 — Floor Plan Drawing
What Is a Floor Plan?
A floor plan is a drawing of a room as seen from directly above — as if you removed the roof and looked straight down. It shows the shape of the room, the thickness of walls, and the locations of doors, windows, closets, and anything built into the room (like cabinets, counters, or shelving).
Floor plans are the most fundamental type of architectural drawing. Every building ever constructed started with one.
Step 1: Choose Your Room
Pick a room you can easily access and measure. Good choices include:
- Your bedroom
- Your living room or family room
- Your troop’s meeting room
- A classroom at school (with permission)
Simpler rooms (rectangular, fewer features) are easier for your first floor plan. A room with unusual angles, multiple closets, and lots of built-ins will be more challenging — but also more interesting.
Step 2: Gather Your Supplies
Floor Plan Supply List
What you will need
- Tape measure (at least 25 feet long)
- Graph paper (with 1/4-inch grid squares)
- Pencil and eraser
- Ruler or straightedge (at least 12 inches)
- Notepad for recording measurements
- A helper to hold the other end of the tape measure
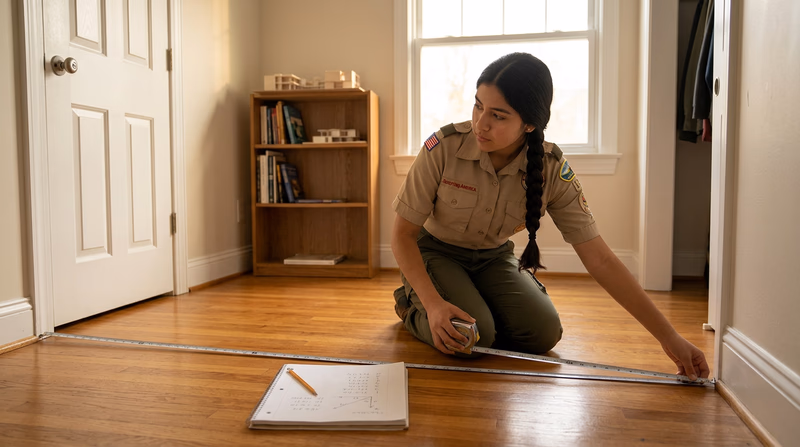
Step 3: Measure the Room
Accuracy matters. Take your time and double-check every measurement.
Walls
Measure each wall from corner to corner. Write down every measurement on your notepad as you go — do not try to remember them. For each wall, note:
- Total length
- Location and width of each door opening
- Location and width of each window
- Location and width of each closet opening
Doors and Windows
For doors, measure the width of the opening (not the door itself). Note which side the hinges are on and which direction the door swings — this affects the floor plan symbol you will use.
For windows, measure the width of the window opening. On a floor plan, windows are shown as thin breaks in the wall line.
Built-in Features
Measure any cabinets, counters, built-in shelves, or other features that are permanently attached to the room. Note their width, depth, and distance from the nearest wall or corner.
Step 4: Draw Your Floor Plan
Now transfer your measurements to paper using the 1/4 inch = 1 foot scale.
Drawing Conventions
Architects use standard symbols so that anyone reading a floor plan knows exactly what they are looking at:
Walls — Draw walls as two parallel lines with a small gap between them (about 1/16 inch apart on your drawing). This represents the thickness of the wall.
Doors — Show doors as a gap in the wall with a quarter-circle arc indicating the direction the door swings. The arc shows the space the door needs to open.
Windows — Show windows as a gap in the wall with three thin parallel lines across the opening.
Closets — Draw the closet walls, the door opening, and any shelving inside.
Built-in cabinets — Draw the outline of the cabinet or counter, showing its depth from the wall.
Drawing Steps
- Start by drawing the outline of the room — the exterior walls
- Add interior walls, closets, and alcoves
- Mark door openings and draw door swing arcs
- Mark window locations and draw window symbols
- Add built-in features (cabinets, counters, shelving)
- Double-check all dimensions against your measurements
- Add dimension lines showing key measurements
Step 5: Label Your Drawing
The requirement specifies four labels that must appear on your drawing:
Required Labels
Every floor plan must include these
- Your name (who drew it)
- The date (when you drew it)
- What room you drew (e.g., “Living Room — 123 Oak Street”)
- The scale of the drawing (1/4" = 1’-0")
Architects typically place this information in a title block — a bordered box in the bottom-right corner of the drawing. Creating a title block for your floor plan is a professional touch that will impress your counselor.
Common Mistakes to Avoid
How to Draw a Floor Plan — Architectural Digest A step-by-step guide to creating floor plans, with tips on measuring rooms and using standard architectural symbols.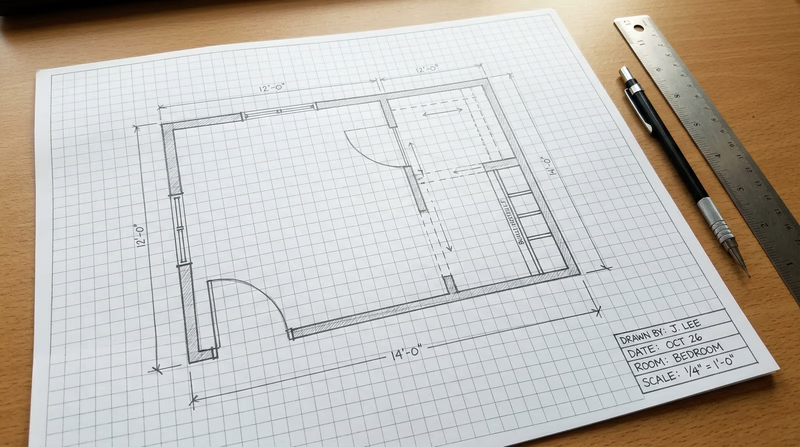
Your floor plan drawing puts you in the shoes of a real architect. Now let’s look at what it takes to make architecture your career.