Art Merit Badge — Complete Digital Resource Guide
https://merit-badge.university/merit-badges/art/guide/
Introduction & Overview
Art is everywhere. It is on the walls of museums, on the screens of your phone, on the side of a building downtown, and in the doodles you sketch in the margins of your notebook. The Art merit badge is your invitation to look at the world like an artist — to notice the colors, shapes, and patterns all around you and learn how to put them to work.
Whether you have been drawing since you could hold a crayon or you have never picked up a paintbrush, this badge will give you the tools and confidence to create. You will learn the language that artists use, try your hand at multiple media, and discover how art connects to almost every career and community you can imagine.
Then and Now
Then — The First Artists
Long before written language existed, humans were making art. The cave paintings at Lascaux, France — created roughly 17,000 years ago — show galloping horses, leaping bulls, and mysterious symbols. Nobody taught those ancient artists how to draw. They picked up natural pigments, mixed them with animal fat, and pressed their visions onto stone walls by firelight.
Throughout history, art has marked every major civilization. Egyptian painters covered tomb walls with stories of the afterlife. Greek sculptors carved figures so lifelike they seemed ready to step off their pedestals. Renaissance masters like Leonardo da Vinci and Michelangelo pushed art into new frontiers of realism, anatomy, and perspective. In every era, art captured what people valued, feared, celebrated, and dreamed about.
- Materials: Charcoal, clay, natural pigments, stone, wood, metals
- Purpose: Storytelling, religion, recording history, decoration
Now — Art Without Boundaries
Today, art has exploded beyond the canvas. Street artists transform blank walls into vibrant murals. Digital artists create entire worlds on tablets and computers. Animators bring characters to life frame by frame. Graphic designers shape the logos, apps, and packaging you interact with every day.
Technology has made art more accessible than ever. You do not need an expensive studio or years of formal training to start creating. A pencil and a sketchbook — or even a free drawing app on your phone — is enough to begin. At the same time, traditional techniques like oil painting, printmaking, and sculpture are thriving. The art world is big enough for all of it.
- Materials: Everything from graphite to code, spray paint to 3-D printers
- Purpose: Self-expression, communication, problem-solving, entertainment, social change
Get Ready! You are about to discover a creative side of yourself that will stay with you for the rest of your life. Art is not about being “talented” — it is about learning to see, practicing your skills, and having the courage to put something on the page. Let’s pick up a pencil and get started.
Kinds of Art
Art comes in many forms. Here is a look at the major categories you will encounter as you work through this merit badge.
Drawing & Illustration
Drawing is where most artists begin. With just a pencil and paper, you can sketch anything you see — or anything you imagine. Illustration takes drawing a step further by telling a story or explaining an idea. Comic books, scientific diagrams, and courtroom sketches are all forms of illustration.
Painting
Painting adds color, texture, and depth to a surface using wet media like watercolors, acrylics, oils, or tempera. Each medium behaves differently — watercolors flow and blend on wet paper, while oils can be layered thickly and reworked over days. Learning to paint teaches you how colors interact and how light falls on objects.
Sculpture
Sculpture is three-dimensional art. You might carve wood, mold clay, weld metal, or assemble found objects. Unlike a painting, a sculpture occupies real space — you can walk around it, touch it (when allowed!), and see it change as the light shifts. Public parks, memorials, and museums are full of sculptures you can visit.
Digital Art
Digital art uses computers, tablets, and software as creative tools. This category includes digital painting, photo manipulation, 3-D modeling, animation, and graphic design. Many of the movies, video games, and advertisements you see every day are made almost entirely with digital art tools.
Photography
Photography captures light to create an image. While some debate whether photography is “art” or “documentation,” the greatest photographers make creative choices about composition, lighting, timing, and subject matter that are every bit as intentional as a painter’s brushstrokes. Your phone camera is a powerful creative tool.
Mixed Media & Collage
Mixed media art combines multiple materials or techniques in a single piece. A collage might layer magazine clippings, fabric, paint, and found objects. Mixed media encourages you to experiment and break rules — there is no wrong way to combine materials if the result communicates your idea.
Now that you know what art is and the many forms it takes, let’s dive into the requirements.
Req 1 — Understanding Art
This requirement asks you to think deeply about three big questions. Your counselor is not looking for textbook answers — they want to hear your own thoughts, backed by what you have learned. Let’s explore each one.
What Is Art?
Ask ten people to define art and you will get ten different answers. That is part of what makes art so interesting. At its core, art is the use of skill and imagination to create something that communicates an idea, an emotion, or an experience. It can be visual (a painting), auditory (a piece of music), physical (a dance), or literary (a poem). For this merit badge, you will focus on the visual arts — the kind you can see and sometimes touch.
Here are some of the major forms of visual art:
- Drawing — Using pencils, pens, charcoal, or pastels to create images on paper
- Painting — Applying pigments (watercolors, oils, acrylics, tempera) to a surface
- Sculpture — Shaping three-dimensional forms from clay, stone, wood, metal, or other materials
- Printmaking — Creating images by pressing inked surfaces onto paper (think woodcuts or screen printing)
- Photography — Capturing images using a camera and creative choices about light and composition
- Digital Art — Creating images or animations with computers and software
- Architecture — Designing buildings and spaces that are both functional and beautiful
- Ceramics — Forming and firing clay into functional or decorative objects
- Textile Art — Creating art through weaving, embroidery, quilting, or fabric dyeing

Why Art Matters to Humankind
Art is not a luxury — it is a fundamental part of being human. Here are some of the reasons art has been important to people throughout history and remains essential today.
Art tells our stories. Before most people could read, art was how communities recorded their history. Medieval stained-glass windows taught Bible stories to churchgoers who could not read. Aztec codices recorded conquests and ceremonies. Today, murals in cities around the world tell the stories of neighborhoods and cultures.
Art helps us communicate. Sometimes words are not enough. A photograph of a war zone can change public opinion. A political cartoon can make a complex issue instantly understandable. The universal symbols you see every day — road signs, emojis, app icons — are all designed by artists.
Art builds empathy. When you look at a painting of someone from a different time, place, or background, you get a window into how they experienced the world. Art invites you to step into someone else’s shoes, even for a moment.
Art drives innovation. Many of the greatest inventions started as sketches. Leonardo da Vinci drew flying machines centuries before the airplane. Architects draft buildings. Engineers visualize bridges. Industrial designers shape the products you use every day. Art and science work together more often than you might think.
Art strengthens communities. Public art brings people together. A mural can transform a neglected wall into a source of neighborhood pride. Community theater, art festivals, and gallery openings create spaces for people to connect and celebrate.
What Art Means to You
This is the most personal part of the requirement — and there is no wrong answer. Your counselor wants to know how art fits into your life and how it makes you feel. Here are some questions to help you prepare:
- Is there a piece of art (a painting, a song, a movie scene, a video game world) that has stuck with you? Why?
- Have you ever created something — a drawing, a model, a photograph — that made you feel proud, calm, frustrated, or excited?
- Do certain colors or styles make you feel a particular way? Bright colors might feel energizing; dark, moody images might feel mysterious or sad.
- Does making art feel relaxing to you, or does it feel challenging? Both are valid.
Art can make people feel joy, peace, confusion, sadness, awe, curiosity, or even anger. All of those responses are valid. The important thing is that art makes you feel something — and being able to talk about that feeling is a skill that will serve you well beyond this merit badge.
Google Arts & Culture Explore thousands of artworks from museums around the world. Zoom in on brushstrokes, take virtual museum tours, and discover art from every era and culture. Link: Google Arts & Culture — https://artsandculture.google.com/ The Art Story — What Is Art? A clear, well-organized overview of how the definition of art has evolved over centuries. Link: The Art Story — What Is Art? — https://www.theartstory.org/definition/art/Req 2 — Elements of Art
Think of the elements of art as the basic ingredients in a recipe. Just as every meal starts with individual ingredients — flour, salt, eggs — every piece of art is built from these seven fundamental elements. Once you can recognize them, you will start seeing them everywhere: in paintings, photographs, buildings, nature, and even your cereal box.
Your counselor will ask you to not only define these elements but also show examples. Look around your home, flip through a magazine, or search online to find real artwork that demonstrates each one. Bringing specific examples will show your counselor that you truly understand these concepts.

Line
A line is a mark that moves from one point to another. It is the most basic element of art — and also one of the most powerful. Lines can be straight, curved, thick, thin, jagged, smooth, horizontal, vertical, or diagonal. Every line communicates something different.
- Horizontal lines suggest calm and stability (think of a flat horizon)
- Vertical lines suggest strength and height (think of a tall building)
- Diagonal lines suggest movement and energy (think of a lightning bolt)
- Curved lines suggest softness and flow (think of rolling hills)
- Jagged lines suggest tension or chaos (think of a cracked windshield)
Artists use line to create outlines, define edges, show texture, suggest movement, and guide your eye through a composition. When you look at a drawing, the lines are doing most of the work.
Value
Value refers to how light or dark something is. Imagine a gradient that goes from pure white to pure black — every shade of gray in between is a different value. Value is what gives flat shapes the appearance of depth and volume.
When light hits an object, one side is bright (the highlight) and the other side fades into shadow. An artist recreates this effect by varying values — making some areas lighter and others darker. This is called shading, and it is one of the most important skills you will develop.
Shape
A shape is a flat, two-dimensional area defined by edges or boundaries. Shapes have height and width but no depth. They fall into two categories:
- Geometric shapes — Circles, squares, triangles, rectangles, and other shapes with precise mathematical properties. You see these in buildings, signs, and patterns.
- Organic shapes — Irregular, free-form shapes found in nature. Leaves, clouds, puddles, and coastlines are all organic shapes.
Every object you draw starts as a basic shape. A tree is a circle on top of a rectangle. A face is an oval. Learning to break complex subjects into simple shapes is one of the fastest ways to improve your drawing.
Form
Form is shape’s three-dimensional sibling. While a circle is a shape, a sphere is a form. While a square is a shape, a cube is a form. Forms have height, width, and depth. Sculptures are forms. Buildings are forms. The mug on your desk is a form.
In two-dimensional art (like a drawing or painting), artists create the illusion of form using value, shading, and perspective. When you shade a circle so it looks like a ball sitting on a table, you have turned a shape into a form.
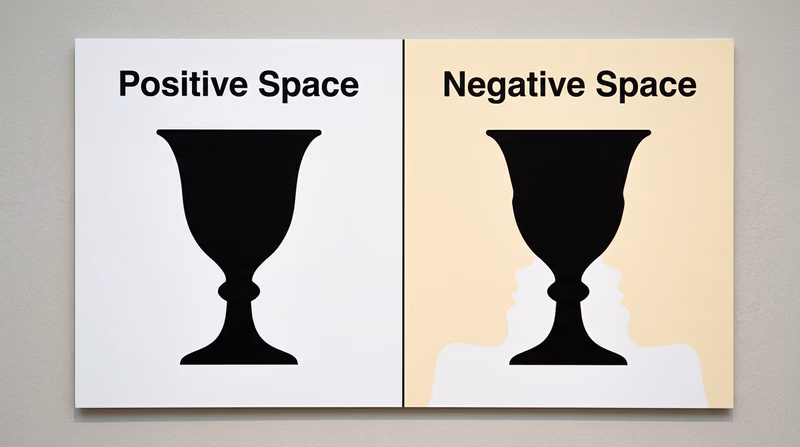
Space
Space is the area around, between, and within objects in an artwork. Artists think about two types of space:
- Positive space — The main subject of the artwork. If you draw a tree, the tree is the positive space.
- Negative space — The empty area around and between subjects. The sky around the tree is the negative space.
Great artists pay just as much attention to negative space as they do to positive space. The empty areas in a composition are not wasted — they give the viewer’s eye a place to rest and help define the subject.
Perspective is an artist’s tool for creating the illusion of depth on a flat surface. Roads that narrow toward the horizon, buildings that shrink in the distance, and overlapping objects all use perspective to create a sense of space.
Color
Color is perhaps the most immediately powerful element of art. It catches your eye, sets a mood, and communicates meaning — sometimes without you even realizing it.
Every color has three properties:
- Hue — The name of the color (red, blue, yellow, green, etc.)
- Value — How light or dark the color is (light blue vs. dark blue)
- Intensity (or saturation) — How bright or dull the color is (vivid red vs. muted brick red)
The color wheel organizes colors by their relationships:
- Primary colors: Red, yellow, blue — these cannot be mixed from other colors
- Secondary colors: Orange, green, violet — made by mixing two primaries
- Tertiary colors: Red-orange, yellow-green, etc. — made by mixing a primary with a secondary
Artists also use color temperature. Warm colors (reds, oranges, yellows) tend to advance and feel energetic. Cool colors (blues, greens, violets) tend to recede and feel calm. Understanding these relationships helps you choose colors that work well together.
Texture
Texture is how a surface feels — or how it looks like it would feel. There are two types:
- Actual texture — The real, physical feel of a surface. A sculpture made of rough stone has actual texture. A woven basket has actual texture. You can touch it and feel it.
- Implied texture — The illusion of texture created on a flat surface. When an artist paints a brick wall so realistically that you want to reach out and touch it, that is implied texture.
Artists create implied texture through careful use of line, value, and pattern. Cross-hatching (many overlapping lines) can suggest rough surfaces. Smooth gradients suggest polished or soft surfaces. Learning to render different textures — fur, metal, fabric, wood, water — makes your artwork more believable and engaging.
Finding Examples
Where to look for the seven elements- Line: Power lines, bridges, wrinkles on a face, cracks in a sidewalk
- Value: Black-and-white photographs, pencil shading, shadows on a sunny day
- Shape: Road signs, logos, windows, cookie cutters
- Form: Sports balls, furniture, fruit, rocks
- Space: Arches, doorways, windows, negative space in logos
- Color: Sunsets, flower gardens, neon signs, stained-glass windows
- Texture: Tree bark, knitted sweaters, sandpaper, water ripples
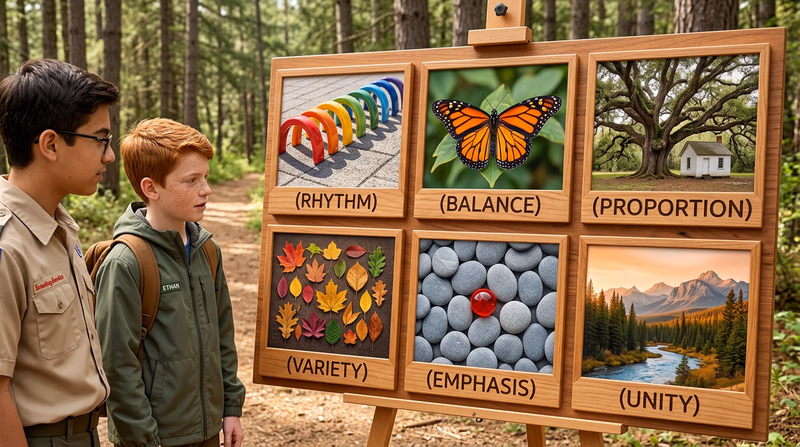
Req 3 — Principles of Design
If the elements of art are your ingredients, the principles of design are your recipe. They tell you how to arrange those ingredients — line, shape, color, value, form, space, and texture — into a composition that works. A painting might use beautiful colors, but if the composition feels lopsided, cluttered, or boring, something is off. The six principles of design help you figure out what.
Think of it this way: you already use these principles without thinking about it. When you arrange photos on your wall so they look balanced, you are using balance. When you wear a bright red shirt to stand out, you are using emphasis. This requirement helps you put names to things you already sense.
Rhythm
Rhythm in art works a lot like rhythm in music. In music, rhythm is the repeated pattern of beats that gives a song its groove. In art, rhythm is the repeated use of visual elements — colors, shapes, or lines — that creates a sense of movement and flow.
When you look at a row of columns on a building, you see rhythm. When you see a pattern of waves in a painting, you feel rhythm. The repetition draws your eye across the artwork, giving it energy and direction.
There are several types of visual rhythm:
- Regular rhythm — The same element repeats at equal intervals (like a picket fence)
- Alternating rhythm — Two or more elements take turns (like a checkerboard)
- Progressive rhythm — An element gradually changes in size, color, or spacing (like ripples spreading from a stone dropped in water)
- Random rhythm — Elements repeat without a predictable pattern (like scattered leaves on the ground)
Balance
Balance is how visual weight is distributed in a composition. A balanced artwork feels stable and “right.” An unbalanced artwork feels like it might tip over — which can be intentional or a mistake, depending on the artist’s goal.
There are three main types of balance:
- Symmetrical balance — Both sides of the composition are mirror images (or close to it). Think of a butterfly’s wings or the front of a Greek temple. Symmetry feels formal, calm, and orderly.
- Asymmetrical balance — The two sides are different but still feel balanced. A large object on one side might be balanced by several smaller objects on the other side, or by a bright color that draws equal attention. Asymmetry feels dynamic and interesting.
- Radial balance — Elements radiate outward from a central point, like the spokes of a wheel or the petals of a flower. Radial balance draws your eye to the center.
Proportion
Proportion is the size relationship between different parts of an artwork. When the parts feel like they belong together at the right sizes, we say the proportions are “correct” — though in art, there is no single correct answer.
Realistic proportion means drawing things at sizes that match reality. A person’s head is about one-seventh of their total height. A cat’s eyes are about one-third of the way down from the top of its head. Learning these ratios helps you draw more accurately.
But artists often break proportion on purpose for effect:
- Caricature artists exaggerate features (a huge nose, tiny eyes) for humor
- Ancient Egyptian artists drew important figures larger than less important ones
- Manga and anime use oversized eyes and small mouths to express emotion
The key is understanding the “normal” proportions first, so you can break them intentionally when you want to.
Variety
Variety is the use of different elements to create visual interest. A painting that uses only one color, one shape, and one line thickness would be monotonous. Adding variety — mixing thick and thin lines, warm and cool colors, large and small shapes — keeps the viewer’s eye engaged.
Variety works best when it is controlled. Too little variety creates boredom. Too much variety creates chaos. The goal is to have enough differences to keep things interesting while maintaining an overall sense of order. This is where variety works hand in hand with unity (which we will cover in a moment).
Think of it like a trail mix. If every piece were the same (all raisins), it would be boring. If every piece were wildly different (raisins, gummy bears, nails, marshmallows), it would be chaotic. A good trail mix has variety within reason — and so does a good artwork.
Emphasis
Emphasis is how an artist draws your attention to the most important part of the composition. That important area is called the focal point — it is where your eye goes first.
Artists create emphasis using several techniques:
- Contrast — Making the focal point a different color, value, or size from everything around it. A single red flower in a green field immediately stands out.
- Isolation — Placing the subject away from other elements so it is alone and therefore noticeable.
- Convergence — Arranging lines, shapes, or patterns so they all point toward the focal point, like arrows.
- Detail — Rendering the focal point with more detail than the surrounding areas, which may be blurred or simplified.
Unity
Unity is the glue that holds everything together. An artwork has unity when all of its parts — the colors, shapes, textures, and ideas — feel like they belong in the same composition. Nothing looks out of place. Everything works toward the same goal.
Artists achieve unity through:
- Repetition — Using the same color, shape, or texture throughout the piece ties it together
- Proximity — Placing related elements close together
- Continuation — Creating a visual path that flows smoothly through the composition
- Consistent style — Using the same brushstroke technique, line quality, or color palette throughout
Unity does not mean everything looks the same — that would kill variety. Unity means that even though the parts are different, they all feel like they belong to the same family.
Putting It All Together
The six principles do not work in isolation. Every successful artwork uses multiple principles at once. A well-designed poster might use emphasis to draw your eye to the headline, balance to keep the layout from feeling lopsided, proportion to make the text readable, variety to keep it visually interesting, rhythm to move your eye through the information, and unity to make the whole thing feel cohesive.
Preparation Checklist
Get ready for your counselor discussion- Define each principle in your own words — do not just memorize definitions
- Find at least one real-world example of each principle (artwork, building, poster, website)
- Think about how principles work together — can you find one artwork that demonstrates at least three principles?
- Consider which principles are most important for the type of art you want to create
Req 4 — Creating in Different Media
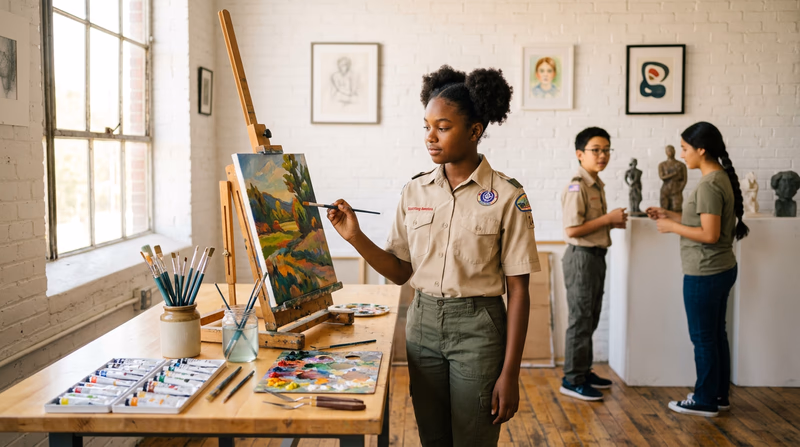
This is where you roll up your sleeves and create. You will pick one subject — a still life, a landscape, a portrait, an animal, a building, or anything else that inspires you — and render it in four different media. The same subject, four different tools. This is an incredible exercise because you will see firsthand how each medium changes the look, feel, and process of your artwork.
Choosing Your Subject
Pick something you can observe directly. Working from life (rather than a photograph) teaches you more about light, shadow, and proportion. Good subjects for beginners include:
- A piece of fruit or a simple still life arrangement
- A tree or flower in your yard
- A pet or animal
- A landscape or building you can sit in front of
- Your own hand (always available, always interesting!)
Choosing Your Four Media
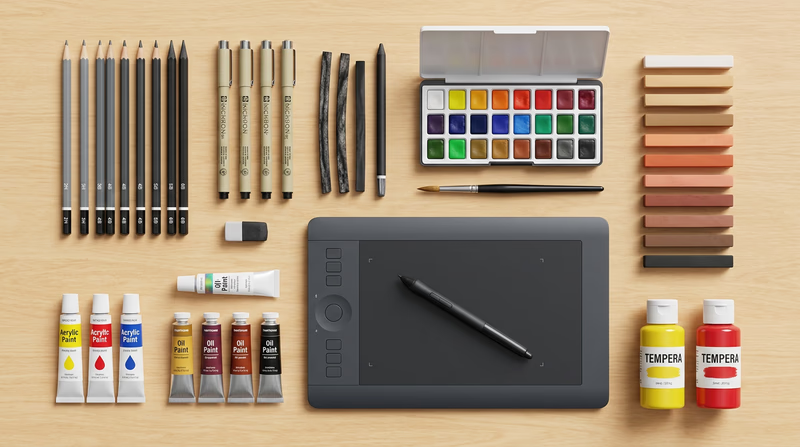
You must choose four of the nine options listed above. Here is what you need to know about each one to help you decide.
Pen and Ink
Pen and ink is bold and permanent — there is no eraser. This forces you to be deliberate with every mark. You can create fine, precise lines or loose, expressive strokes.
What you need: India ink or a fine-tip permanent pen (like a Micron or Sharpie pen), drawing paper
Techniques to try:
- Hatching — Parallel lines close together to create shading
- Cross-hatching — Overlapping sets of parallel lines for darker values
- Stippling — Tiny dots clustered together (more dots = darker value)
- Contour drawing — A single, continuous line that follows the edges of your subject
Watercolors
Watercolors are known for their transparency and luminous quality. The white of the paper shines through the paint, giving watercolors their characteristic glow. They are lightweight, easy to clean up, and portable.
What you need: Watercolor paint set, watercolor paper (heavier paper prevents buckling), brushes, a cup of water, a palette for mixing
Key concepts:
- Work from light to dark — you cannot paint a light color over a dark one
- The amount of water you use controls how light or dark the color appears
- Wet-on-wet: Applying wet paint to wet paper creates soft, blurry edges
- Wet-on-dry: Applying wet paint to dry paper creates sharp, crisp edges
- Let layers dry completely before adding new ones to avoid muddy colors
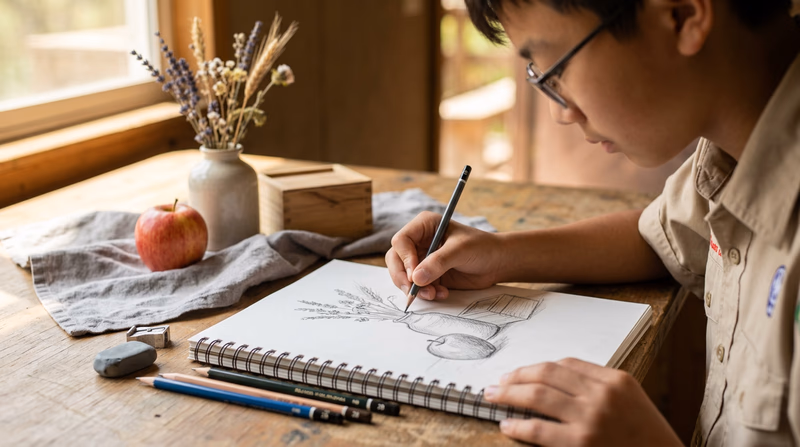
Pencil
The pencil is the most accessible art tool in the world. It is forgiving (you can erase), expressive (you can create a huge range of values), and portable (it fits in your pocket).
What you need: A set of drawing pencils (ranging from hard 2H to soft 6B), drawing paper, an eraser, a sharpener
Understanding pencil grades:
- H pencils (2H, 4H) are hard — they make light, fine lines and are great for detail
- B pencils (2B, 4B, 6B) are soft — they make dark, rich marks and are great for shading
- HB is right in the middle — a good all-purpose pencil
Techniques to try:
- Blending — Use your finger, a blending stump, or a tissue to smooth pencil marks into gradients
- Hatching and cross-hatching — Create value through layered lines
- Contour drawing — Focus on edges and outlines
- Gesture drawing — Quick, loose sketches that capture movement and energy
Pastels
Pastels deliver rich, vibrant color that you apply directly — no brushes needed. They come in two main types:
- Soft pastels — Chalky sticks with intense color. They blend beautifully with your fingers but are fragile and dusty.
- Oil pastels — Waxy, crayon-like sticks. They are more durable and create bold, saturated marks. They do not blend as smoothly as soft pastels but resist smudging.
What you need: A set of pastels (soft or oil), textured paper (pastel paper or construction paper — smooth paper will not hold the pigment), fixative spray (for soft pastels)
Oil Paints
Oil paints are the medium of the Old Masters — Rembrandt, Vermeer, and Monet all worked in oils. They are rich, vibrant, and incredibly versatile. Oil paint dries slowly, which gives you time to blend colors and rework areas.
What you need: Oil paints, canvas or canvas board, bristle brushes, palette, palette knife, linseed oil or odorless mineral spirits, rags for cleanup
Good to know:
- Oil paintings take days or even weeks to dry completely
- Clean brushes with mineral spirits (not water)
- You can build up thick layers of paint (called impasto) for dramatic texture
- Work in a well-ventilated area
Tempera
Tempera is a fast-drying, water-based paint that you have probably used in school. It is opaque, mixes easily, and cleans up with soap and water. Tempera is great for bold, flat areas of color and is very forgiving for beginners.
What you need: Tempera paint, heavy paper or poster board, brushes, a palette or paper plate for mixing, water
Key characteristics:
- Dries quickly — work in small sections
- Opaque — you can paint light colors over dark
- Mixes well — experiment with creating your own colors
- Cleanup is easy — just soap and water
Acrylics
Acrylic paint is one of the most versatile art media available. It is water-based (easy cleanup), dries quickly, and can mimic the look of both watercolors (when thinned with water) and oil paints (when applied thickly). Once dry, acrylic paint is waterproof and durable.
What you need: Acrylic paints, canvas or heavy paper, brushes (synthetic bristles work well), a palette, water, a spray bottle (to keep paint wet on the palette)
Techniques to try:
- Thin washes — Dilute with water for a watercolor-like effect
- Dry brush — Use a nearly dry brush for scratchy, textured marks
- Layering — Build up layers of color (each layer dries in minutes)
- Impasto — Apply paint thickly for visible brushstrokes and texture
Charcoal
Charcoal is one of the oldest drawing materials — and one of the most dramatic. It creates deep blacks and rich tones that pencils cannot match. Charcoal comes in several forms:
- Vine charcoal — Thin, delicate sticks that make light marks and erase easily. Great for initial sketches.
- Compressed charcoal — Denser and darker than vine charcoal. Harder to erase but produces richer values.
- Charcoal pencils — Charcoal wrapped in wood, like a regular pencil. Good for detail work.
What you need: Charcoal (vine or compressed), drawing paper with some texture, a kneaded eraser (molds to any shape), fixative spray
Techniques:
- Use the side of the charcoal for broad, sweeping areas of tone
- Use the tip for fine lines and details
- Blend with your fingers, a cloth, or a blending stump for smooth gradients
- Erase to create highlights — a kneaded eraser can “lift” charcoal to reveal the white paper
Computer Drawing or Painting
Digital art opens up possibilities that traditional media cannot match — infinite undo, unlimited colors, layers you can rearrange, and no cleanup required. Many professional artists today work entirely on a computer or tablet.
What you can use:
- Free software: Krita, GIMP, MediBang Paint, Autodesk Sketchbook
- Hardware: A drawing tablet (like a Wacom), a tablet with a stylus (iPad with Apple Pencil), or even a mouse
- Mobile apps: Procreate (iPad), ibisPaint (free, iOS/Android), Sketchbook (free)
Key concepts:
- Layers — Think of transparent sheets stacked on top of each other. You can draw on one layer without affecting others.
- Brushes — Digital software offers brushes that mimic pencil, pen, watercolor, oil, and more.
- Undo — Your best friend. Press Ctrl+Z (or Cmd+Z on Mac) to reverse any mistake.
- Zoom — Get close for detail work, then zoom out to see the overall composition.
Tips for All Four Renderings
No matter which four media you choose, keep these tips in mind:
Rendering Tips
Make the most of your four artworks- Set up your subject in consistent lighting so it looks the same each time
- Start with the medium you are most comfortable with to build confidence
- Take your time — quality matters more than speed
- Step back from your work regularly to see the overall composition
- Date and label each piece with the medium used
- Keep all four renderings to show your counselor side by side
Req 5 — Applied Art Projects
This requirement bridges art and real-world application. You will pick one of the three options and carry it through from idea to finished product. All three options ask you to think like a designer — someone who uses art to solve a problem, tell a story, or communicate an identity.
Read through all three options before you choose. Think about which one fits your interests, your available materials, and the time you have.
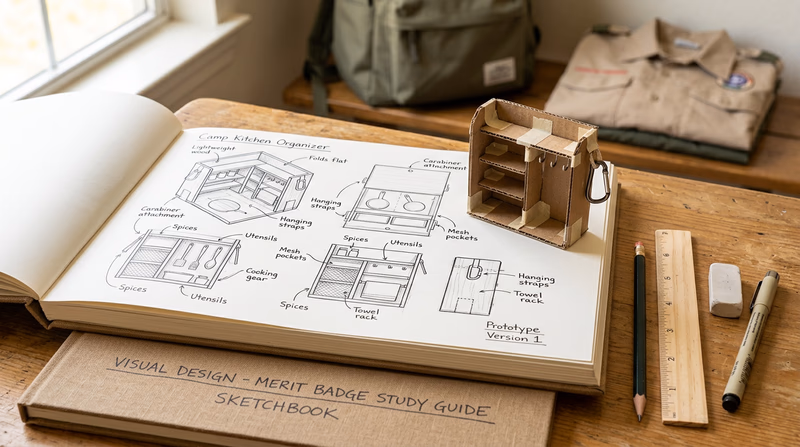
Option A: Design Something Useful
This option is about functional design — creating an object that serves a purpose. Think of the everyday items around you that were designed by someone: a water bottle, a camp chair, a phone case, a bookshelf, a tent. Every one of those objects started as a sketch in a designer’s notebook.
How to approach it:
- Identify a problem or need. What could be improved? What is missing? Look at your Scout gear, your room, your school supplies, or your camp equipment.
- Brainstorm solutions. Sketch several rough ideas quickly — do not worry about perfection. Get your ideas onto paper.
- Refine your best idea. Choose your strongest concept and create a detailed sketch or a 3-D model (using clay, cardboard, or foam board).
- Create a promotional piece. Design a poster, advertisement, or packaging that shows off your product. Include your design drawing and a description of what it does and why someone would want it.
Project ideas:
- A multi-tool holder for your camp kitchen
- A weather-resistant trail marker
- A new design for a merit badge sash or patch organizer
- A phone stand made from natural materials
- A better system for organizing your patrol box
Option B: Tell a Story with Pictures
This option is about narrative art — using images to communicate a sequence of events, an emotion, or an idea. Comic strips, graphic novels, illustrated children’s books, storyboards, and even cave paintings all tell stories through pictures.
How to approach it:
- Choose your story. It can be real or fictional. A Scouting adventure, a historical event, a family memory, or a completely imaginary tale all work.
- Plan your sequence. How many images do you need to tell the story? Sketch small thumbnails to map out the beginning, middle, and end.
- Create your final artwork. You can use any medium — pen and ink, watercolor, digital, or even 3-D sculpture. Make sure the story is clear without needing a lot of words.
- Consider adding captions or dialogue if they strengthen the storytelling, but let the images do most of the work.
Story formats to consider:
- Comic strip — 3–6 panels telling a short, complete story
- Single illustration — One powerful image that captures a moment and implies a larger story
- Triptych — Three images that show a progression (before, during, after)
- 3-D diorama — A scene built from clay, cardboard, or other materials
- Storyboard — A sequence of scenes like a movie director would plan
Option C: Design a Logo
This option is about graphic design and branding — creating a visual symbol that represents an identity. Logos are everywhere: on your shoes, your phone, your school, and your Scout uniform. A great logo is simple, memorable, and meaningful.
How to approach it:
- Choose what the logo represents. Your patrol, your troop, a school club, a family crest, a fictional company, or a personal brand.
- Research. Look at logos you admire. What makes them effective? Notice how the best logos work in one or two colors and are recognizable even at a small size.
- Brainstorm and sketch. Draw at least 10–15 rough concepts. Do not judge them yet — just get ideas flowing.
- Refine your best concept. Pick the strongest idea and create a clean, polished version.
- Explain the significance. Be ready to tell your counselor why you chose the shapes, colors, and symbols you used. What does each element represent?
- Apply it. With permission, put your logo on something real — a patrol flag, a piece of furniture, a ceramic mug, a T-shirt, a hat, or a piece of Scout equipment.
Logo Design Principles
What makes a great logo- Simple: Can you draw it from memory? If not, simplify it.
- Memorable: Does it stick in your mind after seeing it once?
- Scalable: Does it look good both large (on a banner) and small (on a pin)?
- Versatile: Does it work in black and white as well as in color?
- Relevant: Does it connect to the thing it represents?
No Matter Which Option You Choose
All three options follow the same creative process:
- Research and brainstorm — Explore the problem space and generate many ideas
- Plan — Map out your approach before committing to a final direction
- Create — Execute your idea with care and craftsmanship
- Reflect — Be ready to discuss your choices, your process, and what you learned
This is how professional artists and designers work every day. The finished product matters, but your counselor is equally interested in your process — how you got from idea to finished piece.
Canva Design School Free lessons on graphic design fundamentals including logo design, color theory, and layout — useful for all three project options. Link: Canva Design School — https://www.canva.com/designschool/ Making Comics by Scott McCloud Scott McCloud is the world's leading expert on visual storytelling. His books on comics and sequential art are invaluable for Option B. Link: Making Comics by Scott McCloud — https://scottmccloud.com/2-print/3-mc/index.htmlReq 6 — Visiting Art in Person
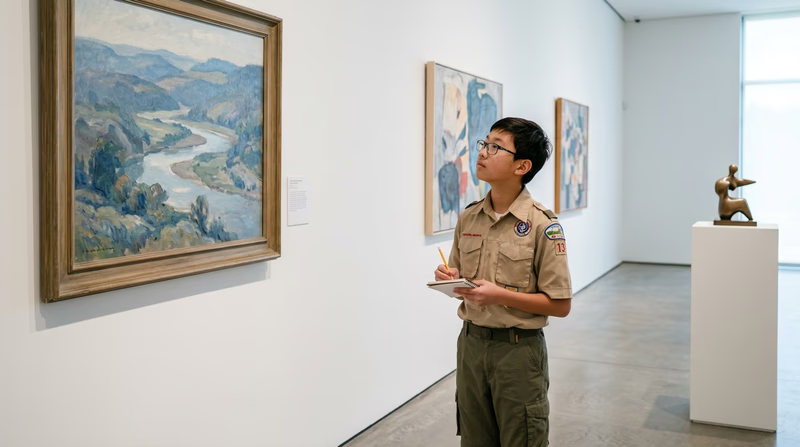
There is something that happens when you stand in front of a real piece of art that no screen, book, or poster can replicate. You see the actual size — a painting might be as tall as a wall or as small as your hand. You see the brushstrokes, the texture, the layers. You feel the space the artist created for you to stand in. This requirement gets you out of your sketchbook and into the world where art lives.
Where to Go
You have several options. Pick the one that is most accessible to you.
Museums are the most traditional choice. They house permanent collections and host rotating exhibits. Many museums have free admission days or discounted rates for youth. Look for art museums, history museums with art collections, or even science museums with design exhibits.
Art galleries are smaller venues that display and sell artwork, often by living artists. Galleries typically change their shows every few weeks, so the art you see will be current. Most galleries are free to enter and the staff is usually happy to talk about the work.
Art exhibits are temporary shows that can pop up anywhere — a community center, a library, a university, a park, or even a warehouse. Check local event listings for exhibits happening near you.
Artists’ co-ops are shared spaces where multiple artists work and display their art together. Visiting a co-op lets you see the creative process in action and ask artists directly about their work.
Artist’s workshops or studios give you a behind-the-scenes look at how art is made. Some artists offer open studio events where you can watch them work, ask questions, and see works in progress.
How to Prepare
Going in with a plan will make your visit more meaningful — and give you plenty to discuss with your counselor afterward.
Before Your Visit
Plan ahead for a great experience- Get permission from your parent or guardian and approval from your counselor
- Check the venue’s hours, admission cost, and any rules (some places do not allow backpacks or photography)
- Decide if you want to focus on a particular artist, time period, or style — or explore broadly
- Bring a small notebook and pencil for jotting down observations and artist names
- Wear comfortable shoes — museum floors are hard and you will be on your feet
What to Look For
You do not need to study every piece in the building. In fact, trying to see everything is a recipe for exhaustion. Instead, take your time and really look at a handful of works that catch your eye.
For each artwork that interests you, ask yourself:
- What elements of art do I see? (Line, value, shape, form, space, color, texture — you learned these in Requirement 2)
- What principles of design are at work? (Rhythm, balance, proportion, variety, emphasis, unity — from Requirement 3)
- What medium did the artist use? Can I see brushstrokes, chisel marks, or pencil lines?
- What is the subject? What is the artist trying to show or say?
- How does it make me feel? Do I like it? Am I confused by it? Does it remind me of anything?
- What is the context? When and where was it created? What was happening in the world at that time?
What to Discuss with Your Counselor
After your visit, your counselor will want to hear about your experience. Be ready to cover:
- Where you went and what kind of art was displayed
- Which artworks stood out to you and why
- What you learned about the artists, techniques, or styles you saw
- How the experience connected to what you have already learned in this merit badge — the elements, principles, and media
- What surprised you or changed your perspective about art
Virtual Options
While an in-person visit is ideal, many world-class museums offer virtual tours and online collections. If travel is genuinely not possible, ask your counselor if a virtual visit might be acceptable. These resources can supplement your in-person experience as well:
Google Arts & Culture — Virtual Museum Tours Walk through hundreds of museums around the world from your computer or phone. Explore collections from the Metropolitan Museum of Art, the Louvre, the Smithsonian, and many more. Link: Google Arts & Culture — Virtual Museum Tours — https://artsandculture.google.com/partner Smithsonian American Art Museum The Smithsonian's art museum features one of the largest collections of American art in the world, with free admission and extensive online resources. Link: Smithsonian American Art Museum — https://americanart.si.edu/ National Gallery of Art Located in Washington, D.C., the National Gallery offers free admission and an incredible collection spanning centuries of art from around the world. Link: National Gallery of Art — https://www.nga.gov/Req 7 — Careers in Art
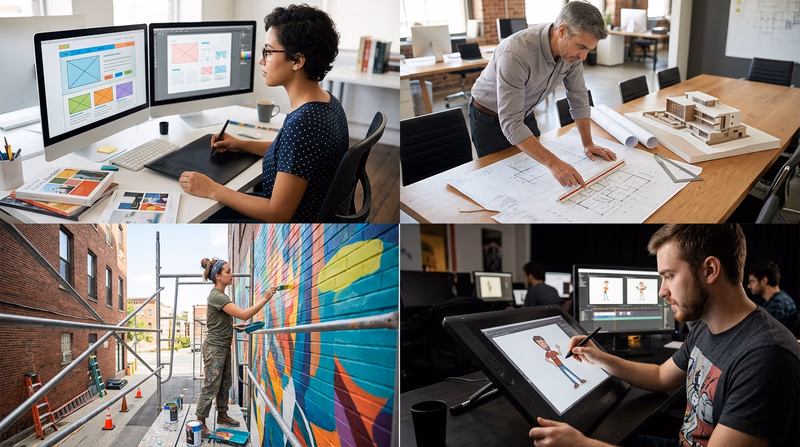
Art is not just a hobby — it is a career path that millions of people follow every day. Chances are, almost everything you have touched, worn, or looked at today was shaped by someone with art skills. Your phone was designed by an industrial designer. The app icons were drawn by a graphic designer. The movie you watched was created by animators, set designers, and visual effects artists. Art careers are everywhere, and many of them pay well and are in high demand.
Career Fields in Art
Here is a look at some of the many career paths available to people with art skills. For this requirement, you need to research three of these (or others you discover), then do a deep dive into one.
Visual & Fine Arts
Fine Artist / Painter / Sculptor Creates original works of art for galleries, commissions, and personal expression. Fine artists may sell through galleries, at art fairs, online, or through commissions from collectors and businesses.
Illustrator Creates images for books, magazines, advertisements, products, and digital media. Illustrators work in publishing, advertising, editorial, medical, scientific, and children’s book illustration.
Muralist Paints large-scale works on walls and buildings. Muralists work with cities, businesses, schools, and community organizations to create public art.
Printmaker Creates art through printing processes — screen printing, lithography, woodcuts, and etching. Printmakers may produce limited-edition prints for collectors or create designs for commercial products.
Design & Applied Arts
Graphic Designer Creates visual content for print and digital media — logos, websites, advertisements, packaging, and branding. This is one of the most in-demand art careers. Nearly every business needs a graphic designer.
Industrial / Product Designer Designs the physical products people use every day — furniture, appliances, sporting goods, vehicles, and consumer electronics. Industrial designers combine art skills with engineering and user experience.
Interior Designer Plans and designs indoor spaces — homes, offices, restaurants, and public buildings. Interior designers choose colors, materials, furniture, lighting, and layouts to create functional, beautiful environments.
Architect Designs buildings and structures that are safe, functional, and visually compelling. Architecture combines art, engineering, and problem-solving at a large scale.
Fashion Designer Creates clothing, shoes, and accessories. Fashion designers sketch concepts, select fabrics, and oversee production. They work for clothing brands, design houses, or independently.
Digital & Media Arts
Animator Brings characters and stories to life through movement — in movies, TV shows, video games, and advertisements. Animators may work in 2-D (traditional drawing) or 3-D (computer-generated).
Video Game Artist Creates the visual world of video games — characters, environments, textures, user interfaces, and special effects. This is one of the fastest-growing art careers.
UX/UI Designer Designs the interfaces of websites, apps, and software. UX (User Experience) designers focus on how a product works and feels. UI (User Interface) designers focus on how it looks. Both require strong visual skills.
Photographer Captures images for commercial, editorial, artistic, or documentary purposes. Photographers may specialize in portraits, events, products, nature, photojournalism, or fine art.
Film / Video Production Directors, cinematographers, set designers, and visual effects artists all use art skills to create movies, TV shows, and online content.
Education & Community
Art Teacher Teaches art at the elementary, middle school, high school, or college level. Art teachers inspire the next generation of artists and help students develop creative thinking.
Museum Curator Selects, organizes, and cares for collections of art in museums and galleries. Curators research artworks, plan exhibitions, and write educational materials.
Art Therapist Uses art as a therapeutic tool to help people deal with stress, trauma, and mental health challenges. Art therapists work in hospitals, clinics, schools, and community centers.
Researching Your Chosen Career
Once you have identified three careers that interest you, pick one for a deeper investigation. Here is what to find out:
Career Research Guide
What to learn about your chosen art career- Education: What degree or training is typically required? (High school diploma, associate’s degree, bachelor’s degree, master’s degree?)
- Training: Are there specific skills, software, or certifications you need? (For example, architects need licensure in most states.)
- Experience: How do people typically break into this field? (Internships, apprenticeships, portfolio development, freelance work?)
- Day-to-day work: What does a typical workday look like?
- Work environment: Do they work in a studio, office, outdoors, or remotely?
- Salary range: What can someone expect to earn at entry level and with experience?
- Job outlook: Is demand for this career growing, stable, or declining?
Where to Research
Bureau of Labor Statistics — Arts and Design Occupations The official U.S. government resource for career information. Find detailed profiles of art careers including salary data, job outlook, and education requirements. Link: Bureau of Labor Statistics — Arts and Design Occupations — https://www.bls.gov/ooh/arts-and-design/ My Next Move — Career Explorer An interactive tool that helps you explore careers based on your interests. Search for art-related careers and see what skills and education they require. Link: My Next Move — Career Explorer — https://www.mynextmove.org/Discussing with Your Counselor
When you meet with your counselor, be ready to share:
- The three careers you researched and a brief summary of each
- The one career you chose for your deep dive
- The education and training path for that career
- Why this career interests you — connect it to your own skills, passions, and experiences from working on this merit badge
Extended Learning
A. Introduction
Congratulations — you have earned the Art merit badge! You have defined what art is, mastered the elements and principles, created works in multiple media, applied your skills to a real-world project, experienced art in person, and explored career opportunities. That is a serious accomplishment. But your journey as an artist is just beginning. Here are some ways to keep growing.
B. Deep Dive: Building a Sketchbook Habit
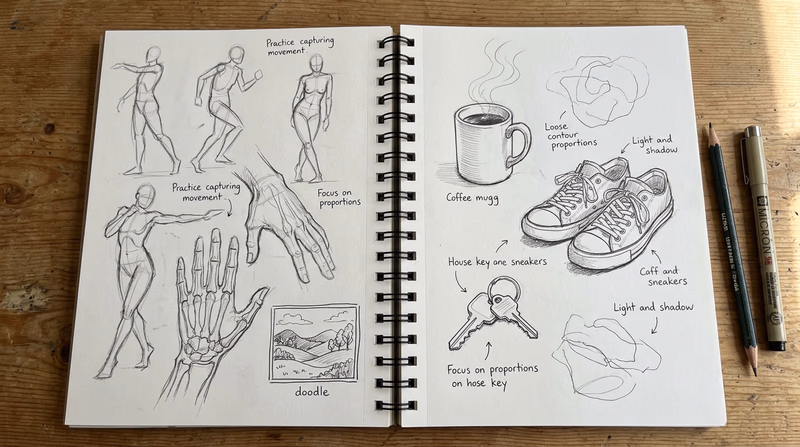
The single most effective thing you can do to improve as an artist is to draw regularly. Professional artists, illustrators, animators, and designers all maintain sketchbooks — not polished portfolios, but messy, honest, daily records of their observations and ideas. A sketchbook is where you practice, experiment, fail, and grow without pressure.
Start with a commitment you can keep. Five minutes a day is better than an hour once a month. Draw what you see: your breakfast, your dog, the view from your window, a stranger on a bus. Do not worry about making it “good.” The goal is to train your eye to observe and your hand to respond. Over time, you will notice your lines getting more confident, your proportions getting more accurate, and your shading getting more nuanced.
Try themed challenges to keep things interesting. “Inktober” is a popular October challenge where artists create one ink drawing per day based on daily prompts. “Sketch a Day” communities online share themes like “draw your shoe” or “draw something round.” These low-stakes challenges push you to draw subjects you would never choose on your own, which is exactly how you grow.
Keep every sketchbook you fill. In six months, flip back to your earliest pages. The improvement will be dramatic — and seeing your own progress is one of the most motivating things in the world. Your sketchbook is not a gallery; it is a gym. Nobody judges you for what you look like at the gym. They respect you for showing up.
C. Deep Dive: Understanding Color Mixing
In Requirement 4, you worked with paint — and you probably noticed that getting the right color is harder than it looks. Understanding how to mix colors from a limited palette is one of the most valuable skills a painter can develop, and it saves you from buying dozens of tubes of paint you do not need.
Start with a limited palette of just five colors: titanium white, ivory black, cadmium yellow, cadmium red (or a red like alizarin crimson), and ultramarine blue. From these five tubes, you can mix nearly every color you will ever need. This forces you to understand color relationships rather than just grabbing a pre-mixed color from the tube.
Practice making a color chart. Squeeze a small amount of each primary onto your palette. Mix yellow + blue to get green. Mix red + blue to get violet. Mix red + yellow to get orange. Then try adjusting each mixture: add more of one color to shift the hue. Add white to create a tint (lighter version). Add a tiny bit of the complementary color (the color across the color wheel) to create a more muted, natural tone. Earthy browns, olive greens, and subtle grays all come from mixing complementary colors together.
Pay attention to color temperature in your mixing. A warm yellow (leaning toward orange) mixed with a cool blue (leaning toward green) produces a different green than a cool yellow mixed with a warm blue. Every primary comes in warm and cool variations, and knowing which you are working with helps you predict the result. Eventually this becomes intuitive, but at first it helps to keep notes on what you mixed and how it turned out.
The most common beginner mistake is using too much paint and ending up with muddy colors. Start with small amounts. Add the darker color to the lighter one (it takes very little dark paint to shift a light color, but a lot of light paint to shift a dark one). Clean your brush between mixtures. And above all, experiment — happy accidents in color mixing are how you discover your most interesting palettes.
D. Deep Dive: Art and Technology
The line between traditional art and technology gets thinner every year. Understanding how digital tools expand your creative possibilities is essential for any artist growing up in the 21st century.
Digital painting software like Procreate, Krita, and Adobe Photoshop gives you access to unlimited colors, infinite layers, and an undo button that traditional media cannot match. Many professional illustrators and concept artists work entirely digitally, creating artwork for films, games, books, and advertisements. The skills you learned with physical paint — color mixing, value, composition — all transfer directly to digital tools. The medium changes, but the fundamentals stay the same.
3-D modeling opens up an entirely different dimension. Programs like Blender (free and open-source), ZBrush, and Tinkercad let you sculpt, texture, and light virtual objects. 3-D artists create characters for animated movies, design products for manufacturing, build virtual environments for video games, and even create models for 3-D printing. If you enjoyed thinking about form and space in Requirements 2 and 3, 3-D modeling is a natural next step.
Photography and photo editing combine artistic composition with technical knowledge of cameras, lighting, and software. Learning to use a DSLR camera or even mastering your phone’s manual mode teaches you about exposure, depth of field, and the relationship between light and image. Photo editing software like Adobe Lightroom or the free GIMP lets you fine-tune your images after capture.
Generative and AI-assisted art is a rapidly evolving field where artists use algorithms and artificial intelligence as creative tools. While this technology raises important questions about authorship and originality, understanding it gives you perspective on where art is heading. The most interesting work in this space comes from artists who combine AI tools with traditional skills and their own creative vision.
No matter which technology you explore, remember that the tool does not make the artist. A great artist with a pencil will always outperform a mediocre artist with the most expensive software. Master the fundamentals first — then let technology amplify what you already know.
E. Real-World Experiences
Take your art beyond the page and into the world. These experiences will challenge you, introduce you to other artists, and give you new perspectives.
Local Art Classes & Workshops
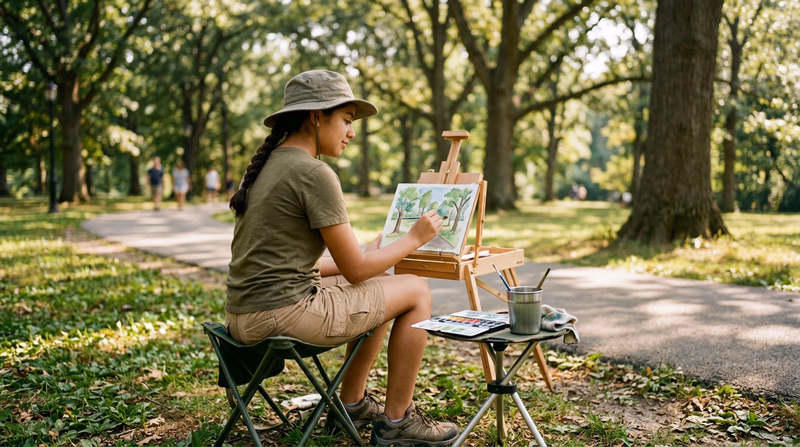
Plein Air Painting
Art Festivals & Fairs
Community Mural Projects
Open Studio Events
F. Organizations
These organizations support artists at all levels and offer resources, events, and communities to help you grow.
The nation’s leading nonprofit for advancing the arts in communities, schools, and civic life. Offers advocacy, research, and programs for young artists.
Organization: Americans for the Arts — https://www.americansforthearts.org/
Promotes art education and supports art teachers and students across the country with resources, research, and professional development.
Organization: National Art Education Association — https://www.arteducators.org/
One of the world’s largest collections of American art, with extensive free online resources, virtual tours, and educational programs for students.
Organization: Smithsonian American Art Museum — https://americanart.si.edu/
Free, world-class art history and art-making courses covering everything from ancient cave paintings to contemporary digital art.
Organization: Khan Academy — Art History — https://www.khanacademy.org/humanities/art-history
A series that explores contemporary art, art history, and creative challenges. Great for discovering new artists and ideas.
Organization: The Art Assignment (YouTube / PBS) — https://www.youtube.com/@theartassignment