Req 4 — Creating in Different Media
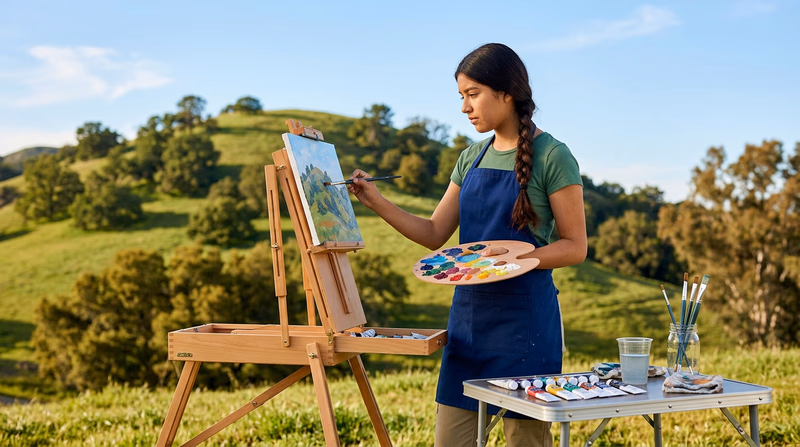
This is where you roll up your sleeves and create. You will pick one subject — a still life, a landscape, a portrait, an animal, a building, or anything else that inspires you — and render it in four different media. The same subject, four different tools. This is an incredible exercise because you will see firsthand how each medium changes the look, feel, and process of your artwork.
Choosing Your Subject
Pick something you can observe directly. Working from life (rather than a photograph) teaches you more about light, shadow, and proportion. Good subjects for beginners include:
- A piece of fruit or a simple still life arrangement
- A tree or flower in your yard
- A pet or animal
- A landscape or building you can sit in front of
- Your own hand (always available, always interesting!)
Choosing Your Four Media
You must choose four of the nine options listed above. Here is what you need to know about each one to help you decide.
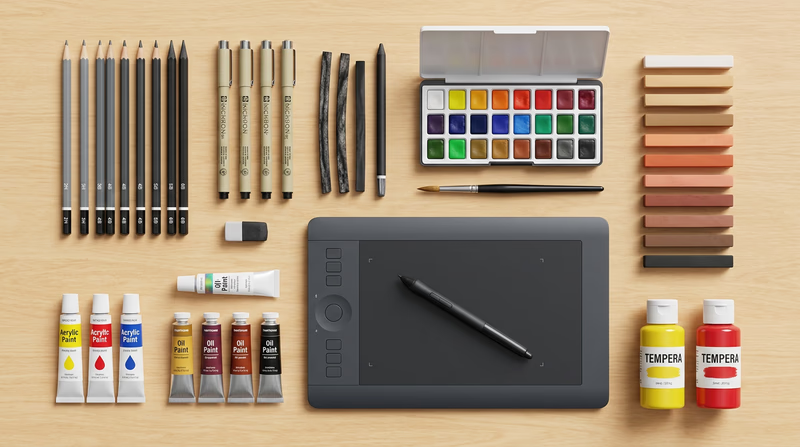
Pen and Ink
Pen and ink is bold and permanent — there is no eraser. This forces you to be deliberate with every mark. You can create fine, precise lines or loose, expressive strokes.
What you need: India ink or a fine-tip permanent pen (like a Micron or Sharpie pen), drawing paper
Techniques to try:
- Hatching — Parallel lines close together to create shading
- Cross-hatching — Overlapping sets of parallel lines for darker values
- Stippling — Tiny dots clustered together (more dots = darker value)
- Contour drawing — A single, continuous line that follows the edges of your subject
Watercolors
Watercolors are known for their transparency and luminous quality. The white of the paper shines through the paint, giving watercolors their characteristic glow. They are lightweight, easy to clean up, and portable.
What you need: Watercolor paint set, watercolor paper (heavier paper prevents buckling), brushes, a cup of water, a palette for mixing
Key concepts:
- Work from light to dark — you cannot paint a light color over a dark one
- The amount of water you use controls how light or dark the color appears
- Wet-on-wet: Applying wet paint to wet paper creates soft, blurry edges
- Wet-on-dry: Applying wet paint to dry paper creates sharp, crisp edges
- Let layers dry completely before adding new ones to avoid muddy colors
Pencil
The pencil is the most accessible art tool in the world. It is forgiving (you can erase), expressive (you can create a huge range of values), and portable (it fits in your pocket).
What you need: A set of drawing pencils (ranging from hard 2H to soft 6B), drawing paper, an eraser, a sharpener
Understanding pencil grades:
- H pencils (2H, 4H) are hard — they make light, fine lines and are great for detail
- B pencils (2B, 4B, 6B) are soft — they make dark, rich marks and are great for shading
- HB is right in the middle — a good all-purpose pencil
Techniques to try:
- Blending — Use your finger, a blending stump, or a tissue to smooth pencil marks into gradients
- Hatching and cross-hatching — Create value through layered lines
- Contour drawing — Focus on edges and outlines
- Gesture drawing — Quick, loose sketches that capture movement and energy
Pastels
Pastels deliver rich, vibrant color that you apply directly — no brushes needed. They come in two main types:
- Soft pastels — Chalky sticks with intense color. They blend beautifully with your fingers but are fragile and dusty.
- Oil pastels — Waxy, crayon-like sticks. They are more durable and create bold, saturated marks. They do not blend as smoothly as soft pastels but resist smudging.
What you need: A set of pastels (soft or oil), textured paper (pastel paper or construction paper — smooth paper will not hold the pigment), fixative spray (for soft pastels)
Oil Paints
Oil paints are the medium of the Old Masters — Rembrandt, Vermeer, and Monet all worked in oils. They are rich, vibrant, and incredibly versatile. Oil paint dries slowly, which gives you time to blend colors and rework areas.
What you need: Oil paints, canvas or canvas board, bristle brushes, palette, palette knife, linseed oil or odorless mineral spirits, rags for cleanup
Good to know:
- Oil paintings take days or even weeks to dry completely
- Clean brushes with mineral spirits (not water)
- You can build up thick layers of paint (called impasto) for dramatic texture
- Work in a well-ventilated area
Tempera
Tempera is a fast-drying, water-based paint that you have probably used in school. It is opaque, mixes easily, and cleans up with soap and water. Tempera is great for bold, flat areas of color and is very forgiving for beginners.
What you need: Tempera paint, heavy paper or poster board, brushes, a palette or paper plate for mixing, water
Key characteristics:
- Dries quickly — work in small sections
- Opaque — you can paint light colors over dark
- Mixes well — experiment with creating your own colors
- Cleanup is easy — just soap and water
Acrylics
Acrylic paint is one of the most versatile art media available. It is water-based (easy cleanup), dries quickly, and can mimic the look of both watercolors (when thinned with water) and oil paints (when applied thickly). Once dry, acrylic paint is waterproof and durable.
What you need: Acrylic paints, canvas or heavy paper, brushes (synthetic bristles work well), a palette, water, a spray bottle (to keep paint wet on the palette)
Techniques to try:
- Thin washes — Dilute with water for a watercolor-like effect
- Dry brush — Use a nearly dry brush for scratchy, textured marks
- Layering — Build up layers of color (each layer dries in minutes)
- Impasto — Apply paint thickly for visible brushstrokes and texture
Charcoal
Charcoal is one of the oldest drawing materials — and one of the most dramatic. It creates deep blacks and rich tones that pencils cannot match. Charcoal comes in several forms:
- Vine charcoal — Thin, delicate sticks that make light marks and erase easily. Great for initial sketches.
- Compressed charcoal — Denser and darker than vine charcoal. Harder to erase but produces richer values.
- Charcoal pencils — Charcoal wrapped in wood, like a regular pencil. Good for detail work.
What you need: Charcoal (vine or compressed), drawing paper with some texture, a kneaded eraser (molds to any shape), fixative spray
Techniques:
- Use the side of the charcoal for broad, sweeping areas of tone
- Use the tip for fine lines and details
- Blend with your fingers, a cloth, or a blending stump for smooth gradients
- Erase to create highlights — a kneaded eraser can “lift” charcoal to reveal the white paper
Computer Drawing or Painting
Digital art opens up possibilities that traditional media cannot match — infinite undo, unlimited colors, layers you can rearrange, and no cleanup required. Many professional artists today work entirely on a computer or tablet.
What you can use:
- Free software: Krita, GIMP, MediBang Paint, Autodesk Sketchbook
- Hardware: A drawing tablet (like a Wacom), a tablet with a stylus (iPad with Apple Pencil), or even a mouse
- Mobile apps: Procreate (iPad), ibisPaint (free, iOS/Android), Sketchbook (free)
Key concepts:
- Layers — Think of transparent sheets stacked on top of each other. You can draw on one layer without affecting others.
- Brushes — Digital software offers brushes that mimic pencil, pen, watercolor, oil, and more.
- Undo — Your best friend. Press Ctrl+Z (or Cmd+Z on Mac) to reverse any mistake.
- Zoom — Get close for detail work, then zoom out to see the overall composition.
Tips for All Four Renderings
No matter which four media you choose, keep these tips in mind:
Rendering Tips
Make the most of your four artworks
- Set up your subject in consistent lighting so it looks the same each time
- Start with the medium you are most comfortable with to build confidence
- Take your time — quality matters more than speed
- Step back from your work regularly to see the overall composition
- Date and label each piece with the medium used
- Keep all four renderings to show your counselor side by side