Athletics Merit Badge — Complete Digital Resource Guide
https://merit-badge.university/merit-badges/athletics/guide/
Introduction & Overview
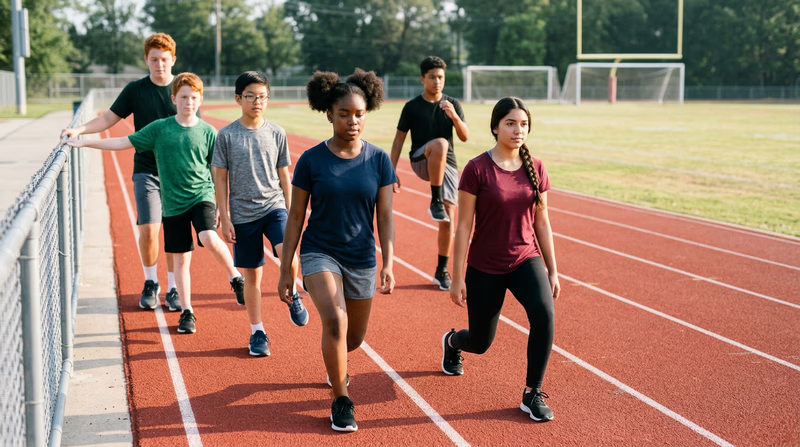
Athletics is more than running fast or throwing far — it is the foundation of physical fitness, discipline, and teamwork. Whether you are sprinting down a track, swimming laps in a pool, or shooting free throws on a basketball court, athletics challenges you to push your limits and discover what your body can do. This merit badge will help you build a personal training program, understand the rules and spirit of fair play, and explore the wide world of competitive and recreational sports.
Then and Now
Then — The Birth of Athletic Competition
The story of athletics begins in ancient Greece, where the first Olympic Games were held in 776 BC. Those early competitions featured foot races, discus throwing, javelin, and wrestling — events not so different from what you will find at a track meet today. For the Greeks, athletics was not just about winning. It was a way to honor the gods, build strong citizens, and unite rival city-states under a common tradition of fair competition.
- Purpose: Civic pride, military readiness, religious celebration
- Mindset: The ideal of the well-rounded athlete — strong in body and mind
Now — Athletics for Everyone
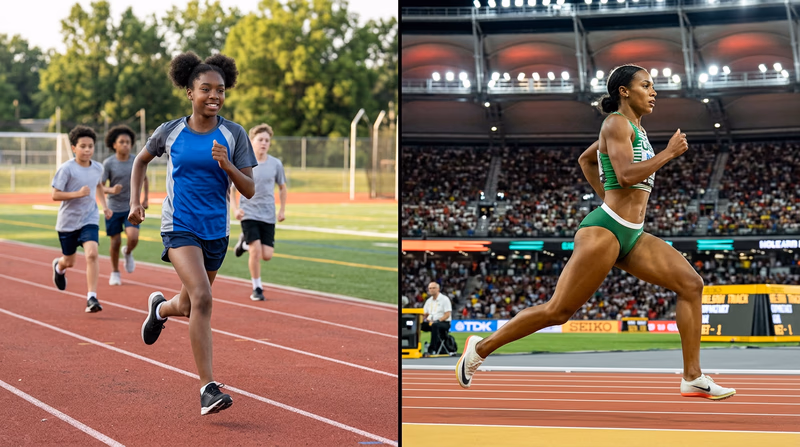
Today, athletics spans hundreds of sports at every level — from your school gym class to the Olympic Games. Modern training science, nutrition, and technology have made athletes faster, stronger, and more resilient than ever. But the biggest change is access: athletics is no longer reserved for elite warriors or wealthy aristocrats. Youth leagues, community rec centers, adaptive sports programs, and school teams make it possible for anyone to compete, no matter their background or ability.
- Purpose: Fitness, fun, personal growth, community, competition
- Mindset: Every athlete has a starting line — improvement is the real victory
Get Ready! You are about to explore the world of athletics from the ground up. You will learn how to train smart, stay safe, eat well, and compete with integrity. Whether you dream of standing on a podium or just want to beat your own personal best, this guide is your playbook.

Kinds of Athletics
Athletics covers a huge range of activities. Here is a look at the main categories you will encounter in this merit badge.
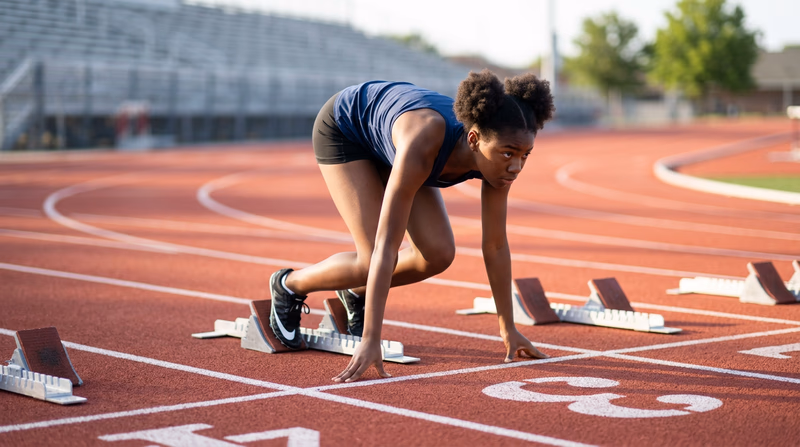
Track Events
Track events are races run on a measured course — usually an oval track. They range from explosive sprints that last just seconds to grueling distance runs that test your endurance over miles.
- Sprints (100m, 200m) — Pure speed. These races are over in a flash, and every fraction of a second counts.
- Middle Distance (800m, 1500m) — A blend of speed and stamina. Pacing is everything.
- Long Distance (3K, 5K, and beyond) — Endurance events where mental toughness matters as much as physical fitness.
Field Events
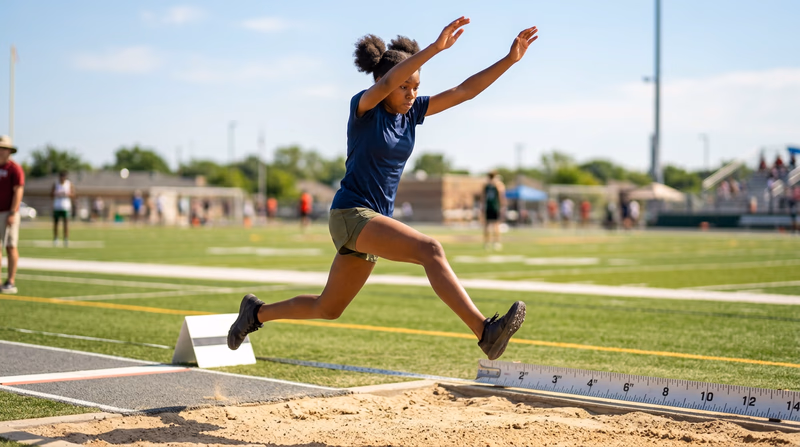
Field events take place in designated areas on or near the track. They focus on jumping and throwing — skills that combine power, technique, and coordination.
- Jumping — Long jump, high jump, triple jump, and pole vault. Each event rewards explosive leg power and precise form.
- Throwing — Shot put, discus, javelin, and hammer throw. These events channel full-body strength into a single powerful motion.
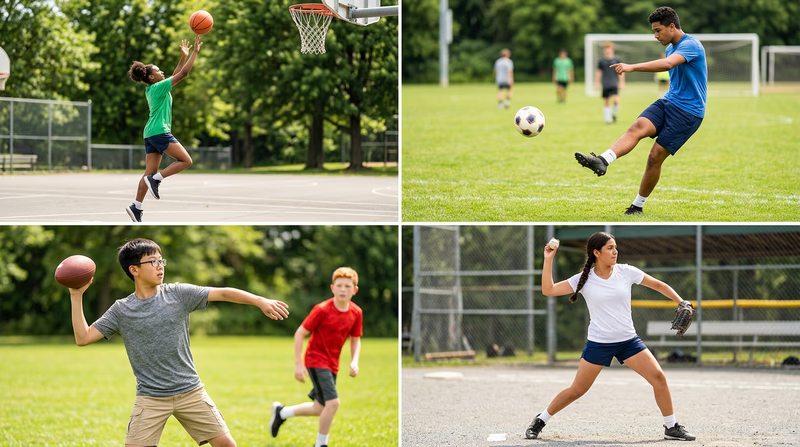
Team Ball Sports
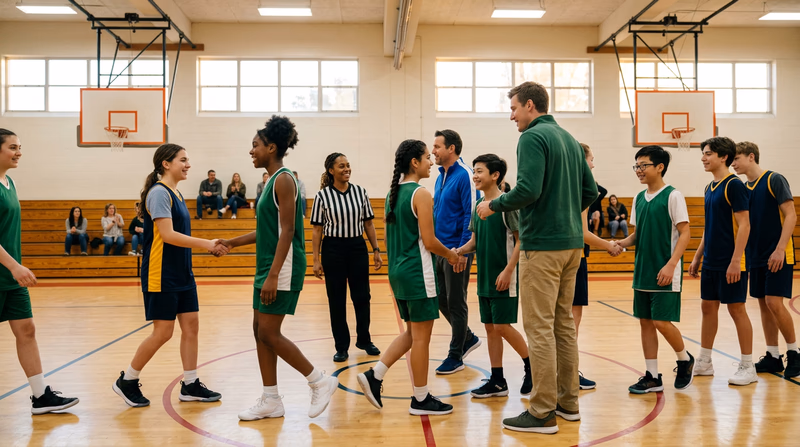
Many athletic activities are team-based. Basketball, soccer, football, and baseball each require a unique mix of individual skill and group coordination. These sports teach you to communicate, trust your teammates, and adapt to changing situations in real time.
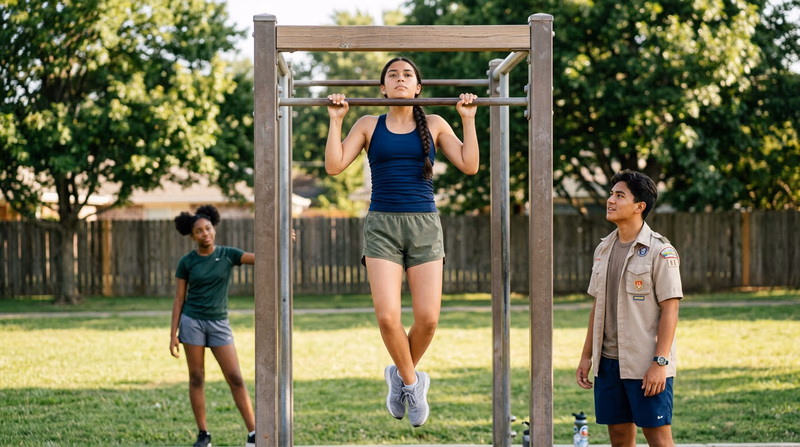
Strength & Conditioning
Pull-ups, push-ups, and weight training build the raw strength and muscular endurance that support every other athletic activity. Whether you are a sprinter, a swimmer, or a soccer player, a stronger body performs better and resists injury.
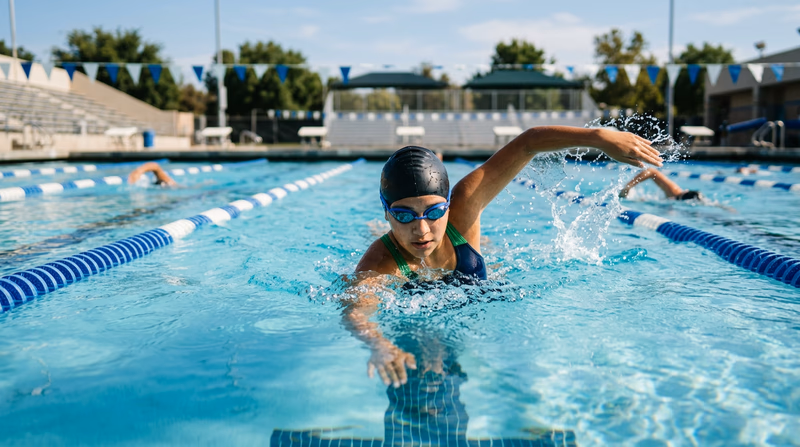
Aquatic Athletics
Swimming is one of the most complete workouts in all of athletics. It builds cardiovascular fitness, upper- and lower-body strength, and flexibility — all while being easy on your joints. Competitive swimming events test both speed and endurance across distances from 50 meters to 1500 meters and beyond.

Now that you have seen the breadth of what athletics has to offer, it is time to start working through the requirements.
Req 1a — Safety Hazards
Before you step onto any field, court, track, or pool deck, you need to know what can go wrong — and how to keep it from happening. The best athletes do not just train hard. They train smart, which means understanding the risks of their sport and preparing for them.
Anticipate: See It Coming
Anticipating a hazard means thinking about what could happen before it does. Every athletic activity has its own set of risks, and recognizing them ahead of time is your first line of defense.
Common hazards in athletics include:
- Muscle and joint injuries — Sprains, strains, and pulled muscles happen when you push too hard, skip your warm-up, or use improper form.
- Heat-related illness — Dehydration, heat cramps, heat exhaustion, and heat stroke are serious risks during outdoor training in warm weather.
- Concussions — A blow to the head or a hard fall can cause a concussion, which is a brain injury that needs immediate attention.
- Overuse injuries — Doing the same motion too many times without rest (like throwing, running, or swimming) can lead to stress fractures, tendinitis, and other chronic problems.
- Environmental hazards — Wet surfaces, uneven ground, extreme temperatures, lightning, and poor lighting all increase the chance of getting hurt.
Prevent: Stop It Before It Starts
Prevention is about taking action so hazards never become injuries. Here are the most important prevention strategies for any athlete:
Injury Prevention Basics
Habits that keep you in the game- Warm up before every session: Light jogging, dynamic stretches, and sport-specific movements prepare your muscles and joints.
- Use proper form: Whether you are lifting, running, or throwing, correct technique protects your body from unnecessary stress.
- Wear the right gear: Shoes that fit, protective equipment that meets standards, and clothing appropriate for the weather.
- Stay hydrated: Drink water before, during, and after activity — do not wait until you feel thirsty.
- Rest and recover: Your body gets stronger during rest, not during training. Take rest days seriously.
- Know the rules: Many rules in sports exist specifically to prevent injuries. Following them protects you and everyone around you.
Mitigate: Make It Less Severe
Sometimes, despite your best efforts, things go wrong. Mitigation means reducing the severity of a bad situation. In athletics, that looks like this:
- Proper playing surfaces — A well-maintained field with no holes, ruts, or debris reduces the chance of a twisted ankle.
- Spotters and buddies — In weight training, a spotter can catch the bar if you fail a rep. In swimming, a buddy watches your back.
- Padded equipment — Helmets, shin guards, mouth guards, and padded mats absorb impacts so your body does not have to.
- Emergency planning — Know where the first-aid kit is. Know who has a phone. Know the address of your training location in case you need to call 911.
Respond: Act When It Happens
When an injury does occur, how you respond in the first few minutes can make a huge difference. The basics of emergency response apply to every sport:
- Stop the activity. Make sure the scene is safe for you and the injured person.
- Assess the injury. Is the person conscious? Breathing? Can they move the injured area?
- Call for help. If the injury is serious — head injury, broken bone, difficulty breathing, or severe bleeding — call 911 immediately.
- Provide first aid. Use what you know and what is in your first-aid kit. The next page covers specific first-aid techniques for common athletic injuries.
- Do not move the person if you suspect a neck, back, or head injury. Wait for trained medical help.
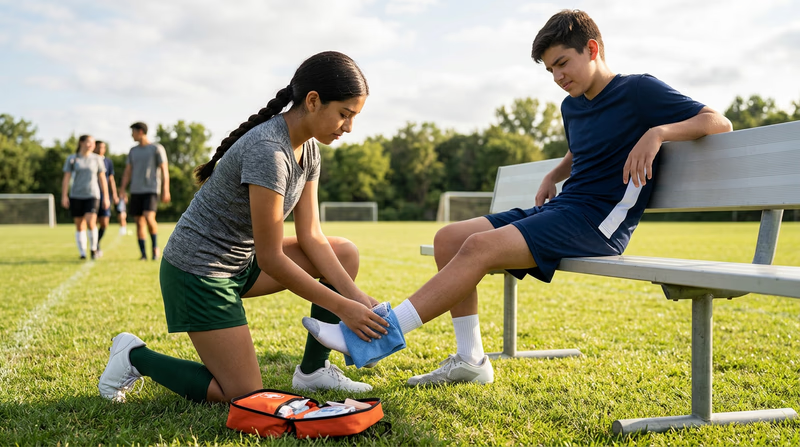
Req 1b — First Aid for Athletes
Knowing first aid is not optional for an athlete — it is part of being prepared. This page walks through each of the injuries and illnesses listed in the requirement so you understand what they are, how to recognize them, and what to do when they happen.
Sprains
A sprain is a stretch or tear of a ligament — the tough band of tissue that connects bones at a joint. Ankle sprains are the most common in athletics, but wrists, knees, and fingers are also vulnerable.
Signs: Swelling, bruising, pain at the joint, difficulty moving the joint.
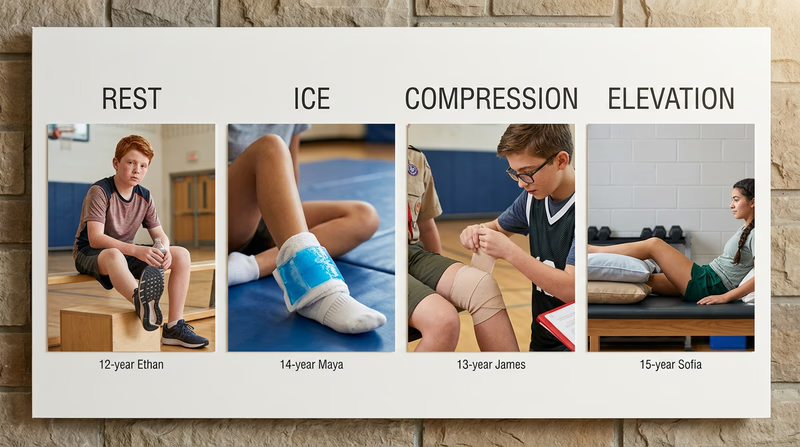
First aid: Use the RICE method:
- Rest — Stop using the injured area immediately.
- Ice — Apply a cold pack wrapped in a cloth for 15–20 minutes at a time.
- Compression — Wrap the area with an elastic bandage to reduce swelling (not too tight!).
- Elevation — Raise the injured area above the level of the heart to help fluid drain away.
Strains
A strain is a stretch or tear of a muscle or tendon (the cord that attaches muscle to bone). Hamstring and back strains are especially common in running and jumping sports.
Signs: Pain, muscle spasms, swelling, limited ability to move the muscle.
First aid: The same RICE method applies. Strains and sprains are treated very similarly in the field. If pain is severe or the athlete cannot bear weight, seek medical attention.
Contusions (Bruises)
A contusion is a bruise caused by a direct blow that damages blood vessels under the skin without breaking the skin itself. In athletics, contusions are common from collisions, falls, or being struck by a ball.
Signs: Discoloration (red, purple, or blue), swelling, tenderness at the impact site.
First aid: Apply ice wrapped in a cloth for 15–20 minutes. If the bruise is on a limb, elevate it. Most contusions heal on their own, but a very deep bruise on a muscle (sometimes called a “charley horse”) may need medical evaluation.
Abrasions (Scrapes)
An abrasion is a scrape or graze where the outer layers of skin are rubbed or torn away. Sliding on a track, diving for a ball, or falling on artificial turf can all cause abrasions.
Signs: Raw, reddened skin that may bleed lightly. Often stings more than it bleeds.
First aid:
- Clean the wound gently with clean water to remove dirt and debris.
- Apply antibiotic ointment to help prevent infection.
- Cover with an adhesive bandage or sterile gauze pad.
- Change the dressing daily and watch for signs of infection (increasing redness, warmth, pus, or red streaks).
Blisters
A blister is a fluid-filled pocket that forms when skin is repeatedly rubbed — usually by shoes, grips, or equipment that does not fit properly.
Signs: A raised area of skin filled with clear fluid. Hot spots (areas of redness and warmth) are the warning sign that a blister is forming.
First aid:
- Hot spots (pre-blisters): Cover immediately with moleskin or athletic tape to reduce friction.
- Intact blisters: Do not pop them. The fluid inside protects the new skin forming underneath. Cover with a donut-shaped pad of moleskin to relieve pressure.
- Popped blisters: Clean the area, apply antibiotic ointment, and cover with a sterile bandage. Watch for infection.
Dehydration
Dehydration happens when your body loses more fluid than it takes in. During athletic activity, you lose water and electrolytes through sweat. If you do not replace them, your performance drops and your health is at risk.
Signs: Thirst, dry mouth, dark yellow urine, headache, dizziness, fatigue, muscle cramps.
First aid:
- Move the person to a cool, shaded area.
- Have them drink water or a sports drink with electrolytes in small, frequent sips.
- If the person is confused, vomiting, or cannot keep fluids down, call 911 — this could be a sign of heat stroke.
Heat Reactions
Heat-related illnesses are a spectrum that gets progressively more dangerous:
Heat cramps — Painful muscle spasms, usually in the legs or abdomen, caused by loss of electrolytes through sweat.
- First aid: Rest in a cool place, drink fluids with electrolytes, gently stretch the cramping muscle.
Heat exhaustion — The body is overheating and struggling to cool itself.
- Signs: Heavy sweating, cool/clammy skin, fast pulse, nausea, headache, dizziness, weakness.
- First aid: Move to a cool area, loosen clothing, apply cool wet cloths, sip water. If symptoms do not improve within 15 minutes or get worse, call 911.
Heat stroke — A life-threatening emergency. The body’s temperature regulation system has failed.
- Signs: High body temperature (103°F or higher), hot/red/dry skin (sweating may have stopped), rapid strong pulse, confusion, loss of consciousness.
- First aid: Call 911 immediately. Move the person to a cool area and try to lower their temperature with cold water, ice packs on the neck, armpits, and groin, or any cooling method available. Do not give fluids if the person is confused or unconscious.
Concussions
A concussion is a traumatic brain injury caused by a bump, blow, or jolt to the head — or by a hit to the body that causes the head and brain to move rapidly back and forth. Concussions are serious and require medical attention.
Signs (may appear immediately or hours later):
- Headache or pressure in the head
- Confusion, feeling “foggy” or “not right”
- Dizziness, balance problems
- Nausea or vomiting
- Sensitivity to light or noise
- Memory problems (not remembering the play or event)
- Loss of consciousness (even briefly)
First aid:
- Remove the athlete from play immediately. They must not return to activity that day.
- Seek medical evaluation — a doctor should clear them before they return to any physical activity.
- Monitor for worsening symptoms. If the person becomes increasingly confused, has repeated vomiting, seizures, or loses consciousness, call 911.
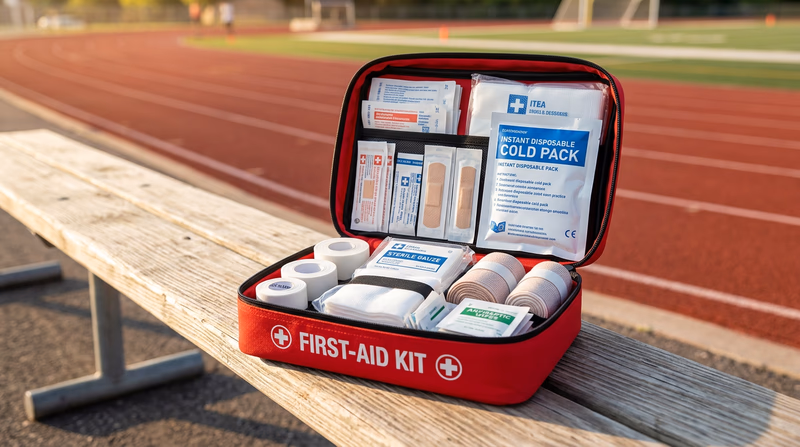
Your Athletic First-Aid Kit
In addition to a standard Scout first-aid kit, athletes should carry a few extra items:
Athletic First-Aid Additions
Items to add for sports activities- Instant cold packs: For immediate icing of sprains, strains, and contusions.
- Elastic bandages: For compression wraps on joints and muscles.
- Moleskin and athletic tape: For blisters and hot spots.
- Electrolyte packets: To mix into water for treating dehydration and heat cramps.
- SAM splint or finger splints: For stabilizing suspected fractures until medical help arrives.
Req 2a — Physical Examinations
Think of an annual physical exam like a pre-flight check for an airplane. Before every flight, pilots walk around the plane and inspect everything — engines, tires, fuel, instruments. They do this even when the plane looks perfectly fine, because catching a small problem on the ground is much better than finding it at 30,000 feet. Your body works the same way. An annual physical catches issues early, when they are easiest to fix.
Why Every Year?
Your body is changing fast during your teen years. You are growing taller, gaining muscle, and your heart, lungs, and bones are all developing. An annual physical exam gives your doctor a chance to make sure everything is progressing normally and to spot any problems before they become serious.
For athletes, the physical is especially important because it determines whether it is safe for you to participate in sports. Most schools and sports leagues require an up-to-date physical before you can compete — and for good reason.
What Happens During a Physical?
A typical sports physical includes:
- Height and weight — Tracking growth over time helps identify developmental issues.
- Blood pressure and heart rate — High blood pressure can be a hidden risk factor, even in young athletes.
- Vision and hearing — Good vision and hearing are important for safety in sports.
- Heart and lung check — The doctor listens with a stethoscope for irregular heartbeats, murmurs, or breathing issues.
- Joint and muscle flexibility — The doctor checks your range of motion and looks for signs of previous injuries that need attention.
- Hernia check — Certain physical activities can worsen a hernia, so it is important to screen for one.
Why the Doctor Asks About So Many Things
You might wonder why a sports physical involves questions about allergies, medications, and family medical history. Here is why each matters:
Overall health: A cold, infection, or chronic condition like asthma can affect your performance and safety. Your doctor needs the full picture to clear you for activity.
Immunizations: Vaccines protect you from diseases like tetanus (a real risk for any athlete who gets a cut or scrape on a dirty field), influenza, and meningitis. Your doctor checks that your shots are up to date.
Medications: Some medications affect your heart rate, blood pressure, or energy level. Your doctor needs to know what you are taking so they can advise you on safe participation.
Allergies: Allergies to bee stings, foods, or medications can cause serious reactions during outdoor sports. Your doctor and your coach need to know about them so an emergency plan is in place.
Medical history: Past injuries, surgeries, or family history of heart conditions can affect your risk during athletics. A family history of sudden cardiac events, for example, may prompt additional screening.

The Scouting Connection
Scouting America takes health screening seriously. The Annual Health and Medical Record is divided into parts:
- Part A: Informed consent and hold-harmless agreement
- Part B: General health history, completed by you and your parent/guardian
- Part C: Pre-participation physical, completed and signed by a licensed healthcare provider
Req 2b — Healthy Habits
Great athletic performance does not come from training alone. What you do in the other 22 hours of the day — how you sleep, how you recover, and what you put into your body — has a massive impact on how well you perform and how quickly you improve.
The Pillars of Healthy Training Habits
Sleep
Sleep is when your body does its most important repair work. During deep sleep, your muscles rebuild, your brain processes what you learned during practice, and your immune system recharges. Cutting sleep short is like leaving the gym halfway through your workout — you miss the most important part.
- How much? Teenagers need 8–10 hours of sleep per night. Athletes in heavy training may need even more.
- Quality matters: A dark, cool, quiet room and a consistent bedtime make a big difference. Avoid screens for at least 30 minutes before bed — the blue light interferes with your body’s sleep signals.
Hydration
Water makes up about 60% of your body weight and is involved in every bodily function. Even mild dehydration — losing just 2% of your body weight in fluid — can reduce your strength, speed, and endurance noticeably.
- Daily baseline: Aim for at least 8 cups (64 ounces) of water per day, more on training days.
- During exercise: Drink 7–10 ounces every 10–20 minutes of activity.
- After exercise: Replace fluids lost through sweat. A sports drink with electrolytes helps after intense sessions lasting more than 60 minutes.
Rest and Recovery
Your body gets stronger during rest, not during exercise. Training creates small amounts of stress and damage in your muscles. Rest days give your body time to repair that damage and come back stronger. Skipping rest leads to overtraining, which causes fatigue, poor performance, and a higher risk of injury.
Hygiene
Athletes share equipment, locker rooms, and playing surfaces. Good hygiene prevents the spread of skin infections like staph, ringworm, and athlete’s foot.
- Shower after every practice or game.
- Wash your workout clothes after each use.
- Never share towels, razors, or water bottles.
- Clean and cover any cuts or scrapes before practicing.

Harmful Substances and Athletic Performance
The requirement asks you to understand how tobacco, alcohol, and other harmful substances hurt both your health and your game. Here is what the science says.
Tobacco Products
Tobacco — whether smoked, chewed, or vaped — is one of the worst things you can do to an athletic body.
- Lungs: Smoking damages your airways and reduces your lung capacity. That means less oxygen reaches your muscles, which kills your endurance.
- Heart: Nicotine raises your heart rate and blood pressure, making your cardiovascular system work harder for less output.
- Recovery: Smoking slows wound healing and increases the time it takes to recover from injuries.
- Vaping: E-cigarettes still deliver nicotine and can contain chemicals that damage lung tissue. “It’s not smoke” does not mean “it’s safe.”
Alcohol
Alcohol impairs virtually every aspect of athletic performance:
- Coordination and reaction time: Even small amounts of alcohol slow your reflexes and impair your balance — the exact skills athletes depend on.
- Muscle recovery: Alcohol interferes with protein synthesis, the process your muscles use to repair and grow after training.
- Dehydration: Alcohol is a diuretic, meaning it causes your body to lose water. This compounds the dehydration you already experience from training.
- Sleep quality: While alcohol may make you feel sleepy, it disrupts the deep, restorative sleep stages your body needs most.
- Decision-making: Impaired judgment leads to risky behavior, both on and off the field.
Other Harmful Substances
- Performance-enhancing drugs (PEDs): Steroids and other PEDs may seem like a shortcut, but they carry severe health risks including liver damage, heart problems, hormonal imbalances, and mental health issues. They are also banned in virtually all organized sports and are illegal without a prescription.
- Recreational drugs: Marijuana, stimulants, and other drugs impair reaction time, judgment, and motivation. They can also lead to disqualification from competition and legal trouble.
- Energy drinks with excessive caffeine: While moderate caffeine is generally safe for older teens, high doses can cause rapid heartbeat, anxiety, dehydration, and in rare cases, cardiac events during intense exercise.
The Scout Oath Connection
The Scout Oath includes the promise to keep yourself “physically strong, mentally awake, and morally straight.” Avoiding harmful substances is one of the most direct ways to live up to that promise. Your body is the only one you get — taking care of it is not just good athletics, it is good Scouting.
CDC — Health Effects of Cigarette Smoking Detailed information on how tobacco use damages every system in the body. Link: CDC — Health Effects of Cigarette Smoking — https://www.cdc.gov/tobacco/about/health-effects.htmlReq 2c — Balanced Diet
Food is fuel. Just like a car will not run well on the wrong type of gas, your body will not perform at its best without the right nutrients. A balanced diet gives you the energy to train, the building blocks to grow and repair muscle, and the vitamins and minerals to keep every system in your body running smoothly.
The Building Blocks of Nutrition
There are three macronutrients (nutrients your body needs in large amounts) and several key micronutrients (vitamins and minerals you need in smaller amounts). Together, they form the foundation of a healthy diet.
Carbohydrates — Your Primary Fuel
Carbohydrates are your body’s preferred energy source, especially during exercise. They break down into glucose, which your muscles burn during activity. Without enough carbs, you will feel tired, sluggish, and unable to maintain intensity.
- Good sources: Whole grains (oatmeal, brown rice, whole wheat bread), fruits, vegetables, beans, and legumes.
- Limit: Added sugars and highly processed foods like candy, soda, and pastries give you a quick energy spike followed by a crash.
Protein — Your Repair Crew
Protein is essential for building and repairing muscle tissue. After a hard workout, your muscles have small tears that protein helps repair — making you stronger for the next session.
- Good sources: Lean meats (chicken, turkey, fish), eggs, dairy (milk, yogurt, cheese), beans, nuts, and tofu.
- How much? Active teenagers need about 0.5 to 0.8 grams of protein per pound of body weight per day. A 130-pound Scout needs roughly 65–100 grams daily.
Fats — Your Long-Lasting Energy Reserve
Fats sometimes get a bad reputation, but your body absolutely needs them. Healthy fats support brain function, protect your organs, help absorb vitamins, and provide a long-lasting energy source for lower-intensity activities.
- Good sources: Avocados, nuts, seeds, olive oil, and fatty fish like salmon.
- Limit: Trans fats (found in many fried and processed foods) and excessive saturated fats.

The MyPlate Model
The USDA’s MyPlate is a simple visual guide to building a balanced meal. Imagine your plate divided into sections:
- Fruits and vegetables fill half the plate — they provide vitamins, minerals, fiber, and antioxidants.
- Grains fill about a quarter — choose whole grains over refined grains whenever possible.
- Protein fills the remaining quarter — vary your sources throughout the week.
- Dairy on the side — a glass of milk, a cup of yogurt, or a serving of cheese provides calcium for strong bones.
- Water — always have a glass of water with your meal. It is the best drink for hydration.
Micronutrients Athletes Should Know
While macronutrients get most of the attention, certain vitamins and minerals are especially important for active bodies:
- Calcium — Builds strong bones and teeth. Found in dairy products, fortified plant milks, broccoli, and almonds.
- Iron — Carries oxygen in your blood to your muscles. Found in lean red meat, beans, spinach, and fortified cereals.
- Vitamin D — Helps your body absorb calcium and supports immune function. Found in sunlight exposure, fortified milk, eggs, and fatty fish.
- Potassium — Helps muscles contract and prevents cramps. Found in bananas, potatoes, oranges, and yogurt.
- B Vitamins — Help convert food into energy. Found in whole grains, eggs, lean meats, and leafy greens.
Eating for Training
What you eat and when you eat it matters during a training program:
Before exercise (1–3 hours before): Eat a meal or snack rich in carbohydrates with some protein. Examples: a peanut butter sandwich, oatmeal with fruit, or a banana with yogurt.
During exercise (over 60 minutes): Sip water or a sports drink. For very long sessions, a small carb-rich snack like an energy bar or handful of raisins can help.
After exercise (within 30–60 minutes): Eat a combination of carbs and protein to replenish energy stores and kickstart muscle repair. Examples: chocolate milk (a classic recovery drink), a turkey wrap, or a smoothie with fruit and protein.
Maintaining Your Own Healthy Diet
The requirement asks you to explain what you do to eat well. Here are some practical strategies:
- Eat breakfast every day. It jumpstarts your metabolism and gives you energy for the morning.
- Pack healthy snacks. Trail mix, fruit, yogurt, and granola bars are easy to carry and keep you fueled between meals.
- Drink water as your default beverage. Save sports drinks for during or after intense exercise.
- Read labels. Check serving sizes, sugar content, and ingredient lists. If sugar is one of the first three ingredients, it is probably not a great choice.
- Eat together. Family meals tend to be more balanced than eating alone or on the go.
Req 3 — Personal Training Program
This is the heart of the Athletics merit badge. You will pick a sport or activity, design a training plan with your counselor, follow it for three months, and then reflect on how you have grown. Let’s break it down step by step.
Step 1: Choose Your Activity (Req 3)
The first question is simple: what athletic activity interests you? It could be one of the options listed in Requirement 5 (sprinting, distance running, swimming, basketball, etc.), or it could be something else entirely — soccer, tennis, martial arts, wrestling, or any sport that involves physical training and measurable performance.
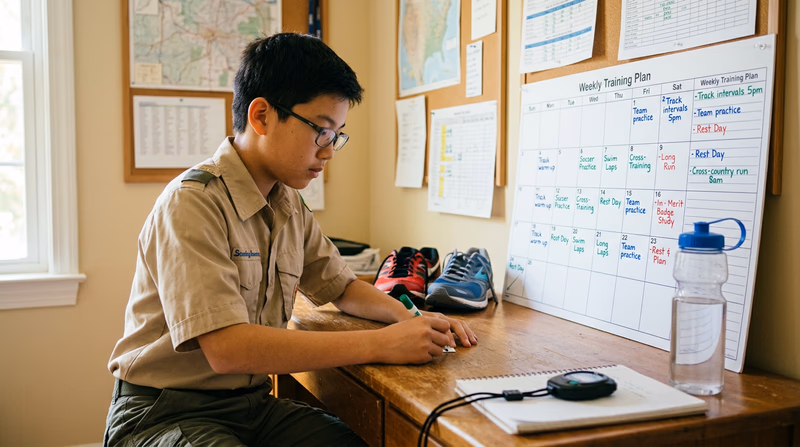
Step 2: Build Your Training Program (Req 3a)
A good training program is not just “go practice whenever you feel like it.” It is a structured plan that builds your fitness gradually over time. Work with your counselor to design a program that includes these elements:
Frequency — How many days per week will you train? Most programs call for 3–5 training days with rest days built in.
Duration — How long is each session? Start with what you can manage (even 20–30 minutes) and increase gradually.
Intensity — How hard will you work? A mix of easy, moderate, and hard sessions prevents burnout and promotes steady improvement.
Progression — How will you make the program harder over time? The key to improvement is progressive overload — gradually increasing the challenge so your body continues to adapt. This could mean running farther, lifting heavier, swimming faster, or adding more repetitions.
Variety — A well-rounded program includes sport-specific practice, general fitness work (cardio, strength, flexibility), and rest days.
Here is a sample weekly framework you can adapt to any activity:
| Day | Focus | Example (Runner) |
|---|---|---|
| Monday | Sport-specific practice | Interval training (sprint/jog repeats) |
| Tuesday | Cross-training / strength | Bodyweight exercises, core work |
| Wednesday | Sport-specific practice | Tempo run (steady moderate pace) |
| Thursday | Rest or active recovery | Light walk, stretching, foam rolling |
| Friday | Sport-specific practice | Long, easy run |
| Saturday | Skills or fun play | Practice with friends, pickup game |
| Sunday | Full rest | Let your body recover |
Step 3: Track Your Progress (Req 3b)
Tracking your progress is what separates a training program from just “working out.” A log helps you see patterns, celebrate improvements, and identify when something is not working.
Your training log should record:
- Date of each session
- Activity performed (what you did)
- Duration (how long)
- Performance metrics (times, distances, weights, reps — whatever measures progress in your sport)
- How you felt (energy level, soreness, mood)
- Notes (weather conditions, equipment changes, things you want to remember)
You can track in a notebook, a spreadsheet, or a phone app — whatever works for you. The important thing is consistency. Log every session, even the bad ones.
Athletics Training Log Resource: Athletics Training Log — /merit-badges/athletics/guide/training-log/Step 4: Know Your Gear (Req 3c)
Every sport has its own equipment and clothing needs, and they change with the seasons. When you talk to your counselor about gear, think about:
Equipment:
- What is the minimum equipment needed to practice safely? (For running, it might be just shoes. For baseball, you need a glove, ball, bat, and helmet.)
- Does any of it require sizing, fitting, or safety certification?
- Where can you access equipment if you cannot buy your own? (School, community center, Scouting troop gear.)
Clothing by season:
| Season | Key considerations |
|---|---|
| Summer | Lightweight, moisture-wicking fabrics. Sun protection. Light colors to reflect heat. |
| Fall/Spring | Layers you can add or remove as temperatures change. Rain-resistant outer layer. |
| Winter | Insulating layers, wind protection, visibility gear for early darkness. Warm-up indoors first. |
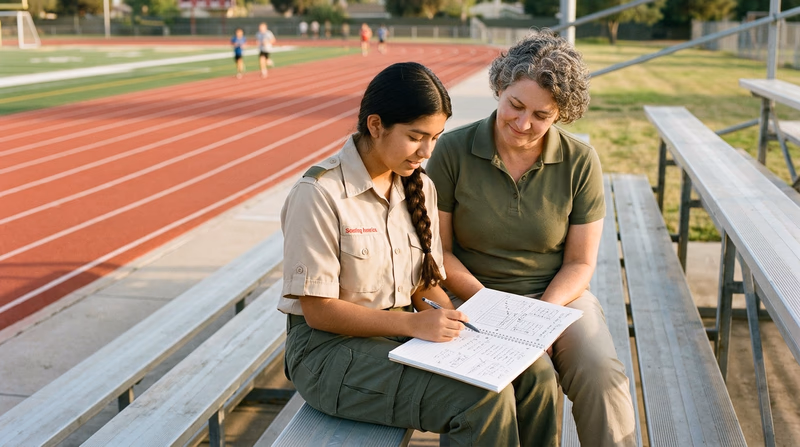
Step 5: Reflect on Your Journey (Req 3d)
After three months, sit down with your training log and your counselor to review what happened. This is not a test — it is a conversation about growth. Be ready to discuss:
Physical changes:
- Did your times, distances, or performance numbers improve?
- Do you feel stronger, faster, or more coordinated?
- Did you notice changes in your endurance or recovery time?
Mental changes:
- Are you more disciplined about sticking to a schedule?
- How did you handle setbacks — a missed workout, a bad performance, or a minor injury?
- Do you feel more confident in your ability to take on physical challenges?
- Did training become something you looked forward to?
Cross-Reference: Requirement 5
Your training program connects directly to Requirement 5, where you will choose four athletic options and show improvement over three months. Consider selecting your Req 3 activity from the Req 5 options so your training program does double duty.
President's Council on Sports, Fitness & Nutrition Resources and programs promoting physical activity for youth and adults. Link: President's Council on Sports, Fitness & Nutrition — https://health.gov/our-work/nutrition-physical-activity/presidents-councilAthletics Training Log
Back to Requirement 3Athletics Training Log
Athletics Merit Badge — Requirement 3b
Training Program Overview
Starting Benchmarks
Record your baseline performance before you begin training. These are the numbers you will compare against at the end of three months.
| Metric | Starting Value | Date Recorded |
|---|---|---|
Weekly Training Log
Print multiple copies of this page — one for each week of your program.
| Day | Activity | Duration | Performance (times, reps, distance) | How I Felt / Notes |
|---|---|---|---|---|
| Mon | ||||
| Tue | ||||
| Wed | ||||
| Thu | ||||
| Fri | ||||
| Sat | ||||
| Sun |
Ending Benchmarks (After 3 Months)
| Metric | Starting Value | Ending Value | Change (+/-) |
|---|---|---|---|
Three-Month Reflection (Req 3d)
Counselor Approval
Req 4a — Rules of the Game
Every sport has rules, and understanding them is not just about avoiding penalties — it is about playing safely, fairly, and with respect for everyone involved. For this requirement, you need to know the rules for two activities: the one you chose for your training program in Requirement 3 and one additional activity.
Why Rules Matter
Rules exist for three main reasons:
Safety. Many rules prevent dangerous situations. In basketball, flagrant fouls are penalized harshly because they can cause serious injury. In swimming, false starts are disqualified partly because a chaotic start can lead to collisions.
Fairness. Rules create a level playing field. Lane assignments in track, pitch counts in baseball, and weight classes in wrestling all ensure that competition is equitable.
Structure. Rules define how the game is played — scoring, boundaries, time limits, and winning conditions. Without them, there is no game.
How to Learn the Rules
When preparing to discuss rules with your counselor, focus on these areas for each sport:
Rules Research Framework
Cover these topics for each activity- Objective: How do you win or score?
- Playing area: What are the boundaries and markings?
- Equipment: What is required and what are the specifications?
- Timing: How long is a game, match, or event? Are there periods, quarters, or innings?
- Scoring: How are points awarded?
- Fouls and penalties: What actions are not allowed and what happens if you break a rule?
- Officials: Who enforces the rules and what are their roles?
- Starting and stopping: How does play begin, pause, and end?
Examples Across Sports
Here are brief overviews of rules for several common athletics activities. Use these as a starting point for your own research into the two sports you have chosen.
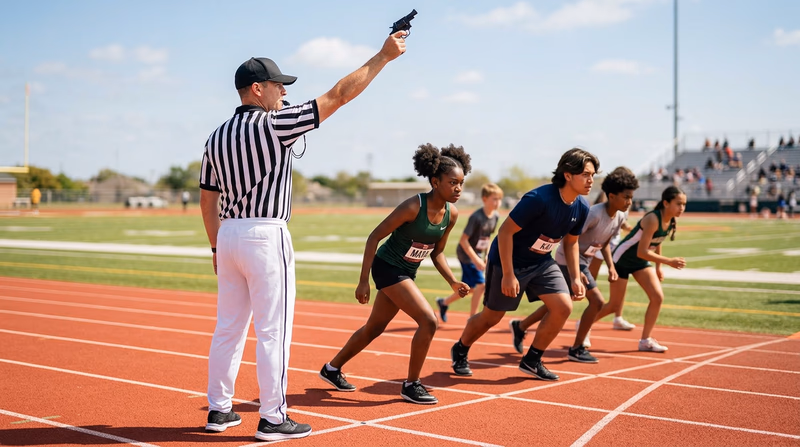
Track (Sprinting/Distance)
- Runners must stay in their assigned lane for sprint events (100m, 200m).
- A false start results in disqualification — there are no second chances.
- In distance events, runners can move to the inside lane after the first curve.
- Runners are timed electronically, and finishes are determined by when the torso crosses the finish line.
Swimming
- Swimmers must start from the blocks (or in the water for backstroke) on the starter’s signal.
- Each stroke (freestyle, backstroke, breaststroke, butterfly) has specific rules about arm movement, kicks, and turns.
- Touching the wall at the finish and during turns must follow stroke-specific rules — two-hand touch for butterfly and breaststroke, one hand for backstroke and freestyle.
Basketball
- A game consists of four quarters (8 minutes for high school, 12 for the NBA).
- Scoring: 2 points for a field goal inside the arc, 3 points outside, 1 point per free throw.
- Key violations include traveling (moving without dribbling), double dribble, and shot clock violations.
- Personal fouls are tracked; five personal fouls disqualify a player in most youth and high school leagues.
Soccer
- Two halves (typically 40–45 minutes each for youth leagues).
- Only the goalkeeper may use their hands, and only inside the penalty area.
- Offside: An attacking player cannot be closer to the goal than the second-to-last defender when the ball is passed to them.
- Yellow card means a warning; two yellow cards (or a straight red card) means ejection.
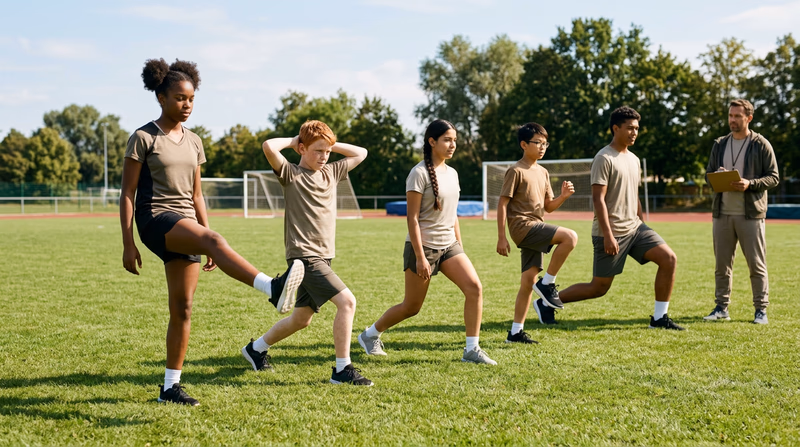
Req 4b — Warm-Ups & Cool-Downs
Imagine starting your car on a freezing morning and immediately flooring the gas pedal. The engine would sputter, strain, and might even stall. Your body works the same way. It needs time to shift from rest mode to performance mode — and time to shift back again when you are done.
Why Warm Up?
A proper warm-up prepares your body for the physical demands ahead. Here is what happens when you warm up correctly:
- Increased blood flow. Your heart rate rises gradually, pumping more blood (and oxygen) to your muscles.
- Higher muscle temperature. Warm muscles are more flexible and contract more powerfully. Cold muscles are stiffer and more prone to tears.
- Improved joint mobility. Your joints produce more synovial fluid (natural lubricant) when you move them through their range of motion.
- Mental preparation. A warm-up routine gives your brain time to focus and shift into “game mode.”
How to Warm Up
A good warm-up lasts 10–15 minutes and follows this progression:
1. Light aerobic activity (5 minutes) Start with easy movement to get your heart rate up: jogging, brisk walking, jumping jacks, or cycling. The goal is a light sweat, not exhaustion.
2. Dynamic stretching (5–10 minutes) Dynamic stretches involve controlled movements that take your joints and muscles through their full range of motion. Unlike static stretches (holding a position), dynamic stretches keep you moving.
Dynamic Warm-Up Routine
Great for any athletic activity- Leg swings: Stand on one leg and swing the other forward and back, then side to side. 10 swings each direction.
- High knees: Jog in place, driving your knees up toward your chest. 20 reps.
- Butt kicks: Jog in place, kicking your heels up toward your glutes. 20 reps.
- Arm circles: Extend your arms and make small circles, gradually increasing to large circles. 15 seconds each direction.
- Walking lunges: Step forward into a lunge, alternating legs. 10 per side.
- Torso twists: Stand with feet shoulder-width apart and rotate your upper body left and right. 10 per side.
- Inchworms: Bend forward, walk your hands out to a plank, then walk your feet to your hands. 5 reps.
3. Sport-specific movements (2–3 minutes) Finish with movements that mimic what you will do in your activity. A basketball player might do layup drills. A sprinter might do short acceleration runs. A swimmer might do arm windmills and ankle rotations.
Why Cool Down?
After intense activity, your body needs a gradual transition back to rest. Stopping suddenly can cause:
- Blood pooling. During exercise, blood rushes to your working muscles. Stopping abruptly can cause blood to pool in your legs, leading to dizziness or even fainting.
- Increased soreness. A cool-down helps clear metabolic waste products (like lactic acid) from your muscles, reducing next-day soreness.
- Stiff muscles. Without gentle stretching after exercise, your muscles may tighten up and reduce your flexibility over time.
How to Cool Down
A proper cool-down lasts 5–10 minutes and reverses the warm-up process:
1. Gradual reduction of activity (3–5 minutes) Slow down rather than stopping. If you were running, transition to a jog, then a walk. If you were swimming, do a few easy laps. Let your heart rate come down gradually.
2. Static stretching (5–10 minutes) Now is the time for those long, sustained stretches. Hold each stretch for 20–30 seconds without bouncing. Focus on the muscles you used most during your activity.
Cool-Down Stretches
Hold each for 20–30 seconds- Hamstring stretch: Sit on the ground with one leg extended, reach toward your toes.
- Quad stretch: Stand on one leg, pull the other foot toward your glutes.
- Calf stretch: Press against a wall with one foot back, heel on the ground.
- Shoulder stretch: Pull one arm across your chest with the opposite hand.
- Hip flexor stretch: Kneel on one knee, lean forward gently.
- Triceps stretch: Reach one hand down your back, gently press the elbow with the other hand.
Req 4c — Amateur vs. Professional
You have probably heard the words “amateur” and “professional” when people talk about sports, but the line between them has changed a lot over the years. Understanding the difference helps you appreciate where you stand as a young athlete and the paths that lie ahead.
What Is an Amateur Athlete?
An amateur athlete is someone who participates in sports for the love of the activity, personal growth, and competition — not as a primary source of income. The word “amateur” comes from the Latin word amator, meaning “lover.” An amateur is literally someone who does something because they love it.
Most Scouts, high school athletes, and recreational players are amateurs. You train, you compete, and you push yourself — but you are not getting paid to do it.
What Is a Professional Athlete?
A professional athlete earns a living from their sport. Their income may come from salaries, prize money, sponsorships, endorsement deals, or appearance fees. Being a professional means that athletics is their job — they are expected to train full-time, perform at the highest level, and often follow strict contracts with teams or organizations.
Key Differences
| Factor | Amateur | Professional |
|---|---|---|
| Motivation | Love of the sport, personal goals, fun | Career, income, contractual obligations |
| Compensation | None or limited (scholarships, stipends) | Salaries, prize money, endorsements |
| Time commitment | Part-time, alongside school or work | Full-time — training is their primary occupation |
| Eligibility | Open to most people; governed by school or league rules | Must meet performance standards or be drafted/signed |
| Regulations | School, NCAA, or recreational league rules | League-specific contracts, anti-doping rules, labor agreements |
| Support | Self-funded or family-supported; school facilities | Professional facilities, coaching staffs, medical teams, trainers |
The Changing Line Between Amateur and Professional
The distinction between amateur and professional is not as clear-cut as it once was:
College athletes in the United States were long considered amateurs, but recent rule changes now allow NCAA athletes to earn money from their Name, Image, and Likeness (NIL) — signing endorsement deals, appearing in advertisements, and getting paid for social media content, all while maintaining their college eligibility.
Olympic athletes may receive stipends, training grants, and sponsorship money. They are technically “professional” by old definitions, but many still hold other jobs to support themselves.
Semi-professional athletes compete at a high level and may receive some compensation, but it is not enough to be their sole income. Many minor league baseball players and lower-division soccer players fall into this category.
What This Means for You
As a Scout working on the Athletics merit badge, you are an amateur — and that is a great place to be. The amateur spirit is about developing your abilities, challenging yourself, enjoying competition, and learning life lessons through sport. Whether you go on to compete at higher levels or simply stay active for life, the skills and habits you are building right now are what matter most.
Req 4d — Sportsmanship
You can be the fastest runner, the strongest lifter, or the most accurate shooter on the field — but none of that matters if you cannot win with grace and lose with dignity. Sportsmanship is the quality that separates an athlete from a good athlete.
What Is Sportsmanship?
Sportsmanship is the combination of respect, fairness, and integrity that an athlete brings to competition. It is how you treat your opponents, your teammates, the officials, and yourself — especially when the pressure is on.
Traits of Good Sportsmanship
Respect for opponents. Your opponents are not your enemies. They are fellow athletes who trained hard to compete. Shake hands before and after. Acknowledge a great play, even when it hurts your score.
Respect for officials. Officials make mistakes — they are human. A good sport accepts the call and moves on. Arguing, gesturing, or showing up an official hurts your team and undermines the game.
Respect for teammates. Lift your teammates up when they struggle. Celebrate their success. Never blame a teammate for a loss — athletics is about shared effort.
Playing by the rules. Good sportsmanship means following the rules even when you could get away with breaking them. If the ball was out and only you saw it, you call it honestly.
Self-control. Frustration, anger, and disappointment are natural feelings in competition. The difference between a good sport and a poor one is what you do with those emotions. A good sport channels them into motivation. A poor sport channels them into tantrums or dirty play.
Humility in victory. Celebrate, but do not taunt. A touchdown dance is fine; pointing and laughing at the other team is not. Remember that the person you beat today might beat you tomorrow.
Grace in defeat. Losing is hard, but how you handle it reveals your character. Congratulate the winner. Reflect on what you can improve. Come back stronger next time.
Sportsmanship in Individual Activities
In individual sports — running, swimming, jumping, throwing — you are competing mostly against yourself and the clock. Sportsmanship here looks like:
- Congratulating the winners instead of making excuses
- Not blaming equipment, weather, or officials for a poor performance
- Competing clean — no performance-enhancing substances, no shortcuts
- Encouraging other competitors, even your rivals
- Respecting the integrity of the results (no false starts, no cutting corners)
Sportsmanship in Group Activities
In team sports — basketball, soccer, football, baseball — sportsmanship extends to how you interact with your own team as well as the opposition:
- Support struggling teammates. Everyone has an off day. A pat on the back means more than a frustrated sigh.
- Share credit for victories. No one wins a team game alone.
- Accept your role. Not everyone can be the star. Playing your position well — even if it is not glamorous — is sportsmanship in action.
- Respect the other team. Running up the score on a weaker opponent, trash-talking, and unsportsmanlike celebrations cross the line from competitive to disrespectful.
The Scout Connection
The Scout Law includes being trustworthy, loyal, helpful, friendly, courteous, kind, and brave — all traits that overlap directly with sportsmanship. When you compete with integrity, you are not just being a good athlete. You are being a good Scout.
Positive Coaching Alliance Resources for athletes, coaches, and parents on building a positive sports culture through character and sportsmanship. Link: Positive Coaching Alliance — https://positivecoach.org/Req 5 — Athletic Options Overview
This is the hands-on core of the Athletics merit badge. You will choose four of the nine options below, perform the activities in each one, and demonstrate measurable improvement over three months. This is where your training program from Requirement 3 pays off.
How This Works
- Pick four options from the list below. Choose activities that interest you and that you have access to practice.
- Record your starting benchmarks for each option at the beginning of your three-month period.
- Train consistently using the program you built in Requirement 3.
- Record your ending benchmarks after three months to show improvement.
You do not need to be the fastest or strongest — you need to show that you got better. Your counselor wants to see effort, consistency, and growth.
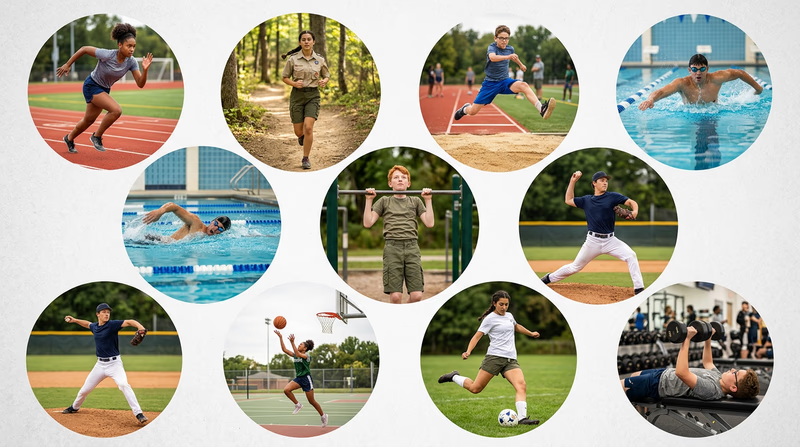
Your Nine Options
Click on any option below to learn more about the activities, techniques, and tips for that category.
Option A — Sprinting 100-meter dash and 200-meter dash.
Option B — Long-Distance Running 3K run and 5K run.
Option C — Long Jump or High Jump Running and standing versions of the long jump or high jump.
Option D — Swimming 100-meter swim and 200-meter swim.
Option E — Pull-Ups & Push-Ups Pull-ups in two minutes and push-ups in two minutes.
Option F — Baseball Throw Throws for accuracy and distance.
Option G — Basketball Shooting Free throws and shots from multiple positions around the key.
Option H — Football or Soccer Kick Goal kicks for accuracy and kicks for distance.
Option I — Weight Training Chest/bench press and leg curls.
Tracking Your Improvement
Use the Athletics Training Log to record your benchmarks and progress for each option. At minimum, record:
- Starting values (times, distances, reps) at the beginning of the three-month period
- Ending values after three months
- The change — this is the improvement your counselor wants to see
Req 5a — Sprinting
Activities: 100-meter dash and 200-meter dash.
Sprinting is the purest test of speed in athletics. It demands explosive power, quick reflexes, and near-perfect running mechanics — all delivered in a burst that lasts just seconds. The 100-meter dash is often called the “fastest event in sports.”
The Basics of Sprinting
A sprint can be broken into four phases, each requiring a different skill:
1. The Start Everything begins in the starting blocks (or at the line for informal timing). A strong start is about reaction time and explosive leg drive. Your first few steps are short, powerful, and low — you are driving forward, not running upright yet.
2. Acceleration (0–30 meters) During acceleration, you gradually rise from your low start position to full upright running posture. Each stride gets longer and faster. Stay relaxed — tension in your shoulders and face wastes energy.
3. Top Speed (30–70 meters in the 100m) This is where you hit maximum velocity. Your stride is long and powerful, your arms pump in a controlled rhythm, and your foot strikes directly beneath your center of gravity. Maintaining top speed is about efficiency — the less energy you waste, the longer you can hold your pace.
4. Deceleration (final meters) Even the best sprinters slow down near the end of a race. The goal is to decelerate as little as possible. Strong finish mechanics — driving through the line rather than lunging — can save crucial fractions of a second.
100m vs. 200m: What’s Different?
The 200-meter dash adds a curve. Running a turn at full speed requires:
- Leaning slightly into the curve
- Driving harder with your outside leg
- Maintaining arm mechanics even when your body is angled
- Pacing — the 200m requires a tiny bit of speed management that the 100m does not
Training Tips for Sprinters
Sprint Training Essentials
Key workouts to build speed- Block starts or standing starts: Practice your reaction and first 10 meters. Repetition builds muscle memory.
- Acceleration runs: Sprint 30–40 meters from a standing start, focusing on gradually building to top speed.
- Flying sprints: Get a rolling start, then sprint a set distance (30–50 meters) at maximum effort.
- Hill sprints: Running uphill forces you to drive your knees higher and push harder, building explosive power.
- Core work: A strong core transfers power from your legs to your upper body and keeps you stable.
Req 5b — Long-Distance Running
Activities: 3K run (3,000 meters / 1.86 miles) and 5K run (5,000 meters / 3.1 miles).
Long-distance running is the ultimate test of endurance, pacing, and mental toughness. Unlike sprinting, where you give everything in seconds, distance running asks you to manage your effort over a much longer period. The reward? There is nothing quite like the feeling of crossing a finish line after pushing through miles of effort.
Running Form for Distance
Good running form conserves energy and prevents injury over the long haul:
- Posture: Stand tall with a slight forward lean from the ankles (not the waist). Imagine a string pulling you up from the top of your head.
- Arms: Bend at roughly 90 degrees. Swing forward and back, not across your body. Relaxed hands — pretend you are holding potato chips without crushing them.
- Foot strike: Land with your foot beneath your hips, not out in front of you. Overstriding acts as a brake and stresses your knees and shins.
- Cadence: Aim for about 170–180 steps per minute. A higher cadence with shorter strides is generally more efficient and easier on your joints.
- Breathing: Breathe rhythmically — many distance runners use a 3:2 pattern (inhale for 3 steps, exhale for 2). Breathe through both your nose and mouth.
Pacing: The Key to Distance Running
Pacing is the single most important skill in distance running. Going out too fast is the most common mistake new runners make — and it almost always leads to “hitting the wall” later in the race.
Training for Distance
A solid distance running program includes a mix of easy runs, tempo runs, and one long run per week:
Weekly Distance Training Plan
A balanced approach for new distance runners- Easy runs (2–3 per week): Run at a conversational pace for 20–30 minutes. These build your aerobic base.
- Tempo run (1 per week): Run at a “comfortably hard” pace for 15–20 minutes. This pace is faster than easy but slower than racing — you should be able to speak in short phrases.
- Long run (1 per week): Run farther than your other runs but at an easy pace. Start at 2 miles and add half a mile each week.
- Rest days (1–2 per week): Critical for recovery. Walk, stretch, or do light cross-training instead.

3K vs. 5K: Strategy Differences
3K (1.86 miles) is shorter but more intense. You can sustain a faster pace because the distance is more manageable. The challenge is running hard enough without going anaerobic (out of breath) too early.
5K (3.1 miles) requires more patience. Your pace will be noticeably slower than your 3K pace. The mental game — staying focused and positive during the middle miles — is often the hardest part.
Road Runners Club of America Find local running clubs, races, and training resources for runners of all levels. Link: Road Runners Club of America — https://www.rrca.org/Req 5c — Long Jump or High Jump
Activities:
- Running long jump OR running high jump (best of three tries)
- Standing long jump OR standing high jump (best of three tries)
Jumping events combine speed, power, coordination, and technique into a single explosive moment. Whether you are launching yourself forward across a sand pit or arching over a high bar, these events reward athletes who can generate maximum force in a split second.
Long Jump
The long jump is about converting horizontal speed into distance. You sprint down a runway, plant your foot on a takeoff board, and fly as far as you can into a sand pit.
Running Long Jump — Key Phases:
- Approach run — Build speed over 12–16 strides. Consistency is critical — you need to hit the takeoff board without slowing down or adjusting your stride.
- Takeoff — Plant your takeoff foot on the board and drive your opposite knee upward. Your body should be slightly behind the takeoff point, leaning back just enough to launch upward and forward.
- Flight — In the air, drive both knees toward your chest (the “tuck” technique) or extend your legs forward (the “hang” technique). Keep your eyes up.
- Landing — Reach your feet as far forward as possible. Bend your knees on impact and fall forward — your distance is measured from the takeoff board to the nearest mark in the sand.
Standing Long Jump: No runway — just raw explosive power from a standstill. Swing your arms back, bend your knees, and drive forward and upward using your arms and legs together.
High Jump
The high jump is about converting horizontal speed into vertical height. You run a curved approach, plant one foot, and use the Fosbury Flop technique to clear a bar set at increasing heights.
Running High Jump — The Fosbury Flop:
- Approach — Run a curved (J-shaped) path toward the bar. The curve builds centrifugal force that helps rotate your body over the bar.
- Takeoff — Plant your inside foot (closest to the bar) and drive your opposite knee and arms upward. This single-leg takeoff converts forward momentum into height.
- Clearance — Arch your back over the bar, leading with your shoulders. Your hips follow, and you kick your legs up at the end to clear the bar.
- Landing — Land on your upper back and shoulders on the crash mat. Never land on your head or neck.
Standing High Jump: Jump vertically from a standstill, using arm swing and leg drive to reach maximum height.
Training for Jumping Events
Jumping performance depends on three qualities: speed, leg power, and technique.
Jump Training Essentials
Exercises that build explosive power- Box jumps: Jump onto and off of progressively taller boxes to build vertical power.
- Bounding: Exaggerated running strides that emphasize hang time and distance per step.
- Squats and lunges: Build the leg strength that powers your takeoff.
- Short sprints (20–40 meters): Speed on the approach directly translates to distance or height.
- Plyometrics: Squat jumps, tuck jumps, and single-leg hops train your muscles to produce force quickly.
- Approach rehearsals: Practice your full approach without jumping to build consistency in your stride pattern.
Req 5d — Swimming
Activities: 100-meter swim and 200-meter swim.
Swimming is one of the most complete athletic activities you can do. It builds cardiovascular endurance, upper- and lower-body strength, and flexibility — all while being gentle on your joints. Unlike running, where impact forces stress your bones and muscles, swimming lets you train hard with almost zero impact.
Freestyle Fundamentals
For most swimmers working on this requirement, freestyle (front crawl) will be the primary stroke. Here are the key elements:
Body position: Lie flat in the water with your hips and legs near the surface. Think of your body as a long, straight line — the flatter you are, the less drag you create.
Arm stroke: Reach forward with one arm, enter the water fingertips first, and pull straight back under your body. As one arm pulls, the other recovers forward above the water. Each pull should feel like you are grabbing the water and pushing yourself past it.
Kick: A flutter kick with straight-ish legs (slight bend at the knee) provides propulsion and balance. Kick from the hips, not the knees. Big, splashy kicks waste energy — keep it compact.
Breathing: Turn your head to the side (do not lift it) to breathe during the arm recovery phase. Exhale underwater through your nose and mouth. Most distance swimmers breathe every two or three strokes.
Rotation: Your body should rotate slightly with each stroke, turning about 30 degrees to each side. This rotation adds power to your pull and makes breathing easier.
100m vs. 200m: Pacing Strategy
100 meters (4 lengths of a 25-meter pool): This is a sprint. You can afford to go hard from the start. Focus on strong turns, a powerful push-off the wall, and maintaining your stroke technique even as fatigue sets in during the last 25 meters.
200 meters (8 lengths): Pacing matters here. Start at a strong but sustainable effort — about 85–90% of your sprint speed. Save something for the last two lengths. Even splits (swimming each length in roughly the same time) is the goal.
Training for Swimmers
Swim Training Plan
Build speed and endurance in the pool- Warm-up: 200–400 meters of easy swimming to loosen up before the main set.
- Drill work: Single-arm drills, catch-up drills, and kick-only sets improve technique.
- Interval sets: Swim repeated distances (e.g., 8 x 50m) with short rest (15–20 seconds) to build speed endurance.
- Distance sets: Swim 400–800 meters continuously at an easy-to-moderate pace to build your aerobic base.
- Sprint sets: Swim short distances (25–50m) at maximum effort with full rest to develop top-end speed.
- Cool-down: 100–200 meters of easy swimming to recover.
Turns and Push-Offs
In a pool, your turns and push-offs are free speed — you cover distance without any swimming effort. A good push-off can carry you 3–5 meters before your first stroke.
Flip turn (freestyle): As you approach the wall, tuck your chin and somersault forward. Plant both feet on the wall and push off in a streamlined position (arms extended overhead, body tight like a torpedo).
Open turn: Touch the wall with one hand, bring your knees to your chest, pivot, plant both feet, and push off. This is simpler than a flip turn and perfectly fine for this requirement.
USA Swimming — Learn to Swim Resources and programs from the national governing body for competitive swimming. Link: USA Swimming — Learn to Swim — https://www.usaswimming.org/parents-resources/learn-to-swimReq 5e — Pull-Ups & Push-Ups
Activities: Pull-ups in two minutes and push-ups in two minutes.
Pull-ups and push-ups are the ultimate bodyweight exercises. They require no gym, no equipment (just a bar for pull-ups), and no fees. They build functional, real-world strength — the kind of strength that helps you climb, carry, push, and pull in everyday life and in every other sport.
Pull-Ups: Proper Form
A proper pull-up starts and ends in a dead hang — arms fully extended, body still, no swinging.
- Grip: Grab the bar with an overhand grip (palms facing away from you), hands slightly wider than shoulder-width apart.
- Pull: Engage your back muscles and pull your body straight up until your chin clears the top of the bar.
- Lower: Slowly lower yourself back to a full dead hang. Control the descent — do not just drop.
- Repeat: Each rep should be smooth and controlled. No kipping (swinging), jerking, or half reps.
Push-Ups: Proper Form
A proper push-up is more demanding than most people think. Here is the standard:
- Starting position: Hands slightly wider than shoulder-width, fingers pointing forward. Body in a straight line from head to heels — no sagging hips, no raised rear.
- Lower: Bend your elbows and lower your chest until it is 2–3 inches from the floor (or your upper arms are parallel to the ground). Keep your elbows at about a 45-degree angle from your body — do not let them flare out to the sides.
- Push: Drive through your palms to straighten your arms and return to the starting position.
- Repeat: Maintain the straight-line body position throughout. A rep does not count if your hips sag or your chest does not go low enough.
The Two-Minute Test
For this requirement, you will perform as many pull-ups (and separately, as many push-ups) as you can in two minutes. Here are strategies for maximizing your count:
Pace yourself. Two minutes is longer than you think. If you sprint through the first 30 seconds and burn out, you will spend the remaining 90 seconds staring at the bar. Start at a steady rhythm you can sustain.
Rest strategically. In push-ups, you can rest in the “up” position (arms locked out). In pull-ups, you can rest in the dead hang. Brief 5–10 second pauses can help you squeeze out extra reps.
Breathe. Exhale on the effort (pushing up or pulling up) and inhale on the return. Holding your breath causes you to fatigue faster.
Training Program
Pull-Up & Push-Up Training
Three workouts per week- Max set: Do as many reps as you can with perfect form. Record the number.
- Volume sets: Do 3–5 sets at 50–60% of your max (if your max is 10 push-ups, do sets of 5–6).
- Negative emphasis: Do 3 sets of 5 reps with a very slow lowering phase (3–5 seconds down).
- Variety: Add close-grip push-ups, wide-grip push-ups, diamond push-ups, and chin-ups (palms facing you) to work different muscle angles.
- Core work: Planks, hollow holds, and leg raises strengthen the core muscles that keep your body stable during both exercises.
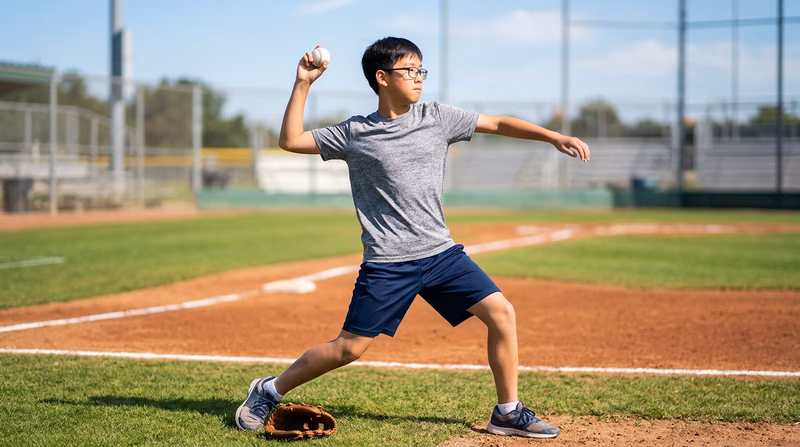
Req 5f — Baseball Throw
Activities:
- Baseball throw for accuracy: 10 throws at a target (distance by age: 11–12 years = 20 feet; 13–15 years = 30 feet; 16–17 years = 40 feet)
- Baseball throw for distance: 5 throws (total distance)
Throwing a baseball combines coordination, arm strength, and whole-body mechanics into one fluid motion. This option tests two very different skills: the precision of hitting a target and the raw power of throwing as far as you can.
Throwing Mechanics
A good throw is not just about your arm — it starts from the ground and moves up through your entire body. This is called the kinetic chain.
1. Grip Hold the ball across the seams with your index and middle fingers on top and your thumb underneath. Keep a gap between the ball and your palm — you are holding it with your fingers, not squeezing it.
2. Stance and Wind-Up Face your target sideways (perpendicular). Your front shoulder points at the target. Step toward the target with your lead foot as you bring the ball back.
3. Arm Action Bring the ball behind your ear with your elbow at or above shoulder height. Your arm should make an “L” shape before you throw. Lead with your elbow, then snap your wrist forward at release.
4. Follow-Through After releasing the ball, let your throwing arm continue across your body. Your back foot should come forward naturally. A full follow-through protects your arm and adds power.
Throwing for Accuracy
The accuracy test measures how many of your 10 throws hit the target from the age-appropriate distance. To improve:
- Pick a consistent routine. Line up the same way every time — same stance, same grip, same wind-up. Consistency breeds accuracy.
- Focus on the target. Look at a specific spot on the target (not the whole thing) and throw to that spot.
- Stay relaxed. Tension in your arm and shoulder causes wild throws. A smooth, relaxed motion is more accurate than a tight, forced one.
- Practice at shorter distances first and gradually move back as your accuracy improves.
Throwing for Distance
Distance throwing is about generating maximum force through the kinetic chain. Tips for throwing farther:
- Use your legs. Power comes from your lower body. Drive hard off your back leg as you step toward your target.
- Full body rotation. Rotate your hips and torso toward the target before your arm comes through. This “lag” generates more whip in your throw.
- Optimal release angle. For maximum distance, aim to release the ball at roughly a 35–45 degree angle above horizontal.
- Throw on the run. A crow-hop (a small running start) before throwing adds momentum and increases distance.
Training for Throwing
Throwing Practice Plan
Build accuracy and arm strength safely- Long toss: Start close (30 feet) and gradually increase distance, focusing on easy, arcing throws. This builds arm strength safely.
- Target practice: Set up a target (a bucket, a marked area on a wall, or a net) and throw 10 balls from your test distance.
- Wrist flicks: Hold the ball and flick it using only your wrist to build forearm strength and snap.
- Band exercises: Use resistance bands to strengthen your rotator cuff muscles (the small muscles that protect your shoulder joint).
- Core work: Planks, Russian twists, and medicine ball rotations build the core strength that powers your throw.
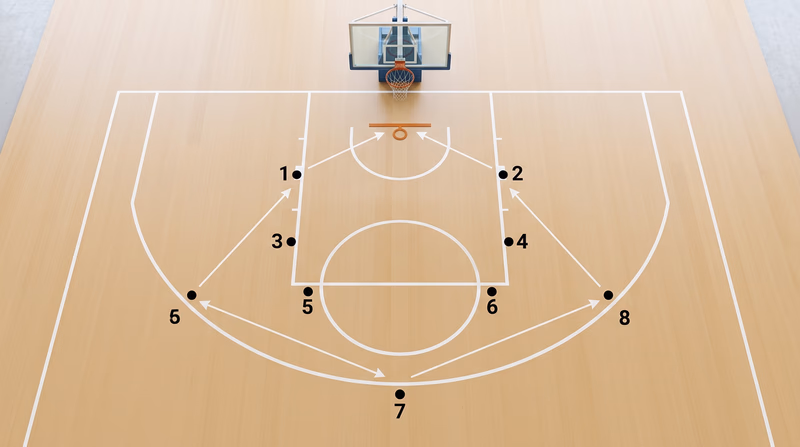
Req 5g — Basketball Shooting
Activities:
- 10 free-throw shots for accuracy
- Shots from 8 positions: left-side layup, right-side layup, left side of hoop along the key line, right side of hoop along the key line, where key line and free-throw line meet (left side), where key line and free-throw line meet (right side), top of the key, and another spot along the three-point line
Basketball shooting is a skill that rewards practice more than natural talent. The best shooters in the world did not start that way — they built their accuracy through thousands of hours of repetition, muscle memory, and attention to form.
Free-Throw Shooting
The free throw is the most practiced shot in basketball. You stand 15 feet from the basket with no defender, no clock pressure, and complete control. It is pure technique.
The fundamentals (B.E.E.F.):
- B — Balance: Feet shoulder-width apart, slightly staggered (shooting foot slightly forward). Weight evenly distributed. Knees slightly bent.
- E — Eyes: Focus on the target. Most coaches recommend looking at the back of the rim (the part closest to you) or just over the front of the rim.
- E — Elbow: Your shooting elbow should be directly under the ball, forming an “L” shape. Keep it tucked in — do not let it wing out to the side.
- F — Follow-through: Extend your arm fully, snap your wrist, and hold the follow-through position. Your fingers should point down toward the basket like you are reaching into a cookie jar on a high shelf.
Layups
A layup is a shot made while moving toward the basket, typically off the backboard. You need to make layups from both the left and right sides.
Right-side layup:
- Approach from the right side at a 45-degree angle.
- Take off from your left foot (the foot opposite your shooting hand).
- Drive your right knee upward and extend the ball toward the backboard with your right hand.
- Aim for the top corner of the small square on the backboard — the ball should kiss the glass and drop in.
Left-side layup: Mirror everything: approach from the left, take off from your right foot, and shoot with your left hand. This is harder for most right-handed players, but it is essential. A player who can only finish on one side is predictable and easy to defend.
Shooting from the Key and Beyond
The remaining positions test your ability to shoot from different angles and distances around the basket:
- Along the key line (left and right): These are mid-range shots from the sides, about 8–12 feet from the basket. Use the backboard for bank shots from these angles.
- Where key line meets free-throw line (left and right): These are elbow shots — named for the corner of the free-throw lane. Square up to the basket and use your standard shooting form.
- Top of the key: A straight-on shot from the free-throw line extended. No backboard — this is a “swish” shot.
- Three-point line: The longest shot in the set. Maintain your shooting form but generate more power from your legs to cover the extra distance.
Training for Basketball Shooting
Shooting Practice Plan
Build accuracy from every spot- Form shooting (close range): Stand 3–5 feet from the basket and shoot one-handed to focus on wrist snap and follow-through. 20 shots.
- Free throws: Shoot 25–50 free throws every practice session. Track your makes.
- Spot shooting: Shoot 10 shots from each of the 8 required positions. Track makes from each spot.
- Layup drills: Alternate left-side and right-side layups. 10 from each side.
- Game-speed shooting: Dribble to a spot, pull up, and shoot. This simulates game conditions more than standing still.
Req 5h — Football or Soccer Kick
Activities:
- Goals from the 10-yard line: 8 kicks
- Football kick or soccer kick for distance: 5 kicks (total distance)
Whether you choose football field goals or soccer goals, this option tests your ability to kick with accuracy and power. Kicking is a skill that relies heavily on technique — proper mechanics will always beat raw leg strength.
Soccer Kick Technique
The instep drive (power shot):
- Approach: Take 2–3 steps at a slight angle (about 30 degrees) to the ball, not straight on.
- Plant foot: Place your non-kicking foot alongside the ball, about 6 inches to the side, pointing at your target. Your knee should be slightly bent.
- Kicking motion: Swing your kicking leg from the hip, lock your ankle (toes pointed down), and strike the ball with the top of your foot (the laces area). Your knee should be over the ball at contact.
- Follow-through: Let your kicking leg continue forward and upward. A strong follow-through adds both power and accuracy.
For accuracy (goals from 10 yards):
- Aim for a specific part of the goal — the corners are the most effective targets.
- Keep your body over the ball to keep the shot low. Leaning back causes the ball to fly high.
- Use the inside of your foot for more control at shorter distances.
For distance:
- Take a longer approach run to generate more momentum.
- Strike the ball slightly below center to get it airborne.
- Follow through completely — your leg should swing high.
Football Field Goal Technique
The place kick:
- Setup: The ball is held upright on the ground by a holder (or placed on a kicking tee for practice).
- Approach: Take 2–3 steps back and 2 steps to the side (for a right-footed kicker, step to the left).
- Plant foot: Step toward the ball with your plant foot, placing it about 6–8 inches to the side and slightly behind the ball.
- Strike: Lock your ankle and contact the lower half of the ball with the inside top of your foot. Keep your hips square to the goalposts.
- Follow-through: Drive through the ball and let your leg swing up toward the target.

Training for Kicking
Kicking Practice Plan
Build accuracy and distance- Target practice: Set up cones or markers inside the goal and aim for specific zones. 10 kicks from the 10-yard line.
- Distance kicking: Mark your starting distance, kick 5 balls, and measure. Track total distance over time.
- One-step kicks: Remove the approach and focus only on the strike and follow-through. This isolates technique.
- Wall kicks: Kick against a wall from 10–15 feet away to practice rapid, controlled contact.
- Leg strength: Squats, lunges, and leg swings build the hip flexor and quadriceps strength that powers your kick.
- Flexibility: Hip flexor and hamstring stretches improve your range of motion and allow a bigger, more powerful swing.
Req 5i — Weight Training
Activities:
- Chest/bench press: 2 sets of 15 repetitions each
- Leg curls: 2 sets of 15 repetitions each
Weight training builds the raw strength that supports every other athletic activity. Whether you sprint, swim, throw, or kick, a stronger body performs better and resists injury. This option focuses on two foundational exercises: the bench press (upper body) and leg curls (lower body).
Bench Press
The bench press is the standard measure of upper-body pushing strength. It primarily works your chest (pectorals), shoulders (anterior deltoids), and the backs of your arms (triceps).
Proper form:
- Setup: Lie flat on the bench with your eyes directly under the bar. Feet flat on the floor. Grab the bar with a grip slightly wider than shoulder-width.
- Unrack: Lift the bar off the rack with your arms straight. Position it directly over your chest.
- Lower: Slowly lower the bar to your mid-chest (roughly at nipple level). Keep your elbows at a 45-degree angle from your body — not flared out to the sides.
- Press: Drive the bar back up to the starting position. Push through your chest and triceps. Exhale as you press.
- Rack: When your set is complete, guide the bar back onto the rack hooks.
Leg Curls
Leg curls target your hamstrings — the muscles on the back of your thigh. Strong hamstrings are critical for running, jumping, and preventing knee injuries.
Proper form (lying leg curl machine):
- Setup: Lie face down on the machine. Adjust the pad so it rests on the back of your ankles, just above your heels. Grip the handles.
- Curl: Bend your knees and curl the weight upward toward your glutes. Keep the movement smooth and controlled.
- Squeeze: At the top of the movement, pause briefly and squeeze your hamstrings.
- Lower: Slowly return to the starting position. Do not let the weight slam down — control the descent.
Starting Weight and Progression
For this requirement, you perform 2 sets of 15 repetitions for each exercise. Here is how to choose the right starting weight:
- Start light. Pick a weight you can complete 15 reps with good form and still feel like you could do 2–3 more. If the last rep is a struggle, the weight is too heavy.
- Progress gradually. When you can complete both sets of 15 comfortably, increase the weight by the smallest available increment (usually 5 pounds). This is progressive overload in action.
- Track everything. Write down the weight, sets, and reps for every session in your training log.
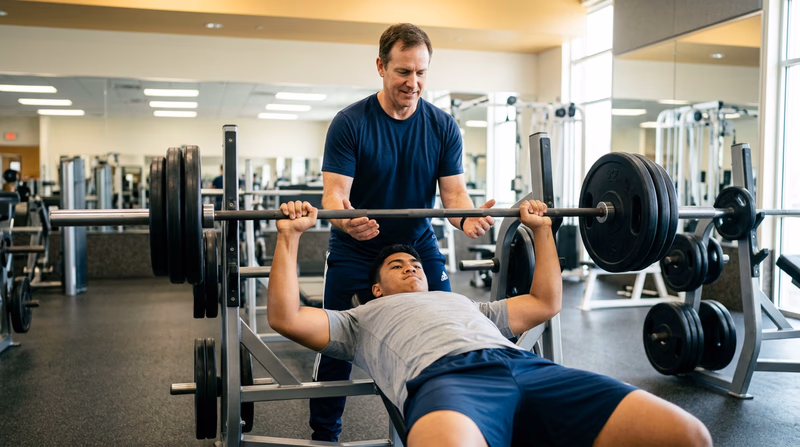
Training Plan for Weight Training
Weight Training Schedule
Three sessions per week- Bench press: 2 sets of 15 reps. Rest 60–90 seconds between sets.
- Leg curls: 2 sets of 15 reps. Rest 60–90 seconds between sets.
- Supporting exercises (optional but recommended): Dumbbell rows, overhead press, squats, and planks round out your program.
- Warm-up: Always do 5 minutes of light cardio and one light set (50% of working weight) before your working sets.
- Cool-down: Stretch your chest, shoulders, and hamstrings after every session.
Gym Safety Rules
Weight Room Code of Conduct
Follow these every time- Always use a spotter for bench press and any exercise where the weight is over your body.
- Wear closed-toe shoes with flat, stable soles. No sandals.
- Rerack your weights when you are done. This is both courtesy and safety.
- Wipe down equipment after use.
- Never drop weights or slam them on the ground.
- Do not distract other lifters during their sets.
- If you feel sharp pain during a lift, stop immediately.
Req 6 — Planning a Sports Meet
Planning and officiating a sports meet puts you on the other side of athletics. Instead of competing, you are organizing, managing, and leading — skills that are just as valuable as physical performance.
Planning Your Sports Meet (Req 6a)
Your plan needs to include 10 activities, with at least 5 drawn from the Requirement 5 options. Here is a framework to help you design a well-organized event.
Step 1: Choose Your 10 Activities
You need a mix of individual and group activities that keep all participants engaged. Here is an example lineup:
| # | Activity | From Req 5? |
|---|---|---|
| 1 | 100-meter dash | Yes (Option A) |
| 2 | Standing long jump | Yes (Option C) |
| 3 | Free-throw shooting (10 shots) | Yes (Option G) |
| 4 | Push-ups in 2 minutes | Yes (Option E) |
| 5 | Baseball throw for distance | Yes (Option F) |
| 6 | Soccer kick for accuracy | Yes (Option H) |
| 7 | Three-legged race | No |
| 8 | Relay race (4 x 100m) | No |
| 9 | Tug of war | No |
| 10 | Obstacle course | No |
Step 2: Schedule and Flow
A good meet runs smoothly because events are organized to avoid bottlenecks:
- Stagger start times so athletes can participate in multiple events.
- Run field events (jumping, throwing) simultaneously with track events — they use different spaces.
- Build in transition time (5–10 minutes between events) for setup, scoring, and hydration.
- Start with warm-ups and end with the most exciting event (often a relay race).
Step 3: Officials and Their Duties
Every meet needs officials to keep things running fairly and safely:
Officials and Roles
Key positions for a sports meet- Meet director: Oversees the entire event. Resolves disputes. Keeps the schedule on track.
- Starter: Signals the beginning of races using a whistle or starting pistol. Watches for false starts.
- Timers: Record finish times for each competitor. At least two timers per event for accuracy.
- Judges (field events): Measure distances and heights. Determine legal attempts (foot faults, etc.).
- Scorers: Track individual and team points. Post results.
- Course marshals: Ensure athletes stay on course and spectators stay off the field.
- First-aid attendant: Staffs the first-aid station. Responds to injuries.
- Equipment manager: Sets up and breaks down equipment. Ensures everything is in the right place at the right time.
Step 4: Equipment List
Your plan should include a complete equipment list. Here is a starting point:
Equipment Checklist
What your meet will need- Stopwatches or timing system (at least 2)
- Measuring tape (for distance events)
- Starting whistle or starter’s pistol
- Cones and markers (for lanes, boundaries, and distance markers)
- Baseballs, basketballs, soccer balls, and/or footballs (depending on events)
- Pull-up bar (portable or fixed)
- High jump bar and crash mat (if applicable)
- Sand pit and rake (for long jump)
- Scoreboard or score sheets
- Clipboards and pencils for officials
- First-aid kit
- Water station supplies (cups, coolers, water)
- Award ribbons, medals, or certificates
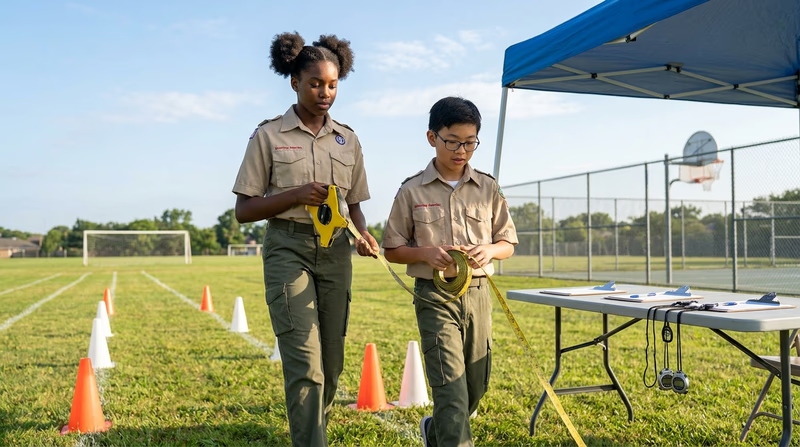
Serving as an Official (Req 6b)
For Requirement 6b, you will volunteer or serve as an official at an actual sports meet. This could be a school track meet, a community 5K race, a swim meet, a youth basketball tournament, or a Scouting field day.
Before the event:
- Get approval from your parent/guardian and your merit badge counselor.
- Contact the event organizer and offer to volunteer. Explain that you are working on your Athletics merit badge.
- Ask what role you will fill and if there is any training or orientation you need to complete.
During the event:
- Take your role seriously. Officials are essential to fair competition.
- Pay attention to how experienced officials handle calls, disputes, and the flow of the event.
- Note what works well and what could be improved.
After the event: Be ready to discuss with your counselor:
- What was your specific role?
- What did you observe about how officials handled difficult situations?
- What surprised you about the behind-the-scenes work of a sports meet?
- How did the experience change your perspective on officials in sports?
Req 7 — Careers & Lifestyle
Athletics does not end when the final whistle blows. The skills, habits, and passion you build through sports can shape your career, your hobbies, and your health for the rest of your life. For this requirement, choose one of the two options below.
Option 7a: Careers in Athletics
The world of athletics supports a huge range of careers beyond being a professional athlete. Here are several categories to explore:
Sports Medicine and Health
- Athletic trainer — Works directly with athletes to prevent, diagnose, and treat injuries. Requires a bachelor’s or master’s degree in athletic training and national certification.
- Physical therapist — Helps athletes recover from injuries and surgery through guided exercise and rehabilitation. Requires a Doctor of Physical Therapy (DPT) degree.
- Sports psychologist — Helps athletes manage performance anxiety, motivation, and mental health. Requires a graduate degree in psychology.
- Sports nutritionist/dietitian — Designs meal plans and nutrition strategies for athletes. Requires a degree in nutrition or dietetics and certification.
Coaching and Instruction
- High school or college coach — Teaches and leads athletes in a specific sport. May require teaching certification and sport-specific experience.
- Personal trainer — Works one-on-one with clients to design fitness programs. Certification through NASM, ACE, or similar organizations.
- Strength and conditioning coach — Designs training programs for teams and athletes to improve performance. Often requires CSCS certification.
Sports Management and Media
- Sports marketing manager — Promotes teams, events, and athletes through advertising and partnerships.
- Sports journalist — Reports on sports for newspapers, websites, TV, or podcasts.
- Event coordinator — Plans and manages sports events, tournaments, and meets.
- Sports data analyst — Uses statistics and data to evaluate player performance and strategy.
Facilities and Operations
- Athletic director — Oversees sports programs at a school or university.
- Facility manager — Manages stadiums, arenas, pools, and sports complexes.
- Groundskeeper/turf manager — Maintains playing fields, tracks, and courts.
Research Framework for Option 7a
When you research your chosen career, cover these six areas:
| Area | Questions to Answer |
|---|---|
| Training/Education | What degree, certification, or experience is required? |
| Expenses | What does the education cost? Are there scholarships or financial aid options? |
| Job Outlook | Is demand for this career growing, stable, or declining? |
| Salary | What is the typical starting salary? What can an experienced professional earn? |
| Advancement | What does the career ladder look like? Where can this job lead? |
| Day-to-Day | What does a typical workday involve? |
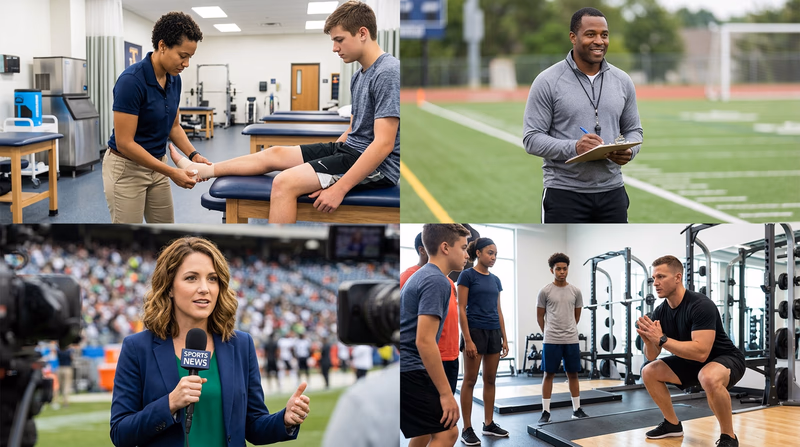
Option 7b: Athletics as a Hobby and Lifestyle
Not everyone who loves athletics will make it a career — and that is perfectly fine. Option 7b asks you to explore how a specific athletic activity could become a lifelong hobby that keeps you healthy, happy, and connected to your community.
Research areas:
- Education: What do you need to learn to participate at a recreational level? Are there classes, clubs, or community programs?
- Costs: What equipment do you need? What are membership or registration fees? How can you participate affordably?
- Organizations: What local, regional, or national organizations support this activity? (Running clubs, swim teams, community leagues, etc.)
- Health benefits: How does this activity contribute to long-term physical and mental health?
- Community: How does this activity connect you with other people? Are there social leagues, volunteer opportunities, or events?
Examples of Lifelong Athletic Activities
- Running — Low cost, can be done anywhere, massive community of recreational runners and road races.
- Swimming — Easy on joints, excellent for lifelong fitness, available through community pools and masters swim programs.
- Basketball — Community recreation leagues and pickup games are available in almost every city.
- Weight training — Gym memberships are widely available, and home gym setups can be minimal.
- Cycling — Combines fitness with transportation and exploration. Active cycling communities exist nationwide.
- Martial arts — Builds discipline, fitness, and self-defense skills across all ages.
Extended Learning
A. Introduction
Congratulations — you have completed the requirements for the Athletics merit badge! You have built a training program, learned about safety and nutrition, explored the rules and spirit of fair play, and pushed your body to improve across multiple athletic activities. But this is just the starting line. The world of athletics is enormous, and there is so much more to explore, practice, and enjoy.
B. Deep Dive: The Science of Recovery
Training breaks your body down. Recovery builds it back up — stronger than before. Understanding recovery science will help you train smarter and avoid the burnout and injuries that sideline so many young athletes.
Sleep and muscle repair. During deep sleep, your body releases human growth hormone (HGH), which triggers muscle repair and growth. Teens who sleep fewer than 8 hours per night recover more slowly and are significantly more likely to get injured. Prioritizing sleep is not being lazy — it is one of the most productive things an athlete can do.
Active recovery. The day after a hard training session, light movement (walking, easy swimming, gentle cycling) increases blood flow to sore muscles without adding stress. This flushes out metabolic waste products and delivers fresh nutrients to damaged tissue, speeding up the repair process.
Foam rolling and self-massage. Foam rolling applies pressure to tight spots in your muscles (called trigger points), helping to release tension and improve flexibility. Rolling your quadriceps, hamstrings, IT band, and calves for 1–2 minutes per area after training can noticeably reduce soreness the next day.
Nutrition timing. Eating protein and carbohydrates within 30–60 minutes after exercise jumpstarts recovery. The carbs replenish your glycogen (stored energy), while the protein provides the building blocks for muscle repair. Chocolate milk has become a popular recovery drink because it has an ideal ratio of carbs to protein — and it tastes good.
Periodization. Serious training programs use a concept called periodization — cycling through phases of high-intensity training and lower-intensity recovery. You might train hard for 3 weeks, then take a lighter “deload” week. This prevents overtraining and keeps your body adapting. Even professional athletes take planned rest periods throughout the year.
C. Deep Dive: Mental Toughness in Athletics
Physical fitness gets you to the starting line. Mental fitness carries you across the finish line. The best athletes in the world are not just physically gifted — they have trained their minds to handle pressure, setbacks, and the voice inside that says “quit.”
Goal setting. Effective athletes set three types of goals: outcome goals (win the race), performance goals (run a 7-minute mile), and process goals (maintain proper form through the last 200 meters). Process goals are the most powerful because they focus on what you can control in the moment.
Visualization. Before a race, a game, or a difficult workout, close your eyes and mentally rehearse every detail — the starting signal, the feel of the track under your feet, the sound of the crowd, the sensation of crossing the finish line. Studies show that athletes who visualize perform measurably better than those who do not. Your brain cannot fully distinguish between a vividly imagined experience and a real one.
Self-talk. The words you say to yourself during competition matter enormously. Replace “I can’t keep up this pace” with “I’ve trained for this — one more lap.” Replace “I’m going to miss this free throw” with “I’ve made this shot a thousand times in practice.” Positive, instructional self-talk has been shown to improve endurance, accuracy, and confidence under pressure.
Embracing failure. Every great athlete has a long history of losing. Michael Jordan was cut from his high school basketball team. Simone Biles fell during her first elite competition. The difference between a champion and someone who quits is how they respond to failure. Each loss is a data point — information that helps you improve. Each failure is proof that you are competing at a level that challenges you, which is exactly where growth happens.
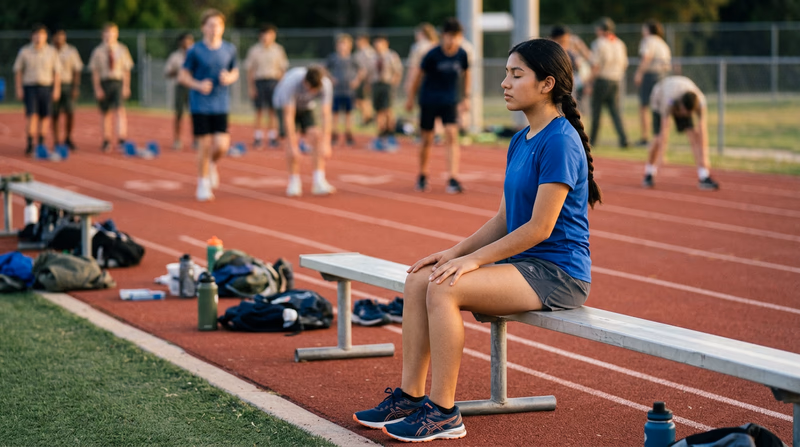
D. Deep Dive: Adaptive and Inclusive Athletics
Athletics is for everyone. Adaptive sports modify rules, equipment, or techniques to enable athletes with physical, visual, or intellectual disabilities to compete. These athletes train just as hard, compete just as fiercely, and display the same sportsmanship as any other competitor.
Paralympic sports include wheelchair racing, seated throwing events, blind soccer, swimming with classifications for different abilities, and many more. The Paralympic Games are held immediately following the Olympic Games and feature over 4,000 athletes from around the world.
Special Olympics provides year-round training and competition in 32 Olympic-type sports for people with intellectual disabilities. The Special Olympics motto — “Let me win. But if I cannot win, let me be brave in the attempt” — captures the spirit of athletics perfectly.
Unified Sports pairs athletes with and without intellectual disabilities on the same team, promoting inclusion, understanding, and friendship through shared competition. If your community offers Unified Sports events, volunteering or participating is an incredible experience.
You can support inclusive athletics by volunteering at Special Olympics events, advocating for adaptive sports programs in your school or community, or simply recognizing that athletic achievement looks different for every person — and every version of it deserves respect.
E. Real-World Experiences
Ready to take your athletics beyond the backyard and the school track? These experiences will challenge you and connect you to the wider world of competitive and recreational sports.
Local 5K Road Race
USA Track & Field Junior Olympics
Parkrun
Special Olympics Volunteer
Tough Mudder or Obstacle Course Race
F. Organizations
Joining an organization connects you with other athletes, coaches, and events in your area. Here are some of the best resources for continuing your athletic journey.
The national governing body for track and field, cross country, and road running. Offers youth programs, competitions, and coaching resources.
Organization: USA Track & Field (USATF) — https://www.usatf.org/
Provides year-round sports training and competition for people with intellectual disabilities, promoting inclusion through athletics.
Organization: Special Olympics — https://www.specialolympics.org/
Governs high school sports and activities across the country. Offers rules, training, and officiating resources.
Organization: National Federation of State High School Associations (NFHS) — https://www.nfhs.org/
Promotes physical activity and healthy eating through programs, challenges, and resources for youth and adults.
Organization: President's Council on Sports, Fitness & Nutrition — https://health.gov/our-work/nutrition-physical-activity/presidents-council
Provides evidence-based resources on strength training, conditioning, and sports performance for athletes and coaches.
Organization: National Strength and Conditioning Association (NSCA) — https://www.nsca.com/
Develops better athletes, better people through resources for youth sports coaches, parents, and athletes focused on character and sportsmanship.
Organization: Positive Coaching Alliance — https://positivecoach.org/