Req 3 — Flight Operations
Now it is time to experience the real world of aviation operations. You will choose two of the five options below. Each one gives you hands-on exposure to a different part of how aircraft actually get from point A to point B safely.
Option A: Flight Simulator
Flight simulators are not just video games — they are training tools used by real pilots. Modern simulators model realistic physics, weather, and aircraft systems. For this requirement, you will plan a course with specific headings, then fly that course from takeoff to landing.
Getting started with a simulator:
- Popular options include Microsoft Flight Simulator, X-Plane, and FlightGear (which is free and open source).
- Start with a simple single-engine aircraft like the Cessna 172 — the same plane most real student pilots begin with.
- Choose a departure airport and a destination airport that are 30–60 miles apart. Use the simulator’s map to plan your route.
Planning your headings:
- Determine the magnetic heading from your departure to your destination.
- Note any intermediate waypoints or heading changes.
- Write down your flight plan before you start: departure airport, initial heading, cruise altitude, heading changes, and destination airport.
Option B: Preflight Inspection
Every flight begins on the ground with a preflight inspection — a careful, methodical walk-around of the aircraft to check that everything is safe and ready to fly. No pilot skips this step, no matter how experienced they are.
How to arrange a preflight inspection:
- Contact a local flight school, flying club, or a pilot you know. Most flight schools are happy to let a Scout participate in a preflight with an instructor present.
- The EAA (Experimental Aircraft Association) Young Eagles program is another great resource — volunteer pilots often welcome Scouts.
What a preflight inspection covers:
Typical Preflight Checklist
Items checked during a walk-around of a single-engine airplane
- Fuel level and quality: Check fuel quantity in each tank and drain a sample to check for water or contamination.
- Oil level: Check engine oil dipstick — must be within the acceptable range.
- Control surfaces: Move ailerons, elevator, and rudder to verify free and correct movement.
- Tires and brakes: Check tire condition, inflation, and brake pads.
- Propeller: Inspect for nicks, cracks, or damage. Even a small nick can cause vibration.
- Lights: Verify navigation lights, landing light, and beacon are working.
- Pitot tube and static ports: Ensure these openings are clear — they feed data to the airspeed indicator and altimeter.
- Skin and structure: Look for dents, cracks, or missing rivets on the fuselage and wings.
- Antennas: Confirm all antennas are attached and undamaged.
- Windshield: Check for cleanliness and cracks that could obscure the pilot’s view.
Option C: Aircraft Maintenance
Aircraft maintenance is the behind-the-scenes work that keeps flying safe. Every aircraft has a required maintenance schedule set by the manufacturer and enforced by the FAA.
How to find a maintenance activity:
- Contact a local FBO (Fixed Base Operator) at a general aviation airport. Many have maintenance shops on-site.
- Ask your merit badge counselor if they know a licensed A&P (Airframe and Powerplant) mechanic who would allow you to observe.
Key maintenance concepts:
- Annual inspection: Every aircraft must have a comprehensive inspection by a certified mechanic at least once a year to remain airworthy.
- 100-hour inspection: Aircraft used for hire (flight training, charter) require an additional inspection every 100 hours of flight time.
- Scheduled maintenance: Manufacturers publish specific maintenance intervals — oil changes every 50 hours, spark plug replacement every 500 hours, and so on.
- Airworthiness Directives (ADs): The FAA issues mandatory maintenance orders when a safety issue is discovered with a specific aircraft type.
Option D: Aeronautical Charts
An aeronautical chart (also called a sectional chart) is a pilot’s map. It shows airports, airspace boundaries, terrain elevations, radio navigation aids, and obstacles like towers and power lines. Learning to read one is like learning a new language — but once you understand the symbols, a huge amount of information fits on a single sheet.
Getting a chart:
- You can buy paper sectional charts from aviation supply stores or order them online.
- Free digital charts are available through the FAA’s website or apps like SkyVector.
Measuring a true course:
- Draw a straight line on the chart from your departure airport to your destination.
- Use a plotter (a special aviation ruler) to measure the angle of your course line relative to a meridian (a line of longitude). This angle is your true course.
Correcting for magnetic variation:
- True north (geographic) and magnetic north (where your compass points) are not in the same place. The difference is called magnetic variation (or declination).
- The chart shows lines of magnetic variation called isogonic lines. Read the variation for your area and add or subtract it from your true course to get your magnetic course.
- Memory aid: “East is least, west is best” — subtract east variation, add west variation.
Correcting for compass deviation:
- Every compass has small errors caused by metals and electronics in the aircraft. A compass deviation card posted near the compass shows these errors for different headings.
Correcting for wind drift:
- Wind pushes the airplane sideways. To fly a straight-line course, the pilot must point the nose slightly into the wind. The correction angle depends on wind speed and direction.
- A flight computer (manual E6B or electronic) calculates the wind correction angle.
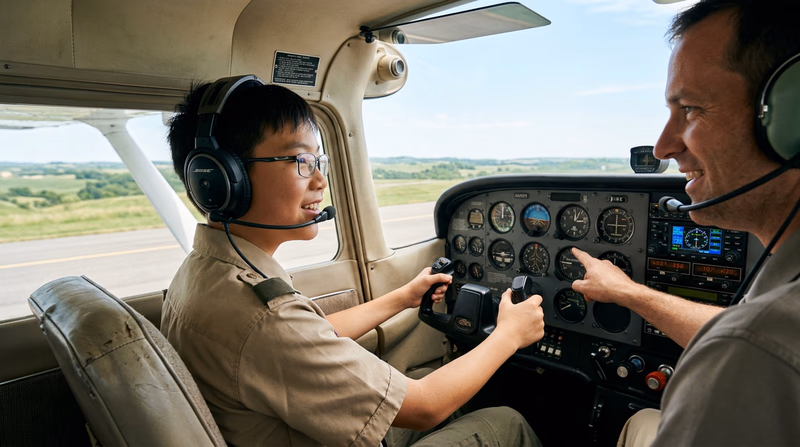
Option E: Discovery Flight
A discovery flight is an introductory flight lesson with a certified flight instructor. You will sit in the pilot’s seat, and after the instructor handles the takeoff, you will actually take the controls and fly the airplane. This is not a passenger ride — you are the pilot (with the instructor right beside you).
How to book a discovery flight:
- Call a local flight school and ask for an “introductory” or “discovery” flight. Most cost between $100 and $250 for 30–60 minutes of flight time.
- The EAA Young Eagles program offers free introductory flights to youth ages 8–17. Visit their website to find a chapter near you.
What to record:
- Date of the flight
- Airport name and identifier (e.g., “Centennial Airport — KAPA”)
- Type of aircraft (e.g., “Cessna 172 Skyhawk”)
- Duration of the flight
- Your impressions: What did it feel like to control the airplane? What surprised you? What was harder or easier than you expected?