Backpacking Merit Badge — Complete Digital Resource Guide
https://merit-badge.university/merit-badges/backpacking/guide/
Introduction & Overview
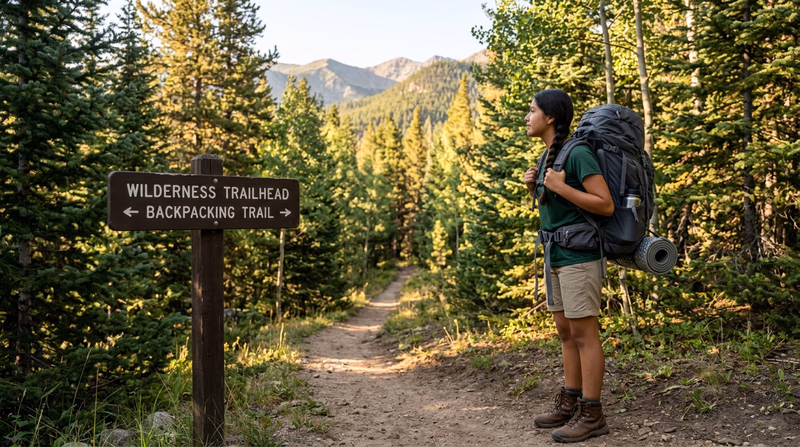
Backpacking is hiking with a purpose — everything you need to eat, sleep, and survive rides on your back. No car waiting at the trailhead, no cabin at the end of the day. Just you, your crew, and the wilderness. It is one of the most challenging and rewarding experiences in Scouting, and earning this merit badge will prove you have the skills to thrive in the backcountry.
This guide will walk you through every requirement, from treating blisters to planning a five-day trek across rugged terrain. By the end, you will be ready to shoulder your pack and hit the trail with confidence.
Then and Now
Then — Carrying Everything on Your Back
Humans have been carrying loads on their backs for thousands of years. Indigenous peoples across every continent used woven baskets, animal-skin bundles, and wooden frames to transport food, tools, and trade goods across mountains and deserts. European explorers and fur trappers in the 1700s and 1800s hauled enormous loads through uncharted wilderness — sometimes 80 pounds or more — using crude leather packs and sheer determination.
- Purpose: Survival, trade, exploration, military campaigns
- Gear: Heavy canvas, wool blankets, cast-iron cookware, no synthetic fabrics
- Mindset: Get through the wilderness alive — comfort was a luxury
Now — The Science of Going Light
Modern backpacking is a blend of adventure and engineering. Today’s packs use lightweight aluminum frames and breathable mesh. Sleeping bags weigh under two pounds. Water filters fit in the palm of your hand. The “ultralight” movement has pushed base pack weights below ten pounds — something a fur trapper would find unbelievable.
- Purpose: Recreation, challenge, connection with nature, personal growth
- Gear: Ultralight fabrics, titanium cookware, GPS devices, freeze-dried meals
- Mindset: Go far, go light, leave no trace
Get Ready! You are about to learn skills that will take you deep into the wilderness and bring you back safely. Backpacking builds strength, self-reliance, and friendships that last a lifetime. Let’s get started!
Kinds of Backpacking
Backpacking takes many forms. Understanding the different styles will help you decide what kind of adventures you want to pursue — and how to prepare for them.
Weekend Backpacking
This is where most backpackers start. You head out on a Friday or Saturday, hike to a campsite, spend one or two nights, and hike back out. Weekend trips are perfect for building skills, testing gear, and getting comfortable sleeping under the stars. Most of your Backpacking merit badge treks will be this style.
Thru-Hiking
Thru-hiking means walking an entire long-distance trail from end to end in a single continuous journey. The most famous thru-hikes in the United States are the Appalachian Trail (2,190 miles), the Pacific Crest Trail (2,650 miles), and the Continental Divide Trail (3,100 miles). These epic adventures take months and push hikers to their physical and mental limits.
Ultralight Backpacking
Ultralight backpackers obsess over every ounce. They cut the handles off their toothbrushes, trim the margins off their maps, and choose gear made from the lightest possible materials. The goal is a base pack weight (everything except food, water, and fuel) under ten pounds. Going lighter means you can cover more miles with less fatigue — but it requires careful planning and trade-offs.
Winter & Alpine Backpacking
When snow covers the trails and temperatures drop below freezing, backpacking becomes a completely different challenge. Winter backpackers carry heavier sleeping bags, insulated pads, and stoves that work in extreme cold. Alpine backpacking takes you above the tree line into high-altitude terrain where weather can change in minutes.
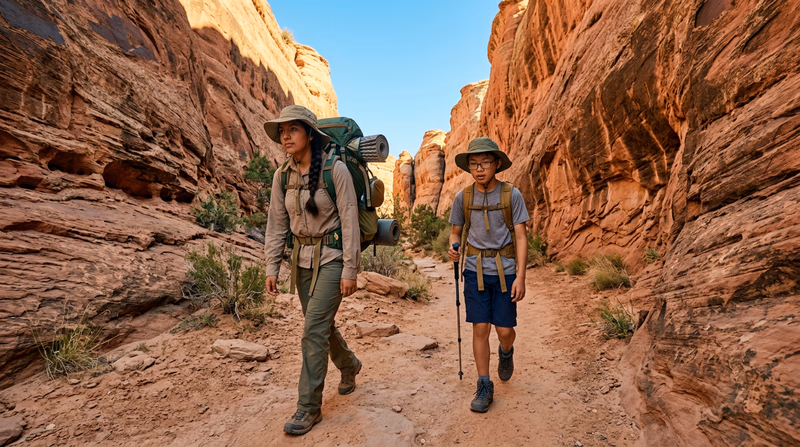
Desert Backpacking
Desert backpacking trades lush forests for vast open landscapes — canyons, mesas, sand dunes, and star-filled skies. Water is the biggest challenge. You may need to carry several liters between water sources, and shade is almost nonexistent during the day.
Base Camp Backpacking
With base camp backpacking, you hike to a central location, set up camp, and then take day hikes to explore the surrounding area. This style lets you cover more ground without carrying your full pack every day. It is a great strategy for exploring areas with lots of side trails, peaks, or lakes.
Now that you know the many ways to explore the backcountry, let’s dive into the skills you will need. First up: staying healthy on the trail.
Req 1 — Trail Health & First Aid
When you are miles from the nearest road, your body is your most important piece of gear. Knowing how to prevent common health problems — and how to treat them when they happen — can make the difference between a great trek and a dangerous situation. Let’s walk through each health concern you need to understand.
Hypothermia
Hypothermia happens when your body loses heat faster than it can produce it, and your core temperature drops below normal. It does not have to be freezing outside — hypothermia can strike in temperatures as warm as 50°F if you are wet and exposed to wind.
Prevention:
- Dress in layers using moisture-wicking fabrics (never cotton)
- Stay dry — change out of wet clothes immediately
- Eat high-energy foods and drink warm fluids to fuel your body’s heat production
- Watch for early signs in yourself and your crew: shivering, confusion, fumbling hands
Treatment:
- Get the person out of the wind and rain
- Remove wet clothing and replace with dry layers
- Wrap them in a sleeping bag or emergency blanket
- Give warm (not hot) liquids if they are alert and can swallow
- In severe cases, use skin-to-skin contact inside a sleeping bag
Heat Reactions
On the other end of the thermometer, heat can be just as dangerous. There are three levels of heat illness:
- Heat cramps — painful muscle cramps caused by losing salt through sweat. Move to shade, drink water with electrolytes, and gently stretch the affected muscles.
- Heat exhaustion — heavy sweating, weakness, nausea, dizziness, and cool/clammy skin. Stop hiking, move to shade, loosen clothing, and drink cool water. Apply cool, wet cloths to the skin.
- Heat stroke — the most dangerous stage. The body stops sweating, skin becomes hot and red, and the person may become confused or unconscious. This is a life-threatening emergency. Cool the person as quickly as possible and get emergency medical help.
Prevention:
- Hike during the cooler parts of the day (early morning and late afternoon)
- Wear light-colored, loose-fitting clothing
- Drink water before you feel thirsty — by the time you are thirsty, you are already dehydrated
- Take breaks in the shade
Frostbite
Frostbite occurs when skin and underlying tissue freeze, usually affecting fingers, toes, ears, and the nose. The skin turns white or grayish-yellow, feels waxy, and may become numb.
Prevention:
- Wear insulated, waterproof gloves and boots
- Keep extremities dry — moisture accelerates heat loss
- Wiggle your fingers and toes regularly to keep blood flowing
- Cover exposed skin when wind chill is severe
Treatment:
- Get to shelter and warmth
- Do not rub the affected area — this damages frozen tissue
- Warm the area gradually by immersing in warm (not hot) water, around 104°F
- Do not rewarm if there is a chance of refreezing — refreezing causes far worse damage
Dehydration
Your body needs water to regulate temperature, digest food, and keep your muscles working. When you lose more fluid than you take in, dehydration sets in. Symptoms include dark urine, headache, fatigue, dizziness, and dry mouth.
Prevention:
- Drink at least half a liter of water per hour while hiking
- Start hydrating the day before your trek
- Monitor the color of your urine — pale yellow means you are well-hydrated
Treatment:
- Stop and rest in the shade
- Drink water in small, frequent sips
- Add electrolytes if available (sports drink mix or electrolyte tablets)
- In severe cases, seek medical attention
Insect Stings
Bees, wasps, and hornets are common in the backcountry. For most people, a sting is painful but not dangerous. For those with allergies, however, a sting can trigger a life-threatening reaction called anaphylaxis.
Prevention:
- Avoid wearing scented products (sunscreen with fragrance, scented soap)
- Do not swat at flying insects — move away calmly
- Check your food and drink before eating — insects are attracted to sweet foods
Treatment:
- Remove the stinger by scraping it out with a flat edge (do not squeeze with tweezers)
- Clean the area and apply a cold compress to reduce swelling
- If the person has a known allergy and carries an epinephrine auto-injector, help them use it and call for emergency help immediately
Tick Bites
Ticks can carry serious diseases including Lyme disease and Rocky Mountain spotted fever. They are most active in spring and summer and live in tall grass, leaf litter, and brushy areas.
Prevention:
- Wear long pants tucked into your socks and light-colored clothing so ticks are easier to spot
- Apply insect repellent with DEET or permethrin to clothing
- Do a full-body tick check every evening and after hiking through brush
Treatment:
- Use fine-tipped tweezers to grasp the tick as close to the skin as possible
- Pull straight out with steady, even pressure — do not twist or jerk
- Clean the bite area with soap and water or antiseptic
- Save the tick in a sealed bag in case symptoms develop later
Snakebite
Most snakes are not venomous and want nothing to do with you. However, in some regions you may encounter rattlesnakes, copperheads, cottonmouths, or coral snakes.
Prevention:
- Watch where you step and where you put your hands — especially on rocks and logs
- Wear sturdy boots and long pants
- Never reach into holes, under rocks, or into brush piles without looking first
- Give snakes a wide berth if you see one — they strike only when threatened
Treatment:
- Stay calm and move away from the snake
- Keep the bitten limb below heart level and immobilize it
- Remove rings, watches, or tight clothing near the bite before swelling starts
- Get to medical help as quickly as possible
- Do not cut the bite, suck out venom, or apply a tourniquet — these old-fashioned remedies do more harm than good
Blisters
Blisters are the most common injury on the trail — and one of the most preventable. They form when repeated friction causes layers of skin to separate and fill with fluid.
Prevention:
- Wear well-fitting boots that you have broken in before your trek
- Use moisture-wicking socks (wool or synthetic, never cotton)
- Apply moleskin or athletic tape to hotspots as soon as you feel them
- Keep your feet dry — change socks at rest stops if they are damp
Treatment:
- If the blister is small and not painful, leave it intact and protect it with moleskin or a bandage
- If the blister is large and painful, clean the area, sterilize a needle, drain the fluid from the edge, and cover with antibiotic ointment and a bandage
- Cut a piece of moleskin with a hole in the center (like a donut) to relieve pressure on the blister
Video Resources
🎬 Video: Backpacking First Aid — https://youtu.be/nxExCQiWa_U?si=E-FC1vbHZYI0vxhb
🎬 Video: Preventing and Treating Blisters — https://youtu.be/lIvLRG31MZI?si=Y7vTYYNYNzcl_MV2
Req 2a — Essential Gear
When you are deep in the backcountry, the gear in your pack is your lifeline. Forgetting a critical item could mean going thirsty, getting lost, or spending a cold night without shelter. The items below form the foundation of every backpacker’s gear list — the things you should never leave home without.
The Backpacker’s Essentials
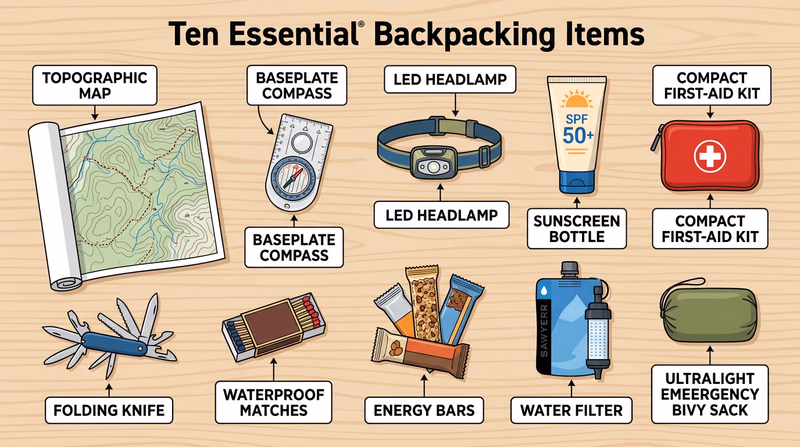
These items are sometimes called the “Ten Essentials” — a concept first developed by The Mountaineers climbing club in the 1930s. Over the decades, the list has evolved, but the core idea remains: carry the tools you need to handle emergencies, navigate safely, and survive an unexpected night outdoors.
Essential Backpacking Gear
Items every backpacker should carry- Navigation tools (map and compass): A topographic map and baseplate compass let you find your way even when GPS batteries die or signals drop. You will learn more about these in Requirement 6.
- Sun protection (sunscreen, sunglasses, hat): Sunburn and snow blindness can happen fast at high altitudes or in open terrain. A hat with a brim, UV-rated sunglasses, and SPF 30+ sunscreen protect you all day.
- Insulation (extra clothing layers): Weather changes quickly in the mountains. An extra insulating layer and a rain shell can prevent hypothermia even if conditions turn bad.
- Illumination (headlamp with extra batteries): A headlamp keeps your hands free for setting up camp, reading a map, or handling an emergency after dark. Always pack spare batteries.
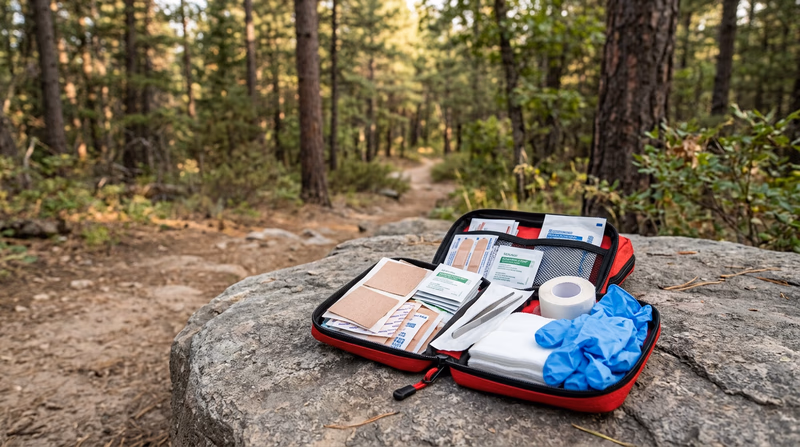
- First-aid kit: Your personal first-aid kit should include bandages, moleskin, antiseptic, pain relievers, tweezers, and any personal medications. See Requirement 1 for what to include.
- Fire-starting tools (matches, lighter, fire starter): You may need fire for warmth, signaling, or water purification in an emergency. Carry waterproof matches or a lighter and a small fire starter.
- Repair tools and knife: A pocketknife or multi-tool handles everything from cutting cord to repairing a broken pack strap. Duct tape wrapped around a trekking pole doubles as an emergency repair kit.
- Nutrition (extra food): Always carry at least one extra day’s worth of high-calorie, no-cook food like trail mix, energy bars, or jerky. If you are delayed by weather or injury, you will be glad you did.
- Hydration (water and treatment): Carry enough water for your day and a way to treat additional water from natural sources. Filters, chemical tablets, or UV purifiers let you safely drink from streams and lakes.
- Emergency shelter (tent, tarp, or bivy): Your tent or tarp is your home in the backcountry. Even on a day hike that turns into an unexpected overnight, an emergency bivy or space blanket can save your life.
Why These Specific Items?
Notice that every essential item on this list serves at least one of three purposes:
- Prevention — stopping a problem before it starts (sun protection, insulation, nutrition)
- Navigation — finding your way and staying found (map, compass, headlamp)
- Emergency response — surviving when things go wrong (first aid, fire, shelter)
If you look at any item and cannot connect it to one of these three purposes, it probably does not belong on the essentials list. Everything else — camp chairs, books, extra snacks — is nice to have but not critical.
Beyond the Ten
For multi-day backpacking treks, you will also need items like a stove, fuel, cookware, a sleeping bag, and a sleeping pad. These are covered in later requirements. But the ten essentials listed above are non-negotiable — they go in your pack on every single trip, no exceptions.
Video Resources
🎬 Video: What Are the 10 Essentials? — https://youtu.be/J-Ae6OKjb6I?si=Ee6rn5JtoCrwtTFo
Req 2b — Reducing Pack Weight
Every ounce in your pack adds up over the miles. Experienced backpackers have a saying: “Ounces equal pounds, and pounds equal pain.” The good news is that you can dramatically reduce your pack weight through smart choices — without leaving behind anything you truly need.
Understanding Pack Weight
Before we talk about cutting weight, let’s define some terms:
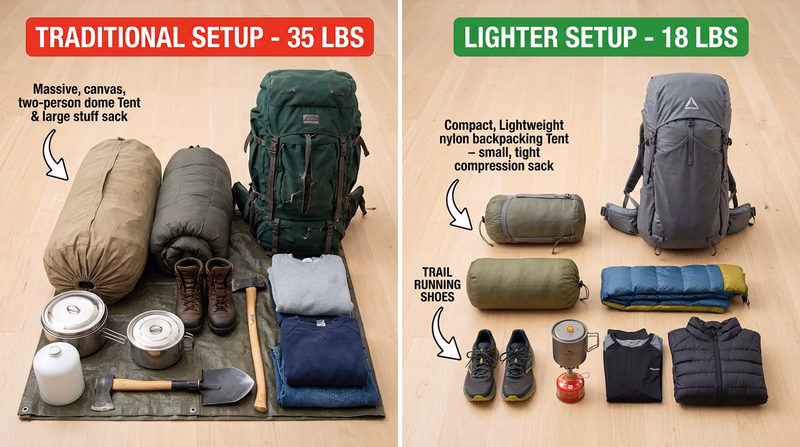
- Base weight — the weight of your pack with all gear but without food, water, or fuel. This is the number most backpackers focus on because it stays constant regardless of trip length.
- Total pack weight (skin-out weight) — everything, including food, water, fuel, and the clothes you are wearing.
A typical beginner’s base weight might be 25–35 pounds. An experienced backpacker aims for 15–20 pounds. Ultralight hikers push below 10 pounds. You do not need to go ultralight, but trimming even a few pounds makes a real difference on a long trek.
Ten Ways to Go Lighter
Here are ten proven strategies for reducing pack weight and bulk. The key rule: never cut weight in a way that puts your health or safety at risk.
1. Repackage food and toiletries. Ditch the original packaging. Transfer trail mix into lightweight zip-lock bags. Squeeze sunscreen into a small travel bottle. Remove cereal from the box and bag it. You will be amazed how much weight and bulk comes from packaging alone.
2. Choose multi-use items. A bandana can be a pot holder, a headband, a washcloth, a water pre-filter, and a sling. A rain jacket can double as a wind layer. Trekking poles can serve as tent poles for certain ultralight shelters. Every item that does two jobs means one less item in your pack.
3. Carry only the clothing you need. Lay out everything you plan to wear, then put half of it back. You do not need a fresh outfit for every day. One set of hiking clothes, one set of camp/sleep clothes, rain gear, and an insulating layer is usually enough for any trek.
4. Share crew gear. A crew of four does not need four stoves, four water filters, or four first-aid kits. Divide shared items — stove, fuel, cook pot, trowel, water filter, repair kit — among the crew so nobody carries everything alone.
5. Leave luxury items behind. That thick paperback novel, the camp pillow, the heavy binoculars — ask yourself honestly whether you will use each item enough to justify its weight. If not, leave it in the car. Your inflatable pillow can be replaced by stuffing a soft jacket into a stuff sack.
6. Upgrade your heaviest items first. The “Big Three” — your pack, shelter, and sleeping bag — make up the majority of your base weight. Replacing a 6-pound tent with a 3-pound tent saves more weight than swapping out every small item in your kit combined.
7. Use a smaller pack. A 70-liter pack weighs more than a 50-liter pack. More importantly, a bigger pack tempts you to fill it with things you do not need. Choose a pack that fits your gear — not one that has room for “just in case” extras.
8. Plan your meals carefully. Freeze-dried meals, instant oatmeal, and trail mix have high calorie-to-weight ratios. Avoid canned food (too heavy) and fresh produce that spoils quickly. Calculate exactly how much food you need — bringing three days of extra food “just in case” adds pounds you do not need to carry.
9. Carry only the water you need between sources. If you know you will pass a reliable water source every hour, there is no reason to carry three liters. Study your map, identify water sources along your route, and carry just enough to get to the next one — plus a reasonable safety margin.
10. Weigh your gear before you go. Use a kitchen scale to weigh every single item. Write the weights down. You will quickly spot the heavy outliers — the 12-ounce camp mug, the 2-pound stuff sack full of “just in case” items. What gets measured gets managed.
The Line Between Light and Unsafe
There is a difference between going lighter and going reckless. Never cut these corners:
- Do not skip the first-aid kit
- Do not leave behind rain gear or insulation
- Do not go without a map and compass
- Do not carry less water than you need between reliable sources
- Do not skip sun protection
Going light is about being smarter, not less prepared. The goal is efficiency — carrying exactly what you need and nothing more.
Video Resources
🎬 Video: 10 FREE Ways to Reduce Base Weight Backpacking — https://youtu.be/Sg8-Urd6_JY?si=jti50ZHuKFyKyxNg
Req 3 — Crew Organization & Safety
This requirement covers four topics about organizing and leading a safe backpacking crew:
- Crew size — how many people should be in your group
- Crew organization — roles and responsibilities
- Risk management — minimizing danger on the trail
- Emergency planning — what to do when things go wrong
3a. Trek Crew Size
The size of your crew affects everything — safety, environmental impact, group dynamics, and logistics. Too few people and you lack support in an emergency. Too many and you damage the trail, overwhelm campsites, and move at the pace of your slowest member.
Recommended crew size: 4 to 10 people.
- Minimum of 4: If one person gets injured, one person stays with them while two go for help. With fewer than four, this buddy-system approach breaks down.
- Maximum of 8–10: Larger groups are harder to manage, move more slowly, and have a bigger impact on campsites and trails. Many wilderness areas have permit limits of 8–12 people per group.
For Scouting activities, BSA policy requires a minimum of four people (two of whom must be adults) for any backcountry trek. Your crew should be large enough to handle emergencies but small enough to travel efficiently and minimize your footprint.
3b. Crew Organization
A well-organized crew runs like a team where everyone has a job. Here are the key roles:
- Crew Leader — sets the pace, makes route decisions, and coordinates the group. This person should have the most backcountry experience.
- Navigator — carries the map and compass, tracks the group’s position, and calls out trail junctions. This is a great learning role for Scouts building navigation skills.
- Sweep (Tail) — hikes at the back of the group to make sure nobody falls behind. The sweep should be a strong, experienced hiker.
- First Aider — carries the crew first-aid kit and takes the lead on treating injuries. Ideally, this person has Wilderness First Aid training.
- Cook/Quartermaster — plans meals, manages the food supply, and oversees cooking. This person ensures food is stored properly (bear canisters or hang bags) each night.
Not every trek needs all of these as separate people. On a small crew, one person might be both the navigator and the first aider. The important thing is that every responsibility is covered and everyone knows their role before the trek begins.
3c. Minimizing Risk
Risk management is about thinking ahead. You cannot eliminate all risk in the backcountry — that is part of the adventure — but you can reduce it dramatically with good planning.
Risk Reduction Strategies
Steps to take before and during every trek- File a detailed trip plan with a responsible adult who is not going on the trek.
- Check weather forecasts for the entire duration of your trek and have a plan for severe weather.
- Ensure every crew member has the fitness level and experience for the planned route.
- Inspect all gear before departure — test stoves, check tent poles, verify first-aid supplies.
- Carry appropriate emergency communication (whistle, signal mirror, or satellite communicator in remote areas).
- Establish a turn-around time — a point by which you will head back regardless of progress.
- Stay together on the trail. Never let anyone hike alone.
- Brief the entire crew on the route, potential hazards, and emergency procedures before starting.
3d. Emergency Response Plan
An emergency response plan is a written document that your crew creates before the trek. It answers one critical question: “If something goes wrong, what do we do?”
A good emergency response plan includes:
- Emergency contacts — phone numbers for local ranger stations, search and rescue, and each crew member’s family
- Nearest evacuation routes — the fastest way out from each section of your route (this may change as you move along the trail)
- Communication plan — how you will call for help (cell coverage, satellite communicator, emergency whistle signals)
- Medical information — allergies, medications, and medical conditions for every crew member
- Roles in an emergency — who calls for help, who administers first aid, who stays with the patient
The plan should be printed and carried by at least two crew members. Review it together before the trek begins so everyone knows the plan and there is no confusion under stress.
Video Resources
🎬 Video: Backpacking Emergency Response Plan — https://youtu.be/kypwGloorRk?si=EU5OPuV3A5yDbfx8
Req 4a — Leave No Trace
The backcountry is not a theme park — there is no maintenance crew sweeping up after you leave. Every footprint, fire ring, and food wrapper has a lasting impact on the landscape, the wildlife, and the next group of hikers who walk the same trail. Leave No Trace is the ethical framework that keeps wild places wild.
The Leave No Trace Seven Principles
These seven principles were developed by the Leave No Trace Center for Outdoor Ethics and are the gold standard for responsible backcountry travel:
1. Plan Ahead and Prepare. Research regulations, weather, and trail conditions before you go. Proper planning prevents situations where you are forced to damage the environment out of desperation — like building an illegal fire because you forgot your stove.
2. Travel on Durable Surfaces. Stick to established trails and camp on existing campsites, rock, gravel, or dry grass. Walking off-trail crushes fragile vegetation that can take years to recover.
3. Dispose of Waste Properly. Pack out everything you pack in — food scraps, wrappers, hygiene products, everything. You will learn more about waste disposal in Requirement 4b.
4. Leave What You Find. Do not pick wildflowers, take rocks, or carve your initials into trees. Leave natural and cultural features exactly as you found them.
5. Minimize Campfire Impacts. Use a stove for cooking instead of a campfire whenever possible. If fires are permitted and appropriate, use established fire rings and burn only small sticks gathered from the ground. See Requirement 8 for more on stoves.
6. Respect Wildlife. Observe animals from a distance. Never feed wildlife — human food can make animals sick and teaches them to approach people, which often leads to the animal being relocated or euthanized.
7. Be Considerate of Other Visitors. Keep noise down, yield the trail to uphill hikers and pack animals, and camp away from other groups when possible.
The Outdoor Code
The BSA Outdoor Code is a pledge that every Scout should know:
As an American, I will do my best to — Be clean in my outdoor manners, Be careful with fire, Be considerate in the outdoors, and Be conservation-minded.
The Outdoor Code complements Leave No Trace by emphasizing personal responsibility. Being “clean in your outdoor manners” means leaving every campsite cleaner than you found it. Being “conservation-minded” means thinking about the long-term health of the wilderness, not just your weekend trip.
Five Ways to Lessen Your Crew’s Impact
Here are practical actions your crew can take to reduce your footprint in the backcountry:
1. Cook with a stove, not a campfire. Campfires scar the ground, consume dead wood that shelters insects and small animals, and leave behind charcoal and ash. A backpacking stove is faster, lighter, and leaves zero trace.
2. Use designated campsites. When available, camp in established sites rather than creating new ones. If you must camp in a pristine area, spread your group out to avoid concentrating impact, and move on after one night.
3. Pack out all trash — including micro-trash. Tiny items like candy wrappers, twist ties, and broken zip ties are easy to miss. Assign one crew member to do a thorough sweep of your campsite before you leave.
4. Wash dishes and yourself at least 200 feet from water sources. Soap, food particles, and sunscreen contaminate streams and lakes that animals and other hikers depend on. Carry water to your wash site in a pot and scatter the strained dishwater over a wide area.
5. Stay on the trail, especially in sensitive environments. Alpine meadows, desert cryptobiotic soil, and riparian (streamside) zones are extremely fragile. A single shortcut across a switchback can cause erosion that takes decades to repair.
Video Resources
🎬 Video: What is Leave No Trace? — https://youtu.be/Rpq01rO9ZR0?si=YIELlDJ5aYqUmUi9
Req 4b — Waste & Hygiene
Nobody’s favorite topic — but one of the most important. Improper waste disposal contaminates water sources, spreads disease, attracts animals, and ruins the experience for every hiker who comes after you. Staying clean on the trail also protects your health and keeps your crew functioning well.
Human Waste
The standard method for disposing of human solid waste in the backcountry is the cathole method:
- Walk at least 200 feet (about 70 adult paces) from any water source, trail, or campsite.
- Dig a hole 6 to 8 inches deep and 4 to 6 inches in diameter using a trowel or sturdy stick.
- Do your business in the hole.
- Cover the hole completely with the original soil and disguise the surface with natural materials.
Important exceptions:
- In some high-use wilderness areas, regulations require you to pack out all solid human waste using WAG (Waste Alleviation and Gelling) bags. Check the rules for your specific area.
- Above the tree line, in snow, and in desert environments, decomposition is extremely slow. Catholes may not work. Many alpine areas require pack-out systems.
- Toilet paper should be packed out in a sealed zip-lock bag. Burying toilet paper does not work — animals dig it up and it takes years to decompose. Some hikers use natural alternatives like smooth rocks or leaves (make sure you can identify poison ivy first).
Other Waste
- Gray water (dishwater, wash water): Strain food particles out with a small screen or bandana. Pack out the food bits. Scatter the strained water over a wide area at least 200 feet from any water source.
- Food scraps: Pack out everything. Apple cores, orange peels, and nutshells do not biodegrade quickly in the backcountry and attract animals.
- Trash: Pack it out — all of it. Bring a dedicated trash bag and do a campsite sweep before you leave.
- Feminine hygiene products: Pack out in sealed zip-lock bags. Never bury or burn these.
Personal Cleanliness
Staying clean on a multi-day trek is not about luxury — it is about health. Bacteria from dirty hands cause gastrointestinal illness. Dirty feet develop blisters and infections faster. A clean crew is a healthy crew.
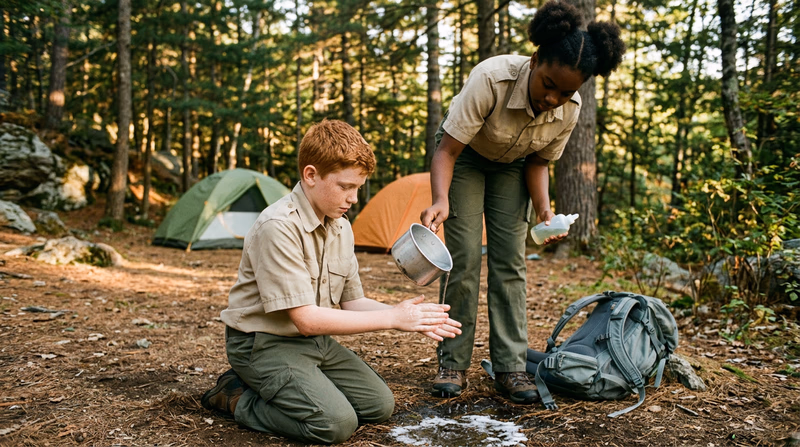
Hand hygiene is the single most important cleanliness practice:
- Wash your hands with biodegradable soap and water before every meal and after using the bathroom
- If water is scarce, use alcohol-based hand sanitizer (at least 60% alcohol)
- Keep a small bottle of sanitizer clipped to your pack for easy access on the trail
Body hygiene on multi-day treks:
- A “sponge bath” with a bandana, a pot of warm water, and a few drops of biodegradable soap is effective and uses minimal water
- Wash at least 200 feet from any water source
- Change into dry, clean socks at camp each evening to prevent blisters and foot infections
- Avoid soap in streams or lakes — even biodegradable soap disrupts aquatic ecosystems
Cooking hygiene:
- Wash all cookware with hot water and a small amount of biodegradable soap after every meal
- Strain dishwater and scatter it at least 200 feet from water sources
- Never leave food or crumbs at your cooking site — this attracts bears, rodents, and insects
Video Resources
🎬 Video: How to Poop in the Woods — https://youtu.be/Dk2k1QEyY7U?si=f4XaWPIgmh29_Cm9
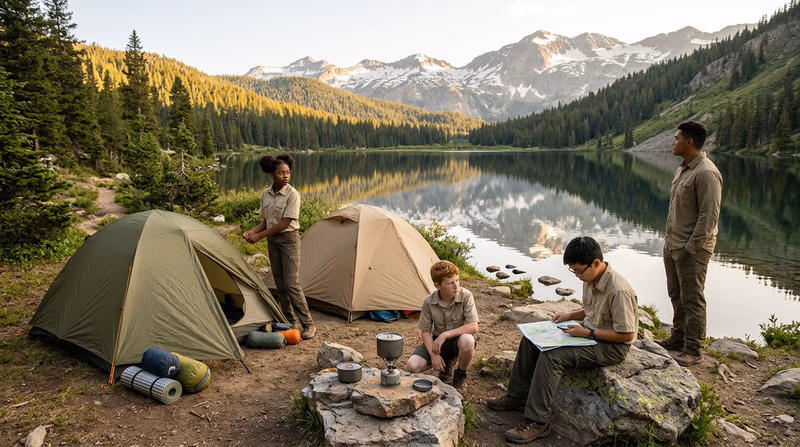
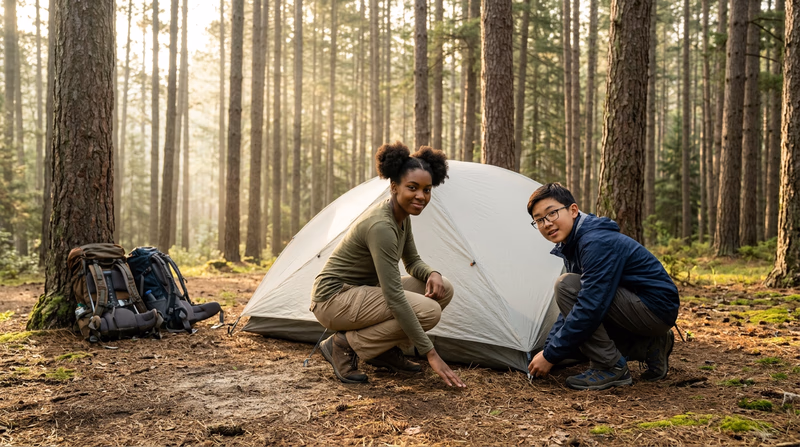
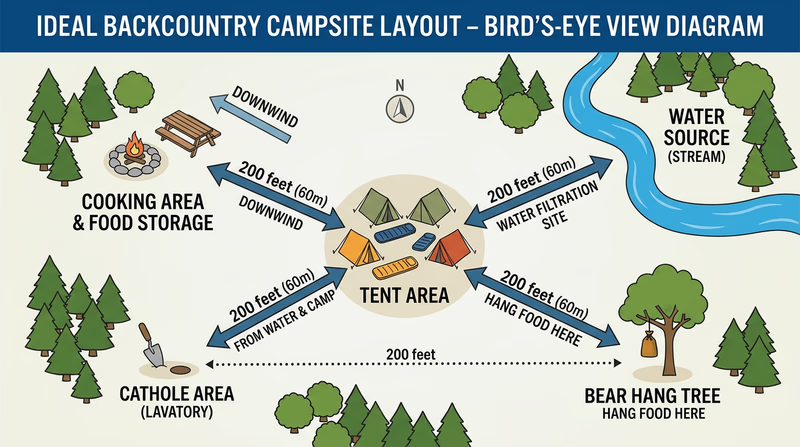
Req 4c — Choosing a Campsite
After a long day on the trail, choosing the right place to camp is one of the most important decisions you will make. A good campsite keeps you safe, comfortable, and minimizes your impact on the environment. A poor choice can mean a sleepless night — or a dangerous one.
The Five Factors of a Good Campsite
1. Safety from hazards.
Look up, look down, and look around before you set up camp.
- Above you: Avoid camping under dead trees or branches (called “widowmakers”) that could fall in wind. Stay away from tall, isolated trees during lightning season.
- Below you: Do not camp in dry streambeds, gullies, or low-lying areas that could flood during a rainstorm. Even a light rain miles upstream can send a wall of water through a dry wash.
- Around you: Look for signs of animal activity — tracks, scat, claw marks on trees. Move on if you find evidence that bears or other large animals frequent the area.
2. Flat, durable ground.
Your tent needs a level surface. Even a slight slope will have you sliding to one end of your sleeping pad by midnight. Look for ground that is already compacted — established campsites, rock, gravel, or hard-packed dirt. Avoid setting up on fragile vegetation like moss, wildflowers, or alpine meadows.
3. Proximity to water — but not too close.
You need water for drinking, cooking, and washing, so camping near a water source is convenient. But “near” does not mean “on top of.” Camp at least 200 feet from lakes and streams. This protects riparian (waterside) habitat, reduces your impact on water quality, and keeps you out of flood zones.
4. Shelter from wind and weather.
A campsite sheltered by trees, rock formations, or natural terrain features is warmer and more comfortable than one exposed to wind. In mountain environments, ridgetops and passes are the windiest spots — drop down to a sheltered bench or valley floor. In hot environments, shade from afternoon sun makes a big difference.
5. Environmental impact.
Choose your campsite with Leave No Trace in mind:
- Use established campsites whenever they are available. These sites are already impacted, and concentrating use prevents new damage.
- In pristine areas, spread your camp out to avoid creating a new permanent campsite. Camp on rock or gravel when possible.
- Avoid camping on trails or blocking trail access.
- Leave your site cleaner than you found it. Do a thorough sweep for micro-trash before you pack up.
Putting It All Together
When you arrive at a potential campsite, do a quick walk-through before dropping your pack:
Campsite Selection Checklist
Walk through this list before setting up- No dead trees or branches overhead
- Not in a dry streambed, gully, or flood-prone area
- At least 200 feet from water sources
- Flat, level ground for tents
- Durable surface (rock, gravel, compacted soil, or established site)
- Sheltered from prevailing wind
- No sign of heavy animal activity
- Room for cooking area at least 200 feet from sleeping area (in bear country)
- No fragile vegetation that would be damaged by tents or foot traffic
Video Resources
🎬 Video: How to Select a Campsite — https://youtu.be/dfpE0x6xTPU?si=op4Dp7UgoJk-qcNw
Req 5 — Water Treatment & Hydration
This requirement covers two essential water topics:
- Water treatment — how to make backcountry water safe to drink
- Hydration — why staying hydrated is critical and how to do it
5a. Water Treatment
Water from streams, lakes, and springs in the backcountry may look crystal clear, but it can contain invisible threats: bacteria (like E. coli and Salmonella), protozoa (like Giardia and Cryptosporidium), and viruses (like norovirus). Drinking untreated water can cause severe gastrointestinal illness — vomiting, diarrhea, and cramps — that can be debilitating when you are miles from the trailhead.
Water treatment is not optional. Every drop of water you drink from a natural source must be treated first.
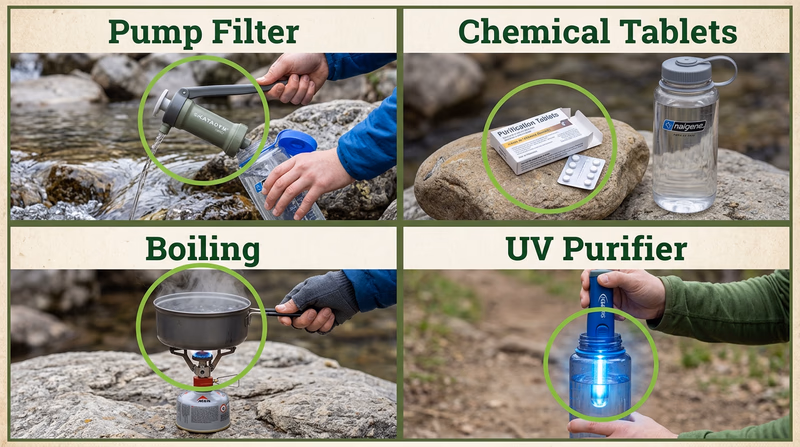
Here are the most common treatment methods:
Pump and Gravity Filters
Portable water filters use a fine membrane or cartridge to physically remove bacteria and protozoa from water. Pump filters require manual effort to push water through the filter. Gravity filters use the weight of water hanging in a bag to push it through — you fill the bag, hang it from a tree branch, and let gravity do the work.
- Pros: Fast, no chemicals or aftertaste, works on cloudy water, reusable
- Cons: Does not remove viruses (usually not a concern in North American backcountry), filters can clog in silty water, adds weight to your pack
- Best for: Groups (gravity filters can treat large volumes) and day-to-day trail use
Chemical Treatment (Tablets or Drops)
Chemical treatments use iodine or chlorine dioxide to kill pathogens in water. You add the tablet or drops, wait a specified time (usually 15–30 minutes for bacteria, up to 4 hours for Cryptosporidium with chlorine dioxide), and then drink.
- Pros: Extremely lightweight, inexpensive, no moving parts to break
- Cons: Requires wait time, can leave a slight taste, iodine should not be used long-term or by people with thyroid conditions
- Best for: Backup method, ultralight backpacking, emergency kits
Boiling
Boiling is the oldest and most reliable water treatment method. Bringing water to a rolling boil for one minute (three minutes above 6,500 feet elevation) kills all bacteria, protozoa, and viruses.
- Pros: 100% effective against all pathogens, requires no special equipment beyond a pot and stove
- Cons: Uses fuel, takes time to heat and cool, impractical for treating water on the move
- Best for: Camp use, when you are cooking anyway, emergency backup
UV Light Purifiers
UV purifiers (like the SteriPEN) use ultraviolet light to destroy the DNA of pathogens, making them unable to reproduce. You stir the device in a bottle of water for 60–90 seconds.
- Pros: Fast, no chemicals, lightweight
- Cons: Requires batteries, does not work on cloudy water (particles block UV light), fragile electronics
- Best for: Solo hikers, clear water sources
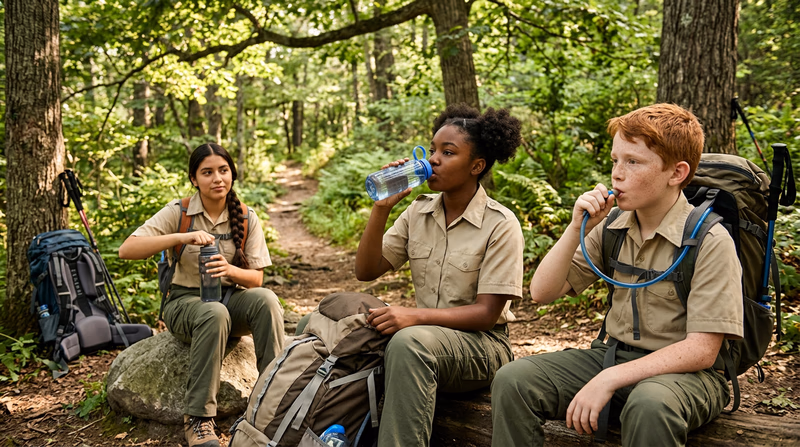
5b. Staying Hydrated
Water makes up about 60% of your body weight and plays a role in nearly every bodily function. When you are hiking with a heavy pack, your body works harder, sweats more, and needs significantly more water than it does during a normal day.
Why Hydration Matters
Dehydration — even mild dehydration — affects your performance, judgment, and safety:
- Physical performance drops. Losing just 2% of your body weight in water reduces endurance and strength. Your muscles cramp, your heart works harder, and you fatigue faster.
- Mental clarity suffers. Dehydration impairs concentration, decision-making, and reaction time. On a trail where navigation and hazard awareness matter, a foggy brain is dangerous.
- Temperature regulation fails. Your body sweats to cool itself. Without enough water, sweating decreases, and your risk of heat illness skyrockets.
- Digestion slows. Water helps your body process the high-calorie trail food you are eating. Without it, you may feel nauseous and lose your appetite — which makes the problem worse.
How Much to Drink
A general rule: drink about half a liter (16 ounces) per hour of moderate hiking. In hot weather, at high altitude, or when carrying a heavy pack, you may need up to a full liter per hour.
Do not wait until you are thirsty — thirst is a lagging indicator. By the time you feel thirsty, you have already lost 1–2% of your body weight in water.
Hydration Strategy
A simple plan for staying on top of your water intake- Drink 16–20 ounces of water in the morning before you start hiking.
- Take 3–4 sips every 15–20 minutes while on the trail.
- Monitor your urine color — pale yellow means well-hydrated; dark yellow means drink more.
- Add electrolyte tablets or powder to your water during long, hot days to replace lost salts.
- Drink water with every meal and snack.
- Know where your next water source is and plan your intake accordingly.
Video Resources
🎬 Video: The Best Way to Filter Water While Backpacking — https://youtu.be/DIZz3iiZ2TY?si=krQx2K9GtsjHx1Lh
🎬 Video: How to Plan Your Hydration — https://youtu.be/zeZ--U2-Vz8?si=H86Y5a0Ac38NmuCb
Req 6 — Navigation
This requirement covers three navigation skills every backpacker must master:
- Reading topographic maps — understanding the landscape before you see it
- Using a map and compass or GPS — establishing your position on the ground
- Staying found — and what to do if you get lost
6a. Reading Topographic Maps
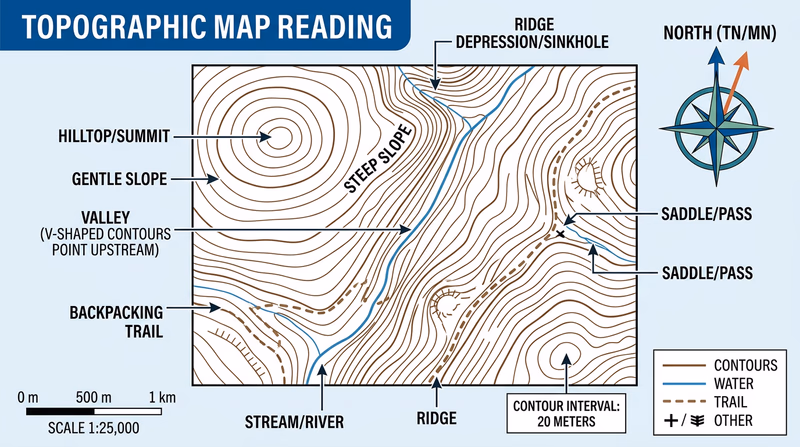
A topographic map (or “topo map”) uses contour lines to show the three-dimensional shape of the land on a flat piece of paper. Unlike a road map that just shows streets, a topo map reveals ridges, valleys, cliffs, lakes, and streams — everything you need to plan a route through the backcountry.
Key Features of a Topo Map
- Contour lines: Brown lines that connect points of equal elevation. Every point along a single contour line is at the same height above sea level.
- Contour interval: The elevation difference between adjacent contour lines, printed in the map legend (commonly 40 feet on USGS maps). Closer lines mean steeper terrain; widely spaced lines mean gentle slopes.
- Index contours: Every fifth contour line is drawn thicker and labeled with its elevation. These help you quickly read elevation.
- Scale: Tells you the ratio between map distance and real-world distance. A 1:24,000 scale (the standard USGS “7.5-minute” map) means 1 inch on the map equals 24,000 inches (2,000 feet) on the ground.
- Legend/key: Explains all symbols — trails, roads, buildings, water features, vegetation, and more.
- Declination diagram: Shows the difference between magnetic north (where your compass points) and true north (where the map grid points). You must adjust for this difference when navigating.
Reading the Terrain
With practice, you can “see” the landscape by looking at contour lines:
- Close together = steep slope (cliff if they merge)
- Far apart = gentle slope or flat ground
- V-shapes pointing uphill = valley or stream drainage
- V-shapes pointing downhill = ridge or spur
- Closed circles = hilltop or summit
- Concentric closed circles with tick marks = depression
6b. Establishing Your Position
Knowing where you are on the map at any given moment is the core skill of backcountry navigation. Here are two methods:
Method 1: Map and Compass (Triangulation)
- Orient your map: Place the compass on the map and rotate the map until the compass needle aligns with the map’s north arrow (adjusting for declination).
- Identify two or three landmarks you can see — a prominent peak, a lake, a trail junction.
- Take a bearing to each landmark with your compass.
- Draw lines (or imagine them) on the map from each landmark along the reverse bearing.
- Where the lines intersect is your approximate position.
Method 2: GPS Receiver
- Turn on your GPS device and wait for it to acquire satellite signals.
- Read your coordinates (latitude/longitude or UTM grid reference).
- Plot those coordinates on your topo map using the grid lines printed on the map.
6c. Staying Found
The best navigation strategy is to never get lost in the first place. Experienced backpackers call this “staying found” — constantly keeping track of where you are so you never reach a point of confusion.
How to Stay Found
- Check your map frequently. Every 15–20 minutes, compare what you see around you to what the map shows. Look for landmarks — ridgelines, stream crossings, trail junctions.
- Track your pace. Know roughly how fast you travel (a common hiking pace is 2 miles per hour on flat terrain, slower uphill). Use your watch and speed to estimate how far you have gone.
- Note landmarks as you pass them. Make a mental (or written) note of distinctive features: “Crossed a wooden bridge at 10:15 AM” or “Passed the Y-junction where the trail splits left toward the lake.”
- Look back. Periodically turn around and observe the trail from the opposite direction. If you need to retrace your steps, the trail looks completely different going the other way.
- Keep your crew together. Everyone should be within sight or shouting distance of the person ahead and behind them.
What to Do If You Get Lost
If you realize you do not know where you are, use the STOP method:

Video Resources
🎬 Video: How to Read a Topographic Map — https://youtu.be/CoVcRxza8nI?si=_vx1M7g51M2l_j4a
🎬 Video: How to Use a Compass — https://youtu.be/0cF0ovA3FtY?si=o6nQlPuwNkbBJhwu
🎬 Video: What to Do If You Get Lost — https://youtu.be/dq6fq-XdgUk?si=jzJ2anuQ7AwWrb3c
Req 7 — Weather Preparedness
In the backcountry, you cannot duck into a coffee shop when it starts raining. Weather is one of the biggest variables on any trek, and being prepared for it separates safe backpackers from miserable ones. The wilderness does not care about your itinerary — rain, wind, lightning, and sudden temperature drops can happen on any trip.
Before the Trek: Preparation
Check the forecast — then plan for worse.
Always check weather forecasts for the entire duration of your trek before you leave. Use reliable sources like the National Weather Service (weather.gov), which provides point forecasts for specific GPS coordinates. But remember that mountain weather is notoriously unpredictable. A forecast for the valley floor may be completely wrong for the ridgeline 3,000 feet above.
Weather Preparation Checklist
Pack and plan for bad weather before you leave- Check the 5-day forecast for your specific area and elevation.
- Pack a waterproof rain jacket and rain pants — even if the forecast says sunny.
- Bring an extra insulating layer (fleece or puffy jacket) beyond what you think you will need.
- Ensure your tent or shelter is fully waterproof — seam-sealed and tested.
- Pack a pack cover or use a waterproof pack liner (a heavy-duty trash compactor bag works).
- Carry a lightweight emergency bivy or space blanket as a backup shelter.
- Know the signs of approaching severe weather: darkening skies, sudden temperature drops, increasing wind, distant thunder.
On the Trail: Dealing with Rain
Rain is the most common weather challenge for backpackers. It can range from a gentle drizzle to a torrential downpour that turns trails into streams.
- Put on rain gear early. Do not wait until you are soaked. As soon as you feel the first drops, stop and put on your rain jacket. Once your clothes are wet, they are very hard to dry in the field.
- Protect your pack. Use a pack cover, or better yet, line the inside of your pack with a waterproof bag. Pack covers can blow off in wind and do not protect the bottom of your pack.
- Keep moving if safe to do so. Standing still in rain makes you colder. A moderate pace generates body heat. But if trails become dangerously slippery or visibility drops, stop and wait it out.
- Set up camp early if needed. If a storm is building and you have not reached your planned campsite, find a safe spot and make camp. Do not push through dangerous conditions to stick to a schedule.
Lightning
Lightning is one of the most dangerous weather hazards in the backcountry, especially above the tree line or near water.
Where to go during a lightning storm:
- Get below the tree line and into a dense forest of uniform-height trees (not a single isolated tree)
- Move away from ridgetops, peaks, open meadows, and water
- Avoid metal objects — drop trekking poles and remove your metal-frame pack
- If you are caught in the open, crouch low on the balls of your feet with your feet together, head tucked, and hands over your ears. Do not lie flat — minimize your contact with the ground
Where NOT to shelter:
- Under isolated or the tallest trees
- In shallow caves or rock overhangs (ground current can arc across the opening)
- Near metal fences, poles, or equipment
Wind
High winds can flatten tents, make ridgeline travel dangerous, and accelerate heat loss from your body (wind chill). In exposed terrain, wind can literally knock you off your feet.
- Pitch your tent with the narrow end facing the wind. Stake it down thoroughly and use guylines.
- In high winds, consider camping lower. Drop below the ridgeline into a sheltered valley or forest.
- Use natural windbreaks — rock walls, dense trees, or terrain features that block the prevailing wind direction.
Cold Snaps and Snow
Mountain temperatures can drop dramatically at night or with a passing front. Snow is possible above 8,000 feet even in summer in many parts of the country.
Video Resources
🎬 Video: Backpacking in Rain, Lightning, Hail, and Wind — https://youtu.be/J4atUCcf4p0?si=E5kHrCGO6P7evExq
Req 8 — Stoves & Backcountry Cooking
This requirement covers everything about cooking in the backcountry:
- Stove types and fuels — advantages and disadvantages
- Safe stove operation — including liquid fuel handling
- Meal preparation — cooking three meals with your stove
- Cleanup and food storage — keeping things clean and critter-free
8a. Backpacking Stove Types
There are several types of backpacking stoves, each using a different fuel. Understanding the trade-offs helps you choose the right stove for your trek conditions and crew needs.
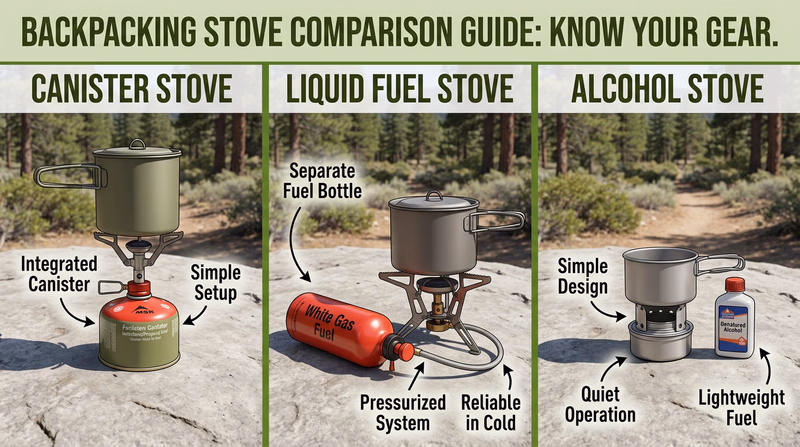
Canister Stoves (Isobutane/Propane Blend)
Canister stoves screw onto a pressurized metal fuel canister containing a blend of isobutane and propane. They are the most popular choice for backpackers.
- Advantages: Lightweight, easy to use (turn the valve and light), consistent flame, no priming needed, clean-burning with little odor
- Disadvantages: Performance drops in cold weather (below 20°F) as the gas pressure decreases, canisters are not refillable (pack-out the empty canister), difficult to tell how much fuel remains, canisters can be hard to find in remote areas
- Best for: Three-season backpacking, weekend trips, beginners
Liquid Fuel Stoves (White Gas/Naphtha)
Liquid fuel stoves use a refillable bottle of white gas (naphtha). They require priming — preheating the burner so the liquid fuel vaporizes before burning.
- Advantages: Excellent cold-weather performance, you can see exactly how much fuel you have, fuel bottles are refillable, white gas is widely available, high heat output for melting snow
- Disadvantages: Heavier than canister stoves, requires priming (a skill that takes practice), more maintenance (cleaning jets, replacing O-rings), can flare during priming if done incorrectly
- Best for: Winter backpacking, high-altitude treks, international travel
Alcohol Stoves (Denatured Alcohol)
Alcohol stoves are simple — often just a small metal cup that holds denatured alcohol or methanol. Many ultralight hikers make their own from aluminum cans.
- Advantages: Extremely lightweight and compact, no moving parts (nothing to break), fuel is cheap and available at hardware stores, silent operation
- Disadvantages: Low heat output (slow boil times), poor wind resistance, no flame control (once lit, it burns until the fuel is gone), not suitable for cooking complex meals, poor performance in cold weather
- Best for: Ultralight solo backpacking, boiling water for freeze-dried meals
Wood-Burning Stoves (Biomass)
Wood-burning backpacking stoves use twigs, pinecones, and small sticks found on the ground as fuel. They use a double-wall design to create a super-efficient burn.
- Advantages: No fuel to carry (weight savings on long treks), renewable fuel source, some models can charge USB devices using thermoelectric generators
- Disadvantages: Banned in many areas during fire season, requires dry wood (useless in rain), produces soot on cookware, slower than gas stoves, gathering wood may violate Leave No Trace principles in some environments
- Best for: Long-distance treks where resupply is infrequent, areas where fires are permitted
8b. Safe Stove Operation
General stove safety rules:
- Always set up your stove on a flat, stable, non-flammable surface (bare ground, rock, or a fire-resistant pad)
- Keep flammable materials (dry leaves, clothing, tent fabric) at least three feet away
- Never leave a burning stove unattended
- Let the stove cool completely before packing it
- Have water nearby to extinguish an accidental fire
Liquid fuel safety:
- Store fuel bottles upright and tightly sealed when not in use
- Refill fuel bottles away from any flame or heat source — spilled white gas is extremely flammable
- Wipe up any spilled fuel immediately and let the area air-dry before lighting the stove
- Familiarize yourself with the priming process before your trek — practice at home in a safe outdoor area
- Check all connections and O-rings for leaks before each use
8c. Trail Meals
Backcountry cooking is about efficiency: maximum calories, minimum weight, and fast preparation. Here are ideas for three classic backpacking meals:
Breakfast — Instant Oatmeal with Trail Mix Boil water, pour over instant oatmeal, stir in a handful of trail mix or dried fruit and a spoonful of peanut butter. Ready in under five minutes and packed with carbohydrates and healthy fats for the morning’s hike.
Lunch — No-Cook Trail Lunch Many backpackers skip cooking at lunch to save time and fuel. Tortillas with peanut butter and honey, hard cheese, summer sausage, crackers, and dried fruit make a satisfying meal with zero stove time. Save your fuel for dinner.
Dinner — Freeze-Dried Backpacking Meal Boil two cups of water, pour into the freeze-dried meal pouch, seal, and wait 10–15 minutes. Freeze-dried meals are lightweight, calorie-dense, and come in dozens of flavors. Add extra calories with a side of instant mashed potatoes or ramen.
8d. Cleanup and Food Storage
Cleaning cookware:
- Scrape all food residue from pots and bowls (eat every last bit — waste is weight you carried for nothing)
- Heat water and add a small amount of biodegradable soap
- Scrub with a small sponge or bandana
- Strain the gray water through a fine mesh or bandana
- Pack out the food particles (add them to your trash bag)
- Scatter the strained gray water over a wide area at least 200 feet from water sources
Food storage:
In bear country, you must protect your food from wildlife. Improperly stored food attracts bears, teaches them to associate humans with food, and often leads to the bear being relocated or destroyed.
Food Storage Methods
Keep your food safe from wildlife- Bear canister: A hard-sided, screw-top container that bears cannot open. Required in many wilderness areas. Store at least 200 feet from your tent.
- Bear hang (PCT method): Hang your food bag from a tree branch at least 10 feet off the ground, 4 feet from the trunk, and 200 feet from your sleeping area.
- Bear pole or bear box: Some established backcountry campsites provide metal poles or boxes for food storage. Use them when available.
- Odor-proof bags: Reduce food smells but should be used inside a bear canister or hung — they are not bear-proof by themselves.
Video Resources
🎬 Video: Trying Every Type of Backpacking Stove — https://youtu.be/DQdhvnXX8PM?si=-H_SQQdh77r70fb1
🎬 Video: Clean-Up: Washing Dishes in the Backcountry — https://youtu.be/NNcu_Ujoiv4?si=ZZtSZLYJ73an86nj
Req 9 — Planning & Packing
This requirement brings everything together — planning a real backpacking hike, inspecting gear, packing your pack, fitting it properly, and hitting the trail. It covers:
- Writing a hike plan with a schedule
- Pre-hike inspection of your patrol and equipment
- Packing your gear properly
- Fitting and adjusting your pack
- Completing a 2-mile hike with a full load
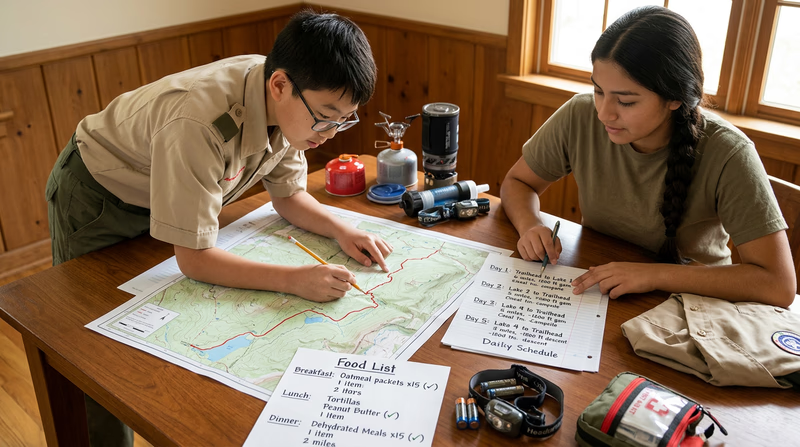
9a. Writing a Hike Plan
A good hike plan is your roadmap for the day. It keeps your crew organized, on schedule, and safe. Here is what to include:
Route information:
- Trailhead location and driving directions
- Total distance and elevation gain
- Trail name(s) and any junction descriptions
- Campsite location (if overnight)
- Water source locations along the route
Schedule:
- Meeting time and departure time
- Estimated time at each waypoint or rest stop
- Planned lunch/snack stops
- Expected arrival time at campsite or trailhead
- Turnaround time (the latest you will start heading back regardless of progress)
Crew information:
- Names of all participants
- Assigned roles (leader, navigator, sweep, first aider)
- Emergency contacts for each participant
Safety plan:
- Emergency contact numbers (ranger station, search and rescue)
- Nearest evacuation routes
- Vehicle location and keys arrangement
- Communication plan (cell coverage expected? satellite communicator?)

9b. Pre-Hike Inspection
Before anyone shoulders a pack, the crew leader should conduct a thorough inspection. This is your last chance to catch problems before you are on the trail.
Pre-Hike Inspection
Check every item before departure- Every crew member has the Ten Essentials (see Requirement 2a).
- First-aid kit is fully stocked and accessible.
- Every crew member has adequate water and a treatment method.
- Food supply matches the planned menu and trip duration.
- Tent, sleeping bag, and pad are packed and functional (no broken poles, no torn fabric).
- Stove works — test-light it before packing.
- Rain gear is packed and accessible (top of pack or outside pocket, not buried at the bottom).
- Map and compass are present and the navigator knows the route.
- Footwear is broken in and appropriate for the terrain.
- All crew members know the emergency plan and have emergency contact information.
- Bear canister or food storage system is packed (if required).
- Trash bags are packed for leave-no-trace compliance.
9c. Packing Your Gear
How you pack your backpack affects your balance, comfort, and ability to access critical items. The general principle is simple: heavy items close to your back and centered between your shoulder blades and hips.
Pack Loading Zones
- Bottom zone (sleeping bag compartment): Sleeping bag, camp clothes, and items you will not need until camp. These are light and compressible.
- Core zone (main compartment, close to your back): Heavy items — food, stove, fuel, water, bear canister. Keeping weight here improves balance and stability.
- Top zone (top of main compartment and lid): Rain gear, first-aid kit, snacks, map — things you may need during the day without unpacking everything.
- Outer pockets and attachments: Water bottles, sunscreen, lip balm, trekking poles, tent (some hikers strap the tent to the outside).
Crew Gear Distribution
Shared crew gear (stove, fuel, cook pot, water filter, trowel, food) should be divided fairly among crew members based on body size and fitness. A smaller Scout should not carry the same crew-gear weight as the biggest member of the crew.
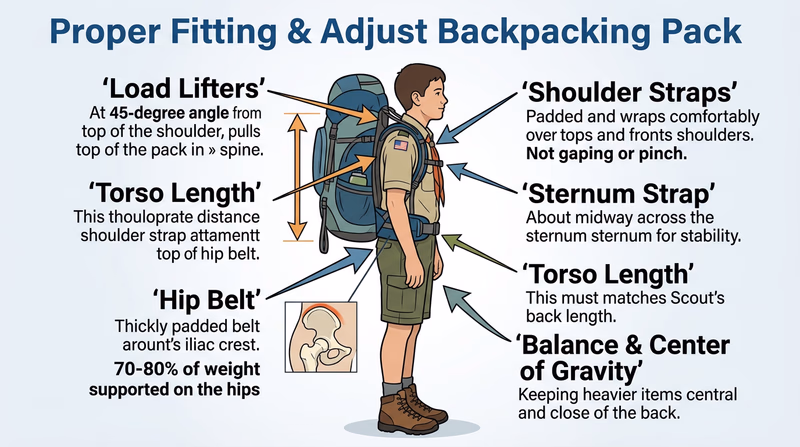
9d. Fitting Your Pack
A poorly adjusted pack causes sore shoulders, back pain, and blisters on your hips. A properly adjusted pack feels like it is part of your body.
How to put on a loaded pack:
- Set the pack on a rock, log, or bench at hip height. Trying to lift a 30-pound pack from the ground in one motion strains your back.
- Slide one arm through the shoulder strap, then the other.
- Lean forward slightly and buckle the hip belt.
How to adjust the fit:
- Hip belt first: The top of the hip belt should sit on your iliac crest (the top of your hip bones). Tighten it firmly — the hip belt should carry 70–80% of the pack’s weight.
- Shoulder straps: Tighten until the straps wrap over your shoulders with no gap, but do not over-tighten. Your shoulders should carry only 20–30% of the weight.
- Load lifters: These small straps connect the top of your shoulder straps to the top of the pack frame. Tighten them to about a 45-degree angle to pull the pack weight closer to your body and off your shoulders.
- Sternum strap: Buckle across your chest and adjust so it sits comfortably without restricting breathing.
9e. Your 2-Mile Hike
This is where the planning meets the trail. Use the plan you wrote in 9a, carry your fully loaded pack, and complete a hike of at least 2 miles. Treat this as a real trek — follow your schedule, use your navigation tools, take breaks at planned stops, and practice the skills you have learned.
After the hike, take time to debrief with your crew:
- What worked well in the plan?
- What would you change?
- Did your pack feel balanced and comfortable?
- Were there any gear issues?
This 2-mile hike is your dress rehearsal for the longer treks in Requirements 10 and 11.
Video Resources
🎬 Video: How to Plan Your First Backpacking Trip — https://youtu.be/O1vtZSKr0pE?si=Uq1SBhiCqqT3OT_M
🎬 Video: How to Pack a Backpack — https://youtu.be/jBDido6uX9k?si=0eooOD1d3NvRP9Bb
🎬 Video: How to Fit a Backpacking Pack — https://youtu.be/0SGiGZlppMM?si=yf56DI_9Z9n7og8F
Req 10 — Three-Day Treks
This is where the Backpacking merit badge gets real. Three separate treks — each at least three days long and covering at least 15 miles — with everything you need on your back. These treks are your chance to put every skill you have learned into practice.
Understanding the Requirements
Let’s break down what is required:
- Three treks — not one long trip, but three separate outings. This gives you the chance to learn from each experience and improve on the next one.
- At least three days each — this means a minimum of two nights in the backcountry per trek.
- At least 15 miles each — that is about 5 miles per day, a moderate pace with a loaded pack. You do not need to hike all 15 miles in one day.
- At least two different campsites per trek — you must move camp at least once during each trek, which means packing up and setting up your full camp twice.
- Carry everything — no resupply drops, no cache of supplies waiting at camp. Everything you need for three days rides on your back from the trailhead.
Planning Your Three Treks
Do not try to make all three treks identical. Use each one as an opportunity to experience something different:
Trek 1: The Learning Trek Choose a well-established trail with reliable water sources and designated campsites. Keep the route straightforward. Focus on dialing in your gear, perfecting your campsite routine, and building confidence. This is your shakedown trip.
Trek 2: The Challenge Trek Step it up. Try a trail with more elevation gain, less-established campsites, or more remote terrain. Practice your navigation skills by choosing a route with trail junctions. Experiment with different meals and cooking techniques.
Trek 3: The Adventure Trek Go somewhere new and push your limits. Try a different region, a different season, or more demanding terrain. By now, your gear is dialed, your camp routine is smooth, and you are ready for a real wilderness experience.
Leave No Trace on Multi-Day Treks
On a three-day trek, your Leave No Trace practices are tested more than on a day hike. You are cooking, sleeping, and living in the backcountry — which means more opportunities for impact.
Multi-Day Leave No Trace
Practices for extended backcountry travel- Pack out all trash from every campsite — do a thorough sweep before leaving.
- Use established campsites whenever possible; spread out in pristine areas.
- Scatter gray water at least 200 feet from water sources.
- Store food properly every night (bear canister, bear hang, or bear box).
- Use catholes for human waste, 200 feet from water, trails, and camp.
- Do not build new fire rings — use your stove for all cooking.
- Stay on established trails even when shortcuts are tempting.
- Respect wildlife by keeping a safe distance and never feeding animals.
Practical Tips for Multi-Day Success
Food planning: For a three-day trek, plan about 1.5 to 2 pounds of food per person per day. Choose high-calorie, lightweight foods: freeze-dried meals, instant oatmeal, trail mix, peanut butter, tortillas, hard cheese, and energy bars.
Water planning: Study your route and know where every reliable water source is. Carry enough water to get between sources, plus a safety margin. Carry at least one backup water treatment method.
Pace yourself: Five miles per day is a comfortable pace. Do not rush. Enjoy the scenery, take photos, and stop to identify plants, birds, and geological features. The point of backpacking is not just to cover miles — it is to experience the wilderness.
Video Resources
🎬 Video: What is Leave No Trace? — https://youtu.be/Rpq01rO9ZR0?si=hjjnThExBUjG0aIW
Req 11 — The Big Trek
This is the capstone of the Backpacking merit badge — a five-day, 30-mile trek that you plan from start to finish. It covers:
- Writing a comprehensive trek plan with route, schedule, food, gear, safety, and budget
- Executing the trek with at least three campsites and a service project
- Keeping a daily journal documenting your experience
11a. The Trek Plan
This plan is significantly more detailed than the one you wrote for Requirement 9. A five-day trek requires careful logistics — you need to carry more food, plan for more variables, and think further ahead.
Route Description and Access
- Describe the trek area: geography, terrain, elevation range, and notable features
- Provide driving directions to the trailhead
- Note any permits required and how to obtain them
- Identify the trail(s) you will follow, with distances between landmarks
- Mark water sources on your map and note their reliability
Daily Schedule
Build a day-by-day itinerary. Here is a sample framework:
| Day | Start | End Camp | Miles | Notes |
|---|---|---|---|---|
| 1 | Trailhead | Camp A | 5 | Easy pace, settle in |
| 2 | Camp A | Camp B | 7 | Longest day, big climb |
| 3 | Camp B | Camp C | 6 | Service project |
| 4 | Camp C | Camp B or D | 7 | Flexible route |
| 5 | Final camp | Trailhead | 5 | Pack out |
Food and Equipment List
- Create a complete meal plan for all five days: breakfast, lunch, dinner, and snacks
- Calculate total food weight (1.5–2 pounds per person per day)
- List every piece of personal and crew gear
- Assign crew gear to specific crew members
- Identify where you will resupply water and how much you will carry between sources
Safety and Emergency Plan
Your safety plan should be more detailed than for a weekend trip because you will be farther from help for a longer time:
- Emergency contacts (ranger station, search and rescue, hospital)
- Evacuation routes from each section of your route
- Communication plan (cell coverage map, satellite communicator if available)
- Medical information for all crew members
- Bad-weather contingency plan (where to shelter, alternate routes)
- Wildlife precautions (bear country protocols, food storage method)
Budget
- Permit fees
- Travel/gas costs to the trailhead
- Food costs (itemize by meal)
- Fuel costs (stove fuel)
- Any gear rentals or purchases needed
- Emergency fund
11b. Execute the Trek
This is the adventure you have been building toward. Five days in the backcountry, covering at least 30 miles, sleeping at three or more different campsites, and completing a service project along the way.
The Service Project
Your service project should be approved by your counselor before the trek. Ideas include:
- Trail maintenance: Clear fallen branches, remove rocks from the trail, or repair water bars (drainage structures that prevent trail erosion)
- Campsite restoration: Clean up and naturalize an overused or damaged campsite
- Litter cleanup: Collect and pack out litter from a trail or campsite area
- Invasive species removal: Pull non-native plants from a trail corridor (get guidance from a ranger)
Making the Most of Five Days
Five days is long enough to experience a true rhythm of backcountry life. By day three, the trail starts to feel like home. The routine of hiking, cooking, and camping becomes natural. You start noticing details you missed on shorter trips — the way light changes through the day, the sounds of the forest at different hours, the satisfaction of covering miles under your own power.
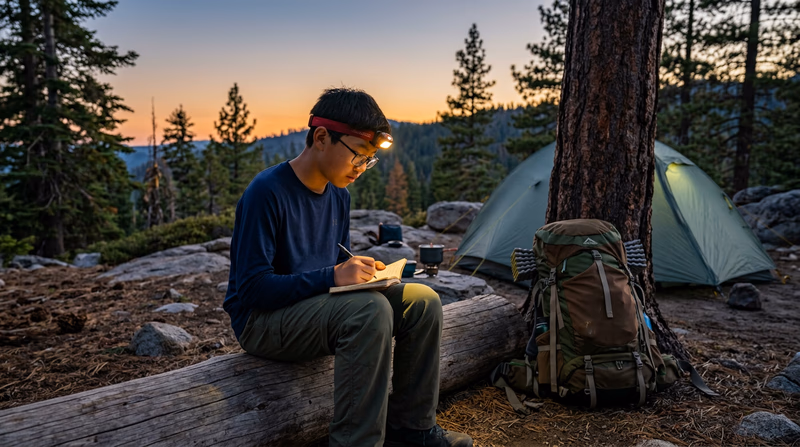
11c. The Daily Journal
Your journal is both a personal record and a learning tool. At the end of each day, take 15–20 minutes to write about your experience.
What to Include
For each day, write about:
- Miles covered and route taken — where did you start and end?
- Weather and conditions — what was the weather like? How did it affect your day?
- Highlights — what was the best part of the day? A view? A wildlife sighting? A great meal?
- Challenges — what was hard? Steep climbs? Rain? Blisters? Group dynamics?
- What worked well — gear, meals, pace, campsite choice, navigation
- What you would improve — did you pack too much? Not enough? Was the schedule realistic?
- Personal reflections — how are you feeling physically and mentally? What are you learning about yourself?
Video Resources
Philmont Scout Ranch — Plan Your Trek Learn about Scouting's premier backpacking experience at Philmont Scout Ranch in New Mexico. Link: Philmont Scout Ranch — Plan Your Trek — https://www.philmontscoutranch.org/treks/ National Park Service — Plan Your Backcountry Trip The National Park Service guide to planning backcountry trips in America's national parks. Link: National Park Service — Plan Your Backcountry Trip — https://www.nps.gov/subjects/camping/backcountry-camping.htmExtended Learning
A. Introduction
Congratulations — you have earned the Backpacking merit badge! You have learned how to stay healthy on the trail, navigate with map and compass, cook in the backcountry, organize a crew, and complete multi-day wilderness treks carrying everything on your back. But your journey is just beginning. The skills you have built open the door to a lifetime of backcountry exploration.
B. Deep Dive: Ultralight Backpacking
The ultralight philosophy centers on one idea: carry less, enjoy more. Ultralight backpackers target a base weight (everything except food, water, and fuel) of under 10 pounds. Getting there requires rethinking every item in your pack and making deliberate trade-offs between comfort and weight.
The foundation of going ultralight is upgrading your “Big Three” — pack, shelter, and sleeping system — since these typically account for over half your base weight. An ultralight pack trades a rigid frame for a simple, frameless design made of Dyneema or ultra-thin nylon. A tarp or single-wall tent replaces a traditional double-wall tent. A quilt replaces a mummy bag, saving weight by eliminating the insulation underneath your body (your sleeping pad already provides that insulation).
Beyond the Big Three, ultralight hikers obsess over every detail. They cut toothbrush handles in half, repackage all food into zip-lock bags, and carry a single multi-use item instead of three specialty pieces. A bandana becomes a pot holder, towel, sun shade, and pre-filter for water. Trekking poles double as tent poles. A rain jacket serves as a wind layer and an emergency shelter layer.
Going ultralight is not for every trip or every hiker. In extreme cold, rugged alpine terrain, or on treks where rescue is far away, the safety margin of heavier gear can be worth the extra weight. The best approach for most backpackers is to adopt ultralight principles — question every item, prefer lighter alternatives, and avoid carrying “just in case” gear — without sacrificing the essentials that keep you safe.
LighterPack — Gear Weight Tracker A free online tool for tracking and optimizing your backpacking gear weight. Link: LighterPack — Gear Weight Tracker — https://lighterpack.com/C. Deep Dive: Navigation Beyond the Basics
The map-and-compass skills you learned in Requirement 6 are your foundation, but backcountry navigation goes much deeper. As you tackle more remote and challenging terrain, consider building these advanced skills:
Off-trail navigation requires you to travel without a marked path, using only terrain features, bearings, and distance estimation to reach your destination. This is how mountaineers reach remote peaks and how search and rescue teams operate. Start by practicing in familiar terrain — try navigating cross-country between two points in a local forest using only your map and compass.
Celestial navigation uses the sun, moon, and stars to determine direction. The North Star (Polaris) sits almost directly over the geographic North Pole and has guided travelers for thousands of years. During the day, you can find south by pointing the hour hand of an analog watch at the sun — the midpoint between the hour hand and 12 o’clock indicates south in the Northern Hemisphere.
Digital navigation tools like GPS apps (Gaia GPS, AllTrails, CalTopo) are powerful companions to traditional methods. These apps let you download offline topographic maps, track your route in real time, mark waypoints, and share your location. But they depend on battery power, which is finite in the backcountry. Always carry a physical map and compass as your primary tools and use digital tools as supplements.
Map reading in the field improves dramatically with practice. Learn to identify terrain features by their contour patterns: saddles (low points between two peaks), benches (flat spots on a mountainside), draws (narrow valleys), and spurs (ridges extending from a main ridge). The more features you can identify on your map and match to what you see around you, the more confident your navigation becomes.
CalTopo — Mapping and Route Planning A powerful free mapping tool for planning backcountry routes, printing custom maps, and analyzing terrain. Link: CalTopo — Mapping and Route Planning — https://caltopo.com/D. Deep Dive: Backcountry Nutrition and Meal Planning
On a strenuous multi-day trek, your body is a furnace that needs constant fuel. Understanding backcountry nutrition helps you plan meals that keep you strong, energized, and healthy for the duration of your trek.
The three macronutrients — carbohydrates, fats, and protein — each play a different role. Carbohydrates are your body’s preferred quick-energy source: instant oatmeal, tortillas, crackers, and dried fruit provide fast fuel for hiking. Fats are your slow-burning energy reserve, packing 9 calories per gram (more than double the 4 calories per gram from carbs or protein): nuts, nut butter, olive oil, cheese, and chocolate are calorie-dense staples. Protein rebuilds muscles that break down during hard hiking: jerky, hard cheese, powdered milk, and freeze-dried meals with meat provide the protein your body needs to recover each night.
A well-planned backcountry menu balances all three macronutrients throughout the day. Start with a carb-heavy breakfast (oatmeal with nuts and dried fruit) for quick energy. Graze on a mix of fats and carbs during the day (trail mix, cheese and crackers, energy bars). End with a protein-rich dinner (freeze-dried meals, ramen with added peanut butter or summer sausage) to kickstart muscle recovery overnight.
Advanced meal planners calculate their calorie needs based on body weight, pack weight, terrain, and temperature. A good starting point is 2,500 to 3,500 calories per day for moderate backpacking, increasing to 4,000 to 5,000 for strenuous high-mileage or cold-weather treks. Aim for about 1.5 to 2 pounds of food per person per day — if your food weighs significantly more than that, you are probably carrying items with too much water content (canned goods, fresh produce) that would be better replaced with dehydrated or freeze-dried alternatives.
E. Real-World Experiences
Ready to put your backpacking skills to the test? These experiences offer some of the best backcountry adventures in the country.
Philmont Scout Ranch
Northern Tier — Charles L. Sommers Canoe Base
John Muir Trail
Glacier National Park Backcountry
Grand Canyon Rim-to-Rim
F. Organizations
These organizations support backpackers through trail maintenance, education, and advocacy.
Dedicated to protecting trails and the hiking experience through advocacy, volunteer trail work, and outdoor education.
Organization: American Hiking Society — https://americanhiking.org/
Protects, preserves, and promotes the Pacific Crest National Scenic Trail from Mexico to Canada.
Organization: Pacific Crest Trail Association — https://www.pcta.org/
Manages and protects the Appalachian Trail through a network of volunteers and partners spanning 14 states.
Organization: Appalachian Trail Conservancy — https://appalachiantrail.org/
Teaches people to enjoy the outdoors responsibly through education, research, and outreach programs.
Organization: Leave No Trace Center for Outdoor Ethics — https://lnt.org/
Offers wilderness courses in backpacking, mountaineering, and outdoor leadership for teens and adults.
Organization: NOLS (National Outdoor Leadership School) — https://www.nols.edu/
Works to complete, promote, and protect the 3,100-mile Continental Divide National Scenic Trail.
Organization: Continental Divide Trail Coalition — https://continentaldividetrail.org/