Camping Merit Badge — Complete Digital Resource Guide
https://merit-badge.university/merit-badges/camping/guide/
Introduction & Overview
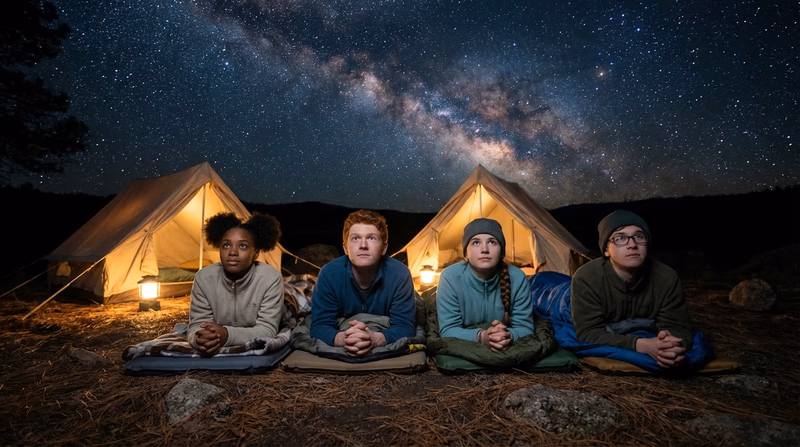
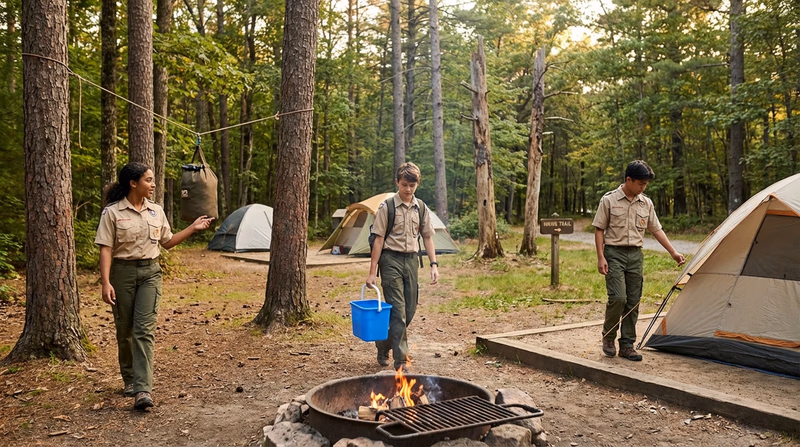
There is something magical about sleeping under the stars, cooking a meal over a crackling stove, and waking up to the sounds of the forest. Camping is one of the most fundamental Scouting experiences — it teaches you self-reliance, teamwork, and a deep appreciation for the natural world. The Camping merit badge is one of the badges required for Eagle Scout, and for good reason: it builds the outdoor skills that define what it means to be a Scout.
Whether you are pitching a tent for the first time or you are already logging your twentieth night under the sky, this guide will help you understand the knowledge and skills you need to camp safely, responsibly, and confidently.
Then and Now
Then — Camping as Survival
For thousands of years, “camping” was simply how humans lived. Indigenous peoples across every continent built temporary shelters, made fire, purified water, and navigated by the stars — not for fun, but for survival. When European explorers and pioneers crossed North America, their ability to make camp each night was the difference between life and death.
In 1907, Robert Baden-Powell took 20 boys to Brownsea Island off the coast of England for an experimental camp. They pitched tents, cooked their own food, tracked animals, and learned first aid. That camp launched the worldwide Scouting movement — and camping has been at its heart ever since.
- Purpose: Survival, exploration, military campaigns
- Mindset: Make do with what the land provides — shelter, food, water, fire
Now — Camping as Adventure
Today, camping is something you choose to do. Modern gear — lightweight tents, synthetic sleeping bags, portable stoves — makes it safer and more comfortable than ever. But the core skills remain the same. You still need to know how to pick a campsite, build a shelter, treat water, cook food, and handle emergencies. The difference is that now you get to enjoy the experience.
- Purpose: Recreation, personal growth, teamwork, conservation
- Mindset: Be prepared, leave no trace, and savor every moment outdoors
Get Ready! With 20 nights of camping ahead of you, this badge is a real adventure. You will learn everything from first aid to fire safety, from packing a backpack to planning a menu. Let’s get started.
Kinds of Camping
Camping comes in many forms. Understanding the different styles helps you prepare for the right experience — and might inspire you to try something new.
Car Camping
Car camping means driving to a campsite and setting up camp right next to your vehicle. It is the most accessible form of camping because you can bring heavier gear — coolers, larger tents, camp chairs, even a dutch oven. Most state parks and national forest campgrounds support car camping with fire rings, picnic tables, and restroom facilities.
Car camping is a great place to start if you are new to the outdoors. It gives you a safety net while you build your skills.
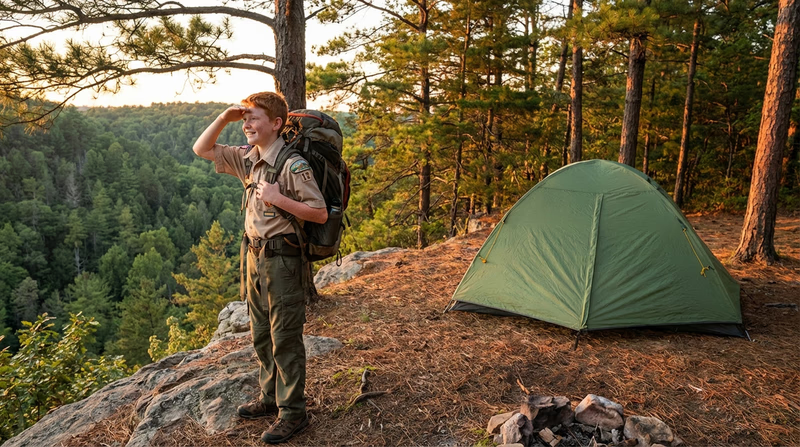
Backpacking
Backpacking takes you beyond the road. You carry everything you need — tent, sleeping bag, food, water, stove — in a pack on your back. Backpacking trips range from a single overnight to multi-day treks through remote wilderness. Weight matters a lot when backpacking, so every item must earn its place in your pack.
Canoe and Kayak Camping
Water-based camping combines paddling with overnight stays at waterside campsites. You load your gear into a canoe or kayak and paddle to your destination. Since the boat carries the weight, you can bring more gear than backpacking — but you still need to pack carefully to keep everything dry.
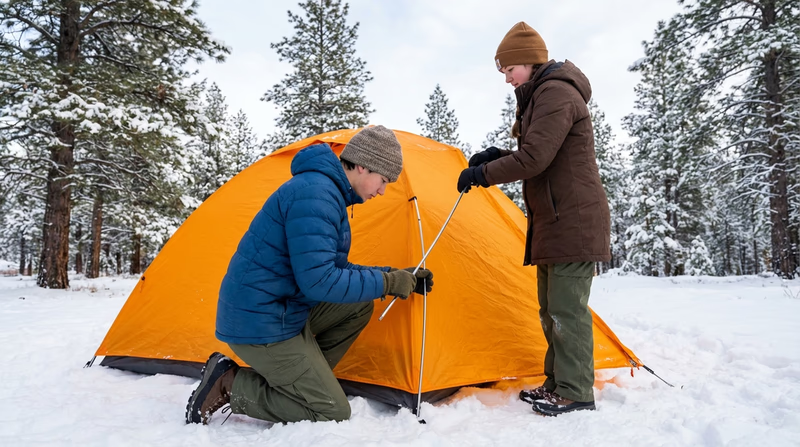
Winter and Snow Camping
Camping in cold weather and snow is a serious challenge — and one of the most rewarding experiences in Scouting. You need specialized insulation, a cold-rated sleeping bag, and knowledge of how to prevent hypothermia and frostbite. Snow camping can include building snow shelters like quinzhees or sleeping in four-season tents designed to handle wind and heavy snowfall.
Hammock Camping
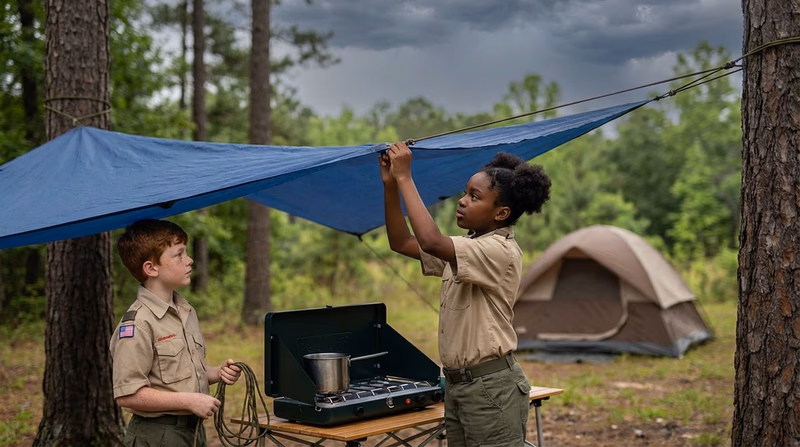
Hammock camping replaces the traditional tent with a lightweight hammock strung between two trees. A rain tarp goes overhead and an underquilt or sleeping pad keeps you warm from below. Hammock camping is popular with ultralight backpackers because it saves weight and gets you off the ground — no rocks or roots poking your back.
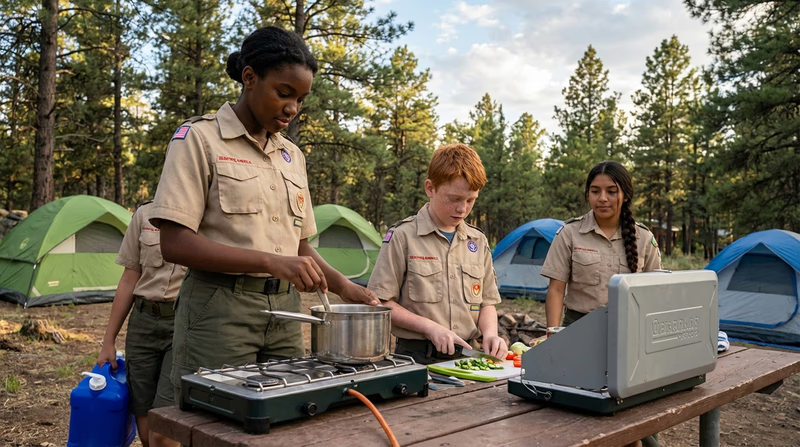
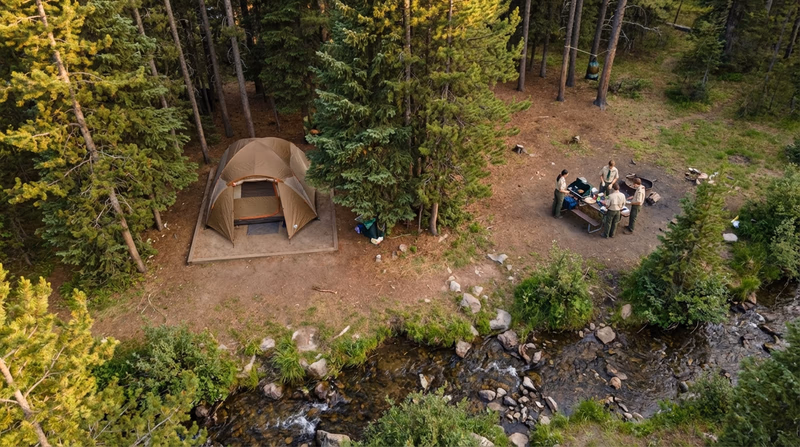
Group and Scout Camping
This is the kind of camping you do most often as a Scout — organized campouts with your patrol and troop. Group camping emphasizes the patrol method: everyone has a role, from cooking to cleanup, and you work together to run a smooth camp. Scout camping builds leadership, teamwork, and responsibility in ways that solo camping simply cannot.
Now that you know the many ways to camp, it is time to dive into the requirements. First up: staying safe in the outdoors.
Req 1a — Camping Hazards
Safety is the foundation of every great camping trip. Before you can enjoy the outdoors, you need to understand the risks — and know how to handle them. This requirement teaches you to think like a prepared camper: someone who sees trouble coming and takes action before it becomes an emergency.
The Four-Step Safety Framework
When the requirement says “anticipate, help prevent, mitigate, and respond,” it is giving you a four-step framework for dealing with any hazard:
- Anticipate — Think ahead. What could go wrong? Research the area, check the weather, and learn about local wildlife before you leave home.
- Prevent — Take action to stop hazards from happening. Store food properly to avoid attracting bears. Wear sturdy boots to prevent ankle injuries. Choose a safe campsite away from dead trees.
- Mitigate — If something does go wrong, reduce the damage. Carry a first-aid kit so you can treat injuries quickly. Bring extra layers so a sudden cold snap does not become hypothermia.
- Respond — When an emergency happens, act decisively. Know when to treat a problem yourself and when to call for help.
Common Camping Hazards
Here are the hazards you are most likely to face while camping. For each one, think about how you would anticipate, prevent, mitigate, and respond.
Wildlife Encounters
Animals live in the places where you camp. Most of them — deer, squirrels, birds — are harmless. But some, like bears, mountain lions, venomous snakes, and even raccoons, can create dangerous situations if you are not prepared.
Falling and Terrain Injuries
Uneven ground, wet rocks, steep slopes, and loose gravel are responsible for more camping injuries than any animal. A twisted ankle miles from the trailhead can turn a fun trip into a rescue situation.
- Wear boots with good ankle support and traction
- Use trekking poles on steep or rocky terrain
- Watch where you step, especially around water crossings
- Set up camp on level ground away from cliff edges
Fire Hazards
Campfires and camp stoves can cause burns, start wildfires, or produce dangerous carbon monoxide. Fire is one of the most useful — and most dangerous — tools in camp.
Getting Lost
Even experienced campers can lose their way, especially in dense forest, fog, or unfamiliar terrain. Disorientation is a real hazard that can lead to panic, exhaustion, and exposure.
Waterborne Hazards
Streams, rivers, and lakes can look inviting but hide serious risks. Flash floods can fill a dry creek bed in minutes. Cold water can cause hypothermia even on a warm day. And untreated water can contain parasites and bacteria that will make you very sick.
- Never camp in a dry wash or creek bed — these are flash flood zones
- Stay out of fast-moving water unless you have proper training and equipment
- Always treat water before drinking it (boiling, filtering, or chemical treatment)
Insect and Plant Hazards
Mosquitoes, ticks, bees, and poisonous plants like poison ivy, poison oak, and poison sumac are common in most camping areas. These hazards are rarely life-threatening, but they can ruin a trip if you are not prepared.
Bug and Plant Protection
Simple steps to stay comfortable- Apply insect repellent containing DEET or picaridin to exposed skin.
- Wear long sleeves and pants when hiking through brush.
- Check your body for ticks every evening, especially behind your ears, around your waistband, and behind your knees.
- Learn to identify poison ivy (“leaves of three, let it be”), poison oak, and poison sumac before your trip.
- If you are allergic to bee stings, carry an epinephrine auto-injector and make sure your patrol knows where it is.
Your Pre-Trip Safety Plan
Before every campout, sit down with your patrol or family and create a simple safety plan. It does not need to be complicated — a quick conversation covering these points can prevent most emergencies:
- Destination hazards: What animals, weather, and terrain risks exist where you are going?
- Group fitness: Is everyone physically able to handle this trip?
- Emergency contacts: Who do you call if something goes wrong? Where is the nearest hospital?
- Communication plan: Will you have cell service? If not, what is your backup communication method?
- Gear check: Does everyone have the outdoor essentials, first-aid supplies, and appropriate clothing?
🎬 Video: Camping Safety Tips — https://youtu.be/JQEcfZ-jBv8?si=Vuvtm0nJmZIdfe2c
Req 1b — Weather Awareness
Weather is the single biggest factor that can change a camping trip from amazing to miserable — or even dangerous. Unlike most other hazards, weather affects everything: your shelter, your clothing, your food prep, your trail conditions, and your mood. The good news is that weather is also the most predictable hazard, as long as you pay attention.
Before You Go — Check the Forecast
The most important thing you can do is check the weather forecast before you leave home. A 10-day forecast gives you a general picture, but focus on the 48 hours around your trip for the most accurate predictions.
Pre-Trip Weather Check
What to look for in a forecast- High and low temperatures: Will you need cold-weather gear or sun protection?
- Precipitation chance: Rain, snow, sleet — each requires different preparation.
- Wind speed and direction: Strong winds affect tent setup and fire safety.
- Severe weather alerts: Thunderstorms, flash flood warnings, heat advisories.
- Sunrise and sunset times: Know how much daylight you have for activities.
Reading the Sky
Once you are in the field, you will not always have access to a weather app. Learning to read natural weather signs is a valuable skill that campers have relied on for centuries.
Clouds tell a story:
- High, thin cirrus clouds — Fair weather for now, but these often arrive 24–48 hours before a front. Change may be coming.
- Puffy cumulus clouds — Fair weather clouds. If they stay small and white, enjoy the day.
- Towering cumulonimbus clouds — Thunderstorm clouds. These can build rapidly on a warm afternoon. If you see them growing tall, prepare for lightning, heavy rain, and possibly hail.
- Low, gray stratus clouds — Overcast skies that often bring steady rain or drizzle.
Other natural signs:
- A sudden drop in temperature or shift in wind direction often means a front is approaching
- If morning dew is heavy, the day will likely be fair; if there is no dew, rain may be coming
- Animals often become quiet before a storm

Preparing for Bad Weather
Even with the best forecast, weather can turn on you. The key is to have a plan before the storm hits.
Rain
Rain is the most common weather challenge. It makes everything harder — gear gets wet, trails get slippery, and morale drops fast. But with the right preparation, rain is completely manageable.
- Shelter: Make sure your tent is properly waterproofed and all seams are sealed. Pitch your rain fly taut so water runs off instead of pooling. Set up a tarp over your cooking area.
- Gear: Pack all clothing and sleeping bags in waterproof stuff sacks or trash bag liners inside your pack. Nothing ruins a campout faster than a wet sleeping bag.
- Clothing: Wear a waterproof outer layer and avoid cotton. Wet cotton pulls heat away from your body.
Thunderstorms and Lightning
Lightning kills more people in the outdoors than any other weather hazard. If you can hear thunder, you are close enough to be struck.
Extreme Heat
Hot weather increases the risk of heat exhaustion and heatstroke. Your body can overheat quickly during physical activity, especially if you are not drinking enough water.
- Drink water before you feel thirsty — by the time you are thirsty, you are already dehydrating
- Rest during the hottest part of the day (noon to 3 p.m.)
- Wear a hat, sunscreen, and lightweight, light-colored clothing
- Watch for signs of heat illness: headache, dizziness, nausea, and confusion
Extreme Cold
Cold weather brings the risk of hypothermia and frostbite. These conditions can develop faster than most people realize, especially when wind and moisture are involved.
- Dress in layers (base layer, insulating layer, outer shell) and adjust as needed
- Stay dry — wet clothing accelerates heat loss dramatically
- Eat high-calorie foods and drink warm fluids to fuel your body’s heat production
- Watch for signs of hypothermia in yourself and others: uncontrollable shivering, slurred speech, confusion, and drowsiness
Weather Resources
National Weather Service Free, accurate weather forecasts for any location in the United States. Bookmark your local office before your trip. Link: National Weather Service — https://www.weather.gov/🎬 Video: Wet Weather Camping Mistakes — https://youtu.be/HzktQBzrSQw?si=AZLAxj0KuDmWjhLl
🎬 Video: Cold Weather Camping Tips — https://youtu.be/Ftc3t93thDw?si=I9UE43d5wRYCQi6k
Req 1c — Camping First Aid
This requirement covers ten specific conditions you might encounter while camping. For each one, you need to know two things: how to prevent it and how to treat it. Let’s walk through them all.
Hypothermia
What it is: Your body loses heat faster than it can produce it, and your core temperature drops below 95°F (35°C). Hypothermia can happen in any season — even on a cool summer evening if you are wet and exposed to wind.
Prevention: Dress in layers using moisture-wicking fabrics. Stay dry. Eat high-calorie foods and drink warm fluids. Avoid cotton clothing, which holds moisture and pulls heat away from your body.
First aid: Get the person out of the cold and wind. Remove any wet clothing and replace with dry layers or a sleeping bag. Give them warm (not hot) drinks if they are alert and conscious. Apply gentle warmth to the core — neck, armpits, groin. Do not rub their skin or put them in hot water. Seek medical help immediately for severe cases (confusion, drowsiness, loss of consciousness).
Frostbite
What it is: Skin and underlying tissue freezes, usually affecting fingers, toes, ears, nose, and cheeks. Frostbitten skin looks white or grayish-yellow, feels waxy or numb, and may be hard to the touch.
Prevention: Cover all exposed skin in cold weather. Wear insulated, waterproof gloves and boots. Keep your feet dry with moisture-wicking socks. Wiggle your fingers and toes regularly to maintain circulation.
First aid: Get to a warm environment. Warm the affected area gradually by placing it in warm (not hot) water — around 104°F (40°C). Do not rub, massage, or apply direct heat like a campfire or heating pad. Do not break any blisters that form. Wrap loosely with sterile bandages and seek medical attention.
Heat Reactions
Heat-related illnesses exist on a spectrum from mild to life-threatening. Know the differences:
Heat cramps — Painful muscle spasms, usually in the legs or abdomen. Caused by dehydration and electrolyte loss. Treat by resting in shade, stretching gently, and drinking water with electrolytes.
Heat exhaustion — Heavy sweating, weakness, cold/clammy skin, nausea, dizziness, and a fast but weak pulse. Move the person to shade, loosen clothing, apply cool wet cloths, and give small sips of water. If symptoms worsen or last more than an hour, get medical help.
Heatstroke — A medical emergency. The body’s cooling system fails. Skin is hot, red, and dry (no sweating). Temperature may exceed 103°F. Confusion, rapid pulse, and possible loss of consciousness. Call 911 immediately. Cool the person rapidly with cold water, ice packs to the armpits/neck/groin, or any available means.
Prevention: Drink water before you feel thirsty. Rest in shade during peak heat hours. Wear light-colored, loose-fitting clothing. Acclimatize gradually to hot conditions.
Types of Heat Reactions — National Weather Service Detailed guide to recognizing and treating heat cramps, heat exhaustion, and heatstroke. Link: Types of Heat Reactions — National Weather Service — https://www.weather.gov/safety/heat-illnessDehydration
What it is: Your body loses more water than you take in. Signs include dark urine, dry mouth, headache, fatigue, dizziness, and reduced urine output.
Prevention: Drink water regularly throughout the day, not just when you are thirsty. A good rule of thumb is at least half a liter per hour during physical activity in warm weather. Eat salty snacks to help your body retain water.
First aid: Rest in shade and drink water in small, frequent sips. If the person is vomiting or cannot keep fluids down, seek medical help.
Altitude Sickness
What it is: When you travel to elevations above 5,000–8,000 feet, the reduced oxygen can cause headache, nausea, fatigue, dizziness, and shortness of breath. In severe cases, it can lead to life-threatening conditions like high-altitude pulmonary edema (HAPE) or high-altitude cerebral edema (HACE).
Prevention: Ascend gradually — no more than 1,000 feet of elevation gain per day above 8,000 feet. Stay well-hydrated. Avoid alcohol. Give your body time to acclimatize before strenuous activity.
First aid: The best treatment is descent. Move to a lower elevation. Rest, drink fluids, and take over-the-counter pain relievers for headache. If symptoms are severe (confusion, difficulty walking, persistent vomiting), descend immediately and seek emergency medical care.
Insect Stings
What it is: Stings from bees, wasps, hornets, and yellow jackets cause immediate pain, redness, and swelling. For most people, stings are painful but not dangerous. For people with allergies, a sting can cause a life-threatening allergic reaction called anaphylaxis.
Prevention: Avoid wearing perfume or scented products in camp. Do not swat at bees — stay calm and move away slowly. Keep food covered and clean up spills promptly. Wear shoes at all times around camp.
First aid: Remove the stinger by scraping it out with a flat edge (credit card, knife blade) — do not squeeze it with tweezers, which can inject more venom. Clean the area and apply a cold pack to reduce swelling. For someone with a known allergy, help them use their epinephrine auto-injector immediately and call for emergency help.
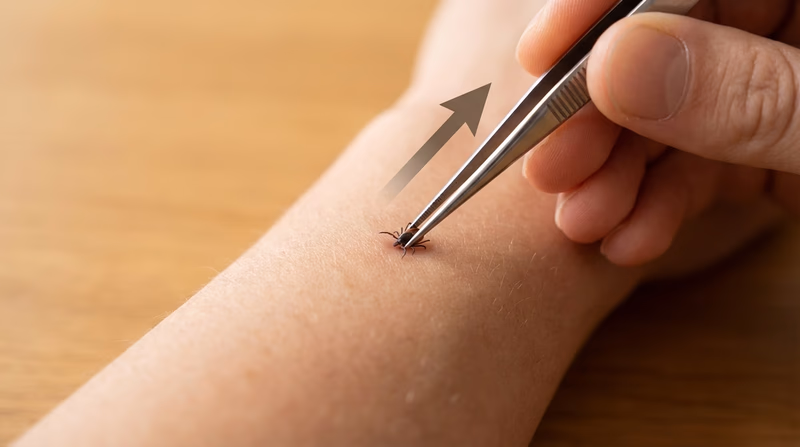
Tick Bites
What it is: Ticks attach to your skin and feed on blood. Some ticks carry diseases like Lyme disease, Rocky Mountain spotted fever, and ehrlichiosis. A tick must usually be attached for 24–48 hours to transmit disease, so early removal is critical.
Prevention: Wear long pants tucked into socks and light-colored clothing (so you can spot ticks easily). Apply insect repellent containing DEET or permethrin. Do a thorough tick check every evening — check behind your ears, around your waistband, behind your knees, and in your hair.
First aid: Remove the tick with fine-tipped tweezers. Grasp the tick as close to your skin as possible and pull straight out with steady, even pressure. Do not twist, crush, or burn the tick. Clean the bite area with soap and water or antiseptic. Save the tick in a sealed bag in case you develop symptoms and need to show it to a doctor.
Bad Bugs and Their Bites Visual guide to identifying common insect bites and stings, including treatment recommendations. Link: Bad Bugs and Their Bites — https://www.webmd.com/allergies/ss/slideshow-bad-bugsSnakebite
What it is: Most snakes in North America are not venomous, but four species are: rattlesnakes, copperheads, cottonmouths (water moccasins), and coral snakes. Venomous snakebites require immediate medical attention.
Prevention: Watch where you put your hands and feet. Step on top of logs rather than over them (snakes like to rest on the far side). Wear sturdy boots and long pants. Use a flashlight when walking around camp at night.
First aid: Keep the victim calm and still — movement spreads venom faster. Remove rings, watches, and tight clothing near the bite before swelling starts. Keep the bite area below heart level. Get to a hospital as quickly as possible. Do not cut the bite, try to suck out the venom, apply a tourniquet, or apply ice.
🎬 Video: First Aid for Snakebites — https://youtu.be/DFFzJIy-ak8?si=SnD_WCthjEE-Bi0W
Blisters
What it is: Friction between your skin and your sock or boot creates a fluid-filled bubble. Blisters are the most common camping injury and can slow you down or stop you in your tracks if they get bad enough.
Prevention: Wear properly fitted boots that you have broken in before the trip. Use moisture-wicking socks (never cotton). Apply moleskin or athletic tape to hotspots — areas of redness and irritation — as soon as you feel them.
First aid: If a blister has not popped, leave it intact — the fluid underneath is protecting the raw skin. Cover it with moleskin or a donut-shaped bandage to relieve pressure. If the blister has popped, clean the area with antiseptic, apply antibiotic ointment, and cover with a sterile bandage.
Hyperventilation
What it is: Rapid, shallow breathing caused by anxiety, panic, or stress. The person breathes out too much carbon dioxide, which causes tingling in the hands and feet, dizziness, lightheadedness, and a feeling of not being able to get enough air. It can look very scary, but it is usually not life-threatening.
Prevention: Build confidence through preparation and experience. Knowing your first aid, having the right gear, and trusting your training all reduce anxiety in stressful situations.
First aid: Stay calm and reassure the person. Have them sit down in a comfortable position. Coach them to breathe slowly: inhale through the nose for 4 counts, hold for 4 counts, exhale through the mouth for 4 counts. Having them breathe into a paper bag is an outdated technique — focused, slow breathing is more effective and safer.
Keep Learning
🎬 Video: Backpacking First Aid — https://youtu.be/nxExCQiWa_U?si=E-FC1vbHZYI0vxhb
Req 2 — Leave No Trace & Outdoor Code
Every time you camp, you leave a mark on the land — or at least you could. The Leave No Trace Seven Principles and the Outdoor Code exist to make sure that mark is as small as possible. These are not just rules to memorize; they are a way of thinking about your relationship with the outdoors.
The Leave No Trace Seven Principles
The Leave No Trace Center for Outdoor Ethics developed these seven principles to guide responsible outdoor recreation. They apply everywhere — from your local park to the most remote wilderness.
1. Plan Ahead and Prepare
Good planning prevents problems before they start. Research your destination, know the regulations, prepare for extreme weather, and plan your meals to minimize waste. When you plan well, you make better decisions in the field.
2. Travel on Durable Surfaces
Stick to established trails and campsites. Walking off-trail damages fragile plants and soil that can take years to recover. When hiking, walk single file in the center of the trail, even if it is muddy — stepping around mud widens the trail and causes erosion.
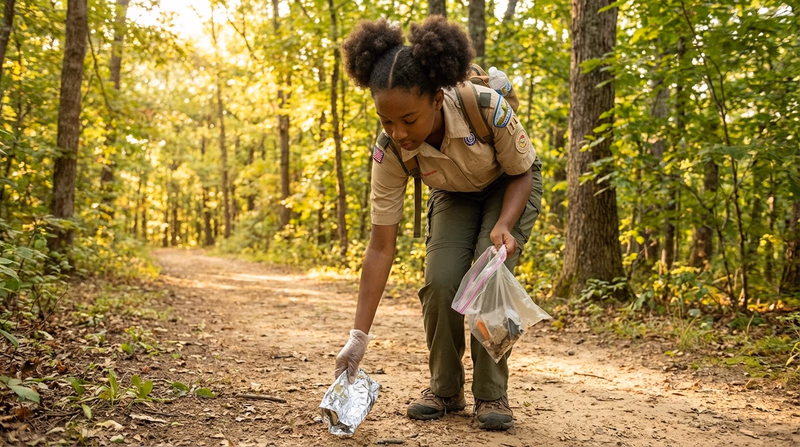
3. Dispose of Waste Properly
The simple version: pack it in, pack it out. Everything you bring into the outdoors leaves with you — food scraps, wrappers, hygiene products, everything. For human waste, use established latrines when available. In the backcountry, dig a cathole 6–8 inches deep at least 200 feet from water sources, trails, and campsites.
4. Leave What You Find
Resist the urge to take “souvenirs” from nature. Leave rocks, plants, flowers, and artifacts where you find them so the next person can enjoy the same experience. Do not build structures, dig trenches, or alter the campsite.
5. Minimize Campfire Impacts
Campfires can scar the landscape and cause wildfires. Use a camp stove for cooking whenever possible. If you do build a fire, use established fire rings, keep fires small, and burn wood down to ash. Make sure your fire is completely out before leaving.
6. Respect Wildlife
Observe animals from a distance. Never feed wildlife — it harms their health and changes their natural behavior. Store food securely and keep a clean camp to avoid attracting animals. Give nesting birds and animals with young extra space.
7. Be Considerate of Other Visitors
The outdoors belongs to everyone. Keep noise levels down, yield the trail to others, and set up camp out of sight of trails and other campers when possible. Leave your campsite better than you found it.
🎬 Video: Principles of Leave No Trace — https://youtu.be/Rpq01rO9ZR0?si=hjjnThExBUjG0aIW
The Outdoor Code
The Outdoor Code is the Scouting America pledge for outdoor behavior. It is shorter and broader than Leave No Trace, and it applies to your entire approach to the outdoors.
As an American, I will do my best to — Be clean in my outdoor manners, Be careful with fire, Be considerate in the outdoors, and Be conservation-minded.
Let’s break it down:
- Be clean in my outdoor manners — Do not litter. Dispose of waste properly. Leave your campsite cleaner than you found it.
- Be careful with fire — Follow fire regulations. Use established fire rings. Never leave a fire unattended. Make sure it is completely out before you leave.
- Be considerate in the outdoors — Respect other visitors, landowners, and the natural environment. Keep noise down and share the trail.
- Be conservation-minded — Protect the land, water, wildlife, and natural resources. Support conservation efforts and leave nature as you found it.
Writing Your Plan
This requirement asks you to create a personal and group plan for implementing these principles on your next outing. Here is a framework to help you think through it:
Personal LNT Plan
What I will do on my next campout- Research the area’s regulations and fire restrictions before I leave.
- Pack all my food in reusable containers to minimize trash.
- Bring a trash bag for packing out all waste, including food scraps.
- Stay on the trail and camp only on durable surfaces.
- Use a camp stove for cooking instead of building a fire (when practical).
- Check for ticks and clean up my campsite before leaving.
- Leave natural objects where I find them.
Group LNT Plan
What our patrol will do together- Assign a Leave No Trace leader to our duty roster.
- Plan meals to minimize waste and packaging before the trip.
- Establish a patrol trash system — someone carries the group trash bag.
- Conduct a campsite sweep before breaking camp to make sure nothing is left behind.
- Agree on noise guidelines to be considerate of other campers.
- Discuss fire safety rules as a patrol before the campout.
- Walk through camp together on departure and pick up any micro-trash (tiny pieces of wrapper, twist ties, etc.).
Req 3 — Map & Navigation
Choose ONE of the following navigation tools to pair with your topographic map:
- (a) Compass
- (b) GPS receiver
- (c) Smartphone with a GPS app
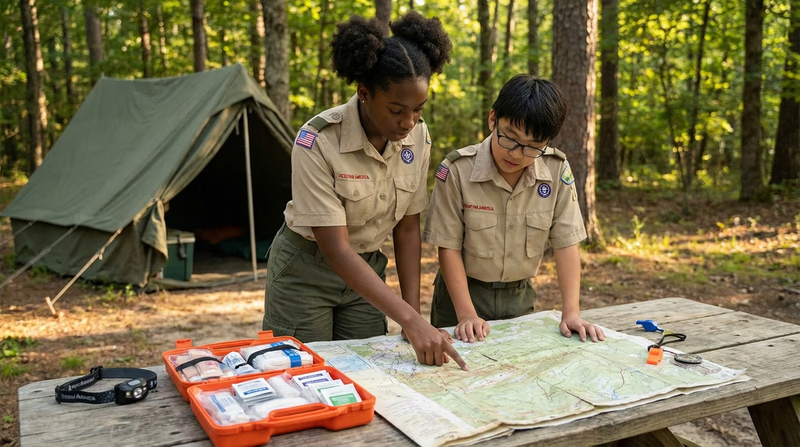
Navigation is one of the most important skills you can develop as a camper. Being able to read a map and find your way — even when the trail disappears or the weather closes in — gives you confidence and keeps you safe. This requirement asks you to plan a real trip and demonstrate that you can get to your campsite using a topographic map and a navigation tool of your choice.
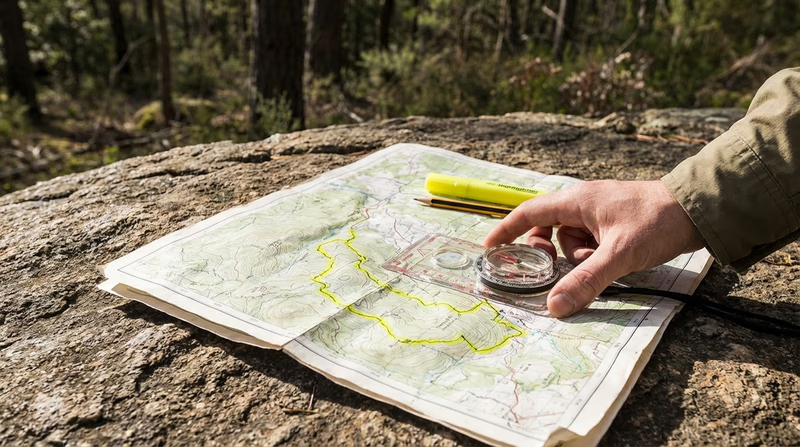
Understanding Topographic Maps
A topographic map (often called a “topo map”) is different from a regular road map. Instead of showing only streets and towns, a topo map shows the shape of the land using contour lines — curved lines that connect points of equal elevation.
Key features of a topo map:
- Contour lines — Each line represents a specific elevation. Lines close together mean steep terrain. Lines far apart mean gentle slopes.
- Contour interval — The elevation change between each contour line (printed in the map legend). Common intervals are 20 or 40 feet.
- Index contours — Every fifth contour line is darker and labeled with its elevation.
- Colors — Green represents vegetation (forests), white represents open areas, blue represents water, and brown represents contour lines.
- Scale — Tells you how much real-world distance is represented by a unit on the map. A common scale is 1:24,000, where 1 inch on the map equals 2,000 feet on the ground.
- Declination diagram — Shows the difference between true north (the North Pole) and magnetic north (where your compass points). This is critical for accurate navigation.
🎬 Video: How to Read a Topographic Map — https://www.youtube.com/watch?v=CoVcRxza8nI&t=45s
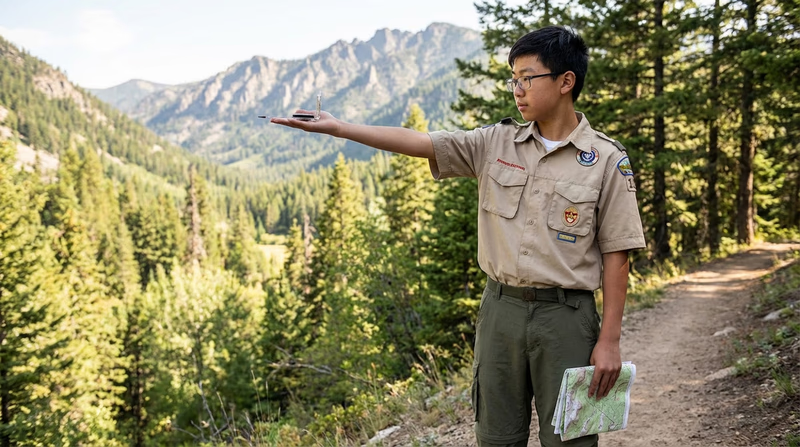
Option A: Compass Navigation
A compass is the classic navigation tool and the most reliable one in the outdoors. It has no batteries to die, no screen to crack, and no signal to lose. Every Scout should know the basics of compass use.
How to take a bearing:
- Place the compass on your map so the edge connects your current location to your destination.
- Rotate the compass housing (bezel) until the orienting lines inside align with the north-south grid lines on the map.
- Read the bearing (in degrees) at the direction-of-travel arrow.
- Adjust for magnetic declination (the difference between true north and magnetic north for your area).
- Hold the compass level in front of you, turn your body until the magnetic needle aligns with the orienting arrow, and walk in the direction the travel arrow points.
🎬 Video: How to Use a Compass — https://youtu.be/0cF0ovA3FtY?si=a1zPKFxoiE68S-0a
Option B: GPS Receiver
A handheld GPS receiver uses satellites to pinpoint your location with remarkable accuracy — usually within 10–30 feet. GPS receivers are popular with backcountry campers because they work in dense forest, in fog, and at night.
Key GPS skills:
- Mark waypoints for your trailhead, campsites, and water sources before you start
- Follow a track (breadcrumb trail) to retrace your steps
- Read coordinates (latitude and longitude) and match them to your topo map
- Carry extra batteries — GPS receivers drain batteries fast, especially in cold weather
🎬 Video: Using a GPS with a Map and Compass — https://youtu.be/mK3pOU_x4jQ?si=PftrLmk-58ruiEZj
Option C: Smartphone GPS App
Most modern smartphones have a built-in GPS chip that works even without cell service. Apps like Gaia GPS, AllTrails, and Avenza Maps let you download topographic maps for offline use, so you can navigate in areas with no signal.
Using your phone as a GPS:
- Download your map area at home while you have Wi-Fi — offline maps are essential
- Put your phone in airplane mode to save battery (GPS still works in airplane mode)
- Carry a portable battery pack for recharging
- Use a waterproof case or bag to protect your phone from rain and drops
- Mark waypoints for key locations before you leave
Your Written Trip Plan
This requirement asks you to create a written plan for an overnight trek. Here is what your plan should include:
Overnight Trek Plan
Essential elements for your written plan- Trip destination and campsite location (with map coordinates or landmark description).
- Route description — trailhead to campsite, including distance and elevation gain.
- Key navigation checkpoints along the route (trail junctions, stream crossings, landmarks).
- Emergency exit routes — alternate ways out if conditions change.
- Estimated travel time based on distance and terrain.
- Group members and their experience levels.
- Emergency contact information and nearest medical facility.
- Equipment list, food plan, and water sources.
Req 4 — Duty Roster & Leadership
Camping is a team effort. The patrol method — where a small group works together with shared responsibilities — is what makes Scout camping run smoothly. A duty roster is the tool that makes sure everyone knows their role and no task falls through the cracks.
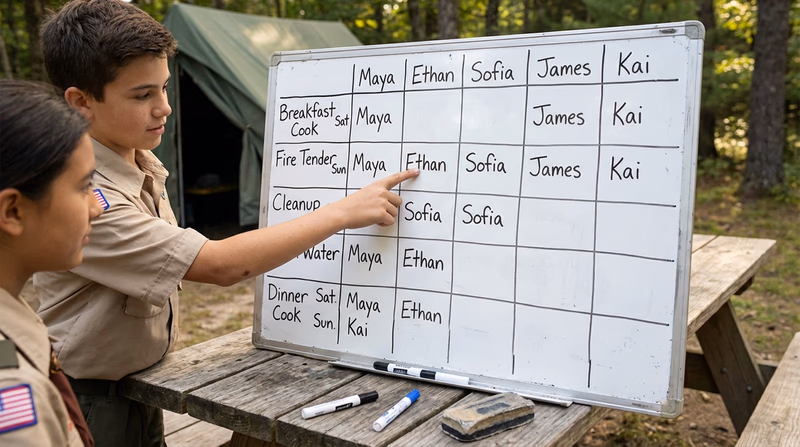
What Is a Duty Roster?
A duty roster is a chart or schedule that assigns specific tasks to each patrol member for the duration of a campout. Think of it as a game plan for camp. When everyone knows their job, camp runs like clockwork. When nobody knows their job, you end up with five people standing around and nobody starting the fire.
Common Camp Duties
Here are the typical roles you might assign on a duty roster:
- Fire/stove tender — Responsible for setting up and maintaining the cooking fire or camp stove, and ensuring the fire is completely out after each use.
- Cook — Prepares meals according to the menu plan. Works with the fire tender to coordinate cooking times.
- Water bearer — Makes sure the patrol always has a supply of treated drinking water.
- Quartermaster — Manages patrol gear — makes sure equipment is accounted for, properly stored, and in good condition.
- Cleanup crew — Washes dishes, cleans the cooking area, and properly disposes of waste water and food scraps.
- Fireguard — Ensures fire safety rules are followed and makes sure the campfire or stove area is left safe.
- Navigator — Leads the patrol on the trail using map and compass or GPS.
Building Your Duty Roster
A good duty roster is simple and clear. Here is an example format for a two-day, one-night campout with a six-person patrol:
| Duty | Friday Dinner | Saturday Breakfast | Saturday Lunch |
|---|---|---|---|
| Cook | Alex | Jordan | Taylor |
| Fire tender | Jordan | Taylor | Morgan |
| Cleanup | Taylor & Morgan | Morgan & Casey | Casey & Alex |
| Water bearer | Casey | Alex | Jordan |
Helping Others Prepare
Requirement 4b asks you to help a Scout patrol or Webelos unit prepare for a campout. This is a leadership opportunity — you are using your experience to guide others through the planning process.
Here is how to approach it:
Helping a Group Prepare
Key areas to cover- Create the duty roster together. Walk the group through each role and explain what it involves.
- Plan the menu as a team. Discuss what meals to prepare, who will cook each one, and what ingredients to buy.
- Make an equipment list. Go through personal gear (what each person needs to bring) and patrol gear (shared items like stoves, pots, tarps).
- Discuss the trip plan. Where are you going? What time do you arrive and depart? What are the emergency procedures?
- Help with camp setup. Show less experienced Scouts how to pitch a tent, set up a cooking area, and organize a campsite.
Menu Planning Basics
Since menu planning is part of helping a group prepare, here are the essentials:
- Keep it simple. One-pot meals are easy to cook and easy to clean up. Save the fancy recipes for when you have more experience.
- Plan for energy. Camping burns calories. Include protein, carbs, and fats in every meal.
- Think about weight and packaging. If you are backpacking, minimize heavy cans and excess packaging. If you are car camping, you have more flexibility.
- Account for dietary needs. Ask if anyone has food allergies or dietary restrictions before you finalize the menu.
- Plan snacks. Trail mix, granola bars, dried fruit, and jerky keep energy levels up between meals.
You will dive much deeper into menu planning in Requirement 8c — Menu Planning.
Scouting America Planning Worksheet An official worksheet to help organize your patrol's campout planning, including duty roster and menu sections. Link: Scouting America Planning Worksheet — https://filestore.scouting.org/filestore/boyscouts/pdf/512-505-2016-Scout-Planning-Worksheet.pdf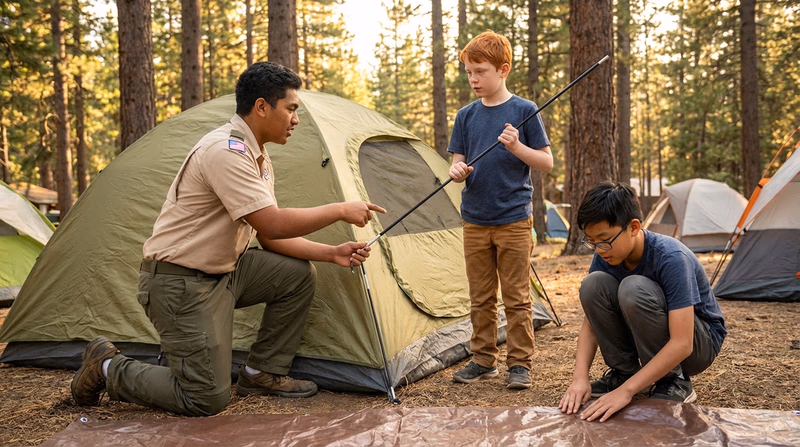
Req 5a — Camping Clothing
What you wear while camping can make the difference between a great trip and a miserable one. The right clothing keeps you warm when it is cold, cool when it is hot, dry when it is wet, and protected from sun, insects, and brush. The wrong clothing — especially cotton — can actually put you in danger.
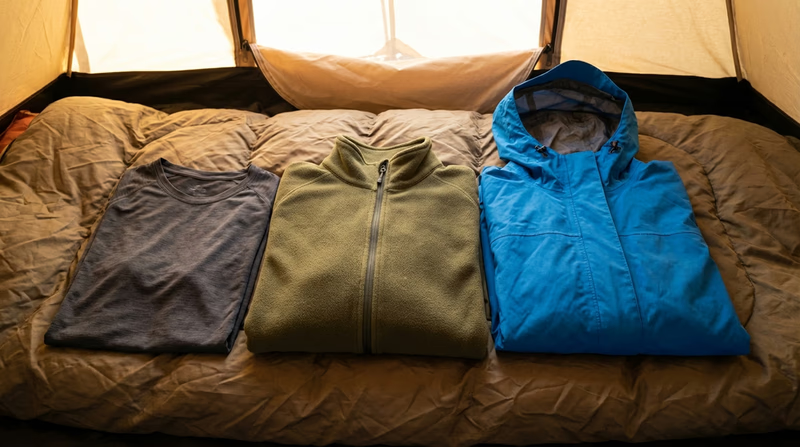
The Layering System
Layering is the practice of wearing multiple thin layers of clothing instead of one thick layer. Each layer serves a specific purpose, and you can add or remove layers as conditions change throughout the day.
Why layering works: Your body temperature changes constantly during a campout. You might be cold at dawn, warm while hiking uphill, and chilled again when you stop for a break in the wind. A single heavy jacket cannot adapt to all those conditions. But three thinner layers — each doing a different job — can.
The three layers:
Base Layer — Moisture Management
The base layer sits against your skin and has one job: move sweat away from your body. When sweat stays on your skin, it cools you down — great on a hot day, dangerous on a cold one.
- Best materials: Merino wool, polyester, nylon blends
- Avoid: Cotton. When cotton gets wet, it stays wet and pulls heat away from your body. Experienced hikers call cotton “death cloth” for a reason.
Mid Layer — Insulation
The mid layer traps warm air close to your body. This is where most of your warmth comes from.
- Best materials: Fleece, down, synthetic insulation
- Options: A fleece jacket is versatile and works in most conditions. Down jackets are lighter and warmer but lose their insulating power when wet. Synthetic insulation is heavier than down but keeps working even when damp.
Outer Layer — Weather Protection
The outer layer (or shell) protects you from wind and rain. It does not need to be warm — its job is to keep the elements out and let moisture escape from your inner layers.
- Best materials: Waterproof-breathable fabrics (Gore-Tex, eVent, or similar)
- Features to look for: A hood, pit zips for ventilation, sealed seams, and an adjustable hem
Warm Weather Clothing List
Warm Weather Camping Clothes
For temperatures above 60°F- Lightweight moisture-wicking t-shirts (2–3, synthetic or merino wool).
- Hiking shorts or convertible pants (zip-off legs give you flexibility).
- Lightweight long-sleeve shirt for sun and insect protection.
- Moisture-wicking underwear.
- Hiking socks — synthetic or merino wool blend (2–3 pairs, plus one extra).
- Sun hat with a brim (protects face, ears, and neck).
- Sunglasses.
- Light rain jacket (even if rain is not in the forecast).
- One warm layer (a fleece or light jacket for cool evenings).
- Sleepwear — a dry set of clothes reserved only for sleeping.
Cold Weather Clothing List
Cold Weather Camping Clothes
For temperatures below 40°F- Moisture-wicking base layer top and bottom (worn against the skin).
- Insulating mid layer — fleece jacket or down sweater.
- Insulating pants (fleece-lined hiking pants or separate insulating layer).
- Waterproof, windproof outer shell jacket.
- Waterproof outer shell pants (for rain or snow).
- Insulated winter hat that covers your ears.
- Insulated gloves or mittens (mittens are warmer because your fingers share heat).
- Warm scarf, gaiter, or balaclava for face and neck.
- Wool or synthetic hiking socks (2–3 pairs, plus dry socks for sleeping).
- Insulated boots (waterproof, rated for expected temperatures).
- Dry sleepwear kept in a waterproof bag.
The Cotton Rule
It is worth repeating: avoid cotton for outdoor activities. Cotton absorbs moisture and holds it against your skin. In warm weather, this leads to chafing and discomfort. In cold weather, it can lead to hypothermia. Synthetic fabrics and merino wool wick moisture away, dry quickly, and keep you comfortable in a wider range of conditions.
The one exception? Cotton can be acceptable in hot, dry desert environments where evaporative cooling is actually helpful. But for most camping situations, stick to synthetics and wool.
Cold Weather Gear Checklist A comprehensive cold-weather gear list from Scout Life magazine. Link: Cold Weather Gear Checklist — https://scoutlife.org/outdoors/outdoorarticles/6981/checklist-for-a-basic-cold-weather-outing/ Warm Weather Gear Checklist A warm-weather gear list from Scout Life magazine. Link: Warm Weather Gear Checklist — https://scoutlife.org/outdoors/outdoorarticles/6992/checklist-for-a-basic-warm-weather-outing/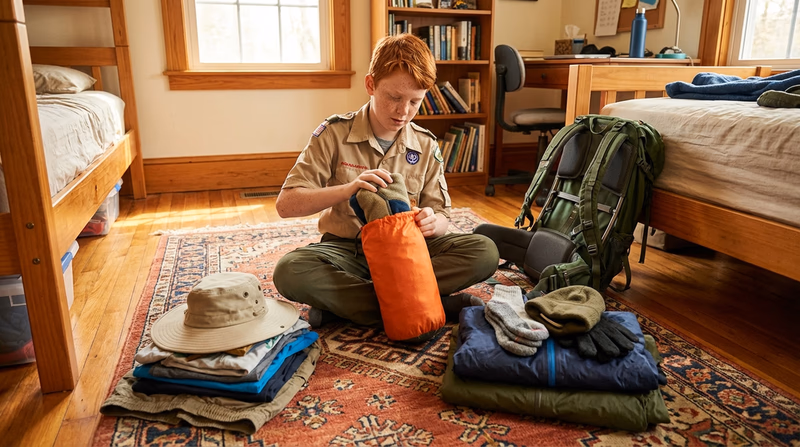
Req 5b — Footwear
Your feet carry you everywhere on a campout. They are your primary mode of transportation, and if they are hurting, your whole trip suffers. Choosing the right footwear for the conditions is one of the most important gear decisions you will make.
Why Footwear Matters
Your feet are complex — each one has 26 bones, 33 joints, and over 100 muscles, tendons, and ligaments. On a camping trip, you are asking them to work on uneven terrain, in wet conditions, and for longer hours than a typical day at home. The right footwear provides:
- Protection from rocks, roots, thorns, and sharp objects
- Support for your ankles on uneven ground
- Traction on slippery, muddy, or rocky surfaces
- Insulation from cold ground and wet conditions
- Comfort for long hours of standing, walking, and hiking
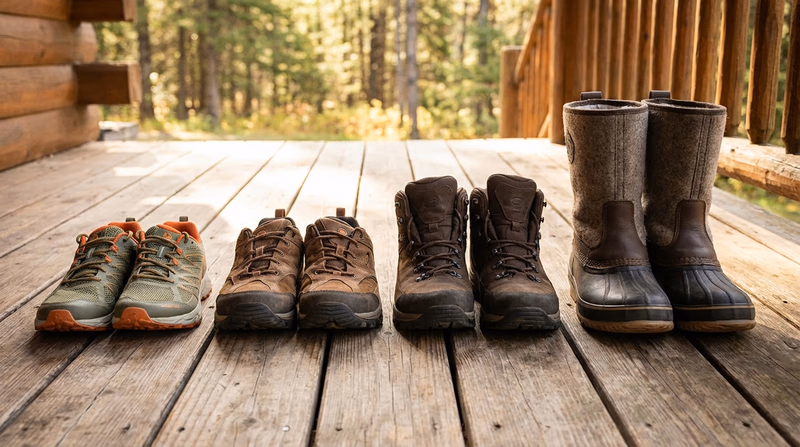
Footwear for Different Conditions
Warm and Dry Weather
In warm, dry conditions, you have the most flexibility. Lightweight hiking shoes or trail runners work well for most summer campouts. They breathe better than boots, dry faster if they get wet, and cause less fatigue because they weigh less.
- Trail runners — Lightweight, flexible, and breathable. Great for established trails and day hikes.
- Hiking shoes — Low-cut with more support and a stiffer sole than trail runners. Good all-around choice for summer camping.
Wet Weather
When rain is in the forecast, waterproof footwear becomes important. Wet feet lead to blisters, chafing, and in cold conditions, frostbite. Look for boots with waterproof membranes (like Gore-Tex) or treat leather boots with a waterproofing agent before your trip.
- Waterproof hiking boots — Keep water out while still allowing some breathability.
- Gaiters — Fabric covers that wrap around your lower leg and boot top. They keep rain, mud, and debris out of your boots.
Cold Weather
Cold weather demands insulated, waterproof boots. Cold feet are not just uncomfortable — they are a frostbite risk. Your boots need to keep your feet warm, dry, and protected from snow and ice.
- Insulated winter boots — Rated for the expected temperature range. Look for at least 200g of insulation for moderate cold, 400g or more for serious winter camping.
- Vapor barrier liners — Thin plastic bags or socks worn inside your boot to prevent sweat from reaching your insulation. Sounds odd, but they work in extreme cold.
- Boot warmers — Felt or foam insoles add extra insulation from the cold ground.
Rocky or Rugged Terrain
When the trail is steep, rocky, or covered with loose gravel, ankle support becomes critical. Mid-cut or high-cut hiking boots protect your ankles from rolling on uneven surfaces and give you stability when carrying a heavy pack.
- Hiking boots — Mid-to-high cut with stiff soles. The best choice for rough terrain and heavy packs.
- Mountaineering boots — Extremely stiff and supportive. Only needed for technical terrain, snow, or ice climbing.
Foot Care on the Trail
Even with the best footwear, you need to take care of your feet:
Trail Foot Care
Keep your feet happy- Break in new boots before your trip. Wear them around the house and on short walks for at least a week.
- Keep your toenails trimmed. Long nails jab into adjacent toes and the front of your boot on downhills.
- Address hotspots immediately. The moment you feel friction or rubbing, stop and apply moleskin or athletic tape.
- Change into dry socks at lunch and before bed.
- Air out your feet during rest stops — take off your boots and socks for a few minutes.
- Bring lightweight camp shoes (sandals or slip-ons) to give your feet a break around camp.
🎬 Video: Choosing Between Hiking Boots, Shoes, and Trail Runners — https://youtu.be/liJtac-GvZw?si=ToQQv90HyVEIqwe_
Req 5c — Gear Care & Storage
Your camping gear is an investment. A good sleeping bag can last 10 years or more — if you take care of it. But gear that is stuffed away dirty and wet will break down fast, lose its performance, and end up in the trash. Proper care and storage keeps your equipment working when you need it most.
Clothing Care
After Every Trip
- Wash promptly. Do not let sweaty, muddy clothes sit in your pack for days. Bacteria and mildew break down fabric and create odors that are hard to remove.
- Follow care labels. Technical fabrics (moisture-wicking shirts, rain jackets, fleece) have specific washing instructions. Most should be washed in cold water on a gentle cycle.
- Avoid fabric softener. Fabric softener coats fibers and destroys the moisture-wicking properties of synthetic clothing. It also damages the waterproof membranes in rain gear.
- Reapply DWR (Durable Water Repellent). If your rain jacket stops beading water, wash it according to the label and then tumble dry on low heat to reactivate the DWR coating. If that does not work, use a spray-on or wash-in DWR treatment.
Storage
- Store clothing clean and completely dry in a cool, dry place
- Hang rain jackets and shells rather than folding them tightly — this prevents crease damage to waterproof membranes
- Store wool items with cedar blocks or in sealed bags to protect against moths
Footwear Care
After Every Trip
- Remove insoles and loosen laces so air can circulate inside
- Knock off dried mud and debris
- For leather boots, clean with a damp cloth and apply leather conditioner or waterproofing treatment once dry
- For synthetic boots, rinse with clean water and let air dry
Storage
- Store boots at room temperature in a dry location
- Keep the shape by stuffing with newspaper or boot trees
- Do not store boots in a sealed plastic bag — trapped moisture causes mildew
- Apply waterproofing treatment before storing for extended periods
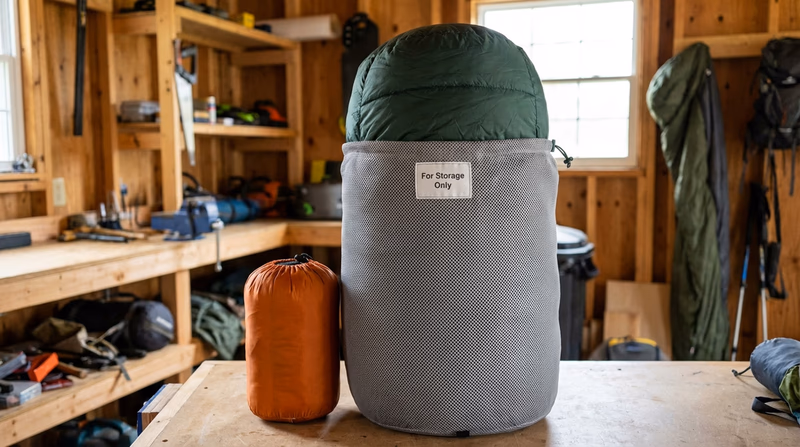
Sleeping Bag Care
Your sleeping bag is one of the most important — and most delicate — pieces of camping gear you own. Both down and synthetic insulation can be damaged by improper care.
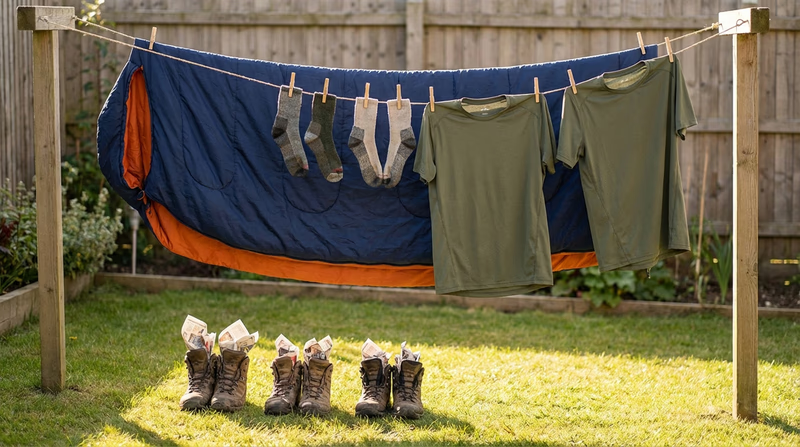
After Every Trip
- Air it out. Before packing up camp, drape your sleeping bag over a line or bush to air out moisture from your body heat.
- Spot clean any visible dirt with a damp cloth and mild soap.
- Deep wash occasionally. Sleeping bags only need a full wash once or twice a season, not after every trip. When you do wash:
- Use a front-loading washer (top-loaders with agitators can tear baffles)
- Use a specialized down wash or gentle, non-detergent soap
- Wash on a gentle cycle with cold water
- Rinse twice to remove all soap residue
Drying
- Tumble dry on the lowest heat setting
- Add a few clean tennis balls to break up clumps of insulation
- This process takes a long time — up to 2–3 hours. Do not rush it. Removing a sleeping bag before it is completely dry leads to mildew
Storage
Tent Care
Although this requirement focuses on clothing, footwear, and bedding, your tent is worth mentioning because it protects all of those things.
- Dry before storing. A wet tent packed away will develop mildew and delaminate its waterproof coating. Set it up at home to dry if you packed it wet.
- Clean the floor. Sweep out dirt, leaves, and sand. Wipe down with a damp cloth if needed.
- Store loosely. Like sleeping bags, tents should not be stored tightly compressed for long periods. Store in a large bag in a cool, dry place.
- Re-waterproof seams when water starts seeping through. Seam sealer is inexpensive and easy to apply.
The Bottom Line
Good gear care comes down to three principles:
- Clean it after every trip
- Dry it completely before storing
- Store it loosely in a cool, dry place
Follow these three rules and your gear will last for years of adventures.
Req 5d — Outdoor Essentials
The outdoor essentials are the items that every Scout should carry on every outdoor outing, regardless of how long or how far you are going. These are not optional extras — they are the gear that keeps you safe when things go wrong. A sunny day hike can turn into a cold, rainy night if you get lost or injured. The essentials are what get you through.
The Scout Outdoor Essentials
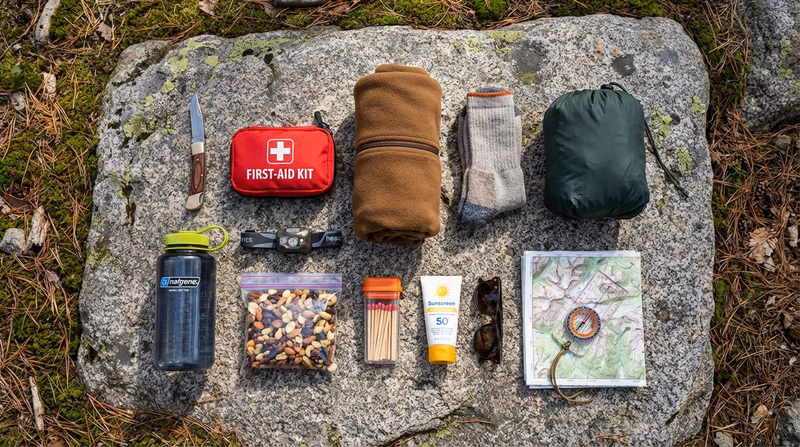
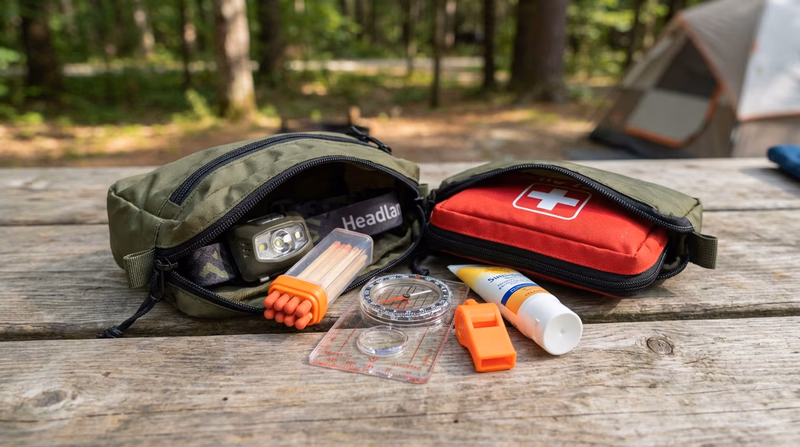
Scout Outdoor Essentials
Carry these on every outing- Pocketknife: A versatile tool for everything from cutting rope to preparing food to making emergency repairs. Remember: you need your Totin’ Chip to carry and use a knife on Scout outings.
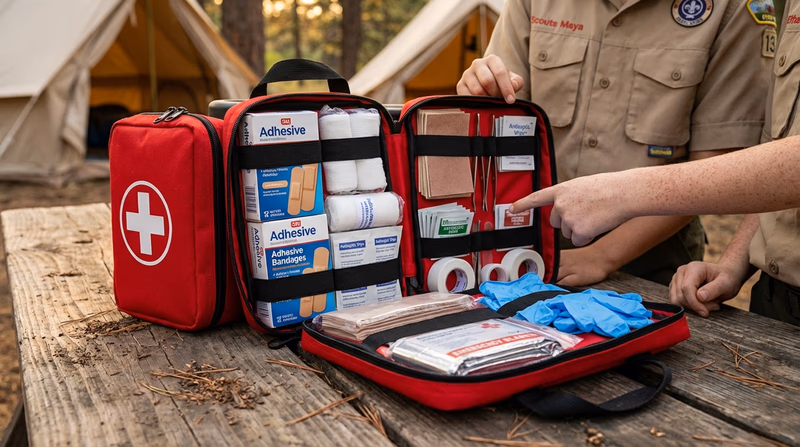
- First-aid kit: Contains the supplies to treat cuts, blisters, sprains, insect stings, and other common injuries. Your kit should be personalized — if you need specific medications (like an inhaler or epinephrine), they go in here.
- Extra clothing: At minimum, an extra pair of socks and an insulating layer. Conditions can change rapidly, and wet or cold clothing is a direct path to hypothermia. Having dry layers available can save your life.
- Rain gear: A lightweight waterproof jacket or poncho. Rain can arrive without warning, and staying dry is one of the most important factors in staying warm and safe.
- Water bottle: Dehydration affects your energy, judgment, and physical performance. Carry at least one liter of water, and know where you can refill and treat more along your route.
- Flashlight or headlamp: If your trip takes longer than expected and the sun goes down, you need a reliable light source. A headlamp is preferred because it keeps your hands free. Always carry extra batteries.
- Trail food: High-energy snacks like trail mix, granola bars, jerky, or dried fruit. Food is fuel — when your energy drops, so does your ability to think clearly and move safely.
- Matches and fire starters: The ability to start a fire can save your life in an emergency. Carry waterproof matches or a lighter, plus fire-starting material (cotton balls coated in petroleum jelly work well). Store them in a waterproof container.
- Sun protection: Sunscreen (SPF 30 or higher), sunglasses, and a hat. Sunburn and heat illness are preventable hazards that catch unprepared campers every season.
- Map and compass: Your most reliable navigation tools. Electronics can fail — batteries die, screens break, signals disappear. A paper map and a compass always work.
Why Each Essential Matters
Every item on this list addresses a specific survival need. Think of them in terms of what keeps you alive:
- Shelter and warmth: Extra clothing, rain gear, matches/fire starters
- Hydration: Water bottle
- Nutrition: Trail food
- Navigation: Map and compass
- Signaling and visibility: Flashlight/headlamp
- First aid: First-aid kit
- Tools: Pocketknife
Beyond the Basics
Depending on the trip, you may want to add a few more items:
- Whistle — Three blasts is the universal distress signal. A whistle carries much farther than your voice and takes almost no energy to use.
- Emergency shelter — A lightweight bivy sack or emergency space blanket weighs just ounces and can protect you from wind and rain if you are stuck overnight.
- Insect repellent — Essential in many regions during warm months.
- Duct tape — Wrap a few feet around your water bottle or trekking pole. It repairs torn gear, seals blisters, and fixes almost anything in a pinch.
- Notebook and pencil — For recording observations, leaving notes, or writing down directions.
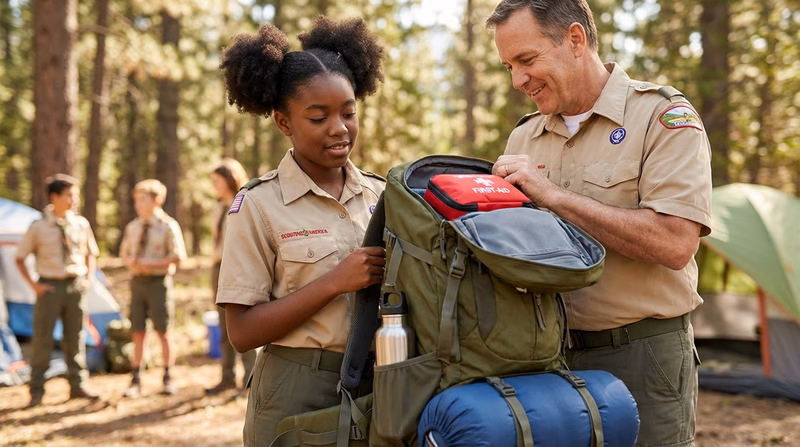
Req 5e — Pack Inspection
This requirement is your chance to show that you can put it all together. You are not just packing a bag — you are demonstrating that you understand what you need, why you need it, and how to organize it for a real campout. Think of this as a dress rehearsal for the field.
What Your Scoutmaster Is Looking For
When you present yourself for inspection, your Scoutmaster wants to see that:
- You are dressed appropriately for the expected weather and terrain
- Your pack contains the outdoor essentials from Requirement 5d
- Your clothing is appropriate for the season, as covered in Requirement 5a
- Your footwear is suitable for the conditions, as discussed in Requirement 5b
- Your gear is organized so you can find what you need without dumping everything out
Preparing for Inspection
Pre-Inspection Checklist
Make sure you can answer yes to each- Am I wearing weather-appropriate clothing (layers for cold, light and wicking for warm)?
- Am I wearing proper footwear for the terrain and weather?
- Does my pack contain all ten outdoor essentials?
- Do I have appropriate sleeping gear (sleeping bag rated for the expected temperatures)?
- Do I have my share of patrol gear and food?
- Is my pack organized so frequently needed items are accessible?
- Can I explain why each item is in my pack if asked?
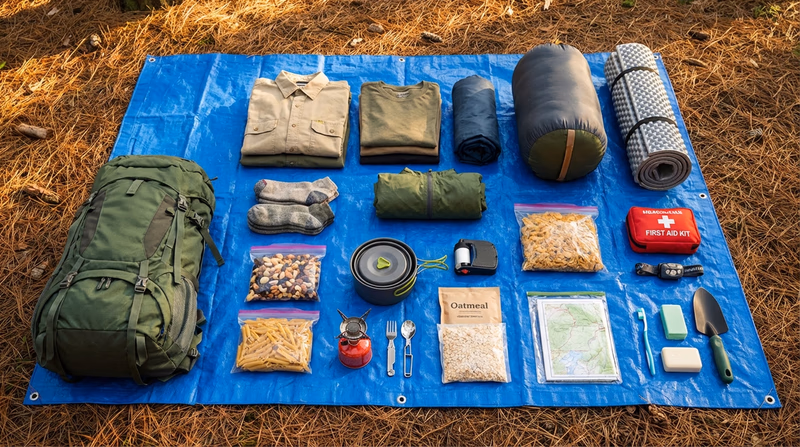
Pack Organization Tips
A well-organized pack shows your Scoutmaster that you think ahead. Here is a general guide for where things go:
- Top of pack / lid pocket — Items you need fast: rain gear, first-aid kit, snacks, map, headlamp, sunscreen
- Middle of pack — Heavier items close to your back: food, stove, water
- Bottom of pack — Sleeping bag (in a waterproof stuff sack), extra clothing
- Side pockets — Water bottles, small tools
- Hip belt pockets — Snacks, lip balm, compass — things you want without stopping
Common Mistakes
Things that will trip you up during inspection:
- Cotton clothing — If you are wearing a cotton t-shirt for a cold-weather campout, that is a red flag
- Missing essentials — Forgetting a flashlight, matches, or first-aid kit
- No rain gear — Even if the forecast is sunny, you need it
- Improperly stored sleeping bag — A sleeping bag rattling around loose in your pack will get wet and damaged
- Overpacking — Bringing too much is almost as bad as bringing too little. Extra weight exhausts you and slows you down. Every item should earn its place.
Your Opportunity to Shine
This inspection is not a test — it is a teaching moment. Your Scoutmaster is not trying to catch you making mistakes. They are making sure you are prepared to be safe and comfortable in the field. If they spot something missing or suggest a change, take it as helpful advice. The goal is for you to head into the outdoors ready for anything.
Req 6a — Types of Tents
Your tent is your home in the outdoors. It protects you from rain, wind, insects, and cold. Choosing the right tent for your trip — and knowing how to set it up properly — is a core camping skill.
Four Types of Tents
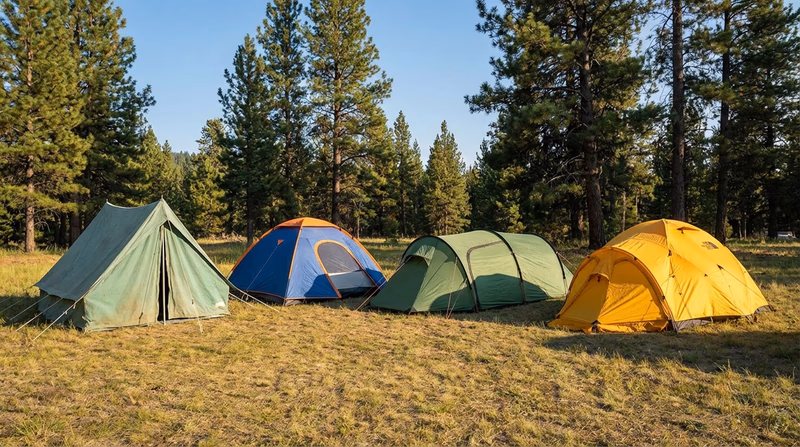
There are many tent designs, but here are four common types you should know:
1. A-Frame Tent
The classic tent shape — two poles forming an “A” at each end with a ridge pole across the top. A-frame tents have been used for generations and are simple in design.
- Best for: Car camping, Scout troops with traditional gear
- Pros: Simple design, easy to understand, good ventilation
- Cons: Heavy, limited headroom, less wind-resistant than modern designs, requires stakes for setup
- Capacity: Typically 2–4 people
2. Dome Tent
The most popular tent style today. Two or more flexible poles cross over each other to create a rounded, self-supporting structure. Dome tents stand up on their own without stakes (though you should always stake them down for wind resistance).
- Best for: General camping, backpacking, Scouts
- Pros: Lightweight, good headroom in the center, easy to pitch, freestanding (can be set up on any surface)
- Cons: Can be less stable in strong winds than tunnel tents, less floor space in the corners
- Capacity: 1–6 people depending on size
3. Tunnel Tent
Long, arching poles run parallel to create a tube-shaped shelter. Tunnel tents offer excellent floor space and headroom but require stakes and guylines to stay upright — they are not freestanding.
- Best for: Base camps, windy conditions, groups needing more interior space
- Pros: Excellent space-to-weight ratio, great wind resistance when oriented correctly, roomy interior
- Cons: Not freestanding (must be staked), harder to pitch in rocky ground where stakes do not hold
- Capacity: 2–8 people depending on size
4. Four-Season (Mountaineering) Tent
Built to handle the worst conditions — heavy snow, high winds, and extreme cold. Four-season tents use more poles, stronger fabrics, and steeper walls to shed snow and resist wind loading.
- Best for: Winter camping, snow camping, high-altitude expeditions
- Pros: Extremely strong and weather-resistant, can handle heavy snow loads, built for the harshest conditions
- Cons: Heavier and more expensive than three-season tents, less ventilation (can feel stuffy in warm weather)
- Capacity: 1–4 people
Tent Anatomy
No matter the type, most tents share these components:
- Body — The main fabric shell. Often made of nylon or polyester. Mesh panels provide ventilation and keep insects out.
- Rain fly — A waterproof outer cover that goes over the tent body. Some flies extend to the ground (full coverage), while others cover only the top.
- Floor — A waterproof tub-style floor that keeps ground moisture out. The floor usually extends a few inches up the walls.
- Poles — Aluminum or fiberglass rods that give the tent its shape. Aluminum is lighter and more durable.
- Stakes — Metal or plastic pins that anchor the tent and guylines to the ground.
- Guylines — Cords that attach to the fly or tent body and stake out to the ground for added wind stability.
- Vestibule — A covered area outside the tent door (under the rain fly) for storing boots and gear out of the rain.
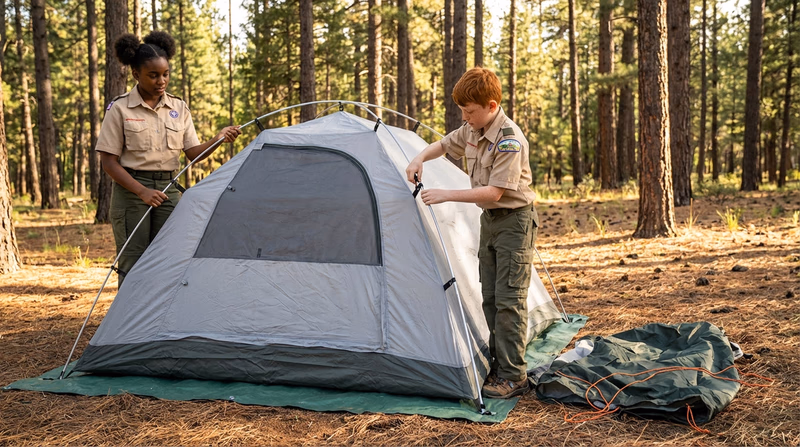
How to Pitch a Tent
Pitching a tent is a team task — it goes much faster and smoother with a partner.
Tent Pitching Steps
Work with your buddy- Choose a level spot free of rocks, roots, and standing water.
- Lay down a ground cloth (footprint) slightly smaller than the tent floor to protect the bottom and prevent moisture seeping up.
- Spread out the tent body on the ground cloth, with the door facing away from the wind.
- Assemble the poles and thread them through the pole sleeves or clip them to the tent body.
- Raise the tent by flexing the poles into position. Have your partner hold one side while you secure the other.
- Stake out the corners and guy out the rain fly taut so water runs off instead of pooling.
- Adjust guylines for stability, especially if wind is expected.
- Do a final check: is the fly taut? Are all stakes secure? Is the vestibule clear for gear storage?
Tent Care
A well-maintained tent lasts for years. A neglected one falls apart in a season.
- Dry before storing. This is the most important rule. A tent packed away wet will develop mold and mildew, and the waterproof coatings will delaminate. If you must pack a wet tent in the field, set it up to dry as soon as you get home.
- Shake out debris. Before packing, open the door and shake out dirt, leaves, and sand. Small grit acts like sandpaper on tent fabric over time.
- Clean gently. Use a damp sponge and mild soap if needed. Never machine wash a tent or use harsh detergents.
- Store loosely. Keep your tent in a large, breathable storage bag — not crammed in its stuff sack for months. The compression weakens fabric and coatings.
- Protect the floor. Always use a footprint or ground cloth. It prevents abrasion and punctures from rough ground.
- Re-seal seams when water starts seeping through. Seam sealer is inexpensive and easy to apply.
🎬 Video: Types of Tents — https://youtu.be/VB7YN3s1oOg?si=eww1BsIZUTBT-Kfo
Req 6b — Sanitation & Water Treatment
A clean camp is a healthy camp. Poor sanitation in the outdoors can spread illness through your entire patrol in hours. And untreated water — even from a crystal-clear mountain stream — can contain invisible organisms that will make you seriously sick. Understanding sanitation and water treatment is not glamorous, but it is essential.
Why Camp Sanitation Matters
When you camp, you create a temporary community in the outdoors. Without the plumbing, trash pickup, and water treatment you rely on at home, you and your patrol are responsible for managing all of it yourselves. Poor sanitation leads to:
- Illness — Bacteria, viruses, and parasites spread quickly in camp through contaminated water, unwashed hands, and improperly handled food
- Wildlife problems — Food scraps and waste attract bears, raccoons, rodents, and insects
- Environmental damage — Soap, food waste, and human waste can contaminate water sources and harm aquatic life
Camp Sanitation Practices
Keeping a Clean Camp
Daily sanitation habits- Wash hands with soap and water (or hand sanitizer) before handling food and after using the latrine.
- Wash dishes promptly after meals using the three-bucket system (see below).
- Strain food scraps from wash water and pack them out — never dump food waste on the ground.
- Dispose of wash water (gray water) at least 200 feet from any water source by scattering it broadly.
- Keep cooking and eating areas clean and free of food scraps.
- Store food and scented items in bear-resistant containers or hang them in a bear bag at least 200 feet from your sleeping area.
- Use designated latrines when available. In the backcountry, dig a cathole 6–8 inches deep, at least 200 feet from water, trails, and campsites.
- Pack out all trash, including food scraps, wrappers, and hygiene products.
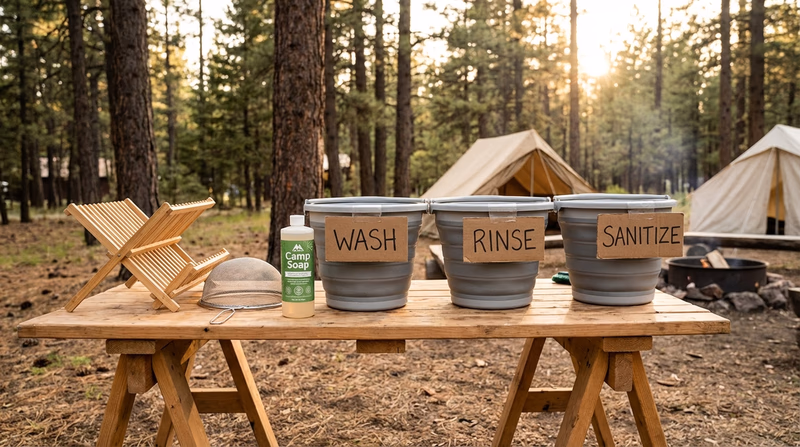
The Three-Bucket Dishwashing System
Proper dishwashing in camp prevents the spread of bacteria from meal to meal.
- Wash bucket — Hot water with a small amount of biodegradable camp soap. Scrub dishes, pots, and utensils.
- Rinse bucket — Clean hot water to rinse off soap residue.
- Sanitize bucket — Hot water with a capful of bleach or a sanitizing tablet. Dip items briefly to kill remaining bacteria.
After washing, let dishes air dry on a clean surface or dry them with a clean towel. Strain all wash water through a fine mesh strainer to catch food particles, and pack those particles out with your trash.
🎬 Video: How to Wash Dishes at Camp — https://youtu.be/4tNLdcjBlQc?si=stW_EkBO7EoTrniD
Why Water Treatment Is Essential
Water in the outdoors can look clean and taste fine but still contain dangerous organisms:
- Giardia — A microscopic parasite that causes severe diarrhea, cramps, and nausea. Found in streams, lakes, and springs throughout North America.
- Cryptosporidium — Another parasite that causes gastrointestinal illness. Resistant to some chemical treatments.
- E. coli and other bacteria — Can enter water from animal waste upstream.
- Viruses — Less common in North American backcountry but possible, especially near areas with human activity.
Even water from a clear, fast-flowing mountain stream can carry these organisms. Animals and other humans upstream can contaminate water sources that appear pristine. The rule is simple: treat all water before drinking it, no matter how clean it looks.
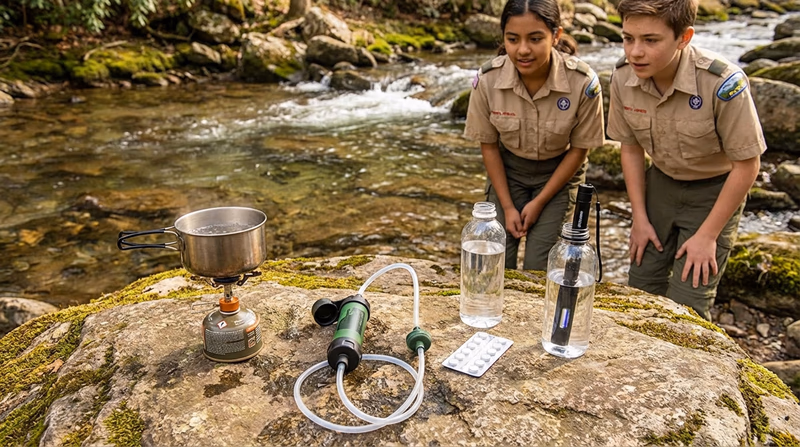
Methods of Water Treatment
You need to be able to demonstrate two of these methods for your counselor:
1. Boiling
The simplest and most reliable method. Boiling kills all pathogens — bacteria, viruses, and parasites.
- Bring water to a rolling boil for at least one minute (three minutes at elevations above 6,500 feet)
- Let it cool before drinking
- Pros: Kills everything, requires no special equipment beyond a pot and stove
- Cons: Uses fuel, takes time to cool, does not remove sediment or chemical contaminants
2. Water Filter (Pump or Gravity)
Portable water filters push or drip water through a fine membrane that physically blocks bacteria and parasites.
- Follow the manufacturer’s instructions for your specific filter
- Most filters have a pore size of 0.2 microns, which blocks bacteria and protozoa
- Pros: Fast, produces clean-tasting water, no chemicals needed
- Cons: Does not remove viruses (rare concern in North American backcountry), filters can clog with sediment, requires maintenance
3. Chemical Treatment
Chemical tablets or drops (iodine or chlorine dioxide) kill pathogens in water.
- Drop the tablet into your water bottle, shake, and wait the recommended time (usually 30 minutes to 4 hours depending on the product)
- Pros: Lightweight, inexpensive, easy to carry as a backup
- Cons: Takes time to work, can leave a chemical taste, some products are not effective against Cryptosporidium
4. UV Light Treatment
Devices like the SteriPEN use ultraviolet light to destroy the DNA of pathogens.
- Insert the UV device into your water bottle, press the button, and stir for the recommended time (usually 60–90 seconds)
- Pros: Fast, no chemical taste, effective against all pathogens including viruses
- Cons: Requires batteries, does not work in cloudy or sediment-heavy water, mechanical failure is possible
🎬 Video: Types of Water Purification — https://youtu.be/tD-Ya2SQk3k?si=S3WLcqg72LIVK85k
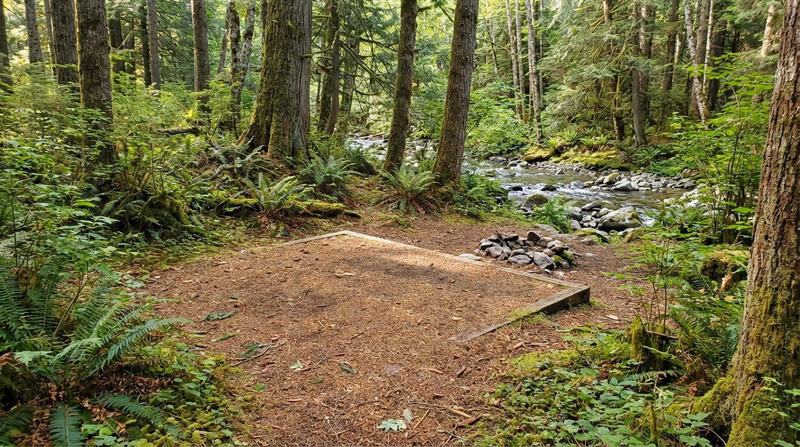
Req 6c — Campsite Selection
Choosing the right spot for your tent is one of the most important decisions you make when you arrive at camp. A great campsite means a comfortable, safe night. A poor choice can mean a sleepless night in a puddle, a tent flattened by wind, or worse. Here are the factors you need to consider.
Ground Surface
The ground under your tent matters more than most people think.
- Level ground — Look for the flattest spot available. Even a slight slope will have you sliding to one side of your tent all night. If you must camp on a slight incline, position your head uphill.
- Avoid rocks, roots, and bumps — Clear away sticks and small stones. A root under your back will make sleep impossible.
- Firm ground — You need ground that will hold your stakes. Sand is difficult for staking, and soft mud can shift under you. Look for packed soil or grass.
- No depressions — Low spots collect rainwater. What looks like a comfortable hollow on a sunny afternoon becomes a pond in a midnight rainstorm.
Drainage
Water flows downhill, and you do not want it flowing through your tent.
- Avoid low spots and dry creek beds — These fill with water during rain, sometimes rapidly.
- Look at the terrain around your site — Will water flow toward your tent or away from it?
- Never dig drainage trenches — This was an old-school technique that damages the ground. Instead, choose a site where water drains naturally.
Wind Protection
Wind can make camping uncomfortable and even dangerous.
- Use natural windbreaks — Trees, large rocks, and terrain features can block wind. Position your tent behind them, with the narrowest end facing the wind.
- Avoid ridgelines and exposed hilltops — These are the windiest spots. Camp on the leeward (downwind) side of a hill.
- Stake and guy out your tent — Even if it seems calm when you set up, wind can pick up at night. Secure guylines before it gets dark.
Distance from Water
Being near a water source is convenient, but being too close creates problems.
- Camp at least 200 feet from streams, lakes, and rivers — This protects water sources from contamination and keeps you out of flood zones.
- Close enough to access — You need water for cooking and drinking, so do not camp so far away that fetching water is a major expedition.
- Be aware of rising water — Rivers and streams can rise overnight from upstream rain. What looks like a safe distance in the evening can be dangerously close by morning.
Hazards Above and Below
Look up and look down before you pitch.
- Dead trees and branches — “Widowmakers” — dead branches hanging overhead — can fall without warning, especially in wind. Never camp under dead or damaged trees.
- Ant mounds and animal burrows — Check the ground for signs of insect colonies or animal homes. You do not want to discover a fire ant mound at 2 a.m.
- Poisonous plants — Look for poison ivy, poison oak, or poison sumac around your campsite.
Sun and Shade
- Morning sun is welcome — it dries dew from your tent and warms camp after a cold night.
- Afternoon shade keeps your tent from becoming an oven on hot days.
- If possible, position your tent to get morning sun on the east side and afternoon shade from trees on the west side.
Camp Layout
Your tent is just one part of your campsite. Think about the overall camp layout:
- Cooking area — Downwind from your sleeping area, at least 200 feet from tents in bear country.
- Latrine — At least 200 feet from water sources, cooking areas, and tents. Downhill from camp if possible.
- Bear bag / food storage — At least 200 feet from sleeping area, hung 12 feet high and 6 feet from the trunk.
- Fire ring — Use existing fire rings when available. Never build a new fire ring if one already exists nearby.
🎬 Video: How to Pick a Campsite — https://youtu.be/dfpE0x6xTPU?si=6HMKmTSPu-t1vVA3
🎬 Video: How to Choose a GREAT Campsite — https://youtu.be/WmtgLjC_9yw?si=3u34a985FeL3qqBQ
Req 6d — Backpacks
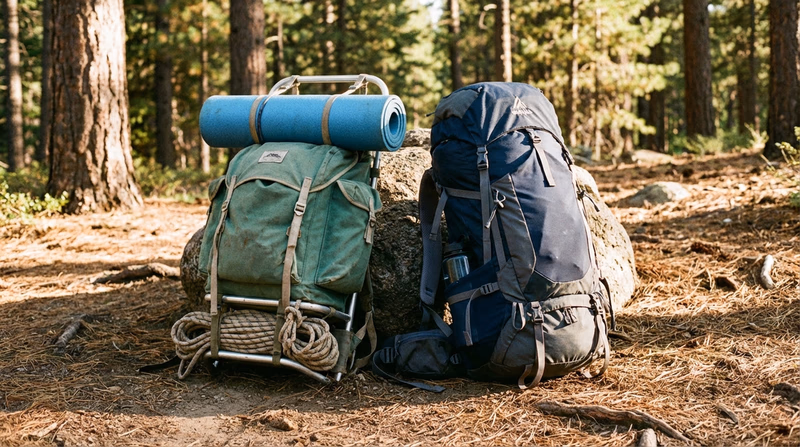
Your backpack is the piece of gear that carries everything else. Choosing the right type of pack affects your comfort, balance, and how much you can bring. There are two main categories: internal-frame and external-frame packs.
External-Frame Packs
An external-frame pack has a rigid frame (usually aluminum) on the outside, with a fabric bag attached to it. The frame is visible, and gear can be lashed to the frame itself.
Advantages:
- Ventilation — The frame holds the pack away from your back, creating an air gap that keeps you cooler. This is a significant advantage on hot days.
- Load organization — The rigid frame makes it easy to organize and access gear. You can strap bulky items (like a sleeping bag or tent) directly to the outside of the frame.
- Affordability — External-frame packs are generally less expensive than comparably sized internal-frame packs.
- Upright posture — The frame distributes weight high, which encourages a more upright walking posture and works well on maintained trails.
Disadvantages:
- Less stable — The high center of gravity makes external frames less stable on rough, uneven terrain. You may feel more “sway” when scrambling over rocks or crossing streams.
- Snag hazard — The rigid frame and external gear can catch on branches, rocks, and brush during off-trail travel.
- Heavier — The metal frame adds weight compared to modern internal-frame designs.
- Less comfortable on technical terrain — On steep or uneven ground, the pack does not move with your body as naturally.
Internal-Frame Packs
An internal-frame pack hides its support structure inside the pack bag. Lightweight aluminum stays or a plastic framesheet provide rigidity, but the pack sits closer to your body and moves with you.
Advantages:
- Stability — The pack hugs your body and keeps the weight close to your center of gravity. This is a huge advantage on rough terrain, steep trails, and when scrambling.
- Streamlined profile — No external frame to snag on branches or rocks. Better for bushwhacking and off-trail travel.
- Lighter — Modern internal-frame packs use lightweight materials and minimal framing, saving weight.
- Versatility — Internal-frame packs are available in a wide range of sizes and configurations, from ultralight daypacks to expedition-size haulers.
Disadvantages:
- Less ventilation — The pack sits against your back, which means more sweat on hot days. Some models use suspended mesh back panels to improve airflow, but they still run warmer than external frames.
- Harder to organize — Without the rigid external frame, gear can shift inside the pack. Packing efficiently takes more practice.
- Cost — Quality internal-frame packs tend to be more expensive than external-frame options.
Which One Should You Choose?
| Factor | External Frame | Internal Frame |
|---|---|---|
| Trail type | Maintained trails | Any terrain |
| Weather | Best in hot weather (ventilation) | Works in all weather |
| Load weight | Handles heavy loads well | Handles moderate to heavy loads |
| Stability | Less stable off-trail | Very stable |
| Price | Generally lower | Generally higher |
| Best for | Summer car camping, trail hikes | Backpacking, rugged terrain |
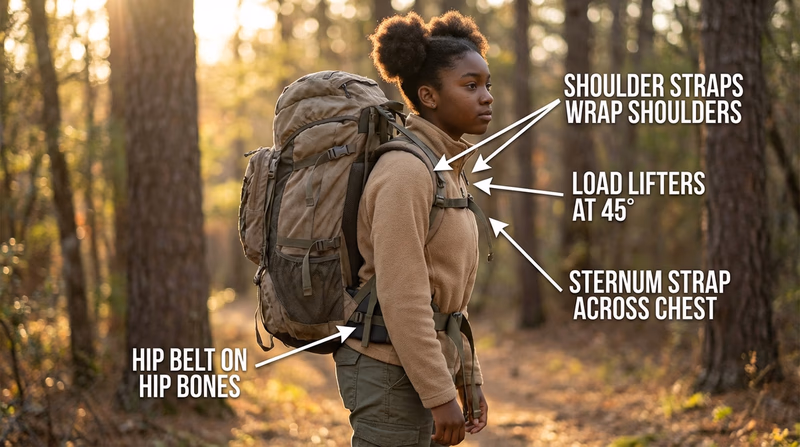
Pack Fit Basics
- Torso length matters more than your height. Measure from your C7 vertebra (the bump at the base of your neck) to the top of your hip bones.
- Hip belt should sit on top of your hip bones, not your waist. This is where 60–70% of the pack weight should rest.
- Shoulder straps should wrap over your shoulders and connect to the pack about 2 inches below the tops of your shoulders.
- Load lifter straps (the small straps that angle from the top of the shoulder straps to the top of the pack) should be angled at about 45 degrees.
🎬 Video: How to Choose a Backpack — https://youtu.be/LI1va-97f4w?si=Yt51x6hhjMUuf7uV
Req 6e — Sleeping Bags
After a long day of hiking and campcraft, a good night’s sleep restores your energy and keeps your spirits high. Your sleeping bag is the piece of gear most responsible for making that happen — especially in cold weather.
Types of Sleeping Bags
Sleeping bags are categorized by shape, insulation type, and temperature rating.
Shapes
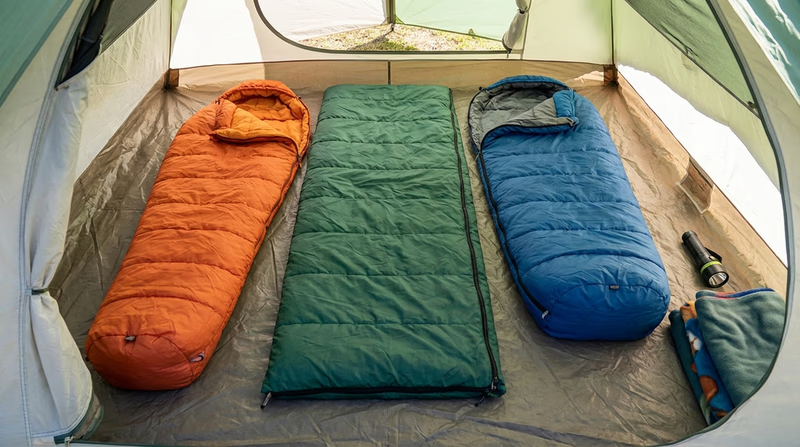
Mummy bags — Tapered from head to foot with a snug fit. The narrow shape reduces the amount of air your body has to warm, making mummy bags the warmest and lightest option. They include a hood that can be cinched around your face.
- Best for: Backpacking, cold weather, weight-conscious campers
Rectangular bags — Roomy and comfortable, with a boxy shape that gives you plenty of room to move around. They can usually be unzipped completely and used as a blanket.
- Best for: Car camping, warm weather, people who feel claustrophobic in mummy bags
Semi-rectangular (barrel) bags — A compromise between mummy and rectangular. Tapered at the feet but wider in the torso than a true mummy bag.
- Best for: Scouts who want warmth without feeling too confined
Insulation Types
Down insulation — Made from goose or duck feathers. Down is the gold standard for warmth-to-weight ratio. It compresses small, lasts for years, and provides exceptional warmth.
- Pros: Lightest and warmest, packs very small, lasts a long time
- Cons: Expensive, loses insulating ability when wet, takes a long time to dry
Synthetic insulation — Made from polyester fibers designed to mimic down’s loft. Synthetic bags are the practical choice for most Scout camping.
- Pros: Insulates even when wet, dries quickly, less expensive than down, easier to care for
- Cons: Heavier and bulkier than down for the same warmth rating, wears out faster
Temperature Ratings
Every sleeping bag has a temperature rating that tells you the lowest temperature at which the bag will keep you warm.
- Summer bags (35°F and above) — Lightweight and packable for warm weather
- Three-season bags (15°F to 35°F) — The most versatile choice for most Scout camping
- Winter bags (15°F and below) — Heavy and bulky but essential for cold weather camping
Keeping Your Sleeping Bag Dry
A wet sleeping bag is a useless sleeping bag — especially a down bag. Keeping it dry is your top priority.
Keeping Your Bag Dry
Protection strategies- Store your sleeping bag in a waterproof stuff sack or line your stuff sack with a trash bag.
- Keep it packed inside your backpack, not strapped to the outside where it can get rained on.
- Never set your sleeping bag directly on wet ground — always use a sleeping pad and tent floor.
- Change into dry sleepwear before getting into your bag. Damp clothing transfers moisture to the insulation.
- Air out your sleeping bag in the morning before packing up. Drape it over your tent or a branch to let body moisture evaporate.
Sleeping Bag Care
Proper care keeps your sleeping bag warm and functional for years. For detailed care instructions, review Requirement 5c — Gear Care & Storage.
Key points:
- Air out after every trip — Body moisture accumulates in the insulation each night.
- Spot clean small stains with a damp cloth and mild soap.
- Deep wash rarely — Once or twice per season at most. Use a front-loading washer, a gentle cycle with cold water, and a specialized sleeping bag wash.
- Dry thoroughly on the lowest dryer setting with tennis balls to break up insulation clumps. This takes 2–3 hours.
- Store loosely in a large breathable storage sack, never compressed in its stuff sack. Long-term compression ruins insulation.
🎬 Video: Choosing a Sleeping Bag — https://youtu.be/yNaUoBUHKPg?si=Zaxv436Q71UlUO7d
🎬 Video: Caring for a Sleeping Bag — https://youtu.be/9qOpq5FvKR4?si=ZxVSRZPQOvIQZNUD
Making a Comfortable Ground Bed
Your sleeping bag provides insulation from the cold air above you, but the cold ground below you is an even bigger heat thief. A comfortable ground bed insulates you from below and cushions you from rocks and roots.
The Ground Bed System
- Ground cloth or footprint — A waterproof layer under your tent that blocks ground moisture.
- Tent floor — Provides a second waterproof barrier.
- Sleeping pad — The most important component. A sleeping pad insulates you from the cold ground and provides cushioning. Types include:
- Closed-cell foam pads — Inexpensive, indestructible, and provide good insulation. They do not puncture like inflatable pads. Lightweight but bulky.
- Self-inflating pads — Foam inside an air-tight shell. Open the valve and the foam expands, sucking in air. Good balance of comfort, insulation, and packability.
- Inflatable air pads — The most comfortable and packable option. Many have insulated cores for cold-weather use. The downside is that they can puncture.
- Sleeping bag — Laid on top of the sleeping pad.
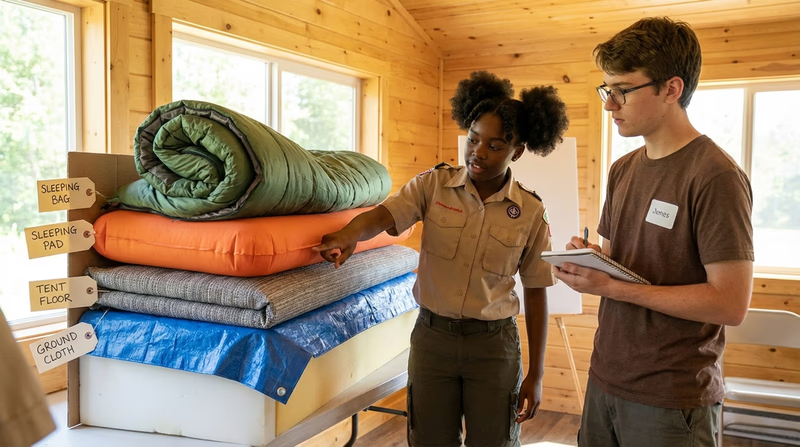
Req 7 — Gear Checklist & Packing
A well-organized gear checklist and a properly packed backpack are the difference between a smooth campout and a frustrating mess. This requirement brings together everything you have learned about clothing, gear, and equipment into a practical system.
Building Your Gear Checklist
A gear checklist has two sections: personal gear (what you carry for yourself) and patrol gear (shared items divided among the group).
Personal Gear Checklist
Items each camper brings- Backpack (properly fitted).
- Sleeping bag (rated for expected temperatures).
- Sleeping pad.
- Tent (or your share of a shared tent).
- Clothing for expected weather (see Req 5a).
- Footwear — hiking boots plus camp shoes (see Req 5b).
- Outdoor essentials (see Req 5d).
- Mess kit (plate, bowl, cup, utensils).
- Water bottles (at least 1–2 liters capacity).
- Personal hygiene items (toothbrush, toothpaste, biodegradable soap, towel).
- Trash bags (for packing out waste and waterproofing gear).
Patrol Gear Checklist
Shared items divided among the patrol- Camp stove and fuel.
- Cooking pots and pans.
- Cooking utensils (spatula, ladle, can opener, pot gripper).
- Water treatment supplies (filter, purification tablets, or both).
- Cooler or food storage bags.
- Dishwashing supplies (biodegradable soap, sponge, mesh strainer, sanitizing tablets).
- Tarp or dining fly.
- Rope or paracord (for bear bags, tarp lines, and gear repairs).
- Fire-starting supplies (if campfires are allowed).
- Patrol first-aid kit (larger than personal kits).
- Group shelter (if not using individual tents).
- Lantern or camp light.
Packing Your Backpack
How you pack is just as important as what you pack. A well-packed backpack is comfortable, balanced, and organized so you can find what you need without dumping everything out.
Packing Zones
Think of your pack as having four zones:
Bottom zone — Items you will not need until camp:
- Sleeping bag (in a waterproof stuff sack)
- Camp shoes
- Extra clothing for sleeping
Core zone (middle, close to your back) — The heaviest items:
- Food
- Stove and fuel
- Water (if carrying extra)
- Cooking gear
Top zone — Items you need during the day:
- Rain gear
- Insulating layer
- Lunch and snacks
- Map
Accessory pockets — Quick-access items:
- Water bottles (side pockets)
- First-aid kit (top lid or brain)
- Headlamp, sunscreen, sunglasses (top lid)
- Snacks, compass, lip balm (hip belt pockets)
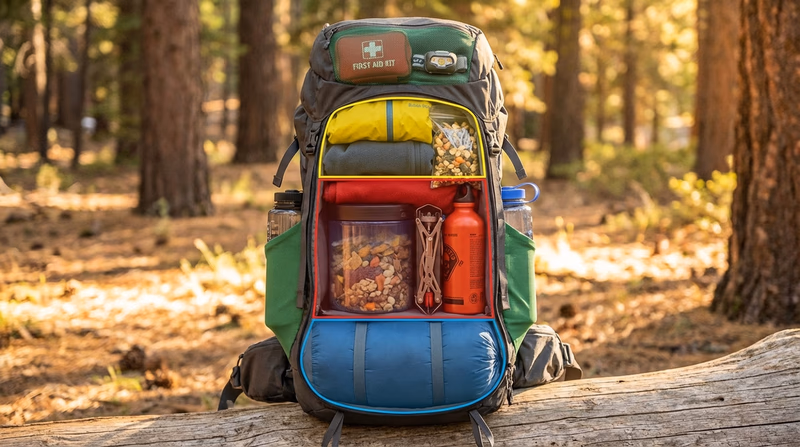
Packing Principles
Packing for Success
Key principles- Heavy items close to your back and centered — This keeps the weight over your hips and prevents the pack from pulling you backward.
- Balance left to right — Distribute weight evenly on both sides to prevent the pack from pulling you sideways.
- Frequently used items on top or in pockets — Rain gear, snacks, map, first-aid kit, water — anything you need without stopping.
- Waterproof everything — Use stuff sacks, dry bags, or trash bag liners for items that must stay dry (sleeping bag, clothing, electronics).
- Compress dead air — Use compression straps and stuff sacks to eliminate empty space. A compact pack carries better than a loose, floppy one.
- Nothing dangling — Loose items hanging from the outside of your pack snag on branches and throw off your balance. If it does not fit inside, strap it tightly against the pack.
Sharing Patrol Gear
Patrol gear is divided among members based on weight, not just number of items. A fair division means everyone carries roughly the same total weight.
Here is how to divide it:
- Lay out all patrol gear
- Weigh each item (or estimate)
- Divide items so each member carries approximately the same additional weight
- Consider each person’s personal gear weight — someone carrying a heavier tent should carry less patrol gear
Show Your Work
When demonstrating your pack to your counselor or Scoutmaster, be ready to explain:
- Why you placed each item where you did
- What you would reach for first if it started raining
- Where your first-aid kit is (it should be instantly accessible)
- How you kept your sleeping bag dry
- How you balanced the weight between both sides
🎬 Video: How to Pack a Backpack — https://youtu.be/HB7ZOjnnFS8?si=OiOXPGCBLGNYt_b0
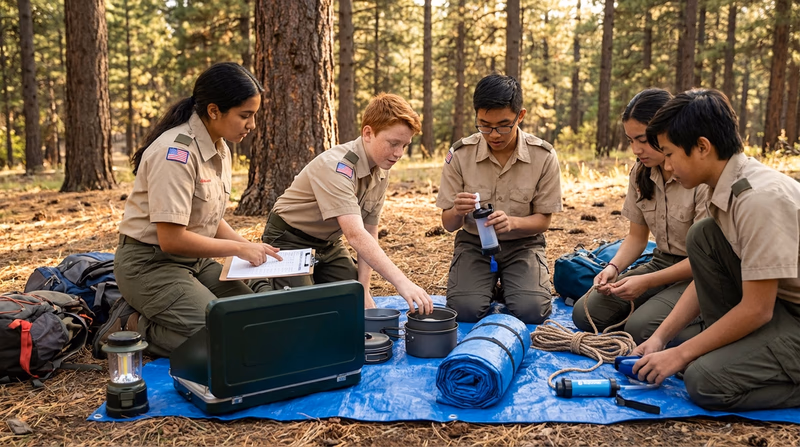
Req 8a — Stove Safety
Camp stoves are essential tools for outdoor cooking, but they produce open flames, intense heat, and flammable fuel vapor. Using them safely requires knowledge, attention, and respect for the hazards involved.
Propane and Butane/Propane Stoves
Canister stoves use pressurized fuel canisters containing propane, butane, or a blend of both. They are the most common type of camp stove because they are easy to use and reliable.
Safety procedures for canister stoves:
Canister Stove Safety
Follow these steps every time- Set up the stove on a flat, stable, non-flammable surface. A flat rock or bare ground works well. Never use a stove on a picnic table with a tablecloth or near dry grass.
- Clear the area around the stove of flammable materials — leaves, paper, clothing, tent fabric.
- Keep the stove at least 15 feet away from tents, shelters, and gear.
- Check the canister connection before lighting. Make sure the canister threads cleanly onto the stove with no cross-threading. Listen for hissing that indicates a leak.
- Light the stove by turning the valve slightly, then using a match or lighter. Some stoves have built-in piezo igniters.
- Never leave a lit stove unattended.
- Turn off the fuel valve to extinguish the stove. Never blow out the flame.
- Let the stove and canister cool completely before handling, disconnecting, or storing.
- Do not attempt to refill, puncture, or modify fuel canisters.
🎬 Video: How to Use a Propane Stove — https://youtu.be/6il0aDjwSGI?si=IMrR6Ycu03lWzTtU
Liquid Fuel Stoves
Liquid fuel stoves burn white gas (naphtha), unleaded gasoline, kerosene, or other liquid fuels. They are more powerful and work better in cold weather than canister stoves, but they require more skill to operate safely.
Safety procedures for liquid fuel stoves:
Liquid Fuel Stove Safety
These stoves require extra care- Fill the fuel bottle away from any heat source or open flame. Spilled fuel is extremely flammable.
- Never overfill the fuel bottle — leave room for air pressure. Most bottles should be filled to about three-quarters capacity.
- Pressurize the stove by pumping the plunger on the fuel bottle according to the manufacturer’s instructions.
- Open the fuel valve slightly and light the stove. Liquid fuel stoves often “flare up” during priming — stand back and be prepared.
- Adjust the flame with the control valve once the stove is running steadily.
- Keep a pot of water nearby when cooking to douse any accidental spill fires.
- If the stove malfunctions (sputtering, flaring, leaking), shut off the fuel valve immediately and let it cool before troubleshooting.
- Never attempt to refuel a hot stove. Wait until it has completely cooled.
- Check O-rings and gaskets regularly for wear. A damaged seal causes fuel leaks.
🎬 Video: How to Use a Liquid Fuel Stove — https://youtu.be/2XRqdVIqimY?si=Wj7JsttaHkIADW9a
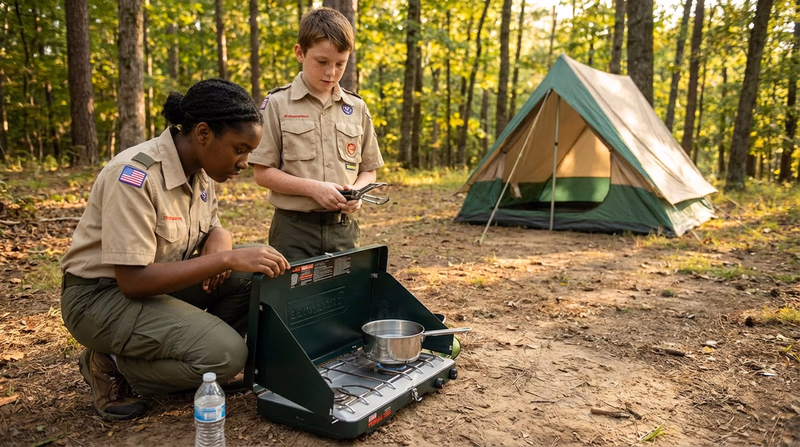
Proper Storage of Extra Fuel
Fuel is the most dangerous item in your camping gear if handled improperly.
Fuel storage rules:
- Canister fuel: Store upright in a cool, shaded area. Do not leave canisters in direct sunlight or inside a hot car — heat increases pressure and can cause the canister to vent or rupture. Always transport canisters in the upright position.
- Liquid fuel: Store in approved fuel bottles with tight-fitting caps. Keep the bottle upright. Make sure the cap is on tight and there are no leaks. Store away from food — fuel can contaminate food through fumes or spills.
- At camp: Keep fuel at least 15 feet from cooking fires, stoves in use, and sleeping areas.
- At home: Store fuel in a cool, dry, well-ventilated area away from heat sources and ignition sources. A garage shelf is fine; next to a water heater is not.
- Disposing of empty canisters: Let the canister fully depressurize by running the stove until it goes out. Many outdoor stores and recycling centers accept empty canisters. Never puncture a canister to empty it unless you have a specialized tool designed for that purpose.
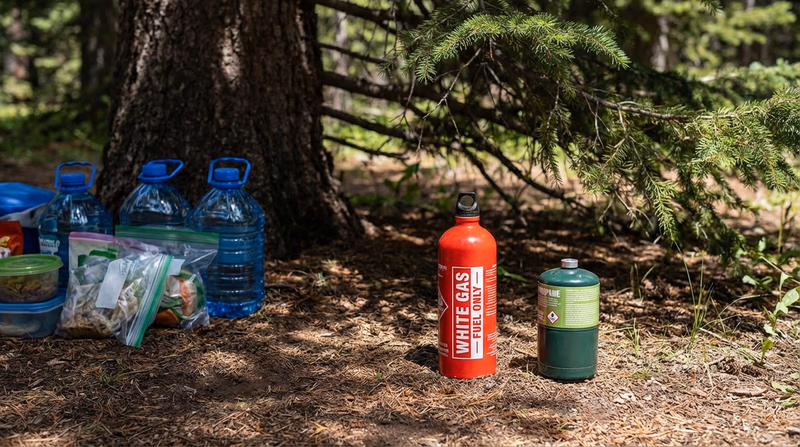
Req 8b — Stove Types
Choosing the right camp stove depends on your trip type, group size, weather conditions, and personal preferences. Each stove type has strengths and trade-offs.
Canister Stoves (Upright)
The most popular choice for backpackers and Scout camping. A lightweight burner screws directly onto a pressurized fuel canister.
| Aspect | Detail |
|---|---|
| Fuel | Pre-mixed butane/propane canisters |
| Weight | Very light (3–10 oz for the burner) |
| Boil time | Fast (3–5 minutes for 1 liter) |
Advantages:
- Extremely easy to use — screw on, turn the valve, light
- Precise flame control for simmering
- No priming, no spills, no mess
- Very lightweight and compact
Disadvantages:
- Performance drops in cold weather (below 20°F) as canister pressure decreases
- Cannot tell how much fuel remains in a canister
- Canisters are not refillable and create waste
- Less stable — the stove sits on top of a narrow canister
Liquid Fuel Stoves
Reliable workhorses that burn white gas or multiple fuel types. Used by serious backpackers and winter campers.
| Aspect | Detail |
|---|---|
| Fuel | White gas, unleaded gasoline, kerosene, or diesel (multi-fuel models) |
| Weight | Moderate (10–20 oz) |
| Boil time | Fast (3–5 minutes for 1 liter) |
Advantages:
- Excellent cold-weather performance — liquid fuel is not affected by temperature
- Refillable fuel bottles — you carry only the fuel you need
- Can burn multiple fuel types (multi-fuel models), useful for international travel
- Very powerful heat output
Disadvantages:
- Require priming (pre-heating) before use, which takes practice
- More complex to operate — pumping, priming, and adjusting
- Heavier and bulkier than canister stoves
- Risk of fuel spills and flare-ups during priming
- Require regular maintenance (cleaning the fuel jet, replacing O-rings)
🎬 Video: Canister vs Liquid Fuel Stoves — https://youtu.be/FCDURxu2L3Y?si=MB1dADsvm80GqDW9
Alcohol Stoves
Ultra-simple stoves that burn denatured alcohol. Popular with ultralight backpackers.
| Aspect | Detail |
|---|---|
| Fuel | Denatured alcohol, methanol |
| Weight | Extremely light (1–3 oz) |
| Boil time | Slow (8–12 minutes for 1 liter) |
Advantages:
- Almost no weight — some are made from a single soda can
- No moving parts — nothing to break or maintain
- Fuel is inexpensive and widely available (hardware stores, gas stations)
- Nearly silent operation
Disadvantages:
- Very slow — significantly longer boil times than other stove types
- Difficult to simmer or control flame
- Flame is nearly invisible in daylight — easy to burn yourself or knock over without realizing it is lit
- Poor performance in wind — requires a windscreen
- Not practical for group cooking
Solid Fuel Stoves
Burn compressed fuel tablets (like Esbit). The simplest stove design possible.
| Aspect | Detail |
|---|---|
| Fuel | Solid fuel tablets (hexamine) |
| Weight | Extremely light (less than 1 oz for the stove) |
| Boil time | Slow (8–15 minutes for 1 liter) |
Advantages:
- Lightest stove option — the “stove” is often just a folding metal stand
- Fuel tablets are lightweight, waterproof, and have a long shelf life
- No spills, no leaks, no priming
Disadvantages:
- Very slow and low heat output
- No flame control — the tablet burns until it is gone
- Leaves a sticky residue on pots
- Not practical for cooking real meals — best for boiling water only
- Strong odor when burning
Wood-Burning Stoves
Small stoves designed to burn twigs, pinecones, and other natural fuel found at camp.
| Aspect | Detail |
|---|---|
| Fuel | Twigs, small sticks, pinecones, bark |
| Weight | Light to moderate (5–20 oz) |
| Boil time | Variable — depends on fuel quality |
Advantages:
- Free fuel — you gather it at your campsite
- No fuel canisters or bottles to carry or dispose of
- Satisfying campfire-like cooking experience
- Some models generate electricity from heat to charge devices
Disadvantages:
- Requires dry wood, which may not be available in wet conditions
- Produces smoke and soot that blackens pots
- Requires constant attention to feed fuel
- Not allowed in many wilderness areas during fire bans
- Slower and less predictable than gas stoves

Which Stove Is Right for Your Trip?
| Trip Type | Best Stove Choice |
|---|---|
| Weekend Scout campout | Canister stove (easy, reliable) |
| Winter camping | Liquid fuel stove (cold-weather performance) |
| Ultralight backpacking | Canister, alcohol, or solid fuel |
| Large group cooking | Liquid fuel or large canister stove |
| Emergency / backup | Solid fuel tablets (lightweight, long shelf life) |
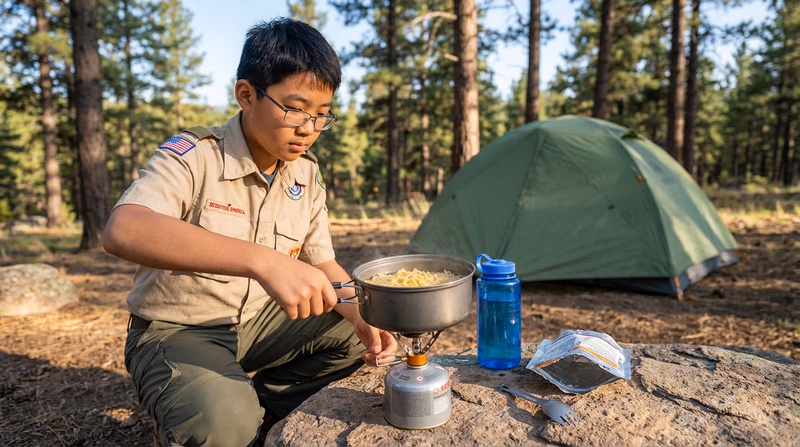
Req 8c — Menu Planning
Meal planning is a skill that separates a well-run patrol from a chaotic one. Good camp food keeps your energy up, your spirits high, and your waste to a minimum. This requirement asks you to think through every aspect of feeding your patrol in the outdoors.
Menu Planning Worksheet Resource: Menu Planning Worksheet — /merit-badges/camping/guide/menu-plan/Car Camping vs. Backpacking vs. Float Trip Menus
The type of trip determines what you can cook. The key difference is weight and storage.
Car camping menus are the most flexible:
- You can bring a cooler with perishable items (eggs, cheese, fresh meat, vegetables)
- Heavier cooking equipment is fine (cast iron, dutch oven, larger stoves)
- No weight limits — cook whatever you want
Backpacking menus must be lightweight and compact:
- Every ounce matters — choose calorie-dense, lightweight foods
- No cooler — everything must be shelf-stable or eaten on day one
- Simpler cooking (boil water, rehydrate, or one-pot meals)
- Minimize packaging and trash
Float trip menus fall in between:
- The boat carries the weight, so you can bring more than backpacking
- Waterproof storage is critical — everything must be in dry bags
- Keep meals simple because cooking space on the water is limited
- Foods must survive bumps, jostling, and possible splashes
Planning Your Menu
When planning meals for your patrol, think about:
- Nutrition — Balance carbohydrates (energy), protein (muscle repair), and fats (sustained fuel). Camping burns a lot of calories, especially in cold weather.
- Simplicity — One-pot meals are easiest to cook and clean up. Save elaborate recipes for when you have more experience.
- Variety — Nobody wants the same meal three times. Mix it up.
- Dietary needs — Ask if anyone has allergies or restrictions before you plan.
- Prep at home — Pre-measure ingredients, pre-mix spices, and repackage food into portion-sized bags at home. This saves time and reduces waste at camp.
Sample Menu: Two Breakfasts, Three Lunches, Two Suppers
Here is a sample menu for a patrol of six. Adjust quantities based on your group size.
Breakfast 1: Oatmeal Power Bowls
- Instant oatmeal packets (2 per person)
- Brown sugar, raisins, dried cranberries
- Hot cocoa or tea
- Fresh fruit (apples or oranges — they travel well)
Breakfast 2: Scrambled Egg Burritos
- Eggs (2 per person, or powdered eggs for backpacking)
- Shredded cheese
- Flour tortillas
- Salsa packets
- Juice boxes or hot cocoa
Lunch 1: Trail Wraps
- Tortillas with peanut butter and honey (or jelly)
- Trail mix
- Apple slices
- Water
Lunch 2: Summer Sausage and Cheese
- Summer sausage (shelf-stable, no refrigeration needed)
- Cheese and crackers
- Dried fruit
- Granola bars
- Water or lemonade mix
Lunch 3: Tuna Packets
- Foil tuna or chicken packets
- Crackers or pita bread
- Carrot sticks (day one only — perishable)
- Cookies
- Water
Supper 1: One-Pot Pasta
- Pasta (penne or rotini — cooks in one pot)
- Jarred pasta sauce (repackage into a ziplock for backpacking)
- Parmesan cheese packets
- Bread or rolls
- Lemonade mix
Supper 2: Foil Packet Dinners
- Ground beef or turkey (pre-cooked for safety, or use shelf-stable protein for backpacking)
- Sliced potatoes, carrots, and onions
- Seasoning (salt, pepper, garlic powder)
- Wrap in heavy-duty foil and cook on coals or stove
- S’mores for dessert
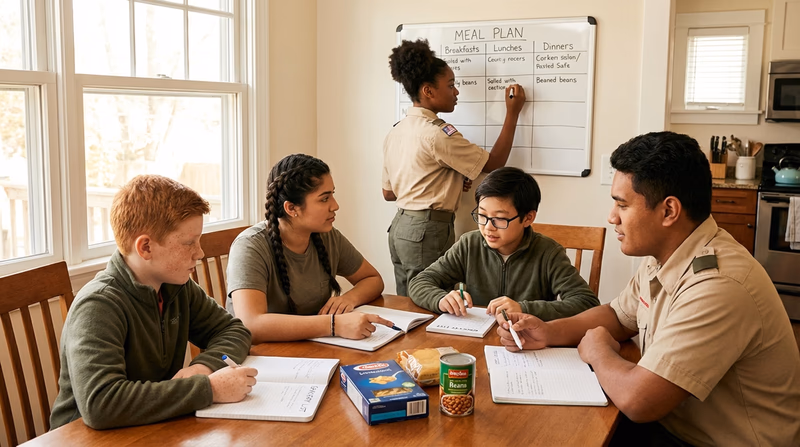
Protecting Your Food
Food is vulnerable to three threats in the outdoors: bad weather, animals, and contamination.
Bad Weather
- Rain: Store all food in waterproof bags or containers. Keep cooking supplies under a tarp or dining fly.
- Heat: Perishable food spoils fast in warm temperatures. Use a cooler with ice for car camping. For backpacking, plan non-perishable meals or eat perishable items on day one.
- Cold: Freezing temperatures can freeze water bottles and make some foods unappetizing. Store water bottles inside your sleeping bag at night to prevent freezing.
Animals
- Bear country: Use a bear canister (required in many areas) or hang a bear bag at least 12 feet off the ground and 6 feet from the trunk, 200 feet from your sleeping area.
- Raccoons and rodents: These clever animals can open zippers and chew through bags. Hard-sided containers are your best defense.
- Birds and insects: Keep food covered at all times. Clean up spills immediately. Use mesh food covers if available.
🎬 Video: Food Storage & Protection: Bears & Mini-Bears — https://youtu.be/7YAiuAuo49Y?si=y87nPJnLJsVPZtJ9
Contamination
- Wash hands before handling food — every time. Use soap and water or hand sanitizer.
- Keep raw and cooked food separate to prevent cross-contamination.
- Cook meat thoroughly — bring a small instant-read thermometer if cooking raw meat at camp.
- Clean cooking surfaces and utensils between uses.
- Dispose of gray water (dirty dishwater) properly — strain food particles and pack them out, scatter water at least 200 feet from water sources.

Menu Planning Worksheet
Back to Requirement 8cMenu Planning Worksheet
Camping Merit Badge — Requirement 8c
Plan two breakfasts, three lunches, and two suppers for your patrol.
Camp Menu
| Meal | Day 1 | Day 2 |
|---|---|---|
| Breakfast | | |
| Lunch | | |
| Supper | | |
| Snacks | | |
Ingredient List
| Ingredient | Quantity | For Which Meal(s) |
|---|---|---|
Equipment Needed
Food Safety Notes
How will you protect your food from bad weather, animals, and contamination?
Counselor Approval
Req 8d — Cook Your Meals
This is where all your planning comes to life. Cooking for your patrol in the outdoors is one of the most satisfying parts of camping — and one of the best ways to build teamwork.
Before You Cook
Review the fundamentals before you fire up the stove:
- Check your stove — Make sure it is in good working order and you have enough fuel. Review the safety procedures from Requirement 8a.
- Set up a clean cooking area — Clear a flat surface, lay out your ingredients, and make sure your water supply is treated and ready.
- Assign roles — Use the duty roster from Requirement 4. The cook prepares food, the fire tender manages the stove, and the cleanup crew handles dishes.
- Wash your hands — This is non-negotiable. Every cook, every meal.
Cooking Tips for the Field
Camp Cooking Tips
Make your meals successful- Start with enough water. Fill all pots and water bottles before you begin cooking. Running out of water mid-recipe is frustrating.
- Use a windscreen around your stove. Wind steals heat and wastes fuel. A simple aluminum windscreen can cut your boil time in half.
- Keep lids on pots. Covered pots boil faster and use less fuel.
- Stir frequently. Camp stoves often create hot spots that burn food. Constant stirring prevents scorching.
- Do not rush. Let the stove do the work. Turning the flame too high wastes fuel and burns food.
- Cook with a buddy nearby. Never leave a lit stove unattended.
The Trail Meal
At least one of your three meals must be a trail meal — a meal cooked using a lightweight stove, typically during a hike or at a rest stop rather than at a full camp setup. Trail meals are simpler and faster because you are cooking with minimal equipment.
Great trail meal options:
- Ramen with added protein — Boil water, add noodles and a foil packet of chicken or tuna
- Instant oatmeal — Boil water, pour over oatmeal, add dried fruit and nuts
- Couscous with vegetables — Boil water, stir in couscous and freeze-dried vegetables, cover and wait 5 minutes
- Hot soup and crackers — Heat canned or dehydrated soup
- Mac and cheese — Boil water, cook pasta, add cheese powder and a squeeze of butter
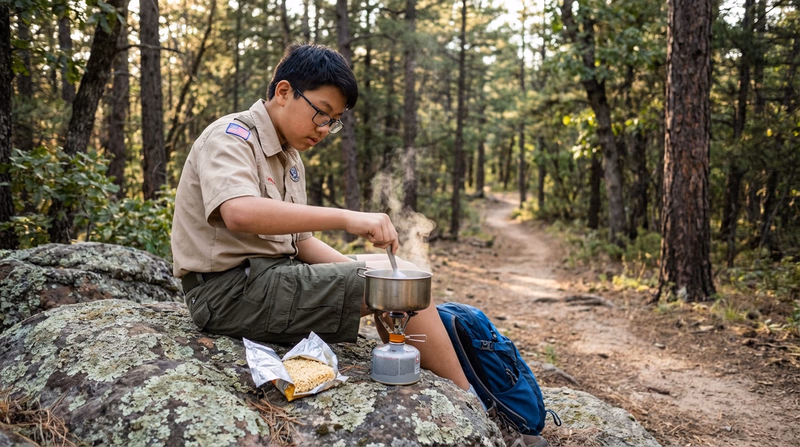
Cleanup
Cleaning up properly is just as important as cooking. Follow the three-bucket system from Requirement 6b:
- Wash — Hot water with biodegradable soap
- Rinse — Clean hot water
- Sanitize — Hot water with a capful of bleach
Strain all food particles from wash water and pack them out. Scatter gray water broadly at least 200 feet from water sources. Leave your cooking area cleaner than you found it.
What Your Counselor Wants to See
When you cook for this requirement, your counselor is looking for:
- Planning — Did you follow the menu you created in Requirement 8c?
- Safety — Did you follow stove safety procedures? Did you keep the cooking area clean and organized?
- Teamwork — Did you work with your patrol and follow the duty roster?
- Skill — Can you operate the stove confidently and cook a decent meal?
- Cleanup — Did you wash dishes properly and dispose of waste correctly?
- Trail meal — Did at least one meal use a lightweight stove in a trail-style setting?
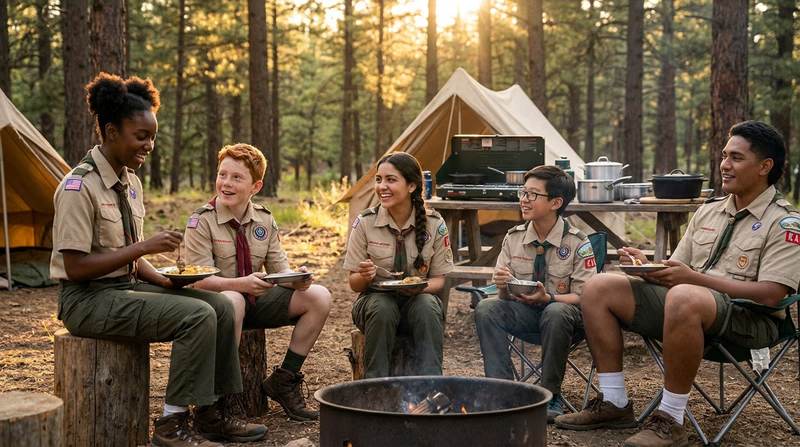
Req 9a — 20 Nights of Camping
Twenty nights of camping. That is the heart of this merit badge — real experience in the outdoors, building your skills one campout at a time. There is no shortcut for this requirement, and that is by design. You cannot learn to camp from a book. You learn by doing it, night after night, in different seasons and conditions.
What Counts
Let’s be clear about what qualifies and what does not:
Counts toward your 20 nights:
- Nights in a tent you pitched yourself
- Nights under the open sky (cowboy camping)
- Nights in a hammock safely strung outdoors
- Nights in a lean-to or three-sided shelter with an open front
- If a tent is already set up and provided for you, you do not need to pitch your own — those nights still count
Does NOT count:
- Cabin camping
- Hotel or lodge stays
- Indoor lock-in events
- Sleeping in a fully enclosed permanent structure
Long-Term Camp Credits
The requirement has special rules for long-term camping:
- First long-term camp (like summer camp): You may count up to six consecutive nights toward your 20.
- Additional long-term camps: Each additional multi-night trip earns you two nights credit, regardless of how many actual nights you camp.
This means most of your 20 nights will come from regular troop and patrol campouts — weekend trips, camporees, and other Scouting events.
Tracking Your Nights
Camping Log Entry
Record these details for each campout- Date(s) of the campout.
- Location (campground name, park, event name).
- Scouting event or activity (troop campout, camporee, summer camp, etc.).
- Shelter type (tent I pitched, hammock, lean-to, under the sky).
- Weather conditions.
- Notable skills practiced or experiences.
- Signature or verification from a leader.
Making the Most of Your 20 Nights
Twenty nights gives you the opportunity to camp in a variety of conditions. Try to include:
- Different seasons — Spring, summer, fall, and (if possible) winter camping all teach different skills
- Different locations — State parks, national forests, Scout camps, backcountry sites
- Different shelter types — Tent, hammock, lean-to, or under the stars
- Different roles — Rotate through duty roster positions so you gain experience cooking, navigating, and leading
Where to Camp
- Troop campouts — Your most frequent camping opportunities. Monthly campouts are the backbone of your 20 nights.
- Camporees — District or council-wide camping events. Great for meeting Scouts from other troops.
- Summer camp — A weeklong experience that counts for up to six nights on your first attendance.
- High adventure bases — Philmont, Northern Tier, Sea Base, and the Summit. These are unforgettable experiences that also count toward your camping nights.
- Patrol campouts — Smaller, more independent trips planned and run by your patrol.
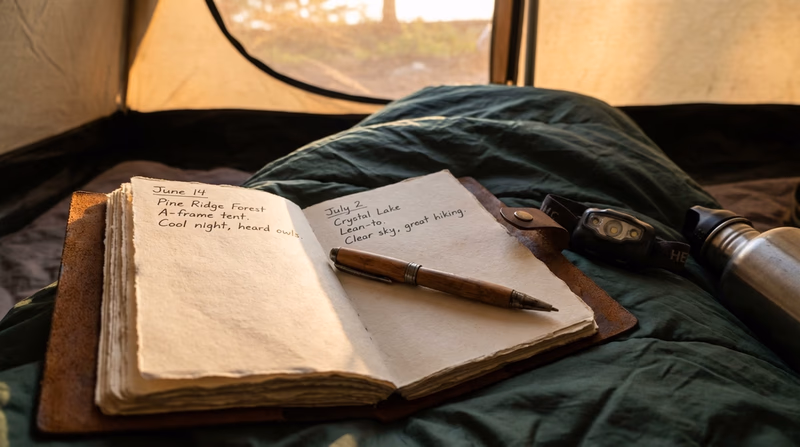
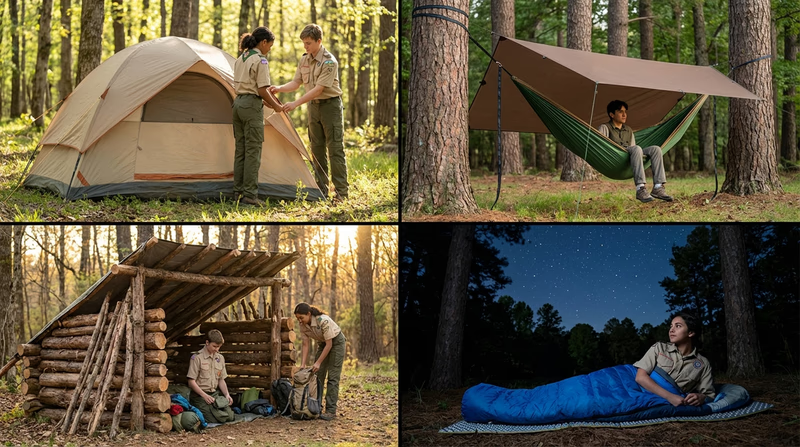
Req 9b — Adventure Activities
Choose TWO of the following activities:
- (1) Hike up a mountain, gaining at least 1,000 vertical feet.
- (2) Backpack, snowshoe, or cross-country ski for at least 4 miles.
- (3) Take a bike trip of at least 15 miles or at least four hours.
- (4) Take a nonmotorized trip on the water of at least four hours or 5 miles.
- (5) Plan and carry out an overnight snow camping experience.
- (6) Rappel down a rappel route of 30 feet or more.
This requirement pushes you beyond regular camping into adventure territory. Each option challenges you physically and builds new outdoor skills. You need to complete two of these six activities during any of your camping experiences. Choose the ones that excite you and fit your troop’s opportunities.
Option 1: Mountain Hike (1,000+ Feet of Elevation Gain)
Hiking uphill for 1,000 vertical feet is a real physical challenge. That is roughly the height of a 100-story building. The trail does not need to be 1,000 feet long — it is about elevation gain, which measures how much you climb upward regardless of horizontal distance.
How to prepare:
- Build your endurance with regular cardio exercise (running, cycling, stair climbing)
- Practice hiking with a loaded pack before the big day
- Study the trail map for elevation profile, water sources, and turnaround points
- Check the weather forecast carefully — mountain weather changes fast
🎬 Video: Training for Elevation Gain — https://youtu.be/wrAzopMgriU?si=POvk4jZLbzeTos5t
Option 2: Backpack, Snowshoe, or Cross-Country Ski (4+ Miles)
A four-mile trek with a loaded pack (or on snowshoes or skis) tests your endurance and your ability to travel through the wilderness under your own power.
Backpacking tips:
- Keep your pack weight to 20–25% of your body weight for comfort
- Plan your route with rest stops every 1–2 miles
- Set a reasonable pace — 2 miles per hour with a pack is typical for most Scouts
Snowshoeing tips:
- Rent snowshoes from an outdoor shop before investing in a pair
- Practice walking on flat ground before hitting the trail
- Dress in layers — you will warm up quickly once you start moving
🎬 Video: Learn to Snowshoe — https://youtu.be/bIylS8VFGcg?si=_C2XoAWrFGsx0bSa
Option 3: Bike Trip (15+ Miles or 4+ Hours)
A 15-mile bike ride is a different kind of adventure. You cover more ground than hiking and see the landscape from a different perspective.
Preparation:
- Make sure your bike is in good working order — check brakes, tires, and chain
- Wear a helmet (required) and bright, visible clothing
- Carry water, snacks, a basic repair kit, and a spare tube
- Plan your route on bike-friendly roads or trails
🎬 Video: What I Wish I Knew Before Bikepacking — https://youtu.be/eC-XDuniSco?si=ThrPiNPJvBWOimjp
Option 4: Nonmotorized Water Trip (4+ Hours or 5+ Miles)
Canoeing, kayaking, or rowing for four hours or five miles gives you a water-based adventure that combines physical effort with the peacefulness of being on a lake or river.
Preparation:
- Ensure everyone has proper swim skills and wears a PFD at all times
- Check water levels, flow rates, and weather conditions before launching
- Pack all gear in waterproof bags
- File a float plan with a responsible adult
🎬 Video: Canoeing with Leave No Trace — https://youtu.be/F8vjVVCf9YI?si=5TuRYuF6q8BjpESE
Option 5: Overnight Snow Camping
Snow camping is the ultimate test of your camping skills. Everything you have learned — shelter, clothing layers, stove operation, food protection — is put to the test in cold and snowy conditions.
Key preparation:
- Cold-rated sleeping bag (0°F or lower recommended)
- Four-season tent or snow shelter (quinzhee or snow trench)
- Insulated sleeping pad with a high R-value
- Extra fuel — stoves consume more fuel in cold weather
- Calorie-dense food — your body burns more energy staying warm
- Practice setting up your shelter and stove in cold conditions before the trip
🎬 Video: Winter Camping Tips — https://youtu.be/ReanLLCCKIc?si=hlHXtTKcefLmsVuJ
Option 6: Rappelling (30+ Feet)
Rappelling is a controlled descent down a rock face or cliff using ropes and specialized equipment. It is an exhilarating experience that builds confidence and trust in your gear and training.
Key requirements:
- Qualified supervision is mandatory — this must be done under the guidance of a certified climbing instructor
- Proper equipment: climbing harness, helmet, rappel device, rope
- Complete a ground-level practice before going to the full route
- Follow all safety checks before descending
🎬 Video: How to Rappel — https://youtu.be/7U6tdEevJgs?si=Iq942pMfrehB7dIX
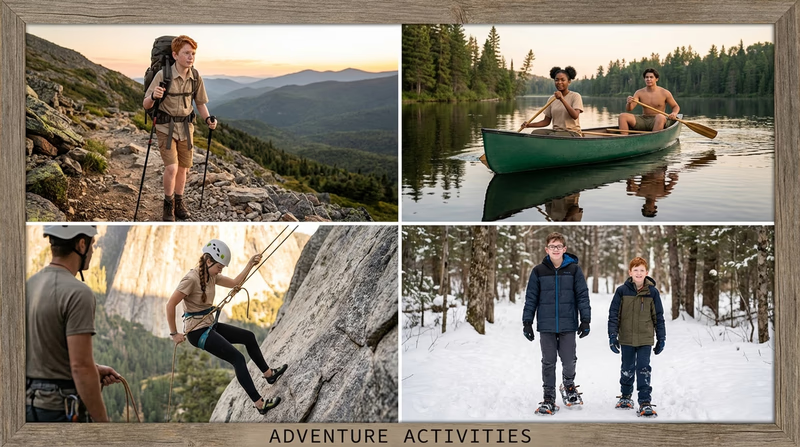
Choosing Your Two Activities
Think about what excites you and what your troop offers. Talk to your Scoutmaster about upcoming opportunities. Many troops plan special trips around these activities — a canoe trip in the fall, a winter campout, or a visit to a climbing facility.
Req 9c — Conservation Project
Conservation is at the heart of Scouting. The places where you camp — forests, parks, rivers, and mountains — are not infinite resources. They need care, protection, and active stewardship to remain healthy for future generations of Scouts and outdoor lovers.
What Is a Conservation Project?
A conservation project is hands-on work that improves or protects the natural environment. It must be approved by the landowner or the agency that manages the land (like the National Forest Service, National Park Service, state parks, or a private landowner).
This does not need to be a massive Eagle Scout-level service project. It can be something practical and focused that makes a real difference in the area where you are camping.
Project Ideas
Here are examples of conservation projects that meet this requirement:
Conservation Project Ideas
Choose one that fits your camping location- Trail maintenance — Clear brush, remove fallen trees, repair eroded sections, or rebuild water bars that divert runoff off the trail.
- Invasive species removal — Pull out non-native plants that are crowding out native vegetation. Your local ranger can identify the target species.
- Campsite restoration — Clean up an overused campsite, remove fire rings that should not be there, and restore vegetation in worn areas.
- Litter cleanup — Conduct a systematic cleanup of a trail, campground, or waterway. Collect and pack out all trash, including micro-trash.
- Erosion control — Build check dams, install water bars, or plant native vegetation to prevent soil erosion.
- Wildlife habitat improvement — Build and install bird boxes, bat houses, or brush piles that provide habitat for small animals.
- Stream or river cleanup — Remove trash and debris from a waterway. This often requires wading, so plan for appropriate clothing and safety.
- Signage and marker maintenance — Repaint trail blazes, repair trail signs, or install informational markers at the direction of the land manager.
Getting Approval
The key phrase in this requirement is “approved by the landowner or land managing agency.” You must get permission before starting your project.
Here is how:
- Identify the land manager — Is it a national forest? A state park? A private landowner? A Scout camp? Each has a contact person who can authorize conservation work.
- Contact them — Call, email, or visit. Explain that you are a Scout working on the Camping merit badge and that you would like to perform a conservation project. Ask what needs to be done — most land managers have a ready list of tasks.
- Get written approval — A simple email confirmation is fine. Document who approved the project, what you will do, and when.
- Follow their instructions — The land manager knows what the area needs. Do exactly what they ask, and nothing more.
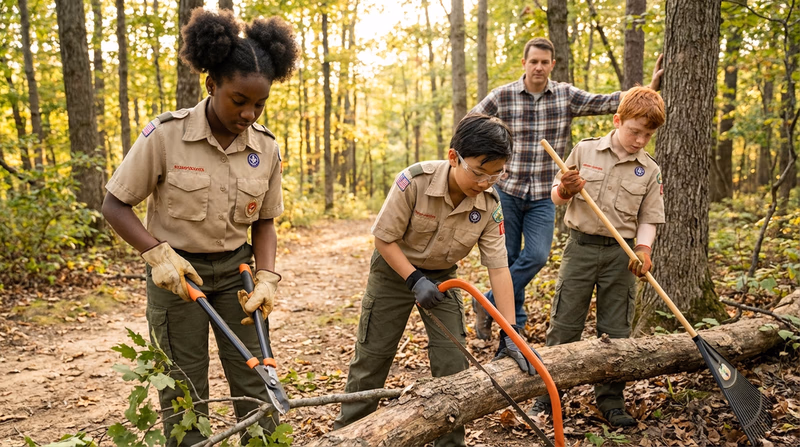
Planning Your Project
Even a small project benefits from basic planning:
Conservation Project Plan
Before you start- What is the project? (Clear description of the work)
- Where will it take place? (Specific location)
- Who approved it? (Name and contact of land manager)
- What tools and materials are needed?
- How many people will participate?
- How long will it take?
- How will you dispose of any waste generated by the project?
- What safety precautions are needed? (Gloves, eye protection, tool safety)
Document Your Work
Take before-and-after photos of your project area. Record what you did, how many people participated, and how long it took. This documentation is useful for your merit badge counselor conversation and demonstrates the impact of your work.
Conservation Project Planning Checklist An official Scouting America checklist to help you plan and document your conservation project. Link: Conservation Project Planning Checklist — https://www.scouting.org/wp-content/uploads/2019/01/Conservation-Project-Planning-Checklist.pdf
Req 10 — Scout Spirit & Reflection
This final requirement asks you to look back at everything you have accomplished and connect it to the bigger picture. Earning the Camping merit badge is not just about checking boxes — it is about becoming a more capable, responsible, and thoughtful person.
Connecting Your Experience to Bigger Ideas
As you prepare for this discussion with your counselor, think about how your camping experiences relate to these five themes:
Personal Health and Safety
Camping taught you how to take care of yourself in the outdoors. You learned about:
- First aid for conditions like hypothermia, heat reactions, and blisters (Req 1c)
- Dressing properly for weather conditions (Req 5a)
- The physical fitness required for hiking, backpacking, and outdoor activities (Req 9b)
- The importance of hydration, nutrition, and rest
Think about how these skills apply beyond camping. The ability to stay calm in an emergency, assess hazards, and take action to protect yourself and others is valuable in every area of life.
Survival
The outdoor essentials, navigation skills, and weather awareness you developed are survival skills. You learned:
- How to anticipate and respond to hazards (Req 1a)
- How to navigate with a map and compass (Req 3)
- How to find and treat water (Req 6b)
- How to build shelter and stay warm (Req 6a, Req 6e)
These are not abstract concepts — you practiced them in the field over 20 nights of real camping.
Public Health
Camp sanitation, food safety, and water treatment protect not just you, but everyone around you. You learned:
- Proper dishwashing and waste disposal (Req 6b)
- Food protection and safe cooking practices (Req 8c, Req 8d)
- How contamination spreads and how to prevent it
When you keep a clean camp, you protect your patrol’s health. That is public health in action.
Conservation
Through Leave No Trace, the Outdoor Code, and your conservation project, you learned that the outdoors is a shared resource that needs active protection. You practiced:
- The seven Leave No Trace principles (Req 2)
- Responsible campsite selection (Req 6c)
- Hands-on conservation work (Req 9c)
Conservation is not just about following rules — it is about developing a mindset that values and protects the natural world.
Good Citizenship
Camping teaches citizenship in surprising ways. Working with your patrol, following a duty roster, helping younger Scouts, and volunteering for conservation projects all build the habits of a good citizen:
- Taking responsibility for your role on the team (Req 4)
- Putting the group’s needs alongside your own
- Being considerate of other campers and the environment
- Giving back through service
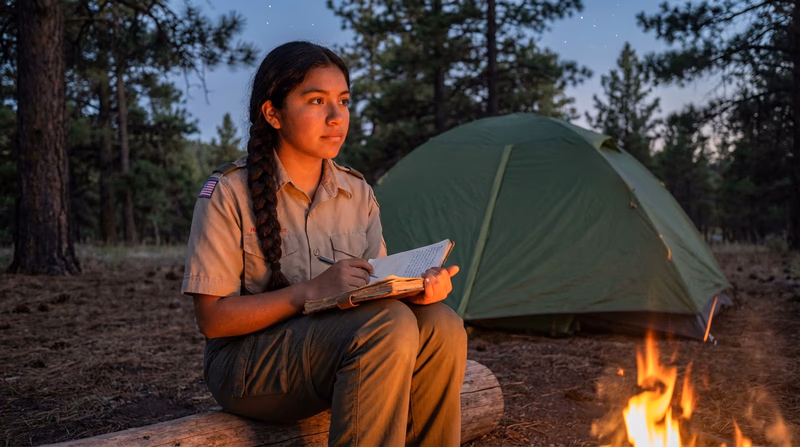
Scout Spirit, the Scout Oath, and the Scout Law
Your counselor will ask how Scout spirit and the Scout Oath and Law connect to camping and outdoor ethics. Here is a framework for thinking about it:
The Scout Oath asks you to do your best to do your duty, help other people, and keep yourself physically strong, mentally awake, and morally straight. Camping embodies all of this — you push your physical limits, make decisions under pressure, help your patrol, and take responsibility for your actions in the outdoors.
The Scout Law describes the character traits of a Scout. Think about how you demonstrated these during your camping experiences:
- Trustworthy — Your patrol trusted you to do your share of the work and keep your commitments.
- Loyal — You supported your patrol and troop, even when conditions were tough.
- Helpful — You assisted younger Scouts, shared your knowledge, and volunteered for tasks.
- Friendly — You built relationships with your patrol members through shared experiences.
- Courteous — You respected other campers and the natural environment.
- Kind — You treated others and the outdoors with compassion and care.
- Obedient — You followed safety rules, fire regulations, and land-use guidelines.
- Cheerful — You maintained a positive attitude, even in rain, cold, or when things did not go as planned.
- Thrifty — You used resources wisely, minimized waste, and cared for your gear.
- Brave — You faced challenges — rappelling, cold weather, unfamiliar situations — with courage.
- Clean — You kept your camp clean, practiced good hygiene, and left no trace.
- Reverent — You appreciated the beauty of creation and treated the natural world with respect.
Your Camping Journey
Take a moment to appreciate what you have accomplished. You have spent 20 nights sleeping under the sky. You have cooked meals, navigated trails, weathered storms, and given back to the land through conservation. You have earned one of the most challenging and rewarding Eagle-required merit badges.
But this is not the end — it is the beginning. The skills and values you built through this badge will serve you for the rest of your life, whether you are leading a backpacking trip, mentoring a new Scout, or simply making good decisions when things get tough.
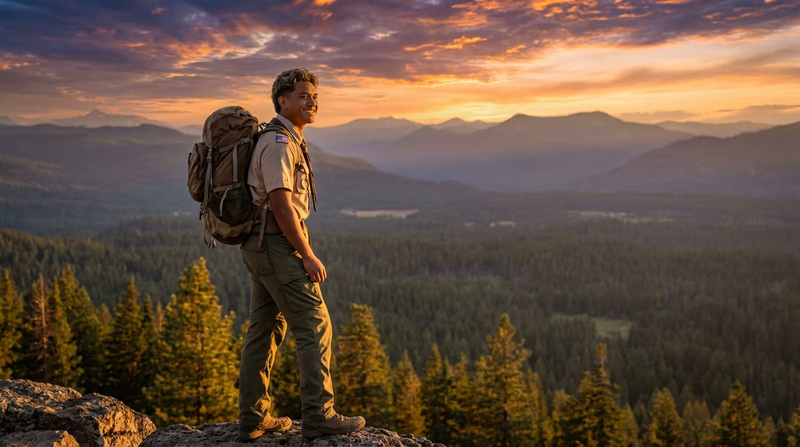
Extended Learning
A. Introduction
Congratulations — you have earned the Camping merit badge! You have spent 20 nights under the sky, cooked meals for your patrol, navigated by map and compass, and given back to the land through conservation. But your camping journey does not end here. The outdoors is vast, and there is always more to explore, learn, and experience.
B. Deep Dive: Ultralight Camping
As you gain experience, you may want to lighten your pack for longer and more ambitious trips. Ultralight camping is a philosophy that focuses on reducing your base pack weight (everything except food, water, and worn clothing) to 10 pounds or less.
Key principles of ultralight camping:
- Every ounce matters. Weigh every item and ask: “Do I really need this?” If you carried it on the last three trips and never used it, leave it home.
- Multi-use items. Choose gear that serves more than one purpose. A bandana can be a pot holder, a towel, a sun shade, and a water pre-filter. Trekking poles can double as tent poles with certain shelter designs.
- Shelter innovations. Ultralight shelters include tarps, hammock systems, and single-wall tents that weigh under two pounds. They sacrifice some comfort and weather protection for significant weight savings.
- Sleep system. A lightweight quilt (no zipper, no hood) paired with a thin inflatable pad can save a pound or more compared to a traditional mummy bag and pad.
C. Deep Dive: Leave No Trace Master Educator
If conservation and outdoor ethics inspired you during this badge, consider pursuing a Leave No Trace Master Educator course. This multi-day training goes deep into outdoor ethics, backcountry skills, and teaching techniques. Graduates are qualified to train others in LNT principles — a valuable leadership skill for your troop and beyond.
The Leave No Trace Center for Outdoor Ethics offers courses for youth and adults, often in partnership with land management agencies and outdoor organizations.
Leave No Trace Training Courses Find Leave No Trace Awareness, Trainer, and Master Educator courses near you. Link: Leave No Trace Training Courses — https://lnt.org/get-involved/training-courses/D. Deep Dive: Wilderness First Aid
Standard first aid covers the basics, but when you camp in remote areas, help may be hours or days away. Wilderness First Aid (WFA) courses teach you to assess, treat, and evacuate patients in backcountry settings where an ambulance is not coming.
A WFA certification (typically a 16-hour course) is highly valued by Scout troops, camps, and outdoor organizations. It builds on everything you learned in Requirement 1c and takes your skills to the next level.
NOLS Wilderness Medicine NOLS offers Wilderness First Aid, Wilderness First Responder, and advanced medical courses for outdoor leaders. Link: NOLS Wilderness Medicine — https://www.nols.edu/en/courses/wilderness-medicine/E. Real-World Camping Experiences
Ready to take your camping to the next level? These destinations and programs offer some of the most memorable outdoor experiences available to Scouts.
Philmont Scout Ranch
Northern Tier High Adventure
Florida Sea Base
The Summit Bechtel Reserve
National Parks Camping
State Parks and National Forests
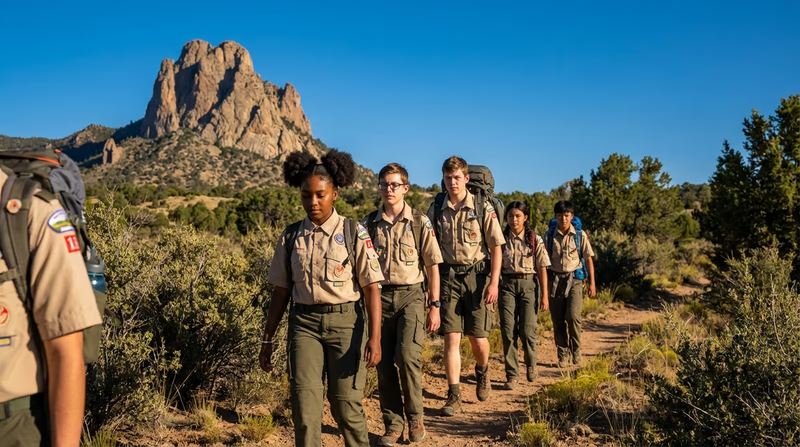
F. Organizations
These organizations support outdoor recreation, conservation, and education. Connecting with them can open doors to new adventures, volunteer opportunities, and learning resources.
Protects the outdoors by teaching and inspiring people to enjoy it responsibly. Offers training courses, educational materials, and volunteer programs.
Organization: Leave No Trace Center for Outdoor Ethics — https://lnt.org/
Accredits camps and provides resources for campers and camp professionals. Their website helps you find accredited camps across the country.
Organization: American Camping Association — https://www.acacamps.org/
The official charity of the National Park Service. Supports conservation, education, and access programs for America’s national parks.
Organization: The National Park Foundation — https://www.nationalparks.org/
Engages communities in the restoration and enhancement of America’s 193 million acres of national forests and grasslands.
Organization: National Forest Foundation — https://www.nationalforests.org/
Protects and promotes hiking trails and the hiking experience. Organizes National Trails Day and volunteer trail maintenance events.
Organization: American Hiking Society — https://americanhiking.org/
An outdoor recreation cooperative that offers classes, events, and expert advice on camping, hiking, and outdoor skills. Many locations offer free or low-cost workshops.
Organization: REI Co-op — https://www.rei.com/