Cycling Merit Badge — Complete Digital Resource Guide
https://merit-badge.university/merit-badges/cycling/guide/
Introduction & Overview
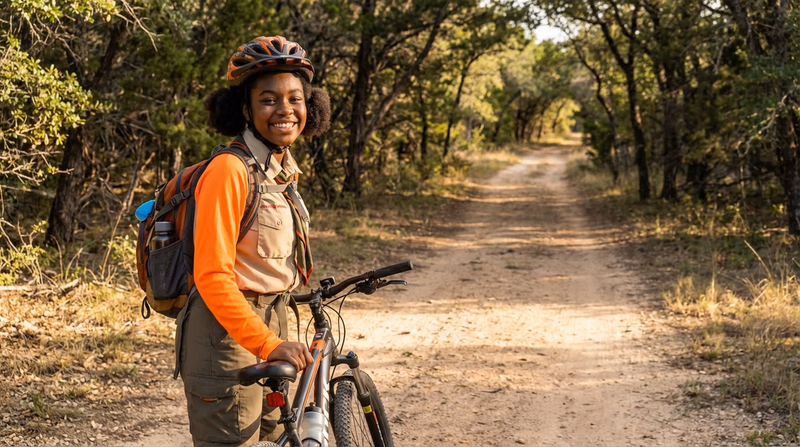
Few inventions have changed the world quite like the bicycle. With two wheels, a chain, and your own power, you can travel faster, farther, and more freely than on foot — all while having a blast. The Cycling merit badge teaches you how to ride safely, maintain your bike, and push your endurance on road or trail. Whether you are commuting to school, exploring a mountain singletrack, or training for a century ride, this badge will make you a stronger, smarter cyclist.
Cycling is also one of the merit badges that can count toward your Eagle Scout rank, so the skills you build here will serve you well on your entire Scouting journey.
Then and Now
Then — The Bicycle Revolution
The bicycle’s story begins in the early 1800s. The first rideable two-wheeler, called a “draisine” or “running machine,” appeared in Germany in 1817. It had no pedals — riders pushed themselves along with their feet on the ground. By the 1860s, pedals were added to create the “velocipede,” nicknamed the “boneshaker” because of its bone-rattling iron tires on cobblestone streets.
Then came the famous penny-farthing, with its enormous front wheel and tiny rear wheel. It was fast but dangerous — a sudden stop could send you flying headfirst over the handlebars (that’s where the phrase “taking a header” comes from). In the 1880s, the “safety bicycle” arrived with two equal-sized wheels, a chain drive, and pneumatic rubber tires. It looked a lot like the bikes we ride today.
The bicycle changed society in ways nobody expected. It gave ordinary people affordable, independent transportation for the first time. Women in particular embraced the bicycle as a tool of freedom — Susan B. Anthony called it the machine that did “more to emancipate women than anything else in the world.”
- Purpose: Transportation, freedom, sport
- Mindset: A revolutionary machine that put the world within reach
Now — Two Wheels, Endless Possibilities
Today, cycling is a global phenomenon. Over a billion bicycles are in use worldwide — more than double the number of cars. People ride for fitness, fun, competition, commuting, and adventure. Professional road racing draws millions of fans to events like the Tour de France. Mountain biking has become an Olympic sport. Cities around the world are building bike lanes and launching bike-share programs to reduce traffic and pollution.
Modern bikes are engineering marvels. Carbon fiber frames weigh less than a gallon of water. Electronic shifting changes gears with the press of a button. Fat-tire bikes roll across sand and snow. And adaptive cycles make riding accessible to people of all abilities.
- Purpose: Recreation, fitness, competition, transportation, environmental stewardship
- Mindset: Ride your way — on any surface, at any pace, for any reason
Get Ready! Whether you ride a hand-me-down cruiser or a brand-new mountain bike, the Cycling merit badge will help you ride with confidence, skill, and safety. Let’s roll!
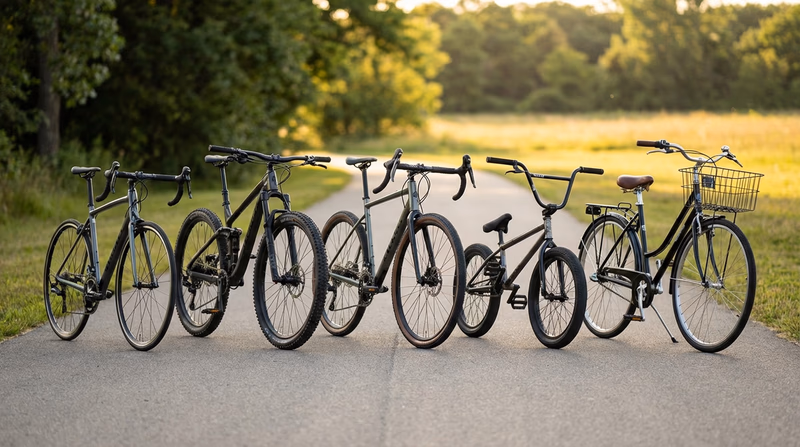
Kinds of Cycling
There are many ways to ride a bike. Before you start working on requirements, take a look at the different styles of cycling you might explore.
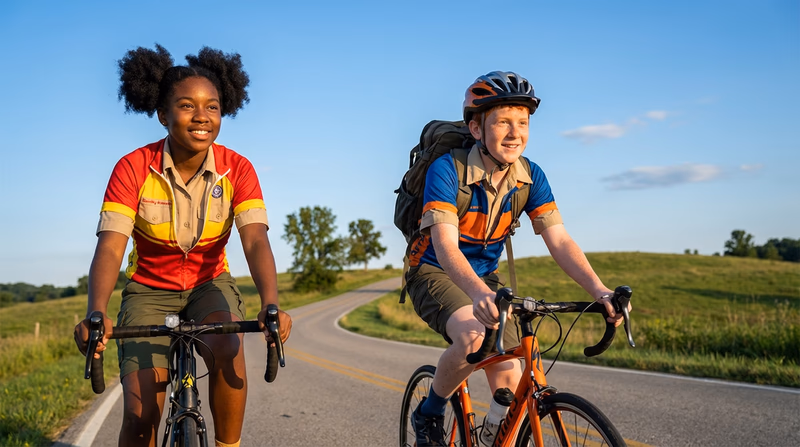
Road Cycling
Road cycling means riding on paved surfaces — streets, bike lanes, and highways. Road bikes are built for speed and efficiency, with lightweight frames, narrow tires, and drop handlebars that let you tuck into an aerodynamic position. Road cyclists can cover impressive distances, and group rides are a great way to build endurance and make friends.
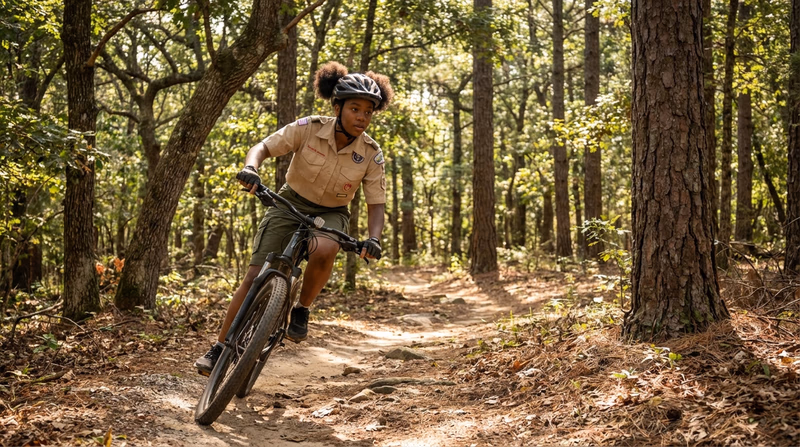
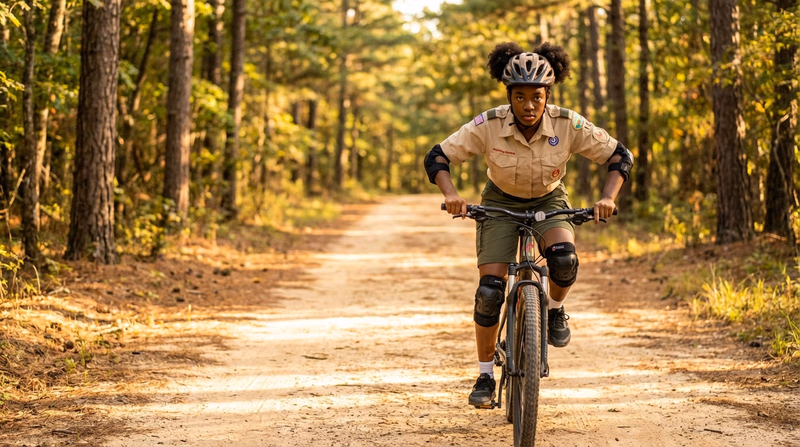
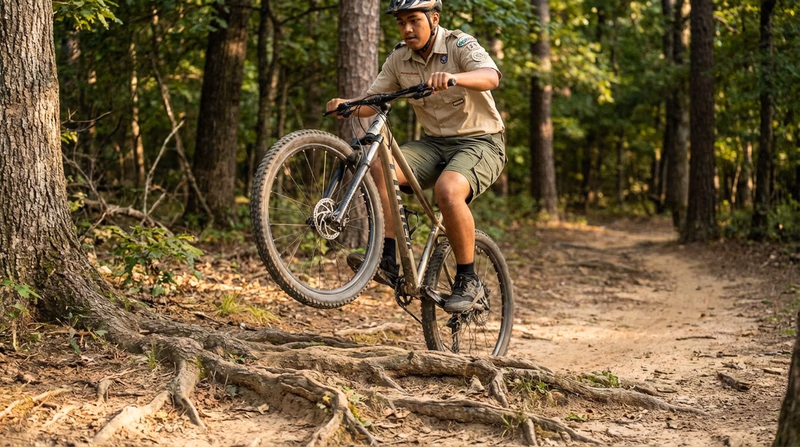
Mountain Biking
Mountain biking takes you off-road — onto dirt trails, rocky paths, and forest singletrack. Mountain bikes have wide, knobby tires for grip, suspension systems to absorb bumps, and strong brakes for steep descents. It is a thrilling way to explore the outdoors and test your bike-handling skills.
Gravel and Adventure Cycling
Gravel cycling blends road and mountain biking. Gravel bikes have wider tires than road bikes and more relaxed geometry, making them comfortable on dirt roads, crushed limestone paths, and mixed-surface routes. Adventure cycling often means multi-day trips with gear strapped to the bike — a modern twist on bicycle touring.
BMX
BMX (Bicycle Motocross) is all about short, intense bursts of speed, jumps, and tricks. BMX bikes are small, tough, and designed for dirt tracks, skate parks, and freestyle competitions. BMX racing is an Olympic sport, and freestyle BMX is one of the most creative forms of cycling.
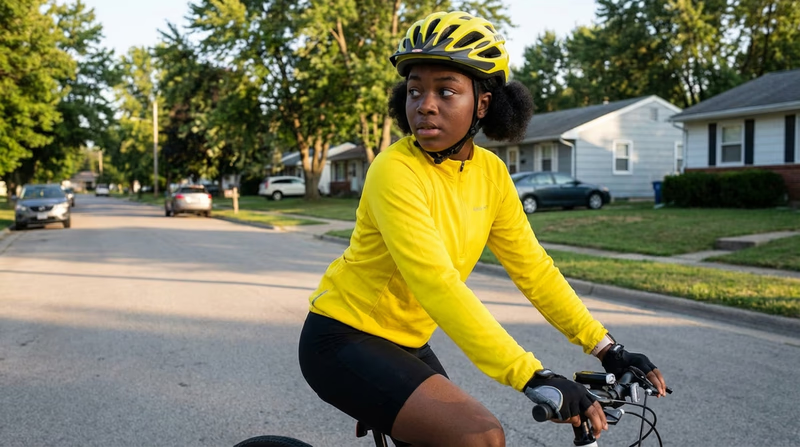
Commuter and Urban Cycling
Millions of people ride their bikes to school, work, and errands every day. Commuter bikes are practical and reliable, often equipped with fenders, lights, racks, and baskets. Riding instead of driving saves money, reduces pollution, and keeps you fit — all at the same time.
Touring and Bikepacking
Touring cyclists carry everything they need — tent, sleeping bag, cooking gear, clothes — on their bikes and ride from town to town or campsite to campsite. Bikepacking is a lighter-weight version that uses frame bags instead of traditional panniers. Both styles let you see the world at your own pace, under your own power.
Now let’s dive into the requirements for the Cycling Merit Badge!
Req 1a — Cycling Hazards
Before you clip in and start pedaling, every smart cyclist needs to understand the hazards that come with riding — and how to deal with them. The good news? Most cycling accidents are preventable. By thinking ahead and developing safe habits, you can enjoy thousands of miles of riding with confidence.
The Four Principles of Safe Cycling
The requirement mentions four key ideas: ride predictably, be conspicuous, think ahead, and ride ready. These four principles are the foundation of everything else you will learn about cycling safety.
The Four Principles
Your cycling safety framework- Ride predictably: Travel in a straight line, obey traffic signals, use hand signals, and avoid sudden swerves. When drivers and other cyclists can predict what you will do next, everyone stays safer.
- Be conspicuous: Make yourself visible. Wear bright colors during the day and reflective gear at dusk or night. Use front and rear lights. Ride where drivers expect to see you — not hidden behind parked cars.
- Think ahead: Scan the road 100–200 feet in front of you. Look for potholes, debris, turning cars, opening doors, and pedestrians. The earlier you spot a hazard, the more time you have to react.
- Ride ready: Keep your hands near the brakes, stay balanced and relaxed, and be prepared to stop or swerve at any moment. A ready rider can react in a fraction of a second.
Common Cycling Hazards
Understanding what can go wrong is the first step to making sure it doesn’t. Here are the hazards you are most likely to encounter.
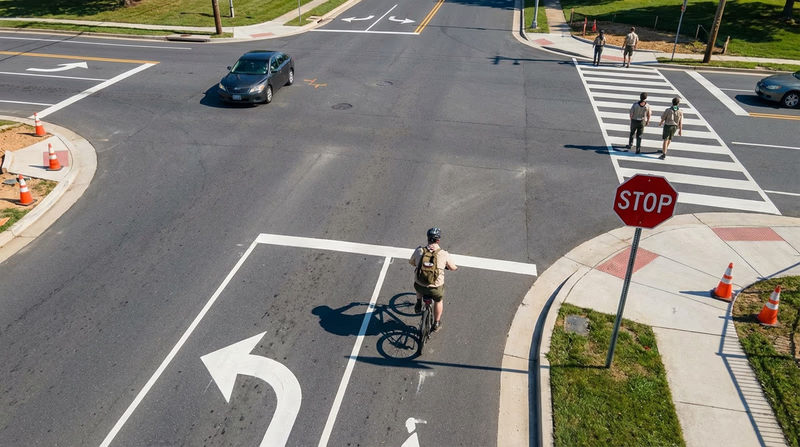
Traffic and Motor Vehicles
The biggest risk for road cyclists is interaction with motor vehicles. Intersections are especially dangerous — most car-bike collisions happen when a vehicle is turning or when a cyclist runs a stop sign or red light.
Road Surface Hazards
Potholes, gravel patches, wet leaves, railroad tracks, metal grates, painted road markings, and storm drains can all cause you to lose traction or crash. Scan the road surface constantly and give yourself room to maneuver around obstacles.
The Door Zone
Parked cars are a hidden danger. A driver or passenger can open a door directly into your path with almost no warning. This is called “getting doored,” and it can cause serious injuries.
Weather Conditions
Rain makes roads slippery, reduces visibility, and increases stopping distance. Wind can push you into traffic or off course. Extreme heat leads to dehydration and heat exhaustion. Cold weather numbs your fingers and slows your reaction time.
Mechanical Failures
A flat tire, broken chain, or failed brakes at the wrong moment can turn a routine ride into a dangerous situation. Regular maintenance is the best prevention (you will learn all about this in Requirement 4).
Dogs and Animals
Dogs may chase cyclists, and wildlife like deer or squirrels can dart into your path unexpectedly. If a dog is chasing you, the safest approach is usually to slow down, put the bike between you and the dog, and use a firm voice to command “No!” or “Stay!”
Anticipate, Prevent, Mitigate, Respond
Your counselor wants you to think about hazards using four steps. Here is how they work together:
| Step | What It Means | Cycling Example |
|---|---|---|
| Anticipate | See the hazard before it happens | Scanning the road and spotting a car waiting to turn left at an intersection |
| Prevent | Take action so it doesn’t happen | Slowing down and making eye contact with the driver before entering the intersection |
| Mitigate | Reduce the severity if it does happen | Wearing a helmet and gloves so a fall causes scrapes instead of serious injury |
| Respond | Handle the situation after it occurs | Pulling off the road to treat a wound and calling for help if needed |
Explore More Resources
🎬 Video: Avoiding Road Hazards — https://www.youtube.com/watch?v=dcRpBP9WvKg
🎬 Video: Hazards, Prevention, and First Aid | Scouting America — https://vimeo.com/1125028263
Req 1b — First Aid for Cyclists
Cycling takes you through a wide variety of environments — city streets, country roads, forest trails, and everything in between. Knowing how to handle injuries and illnesses on the ride is just as important as knowing how to ride the bike itself. Let’s walk through the first-aid skills your counselor will want to see.
Cuts and Scratches
Cuts and scratches are the most common cycling injuries. A fall on pavement or gravel can leave you with “road rash” — a painful scrape across the skin.
Treating Cuts and Scratches
Step-by-step first aid- Stop the bleeding by applying gentle, direct pressure with a clean cloth or gauze.
- Clean the wound thoroughly with clean water. Remove dirt, gravel, or debris carefully.
- Apply antibiotic ointment to help prevent infection.
- Cover with a sterile bandage or adhesive dressing.
- Monitor for signs of infection over the next few days: increasing redness, swelling, warmth, or pus.
Concussions
A concussion is a brain injury caused by a blow to the head. In cycling, this usually happens in a crash when your head hits the ground, a vehicle, or an obstacle — even if you are wearing a helmet.
Signs to watch for:
- Confusion or disorientation (“Where am I?”)
- Headache that gets worse
- Nausea or vomiting
- Slurred speech or difficulty concentrating
- Loss of consciousness (even briefly)
Blisters
Blisters on the hands (from gripping handlebars) and feet (from pedaling in poorly fitting shoes) are common on long rides. They form when friction causes the outer layer of skin to separate and fill with fluid.
Sunburn
You can get sunburned on a bike faster than you might think. Cyclists are exposed to direct sunlight and reflected UV rays from pavement for hours at a time. The wind on your face can mask the burning sensation until the damage is done.
Heat-Related Illness
Cycling in hot weather puts you at risk for heat exhaustion and heatstroke — and the difference between the two matters.
Heat exhaustion happens when your body overheats but can still cool itself. Symptoms include heavy sweating, weakness, cool and clammy skin, nausea, and a fast pulse.
Heatstroke is a medical emergency. Your body’s cooling system has failed. Symptoms include hot, dry, or red skin, a body temperature above 103°F, confusion, and possible loss of consciousness.
Heat Illness Response
Know the difference and act fast- Heat exhaustion: Move the person to shade, loosen clothing, apply cool wet cloths, and give sips of water. Rest until symptoms pass completely.
- Heatstroke: Call 911 immediately. Move the person to shade, cool them rapidly with water or wet cloths, and fan them. Do not give fluids if they are confused or unconscious.
Hypothermia and Frostbite
Cold-weather cycling — especially at high speeds on descents — can rapidly lower your body temperature. Wind chill makes the air feel much colder than the actual temperature.
Hypothermia occurs when your core body temperature drops below 95°F. Watch for uncontrollable shivering, slurred speech, clumsiness, and confusion.
Frostbite affects exposed extremities — fingers, toes, ears, and nose. Skin turns pale or waxy and feels numb or hard.
Dehydration
When you ride, you sweat — and you lose more water than you realize, especially on hot or windy days. Dehydration sneaks up on you because by the time you feel thirsty, you are already behind on fluids.
Insect Stings, Tick Bites, and Snakebite
Cyclists — especially trail riders — pass through areas where insects, ticks, and snakes live.
- Insect stings: Remove the stinger by scraping it off (don’t squeeze it). Clean the area, apply ice, and watch for signs of allergic reaction (swelling of the face or throat, difficulty breathing). A severe reaction requires an EpiPen and immediate 911 call.
- Tick bites: Use fine-tipped tweezers to grasp the tick as close to the skin as possible and pull straight out with steady pressure. Clean the area and save the tick in a sealed bag for identification. Watch for a bullseye rash or flu-like symptoms in the following weeks.
- Snakebite: Keep the person calm and still. Do not cut the bite, try to suck out venom, or apply a tourniquet. Keep the bitten area below heart level and get to a hospital as quickly as possible.
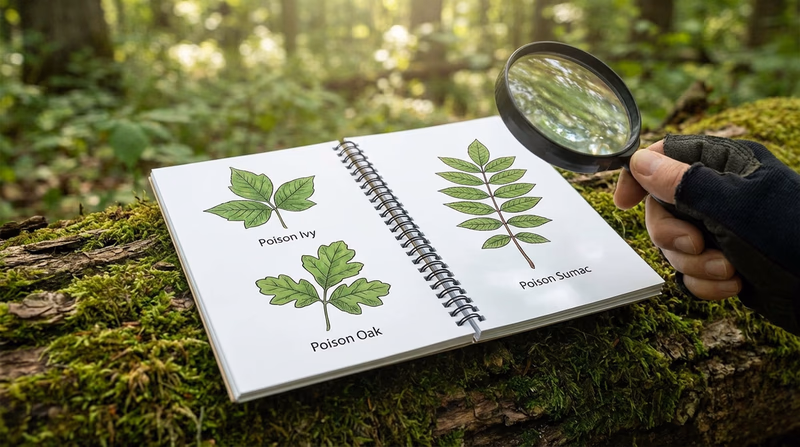
Poisonous Plants and Animals
Your counselor wants you to know why identifying local hazards matters. Trail cyclists ride through areas with poison ivy, poison oak, and poison sumac — plants that cause painful, itchy rashes on contact. Mountain bikers in some regions may encounter venomous snakes or spiders.
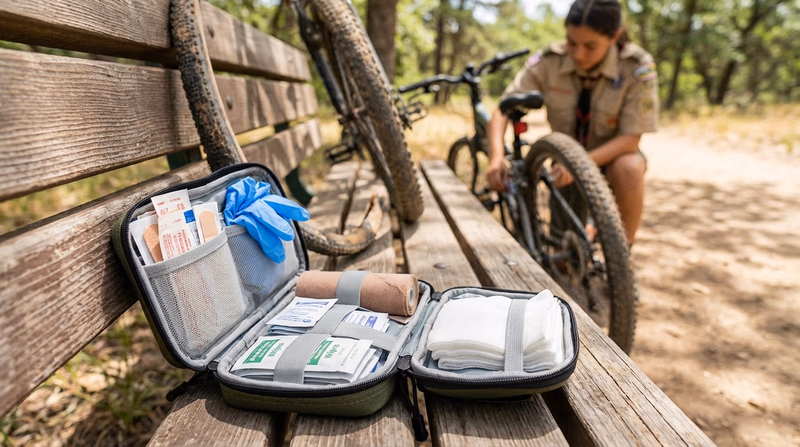
Your Cycling First-Aid Kit
Every cyclist should carry a compact first-aid kit. You can tuck one into a saddle bag or jersey pocket.
Cycling First-Aid Kit
Lightweight essentials for every ride- Adhesive bandages (assorted sizes): For small cuts and scrapes.
- Gauze pads and adhesive tape: For larger wounds and road rash.
- Antiseptic wipes: For cleaning wounds in the field.
- Antibiotic ointment packets: To prevent infection.
- Moleskin or blister bandages: For hotspots on hands and feet.
- Nitrile gloves: To protect yourself when treating another rider.
- Tweezers: For splinters, thorns, and tick removal.
- Emergency information card: Your name, emergency contacts, allergies, and medical conditions.
Explore More Resources
🎬 Video: First Aid Guide for Mountain Bikers — https://www.youtube.com/watch?v=oPCWzECMD_4
Req 2 — Bicycle Laws
Bicycles are not toys in the eyes of the law — in most states, a bicycle is a vehicle. That means when you ride on the road, you have many of the same rights and responsibilities as someone driving a car. Understanding these laws is essential for your safety and for earning this merit badge.
Bicycles as Vehicles
In nearly every state, traffic laws classify bicycles as vehicles. That single fact changes everything about how you should think about riding. You are not just “a kid on a bike” — you are an operator of a vehicle, and other road users are required to treat you that way.
What’s the Same as Driving a Car?
Many traffic laws apply equally to bikes and motor vehicles:
- Obey traffic signals and signs. Stop at red lights and stop signs. Yield at yield signs.
- Ride with the flow of traffic. Always ride in the same direction as cars on your side of the road.
- Use hand signals. Signal your turns and stops so other road users know what you plan to do.
- Yield to pedestrians. Pedestrians in crosswalks always have the right-of-way.
- No riding under the influence. Operating a bicycle while impaired is illegal in many states.
What’s Different from Driving a Car?
There are some rules that apply specifically to cyclists:
- Riding position. In most states, you must ride as far to the right as is safe and practicable — but you are allowed to “take the lane” when it is too narrow to share, when you are turning left, or when there are hazards near the right edge.
- Helmet laws. Many states and cities require helmets for riders under a certain age (often 16 or 18). Even where helmets are not legally required, Scouting America requires all Scouts to wear a properly fitted helmet.
- Sidewalk riding. Some cities allow bicycles on sidewalks; others prohibit it. Always check your local rules.
- Lighting requirements. Most states require a white front light and a red rear light or reflector when riding at night.
- Earbuds and headphones. Some states restrict or ban wearing headphones while cycling because they block your ability to hear traffic.
Lane Position
Where you ride within the lane matters. There are three basic lane positions:
- Right third of the lane — Your default position on wide roads with no hazards on the right edge. This gives cars room to pass while keeping you visible.
- Center of the lane (taking the lane) — Use this when the lane is too narrow for a car to pass you safely, when you are approaching an intersection, or when there are hazards on the right (parked cars, debris, drain grates).
- Left third of the lane — Used only when you are preparing for a left turn and have moved into the left-turn lane or the left side of your lane.
Changing Lanes
Changing lanes on a bicycle follows the same basic steps as in a car:
- Look behind you — Turn your head and glance over your shoulder (called a “shoulder check” or “scan”). Practice this skill so you can do it without swerving.
- Signal your intention — Extend your left arm straight out for a left lane change or your right arm straight out for a right lane change.
- Check again — Make sure the gap is clear.
- Move smoothly — Merge into the new lane gradually. No sudden swerves.
Making Turns
Left Turns
Left turns are the most complex maneuver for a cyclist. There are two methods:
Vehicular left turn (standard): Scan, signal, move into the left-turn lane or the left side of your lane, and turn with traffic. This is the same technique a car would use and works well on streets with light to moderate traffic.
Pedestrian-style (box) left turn: For heavy traffic or multi-lane roads, ride straight through the intersection, stop on the far-right corner, reposition your bike to face the new direction, and cross with the next green light. This keeps you out of fast-moving traffic.
Right Turns
Right turns are simpler. Signal with your right arm, check for pedestrians in the crosswalk, and turn from the right side of the lane. Watch for vehicles passing you on the left that may also be turning right — they might not see you.
Riding Through Intersections
Intersections are where most car-bicycle collisions happen. Approach every intersection with caution:
Intersection Safety
Steps for safe crossing- Scan in all directions as you approach — don’t just look ahead.
- Make eye contact with drivers who might turn across your path.
- Cover your brakes so you can stop quickly if needed.
- Do not pass vehicles on the right at an intersection — you may be in their blind spot.
- If you are in a bike lane that goes through an intersection, watch for right-turning vehicles crossing your path (the “right hook”).
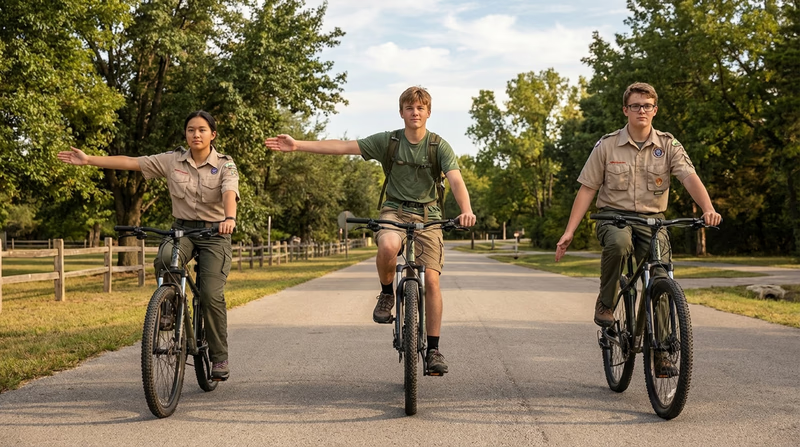
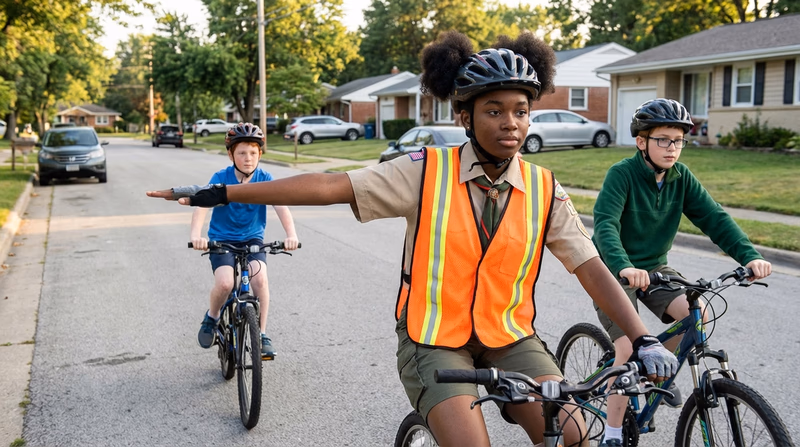
Hand Signals
Hand signals are your turn signals. Make them clearly and hold them long enough for drivers to see:
- Left turn: Left arm extended straight out to the side.
- Right turn: Right arm extended straight out to the side (or left arm bent upward at the elbow — both are legal, but the straight right arm is easier for drivers to understand).
- Stopping or slowing: Left arm extended downward with palm facing behind you.
Explore More Resources
🎬 Video: Bicycle Laws and Safe Road Riding | Scouting America — https://vimeo.com/1125028107
🎬 Video: Rules of the Road — https://youtu.be/-Jp0SSAeCiY
Req 3 — Clothing, Gear & Helmets
The right gear can be the difference between a great ride and a miserable one — or between a minor fall and a serious injury. You don’t need to spend a fortune, but you do need to be smart about what you wear and carry.
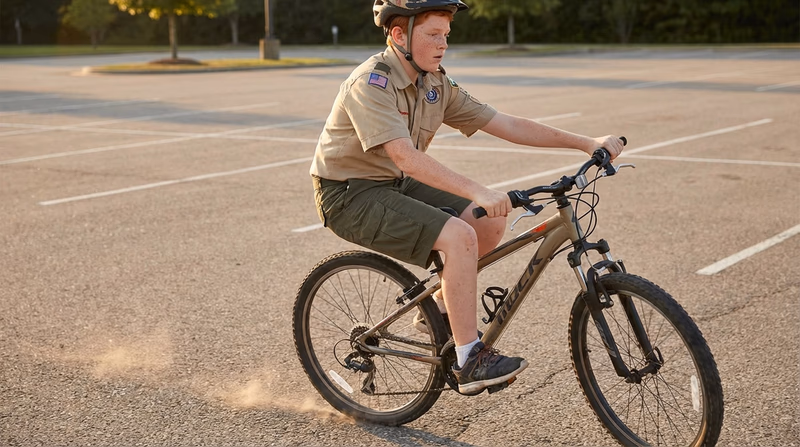
The Helmet: Your Most Important Piece of Gear
A helmet is non-negotiable. It is the single most effective piece of safety equipment you can wear on a bike. Scouting America requires all Scouts to wear a properly fitted helmet during any cycling activity — no exceptions.
How a Helmet Protects You
A cycling helmet has two layers: a hard outer shell that spreads the force of an impact across a wide area, and a foam inner liner (usually expanded polystyrene, or EPS) that crushes on impact to absorb energy before it reaches your skull. Together, they reduce the risk of serious head injury by up to 70%.
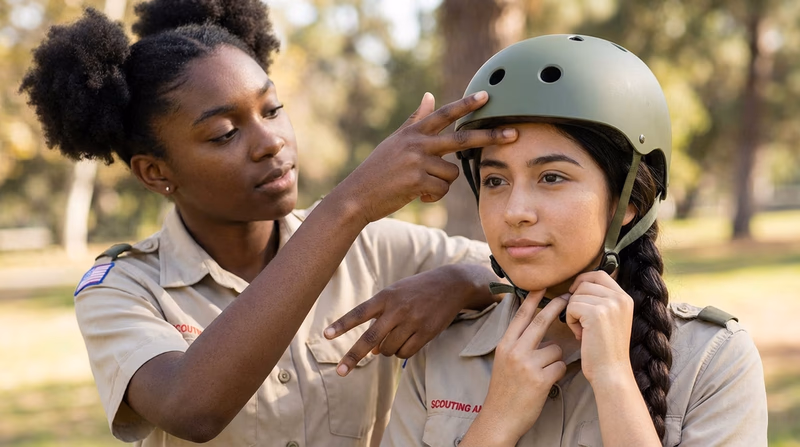
Fitting Your Helmet
A helmet only works if it fits correctly. An improperly fitted helmet can shift on impact and leave parts of your head unprotected.
Helmet Fit Check
The 2-V-1 method- 2 fingers: Place two fingers above your eyebrow. The front edge of the helmet should sit right at your fingers — not tilted back on your forehead.
- V shape: The straps should form a “V” shape just below each ear. Adjust the side straps until the V sits snugly under your earlobes.
- 1 finger: Buckle the chin strap and try to fit one finger between the strap and your chin. It should be snug — tight enough that the helmet doesn’t rock when you shake your head, but not so tight that it’s uncomfortable.
Cycling Clothing
You don’t need a professional cycling kit to ride safely, but wearing the right fabrics and the right fit makes a big difference in comfort and safety.
Fabrics
Fabric Guide
What to wear and what to avoid- Moisture-wicking synthetics (polyester, nylon): Pull sweat away from your skin so it can evaporate. Your best choice for cycling.
- Merino wool: Naturally wicks moisture, resists odor, and regulates temperature. Great for cool-weather riding.
- Cotton: Absorbs sweat and holds it against your skin. Avoid cotton for cycling — it gets cold and heavy when wet and takes forever to dry.
Fit
Loose, baggy clothing can catch on the bike or flap in the wind, creating drag and distraction. Cycling-specific clothing is designed to fit close to the body without restricting movement. If you prefer a more relaxed fit, avoid anything that could snag on the chain, pedals, or handlebars.
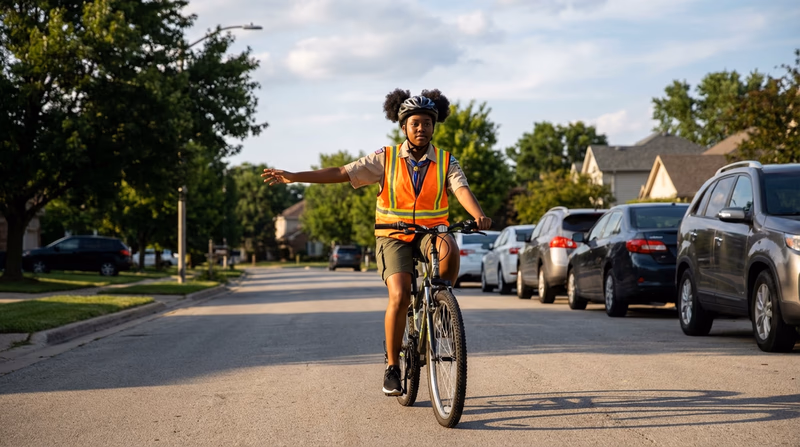
Visibility
Bright colors (yellow, orange, lime green) make you more visible to drivers during the day. At dawn, dusk, and night, reflective accents on clothing, shoes, and your helmet are essential. A reflective vest is a cheap, effective way to make yourself stand out.
Essential Cycling Gear
Beyond clothing, there are a few things every cyclist should carry on every ride.
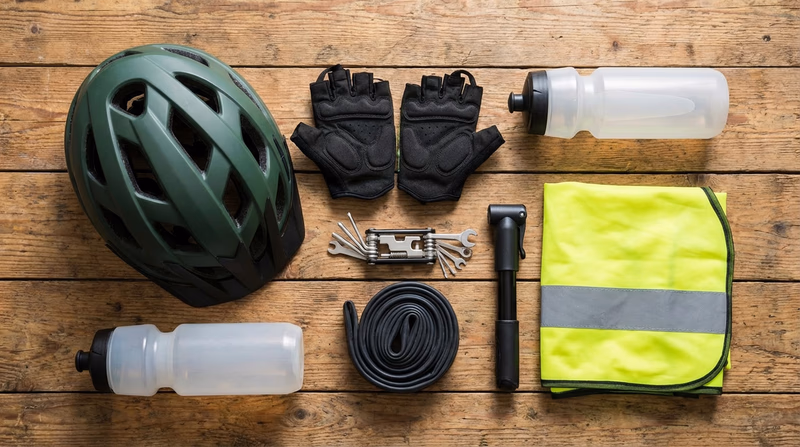
Ride-Ready Gear
What to carry every time- Helmet: Properly fitted and certified (look for CPSC sticker inside).
- Water bottle: Mounted on the frame or in a backpack hydration system. Stay hydrated.
- Spare tube, tire levers, and a mini pump or CO2 inflator: A flat tire is the most common mechanical problem, and you need to be able to fix it on the road.
- Multi-tool: A compact bike multi-tool with hex wrenches, a screwdriver, and a chain breaker covers most trailside repairs.
- ID and emergency contact info: Carry a card with your name, phone number, allergies, and an emergency contact.
- Phone: For emergencies and navigation — but keep it in a pocket or bag, not in your hand while riding.
Night Riding Gear
If you ride at dawn, dusk, or after dark, you need lights — it’s the law in most states.
Night Riding Requirements
Be seen and see the road- Front light (white): At least 200 lumens for road riding, more for unlit trails. Must be visible from 500 feet.
- Rear light (red): A flashing red light is the most effective way to be seen from behind.
- Reflectors: On pedals, wheels, and the rear of the bike. Many states require them.
- Reflective clothing or accessories: A vest, ankle bands, or reflective tape on your helmet.
Scouting America Bike Safety Guidelines
Scouting America has specific safety guidelines for all cycling activities. Your counselor will expect you to know these.
Key BSA Bike Safety Guidelines
Rules for all Scout cycling activities- All riders must wear a properly fitted, CPSC-certified bicycle helmet at all times while riding.
- The buddy system is required — never ride alone.
- Riders must obey all traffic laws and ride with the flow of traffic.
- Bicycles must be in good mechanical condition and appropriate for the type of riding.
- Routes should be planned in advance and shared with a responsible adult.
- Night riding requires proper lighting (white front, red rear) and reflective gear.
- Riders should carry water and first-aid supplies.
Weather-Specific Gear
Hot Weather
Stay cool and protected- Lightweight, vented helmet with good airflow.
- Light-colored, moisture-wicking jersey.
- Sunscreen (SPF 30+) applied to exposed skin.
- Sunglasses with UV protection.
- Extra water — consider a second bottle or a hydration pack.
Cold Weather
Layer up and protect extremities- Thermal base layer under your jersey.
- Wind-resistant jacket or vest.
- Full-finger gloves with windproof backing.
- Shoe covers or thermal socks to keep toes warm.
- Ear covers or a thermal skullcap under your helmet.
Wet Weather
Stay dry and visible- Waterproof cycling jacket with sealed seams.
- Fenders on the bike to reduce spray.
- Clear or yellow-tinted glasses to protect eyes from rain and improve visibility.
- Bright colors and extra reflective gear — visibility drops dramatically in rain.
Explore More Resources
🎬 Video: Fitting a Bike Helmet — https://www.youtube.com/watch?v=hLlXswx0VvQ
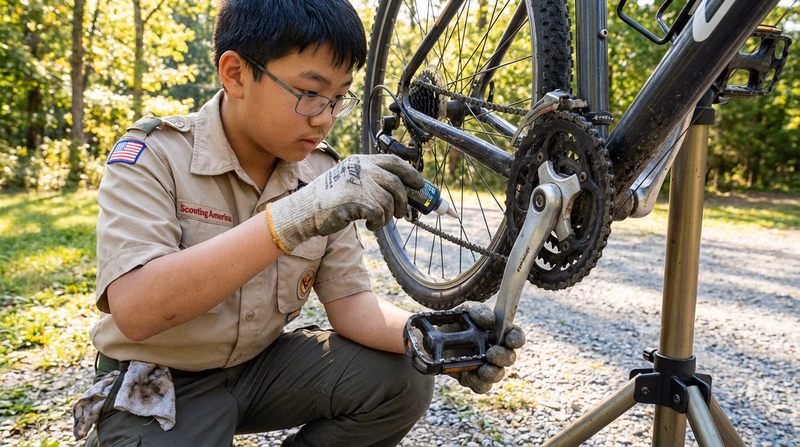
Req 4 — Inspect, Adjust & Repair
A well-maintained bicycle is a safe bicycle. Knowing how to inspect, adjust, and repair your bike is one of the most practical skills you will learn in this merit badge. It saves money, keeps you safe, and builds the confidence to ride anywhere.
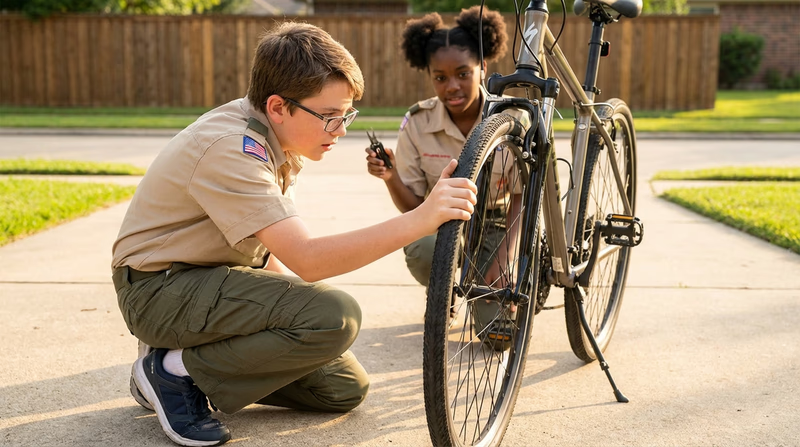
The Pre-Ride Safety Check
Before every ride, you should do a quick inspection to make sure your bike is ready. A common method is the ABC Quick Check:
ABC Quick Check
Do this before every ride- A — Air: Squeeze your tires. Are they firm? Check that they are inflated to the pressure listed on the tire sidewall.
- B — Brakes: Squeeze each brake lever. Do the brakes engage firmly before the lever touches the handlebar? Do the pads contact the rim (or rotor) evenly?
- C — Chain: Look at your chain. Is it clean and lubricated? Does it run smoothly without skipping or grinding?
- Quick — Quick releases: If your wheels have quick-release levers, make sure they are fully closed and tight. Give each wheel a tug to confirm it is secure.
- Check — Check it over: Take a quick look at the whole bike. Are the handlebars straight? Is the seat at the right height? Is anything loose, cracked, or missing?
Requirement 4a — Safety Inspection Points
Beyond the pre-ride ABC check, there are deeper inspection points to check on a regular basis (weekly for frequent riders, or before longer rides):
Regular Inspection Points
Check these weekly or before long rides- Tires: Look for cuts, bulges, embedded glass or thorns, and worn tread. Replace tires with visible cord or deep cuts.
- Wheels: Spin each wheel and watch for wobbles (side-to-side movement). A wobbly wheel may need truing.
- Spokes: Squeeze pairs of spokes together. They should feel firm and evenly tensioned. A loose or broken spoke needs repair.
- Brakes: Check pad wear. Most brake pads have wear indicators — replace them when the grooves are gone. Make sure cables move freely without fraying.
- Chain: A worn chain causes poor shifting and accelerates wear on your gears. A bike shop can measure chain stretch.
- Pedals: Spin them — they should rotate smoothly. Check that they are tight on the crank arms.
- Handlebars and stem: Grab the front wheel between your knees and try to twist the handlebars. They should not move. Check that the stem bolts are tight.
- Seat and seat post: The seat should not tilt or twist when you push on it. The seat post clamp should be tight.
- Reflectors and lights: Make sure all required reflectors and lights are present and working.
Requirement 4b — Saddle and Handlebar Fit
A properly fitted bike prevents injury and makes riding more comfortable and efficient. Two adjustments matter most: saddle height and handlebar position.
Saddle Height
Your saddle height affects your power, comfort, and knee health. Here’s how to set it:
- Sit on the bike with one pedal at the lowest point (6 o’clock position).
- Place your heel on the pedal. Your leg should be fully extended — straight but not locked.
- Now put the ball of your foot on the pedal (normal pedaling position). Your knee should have a slight bend — about 25 to 30 degrees.
If your hips rock side-to-side when you pedal, your saddle is too high. If your knees feel crunched or you bounce on the seat, it is too low.
Saddle Fore/Aft Position
The saddle also slides forward and backward on its rails. With the pedals level (3 o’clock and 9 o’clock), your forward knee should be directly over the pedal axle. Adjust the saddle position until this lines up.
Handlebar Height and Reach
For most recreational and fitness riding, the handlebars should be level with or slightly above the saddle. This puts you in a comfortable, upright position. As you become more experienced and want a more aerodynamic position, you may lower them — but start high for comfort.
Requirement 4c — Brakes and Derailleurs
Brake Adjustment
Your brakes need to stop you quickly and evenly. Here is what to check:
- Rim brakes: The pads should contact the rim squarely — not rubbing the tire or missing the rim. The gap between pad and rim should be about 1–2 mm on each side. Adjust using the barrel adjuster on the brake lever or the cable anchor bolt.
- Disc brakes: The rotor should spin freely between the pads without rubbing. If the brake squeals or rubs, the caliper may need to be realigned. Hydraulic disc brakes are self-adjusting for pad wear; mechanical disc brakes may need cable tension adjustment.
Derailleur Adjustment
The derailleur moves your chain between gears. When properly adjusted, gear changes are smooth and quiet. When misadjusted, the chain skips, rattles, or falls off.
- Limit screws: Prevent the chain from shifting too far inward (into the spokes) or too far outward (off the smallest gear). Adjustment requires a small Phillips or flathead screwdriver.
- Cable tension: Controls how precisely the derailleur moves between gears. Use the barrel adjuster on the shifter or derailleur to fine-tune.
- Indexing: Shift through all gears. If the chain hesitates when shifting to a larger gear, increase cable tension slightly. If it hesitates when shifting to a smaller gear, decrease tension.
Requirement 4d — Lubrication Points
A properly lubricated bike runs quieter, shifts better, and lasts longer. Here are the key points that need regular lubrication:
Lubrication Points
Keep your bike running smoothly- Chain: The most important part to lubricate. Apply chain lube to each link while slowly turning the pedals backward. Wipe off the excess — a wet, drippy chain attracts dirt and grit.
- Derailleur pivot points: A small drop of oil on each pivot keeps the derailleurs moving freely.
- Brake pivot points: A tiny drop of oil on the pivot bolt (not on the pads or rims!) keeps brakes operating smoothly.
- Cable housings: If cables feel sticky, a drop of lube where the cable enters the housing helps them slide freely.
- Pedal threads: Apply grease to the pedal threads before installing them to prevent them from seizing in the crank arms.
- Seat post: Apply a thin layer of grease to prevent the seat post from seizing inside the frame. (For carbon frames, use carbon-specific assembly paste instead of grease.)
Requirement 4e — Fixing a Flat Tire
Flat tires happen to everyone. Being able to fix one on the side of the road is an essential cycling skill. Practice this at home until you can do it confidently.
Fixing a Flat
Step by step- Remove the wheel from the bike. For rear wheels, shift to the smallest gear first to make removal easier.
- Deflate the tube completely by pressing the valve core.
- Insert tire levers under the tire bead (the edge that hooks onto the rim) and pry one side of the tire off the rim. Work around the wheel with the levers until one side of the tire is free.
- Pull the tube out of the tire.
- Inspect the inside of the tire by running your fingers carefully along the interior. Feel for the object that caused the flat (a thorn, piece of glass, or wire). Remove it so it doesn’t puncture your new tube.
- If patching: Find the hole by inflating the tube slightly and listening or feeling for escaping air. Rough up the area around the hole with sandpaper, apply rubber cement, wait for it to get tacky, and press the patch firmly in place.
- If replacing: Insert the new tube into the tire, starting at the valve. Tuck the tube neatly inside the tire all the way around.
- Push the tire bead back onto the rim using your hands. Avoid using tire levers for this step if possible — they can pinch and puncture the tube.
- Inflate the tire to the pressure listed on the sidewall. Check that the tire is seated evenly on the rim.
- Reinstall the wheel and confirm the brakes are working.
Requirement 4f — Meeting Local Laws
This ties back to what you learned in Requirement 2. Most local laws require:
- A working front brake and rear brake
- A white front light visible from 500 feet (for night riding)
- A red rear reflector or red rear light visible from 500 feet
- A bell or horn (in some cities)
- Reflectors on pedals and wheels (in some states)
Check your state and local regulations and make sure your bike meets every requirement before your counselor inspection.
Explore More Resources
🎬 Video: Checklist, Maintenance, and Inspection | Scouting America — https://vimeo.com/1125028194
🎬 Video: Changing a Tire with Disc Brakes | Scouting America — https://vimeo.com/1125028160
🎬 Video: Changing a Tire with Caliper Brakes | Scouting America — https://vimeo.com/1125028134
Req 5 — Basic Bike Handling
This requirement is all about demonstrating that you can control your bike confidently and safely. Your counselor will watch you perform each of these skills, so practice them until they feel natural.
Mounting Your Bicycle
It sounds simple, but there is a right way to get on a bike — one that keeps you balanced and in control from the start.
- Stand on the left side of the bike (the side away from the chain and gears).
- Squeeze both brakes to keep the bike from rolling.
- Swing your right leg over the saddle.
- Place one foot on a pedal at the 2 o’clock position (slightly forward and up). This gives you power to push off.
- Release the brakes, push down on the pedal, and lift yourself onto the saddle as the bike begins to move.
Starting and Stopping
Normal Starts
Use the power pedal technique described above. Push off, get both feet on the pedals, and begin pedaling smoothly. Avoid wobbling — start in a low gear so you can accelerate without straining.
Normal Stops
- Stop pedaling and coast briefly.
- Apply both brakes gradually and evenly. Use slightly more pressure on the rear brake than the front to avoid pitching forward.
- As the bike slows, shift your weight slightly back.
- Just before you stop, lean the bike slightly to one side and place that foot on the ground.
Emergency Stops
An emergency stop is a maximum-effort stop — you need to go from full speed to zero in the shortest distance possible. This skill could save your life.
Riding in a Straight Line
Riding in a straight line sounds easy, but it takes practice — especially at low speeds. A cyclist who weaves is unpredictable and unsafe, especially in traffic.
Tips for straight-line riding:
- Look ahead, not down at your front wheel. Your bike follows your eyes.
- Keep a relaxed but firm grip on the handlebars. Tight, white-knuckle grips cause wobbling.
- Use your core muscles (abs and back) to stabilize your body, not your arms.
- Practice riding along a painted line in a parking lot. Try to keep your front wheel on the line for 50 feet, then 100 feet.
Turning
Turning a bicycle is different from turning a car. Your body, not just the handlebars, controls the direction.
Slow-Speed Turns
At low speeds, you steer by turning the handlebars in the direction you want to go and leaning your body slightly. Keep pedaling through the turn to maintain balance.
High-Speed Turns
At higher speeds, you lean the bike into the turn. The faster you go, the more you lean. Your inside pedal should be up (at 12 o’clock) to avoid scraping the ground, and your outside pedal should be down (at 6 o’clock) with your weight pressing into it.
Shifting Gears
Modern bikes have many gears — anywhere from 7 to 30 or more. Knowing when and how to shift keeps you pedaling efficiently and prevents mechanical problems.
When to Shift
- Shift before you need to. If you see a hill coming, shift to an easier gear before you start climbing — not halfway up when you are straining.
- Shift to maintain cadence. Cadence is your pedaling speed, measured in revolutions per minute (RPM). A comfortable cadence for most riders is 70–90 RPM. If your legs are spinning too fast, shift to a harder gear. If you are grinding slowly, shift to an easier gear.
How to Shift
- Ease up on the pedals slightly while shifting. The chain needs a moment of reduced tension to move smoothly between gears.
- Shift one gear at a time. Avoid shifting multiple gears at once — it can cause the chain to skip or drop.
- Never shift under heavy load (like standing and mashing up a steep hill). This puts enormous stress on the chain and derailleur and can cause damage.
Scanning
Scanning means looking behind you while riding in a straight line. This is one of the hardest skills for new cyclists because turning your head tends to pull the handlebars and cause you to swerve.
Scanning Technique
Look behind without swerving- Keep a firm grip on the handlebars with your right hand and a light grip with your left.
- Drop your left hand to your side (or onto your left thigh).
- Turn your head and look over your left shoulder.
- Bring your head back and return your hand to the handlebar.
- Practice this in a parking lot along a painted line — you should be able to scan without drifting off the line.
Signaling
Hand signals communicate your intentions to drivers and other cyclists. You learned the specific signals in Requirement 2 — now you need to demonstrate them while riding.
The key is timing: signal early enough for others to react (at least 100 feet before your turn), then return your hand to the handlebar before you make the maneuver. You need both hands on the handlebars to control the bike during a turn or stop.
Putting It All Together
When your counselor evaluates you, they are looking for smooth, confident execution of all these skills. The best way to prepare is to practice each skill individually and then combine them into a continuous ride:
- Mount the bike using the power pedal start.
- Ride in a straight line for 50–100 feet.
- Shift through several gears smoothly.
- Scan over your left shoulder without swerving.
- Signal a left turn and execute it.
- Signal a right turn and execute it.
- Come to a normal, controlled stop.
- Ride again and perform an emergency stop.
Explore More Resources
🎬 Video: Mastering Basic Bicycle Handling Skills | Scouting America — https://vimeo.com/1125028294
🎬 Video: Bicycle Safer Journey — https://youtu.be/XMj_95C5ihk
Req 6a — Road Biking Option
If you prefer trail or mixed-surface riding, see Req 6b — Trail Biking Option. You only need to complete one of the two options.
Requirement 6a.1 — Road Safety Test
Your counselor will ride with you (or observe you) on public streets to evaluate your road-riding skills. This is a practical test — you will need to demonstrate each skill listed below in real traffic conditions.
6a.1.a — Left Turns
Standard vehicular left turn:
- Scan behind you for traffic.
- Signal left with your left arm extended.
- When safe, merge to the center of the lane (or into the left-turn lane if one exists).
- Yield to oncoming traffic.
- Complete the turn into the proper lane.
Box turn (pedestrian-style left turn) for heavy traffic:
- Ride straight through the intersection in the right lane.
- Stop on the far-right corner, staying out of the crosswalk.
- Reposition your bike to face the new direction of travel.
- Wait for the green signal, then proceed across the intersection.
6a.1.b — Right Turns
- Scan behind you.
- Signal right with your right arm.
- Check for pedestrians in the crosswalk.
- Make the turn from the right side of the lane, staying in control.
6a.1.c — Right-Turn-Only Lanes
When a right-turn-only lane appears and you need to go straight:
- Before the lane splits, merge left out of the right-turn-only lane.
- Signal your intention early.
- Position yourself in the through-traffic lane.
- Proceed straight through the intersection.
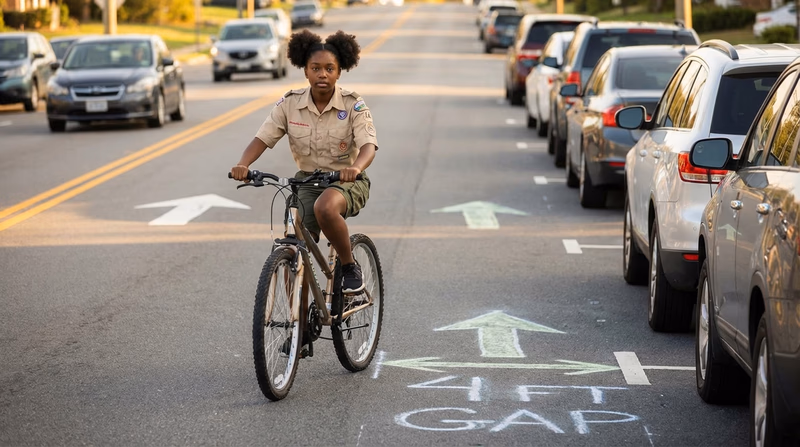
6a.1.d — Curbside and Road-Edge Riding
- Ride at least 4 feet from parked cars to stay outside the “door zone.”
- Maintain a straight, predictable line — don’t weave in and out of gaps between parked cars.
- Scan for signs that a car door may open: brake lights, people sitting inside, or movement in side mirrors.
6a.1.e — Railroad Tracks
- Approach railroad tracks at a right angle (perpendicular). If the tracks cross the road diagonally, adjust your line so you cross them straight-on.
- Rise slightly off the saddle to absorb the bump.
- Do not brake on the tracks — metal rails are slippery, especially when wet.
Requirement 6a.2 — Building Your Miles
This is where the real adventure begins. Six rides totaling 100 miles will build your endurance, confidence, and love of cycling. The rides get progressively longer, giving your body time to adapt.
Ride Log Resource: Ride Log — /merit-badges/cycling/guide/ride-log/Planning Your Rides
Ride Planning
Set yourself up for success- Map your route in advance using a cycling app or a paper map. Stay on secondary roads, bike lanes, and multi-use paths — avoid main highways.
- Share your route and estimated return time with an adult.
- Ride with your buddy — it’s required, and it makes the ride safer and more fun.
- Check the weather and plan accordingly.
- Carry water, snacks, a repair kit, your phone, and your first-aid kit.
Pacing Yourself
| Ride Distance | Estimated Time (10–12 mph) | Tips |
|---|---|---|
| 10 miles | 50–60 minutes | A great training ride. Focus on smooth pedaling and consistent speed. |
| 15 miles | 75–90 minutes | Bring a snack and extra water. Practice fueling while riding. |
| 25 miles | 2–2.5 hours | Plan a rest stop at the halfway point. Eat and drink before you feel hungry or thirsty. |
Ride Reports
Your report for each ride should include:
- Date of the ride
- Route taken (description or map)
- Total distance and approximate time
- Weather conditions
- Interesting things you saw or experienced
- Any challenges or lessons learned
Requirement 6a.3 — The Capstone Ride
This is the final challenge of the road biking option. Choose one of these two sub-options:
Option 6a.3.a — Plan and Ride a 50-Mile Route
A 50-mile ride (often called a “half-century”) is a major accomplishment. Planning is everything.
50-Mile Ride Planning
Prepare for the big ride- Plan your route on a road map. Mark rest stops every 15–20 miles where you can refuel and use a restroom.
- Carry enough food and water — or plan stops where you can buy supplies.
- Start early. At 12 mph average speed, a 50-mile ride takes about 4 hours of riding time plus stops.
- Break the ride into mental segments: “Just 10 more miles to the next rest stop.”
- Bring your map and follow your planned route. Navigation is part of the skill.
Option 6a.3.b — Organized Bike Tour
Organized rides provide rest stops, route markings, and safety support, making them an excellent way to complete your first 50-mile ride. After the ride, you will use the event’s cue sheet (turn-by-turn directions) to create a map showing the route you followed.
Explore More Resources
🎬 Video: Advanced Techniques for Urban Riding | Scouting America — https://vimeo.com/1125028086
Req 6b — Trail Biking Option
If you prefer road riding, see Req 6a — Road Biking Option. You only need to complete one of the two options.
Requirement 6b.1 — Mountain Bike Handling Skills
Trail riding demands a different set of skills than road riding. Your counselor will want to see that you can handle your bike safely on uneven, unpredictable surfaces.
6b.1.a — Body Positioning
Neutral position is your default riding posture on flat, easy terrain:
- Seated on the saddle
- Pedals level (3 o’clock and 9 o’clock)
- Elbows slightly bent, relaxed grip
- Eyes looking ahead, not at the front wheel
Ready position (also called “attack position”) is for technical terrain:
- Stand on the pedals with pedals level
- Knees and elbows bent — like a spring ready to absorb impacts
- Hips centered over the bottom bracket
- Head up, eyes scanning the trail ahead
Bike-body separation means moving your body independently of the bike:
- Side to side: Lean the bike under you while keeping your body upright — essential for weaving between obstacles.
- Forward and back: Shift your weight forward (for climbing) or backward (for steep descents) to keep traction on the right wheel.
Cornering position:
- Lean the bike into the turn while keeping your body more upright.
- Outside pedal down, inside pedal up.
- Weight on the outside pedal and outside hand.
- Look through the turn to where you want to exit.
6b.1.b — Shifting on Climbs and Obstacles
Trail shifting is different from road shifting because terrain changes happen suddenly.
Trail Shifting Tips
Keep your momentum- Shift to an easier gear before you reach the climb — not on the climb itself. Shifting under heavy load can break chains and damage gears.
- On rolling terrain, anticipate the next change. If you see a hill coming after a descent, shift while you still have momentum.
- When approaching an obstacle (roots, rocks), keep the chain in a gear that gives you enough power to maintain speed without spinning out.
- If you stall on a climb, stop pedaling, hold both brakes, and shift to an easier gear while stationary. Then resume.
6b.1.c — Riding Hills
Climbing:
- Seated climbing (moderate grades): Stay seated, shift to an easier gear, and keep a steady cadence. Scoot forward on the saddle slightly to keep the front wheel weighted and prevent it from lifting.
- Standing climbing (steep grades): Stand on the pedals and shift your weight forward over the handlebars. Use a slightly harder gear than seated climbing to match the slower cadence.
- Crouched climbing (very steep, technical): A hybrid position — hover just above the saddle with your chest low. This keeps weight on both wheels and gives you the most traction.
Descending:
- Move into the ready position: stand on level pedals, bend knees and elbows, shift your weight back.
- The steeper the descent, the farther back your weight goes. On very steep drops, your rear end may be behind and below the saddle.
- Use both brakes, but be careful with the front brake on loose surfaces — locking the front wheel can send you over the bars.
- Keep your speed controlled. It is always easier to add speed than to scrub it off on rough terrain.
Requirement 6b.2 — Trail Safety Test
6b.2.a — Trail Etiquette
On shared-use trails, cyclists must yield to both hikers and horses. The standard right-of-way hierarchy is:
- Horses have the right-of-way over everyone.
- Hikers have the right-of-way over cyclists.
- Cyclists yield to both.
When approaching hikers or other trail users:
- Slow down and announce your presence (“On your left!” or a friendly bell ring).
- Pass at a walking pace.
- Say hello — a friendly greeting goes a long way toward keeping trails open to cyclists.
When encountering other cyclists:
- Uphill riders have the right-of-way over downhill riders. It is harder to stop and restart on a climb.
- If you are faster, pass on the left with a verbal warning and only when it is safe.
6b.2.b — Crossing Obstacles
Not every obstacle needs to be ridden over. Knowing when to ride and when to walk is a sign of a smart rider.
Riding over small obstacles (logs, rocks under 6 inches):
- Approach in the ready position at moderate speed.
- Just before the obstacle, pull up on the handlebars to lift the front wheel over.
- As the front wheel clears, shift your weight forward to unweight the rear wheel and let it roll over.
Dismounting for larger obstacles:
- Slow down and stop safely before the obstacle.
- Dismount on the uphill side.
- Carry or walk your bike over or around the obstacle.
- Remount and continue when the trail is clear.
6b.2.c — Rocks, Gravel, and Roots
Rocks: Stay in the ready position. Let the bike move beneath you while your body stays stable. Choose a line (path) through the rocks before you enter — don’t look down at individual rocks; look ahead to where you want to go. Maintain momentum; stopping in a rock garden usually means falling over.
Gravel: Reduce speed before entering gravel — don’t brake on loose surfaces. Keep a light, relaxed grip on the handlebars and let the front wheel find its own path. Avoid sudden turns or hard braking.
Roots: Cross roots as close to perpendicular as possible, just like railroad tracks. Wet roots are extremely slippery — reduce speed and avoid braking or turning while on them. Unweight your front wheel as you cross.
Requirement 6b.3 — Trail Rules
IMBA (International Mountain Bicycling Association) established the Rules of the Trail that every mountain biker should follow:
IMBA Rules of the Trail
Ride responsibly- Ride on open trails only. Do not ride on trails closed to bikes — ever.
- Leave no trace. Don’t skid, don’t cut switchbacks, don’t widen trails, and pack out everything you bring in.
- Control your bicycle. Speed should always match conditions and your skill level.
- Yield appropriately. Yield to hikers and horses. Yield to uphill traffic.
- Never scare animals. Give wildlife a wide berth and slow down around horses.
- Plan ahead. Know your equipment, know the trail, and tell someone your plan.
When is a trail unsuitable for riding?
- Muddy conditions: Riding on wet, muddy trails causes ruts and erosion that can take years to repair. If you leave a rut deeper than one inch, the trail is too wet to ride.
- Closed or restricted trails: Some trails ban bikes entirely; others close seasonally. Always check before riding.
- Beyond your skill level: If a trail feature makes you feel unsafe, walk it. There is no shame in dismounting.
- Poorly maintained or hazardous trails: Fallen trees, washed-out sections, or cliffside trails with no runout should be avoided or approached with extreme caution.
Requirement 6b.4 — Building Your Trail Miles
Six rides totaling 30 miles of trail riding will build your off-road skills and confidence. Trail miles are harder than road miles — a 5-mile trail ride can be more demanding than a 15-mile road ride.
Ride Log Resource: Ride Log — /merit-badges/cycling/guide/ride-log/| Ride Distance | What to Focus On |
|---|---|
| 2 miles (x2) | Get comfortable on the trail. Practice body position and basic skills. |
| 5 miles (x2) | Build endurance. Practice shifting on climbs and navigating obstacles. |
| 8 miles (x2) | Push your limits. Manage nutrition, hydration, and fatigue over longer rides. |
Keep a ride report for each outing that includes the date, trail name and location, distance, conditions, and things you observed. Note what went well and what you want to improve.
Requirement 6b.5 — The Capstone Ride
A 22-mile trail ride is a serious achievement. You may combine multiple trail systems or use connecting roads to reach your total distance — just stay off main highways.
22-Mile Ride Planning
Prepare for your biggest trail ride- Study trail maps for your area. Identify trails that connect or are close enough to link with short road segments.
- Plan rest stops every 5–7 miles for water, food, and a break.
- Carry extra food, water, and a complete repair kit — you will be out for several hours.
- Start early to give yourself plenty of daylight.
- Share your detailed route and estimated return time with an adult.
- Get your counselor’s approval for the route before riding.
Explore More Resources
International Mountain Bicycling Association (IMBA) The leading organization for mountain biking trail access, advocacy, and education. Link: International Mountain Bicycling Association (IMBA) — https://www.imba.com/ Sharing Our Trails — Trail Etiquette A comprehensive guide to multi-use trail etiquette for all trail users. Link: Sharing Our Trails — Trail Etiquette — https://trailetiquette.org/🎬 Video: Bike Trail Etiquette — https://youtu.be/gwYBL2zPYXQ
🎬 Video: How to Navigate Rock Gardens — https://youtu.be/arh94o3Qm4Y
Ride Log
Back to Requirement 6Ride Log
Cycling Merit Badge — Requirement 6
Record each ride for your chosen option. Space for up to 10 rides (road option needs 7, trail option needs 7).
Ride Records
| # | Date | Route | Distance | Time | Avg Speed | Weather | Terrain | Notes |
|---|---|---|---|---|---|---|---|---|
| 1 | ||||||||
| 2 | ||||||||
| 3 | ||||||||
| 4 | ||||||||
| 5 | ||||||||
| 6 | ||||||||
| 7 | ||||||||
| 8 | ||||||||
| 9 | ||||||||
| 10 |
Interesting Things Seen
Use this space to describe highlights from your rides — landmarks, wildlife, scenic views, or anything noteworthy.
Counselor Verification
Extended Learning
A. Introduction
Congratulations — you have earned the Cycling merit badge! You have learned how to ride safely, maintain your bike, handle it with confidence, and push your endurance over real distances. But the road (and the trail) stretches far beyond this badge. Cycling is a lifelong pursuit with endless room to grow, explore, and challenge yourself.
B. Deep Dive: Understanding Bike Fit
Getting the right bike fit is one of the best investments you can make as a cyclist. A bike that fits well lets you ride longer, faster, and more comfortably — and it prevents overuse injuries that can sideline you for weeks.
There are five key contact points between your body and the bike: hands (two), feet (two), and seat (one). Each one needs to be set up correctly.
- Saddle height: You covered the basics in Requirement 4b. As you ride more, you will fine-tune this. A difference of just 5 millimeters can affect your comfort and power on a long ride.
- Saddle fore/aft: Slide the saddle forward or back on its rails to position your knee directly over the pedal spindle when the cranks are level.
- Handlebar reach: If you feel stretched out or cramped, you may need a shorter or longer stem. Comfortable reach means a slight bend in the elbows with relaxed shoulders.
- Handlebar width: Your handlebars should be approximately the same width as your shoulders.
- Cleat position (for clipless pedals): If you use clip-in pedals, cleat alignment affects your knee tracking. Start with the cleat centered under the ball of your foot and adjust from there.
C. Deep Dive: Nutrition for Cyclists
Food is fuel, and the further you ride, the more important nutrition becomes. Your body stores about 90 minutes of glycogen (the energy your muscles burn during exercise). After that, you need to eat — or risk “bonking,” a sudden, total loss of energy that can leave you unable to pedal.
Before the ride: Eat a balanced meal 2–3 hours before riding. Focus on carbohydrates (pasta, rice, oatmeal, toast) with some protein. Avoid heavy, greasy foods.
During the ride: For rides over an hour, eat 30–60 grams of carbohydrates per hour. Good options include energy bars, bananas, fig bars, and sports chews. Drink water or a sports drink every 15 minutes.
After the ride: Eat a recovery meal within 30 minutes of finishing. Aim for a 3:1 ratio of carbohydrates to protein — chocolate milk is a classic (and delicious) cycling recovery drink.
D. Deep Dive: Basic Trail Building and Maintenance
If you love riding trails, consider giving back by helping build and maintain them. Trail work is a fantastic community service project and can even count toward Eagle Scout service hours.
- What trail maintenance involves: Clearing fallen trees and debris, repairing drainage features (water bars, grade reversals), trimming overgrowth, and filling ruts.
- Why it matters: Well-maintained trails are safer, more fun, and more sustainable. Erosion from neglected trails can damage ecosystems and lead to trail closures.
- How to get involved: Contact your local IMBA chapter, mountain bike club, or land management agency (USFS, BLM, state parks) to find volunteer trail work days.
E. Deep Dive: Cycling Safety Technology
Whether you ride roads or trails, modern safety technology can make every ride safer and more enjoyable. Understanding what is available — and what is actually worth using — helps you ride with confidence.
Lights and visibility. Front and rear lights are not just for night riding. Daytime running lights make you dramatically more visible to drivers. A solid white front light and a flashing red rear light are the minimum. Look for lights rated at least 200 lumens for the front (much more for night riding) and 50 lumens for the rear. Many modern lights are USB-rechargeable, which saves money on batteries and is better for the environment.
Reflective gear and clothing. Reflective tape, vests, and ankle bands catch headlights from hundreds of feet away. Your ankles are especially effective locations for reflective material because the up-and-down pedaling motion catches a driver’s eye faster than a stationary reflector. Reflective sidewall tires and spoke reflectors add visibility without any effort on your part once installed.
Helmet standards. Not all helmets are created equal. In the United States, bicycle helmets must meet the Consumer Product Safety Commission (CPSC) standard. Look for the CPSC sticker inside the helmet. For mountain biking, helmets with extended rear coverage (sometimes called “enduro” style) protect the back of the head during falls. MIPS (Multi-directional Impact Protection System) is an additional technology that reduces rotational forces during angled impacts — many safety experts recommend it.
Bike computers and GPS. A basic bike computer tracks speed, distance, and ride time — the exact data you need for your ride reports. GPS-enabled units and smartphone apps like Strava, Komoot, and Ride with GPS let you plan routes, follow turn-by-turn directions, and share your location with family. Some GPS units send automatic crash-detection alerts to your emergency contacts if they detect a sudden stop.
F. Cycling Experiences
Ready to take your riding to the next level? These experiences will challenge you and create memories that last a lifetime.
RAGBRAI — Register's Annual Great Bicycle Ride Across Iowa
Great Divide Mountain Bike Route
Moab, Utah — Slickrock Trail
Your Local Bike Park
G. Organizations
Getting connected with a cycling organization is a great way to find rides, learn new skills, and advocate for better cycling infrastructure in your community.
The nation’s leading bicycle advocacy organization, working to make cycling safer, more accessible, and more enjoyable for everyone.
Organization: League of American Bicyclists — https://bikeleague.org/
Dedicated to creating, enhancing, and protecting great places to ride mountain bikes.
Organization: International Mountain Bicycling Association (IMBA) — https://www.imba.com/
A coalition working to make biking better for everyone through infrastructure investment, policy advocacy, and community building.
Organization: People for Bikes — https://www.peopleforbikes.org/
The premier bicycle-travel organization in North America, with a network of mapped cycling routes spanning over 50,000 miles.
Organization: Adventure Cycling Association — https://www.adventurecycling.org/
Develops interscholastic mountain biking programs for student-athletes across the United States.
Organization: National Interscholastic Cycling Association (NICA) — https://www.nationalmtb.org/
The national governing body for competitive cycling in the United States, covering road, track, mountain bike, BMX, and cyclocross.
Organization: USA Cycling — https://usacycling.org/