Req 4 — Inspect, Adjust & Repair
A well-maintained bicycle is a safe bicycle. Knowing how to inspect, adjust, and repair your bike is one of the most practical skills you will learn in this merit badge. It saves money, keeps you safe, and builds the confidence to ride anywhere.
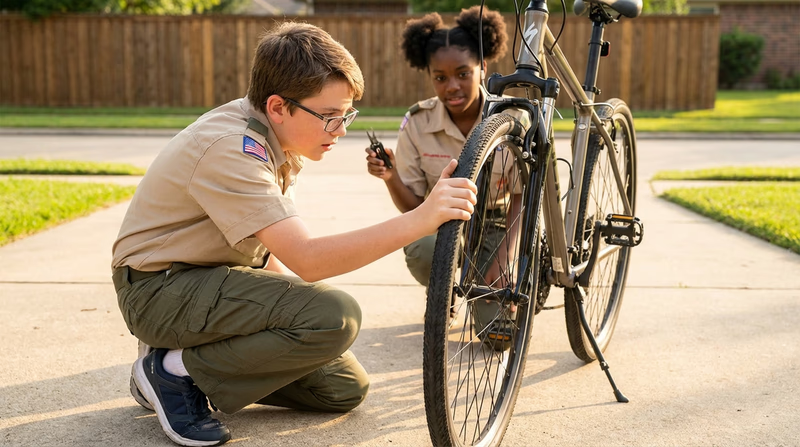
The Pre-Ride Safety Check
Before every ride, you should do a quick inspection to make sure your bike is ready. A common method is the ABC Quick Check:
ABC Quick Check
Do this before every ride
- A — Air: Squeeze your tires. Are they firm? Check that they are inflated to the pressure listed on the tire sidewall.
- B — Brakes: Squeeze each brake lever. Do the brakes engage firmly before the lever touches the handlebar? Do the pads contact the rim (or rotor) evenly?
- C — Chain: Look at your chain. Is it clean and lubricated? Does it run smoothly without skipping or grinding?
- Quick — Quick releases: If your wheels have quick-release levers, make sure they are fully closed and tight. Give each wheel a tug to confirm it is secure.
- Check — Check it over: Take a quick look at the whole bike. Are the handlebars straight? Is the seat at the right height? Is anything loose, cracked, or missing?
Requirement 4a — Safety Inspection Points
Beyond the pre-ride ABC check, there are deeper inspection points to check on a regular basis (weekly for frequent riders, or before longer rides):
Regular Inspection Points
Check these weekly or before long rides
- Tires: Look for cuts, bulges, embedded glass or thorns, and worn tread. Replace tires with visible cord or deep cuts.
- Wheels: Spin each wheel and watch for wobbles (side-to-side movement). A wobbly wheel may need truing.
- Spokes: Squeeze pairs of spokes together. They should feel firm and evenly tensioned. A loose or broken spoke needs repair.
- Brakes: Check pad wear. Most brake pads have wear indicators — replace them when the grooves are gone. Make sure cables move freely without fraying.
- Chain: A worn chain causes poor shifting and accelerates wear on your gears. A bike shop can measure chain stretch.
- Pedals: Spin them — they should rotate smoothly. Check that they are tight on the crank arms.
- Handlebars and stem: Grab the front wheel between your knees and try to twist the handlebars. They should not move. Check that the stem bolts are tight.
- Seat and seat post: The seat should not tilt or twist when you push on it. The seat post clamp should be tight.
- Reflectors and lights: Make sure all required reflectors and lights are present and working.
Requirement 4b — Saddle and Handlebar Fit
A properly fitted bike prevents injury and makes riding more comfortable and efficient. Two adjustments matter most: saddle height and handlebar position.
Saddle Height
Your saddle height affects your power, comfort, and knee health. Here’s how to set it:
- Sit on the bike with one pedal at the lowest point (6 o’clock position).
- Place your heel on the pedal. Your leg should be fully extended — straight but not locked.
- Now put the ball of your foot on the pedal (normal pedaling position). Your knee should have a slight bend — about 25 to 30 degrees.
If your hips rock side-to-side when you pedal, your saddle is too high. If your knees feel crunched or you bounce on the seat, it is too low.
Saddle Fore/Aft Position
The saddle also slides forward and backward on its rails. With the pedals level (3 o’clock and 9 o’clock), your forward knee should be directly over the pedal axle. Adjust the saddle position until this lines up.
Handlebar Height and Reach
For most recreational and fitness riding, the handlebars should be level with or slightly above the saddle. This puts you in a comfortable, upright position. As you become more experienced and want a more aerodynamic position, you may lower them — but start high for comfort.
Requirement 4c — Brakes and Derailleurs
Brake Adjustment
Your brakes need to stop you quickly and evenly. Here is what to check:
- Rim brakes: The pads should contact the rim squarely — not rubbing the tire or missing the rim. The gap between pad and rim should be about 1–2 mm on each side. Adjust using the barrel adjuster on the brake lever or the cable anchor bolt.
- Disc brakes: The rotor should spin freely between the pads without rubbing. If the brake squeals or rubs, the caliper may need to be realigned. Hydraulic disc brakes are self-adjusting for pad wear; mechanical disc brakes may need cable tension adjustment.
Derailleur Adjustment
The derailleur moves your chain between gears. When properly adjusted, gear changes are smooth and quiet. When misadjusted, the chain skips, rattles, or falls off.
- Limit screws: Prevent the chain from shifting too far inward (into the spokes) or too far outward (off the smallest gear). Adjustment requires a small Phillips or flathead screwdriver.
- Cable tension: Controls how precisely the derailleur moves between gears. Use the barrel adjuster on the shifter or derailleur to fine-tune.
- Indexing: Shift through all gears. If the chain hesitates when shifting to a larger gear, increase cable tension slightly. If it hesitates when shifting to a smaller gear, decrease tension.
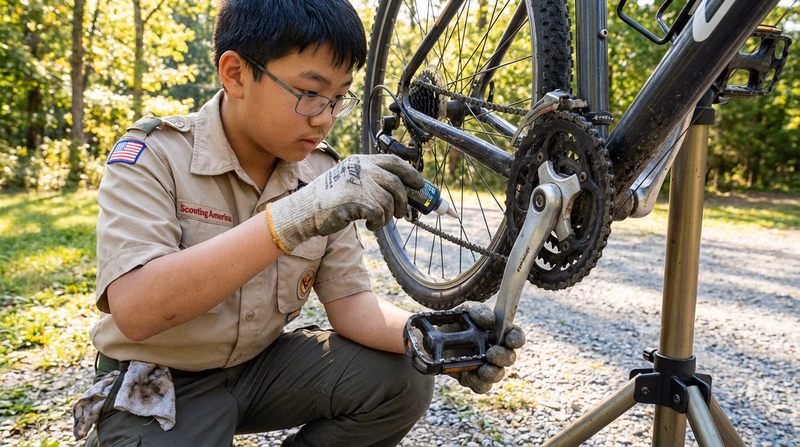
Requirement 4d — Lubrication Points
A properly lubricated bike runs quieter, shifts better, and lasts longer. Here are the key points that need regular lubrication:
Lubrication Points
Keep your bike running smoothly
- Chain: The most important part to lubricate. Apply chain lube to each link while slowly turning the pedals backward. Wipe off the excess — a wet, drippy chain attracts dirt and grit.
- Derailleur pivot points: A small drop of oil on each pivot keeps the derailleurs moving freely.
- Brake pivot points: A tiny drop of oil on the pivot bolt (not on the pads or rims!) keeps brakes operating smoothly.
- Cable housings: If cables feel sticky, a drop of lube where the cable enters the housing helps them slide freely.
- Pedal threads: Apply grease to the pedal threads before installing them to prevent them from seizing in the crank arms.
- Seat post: Apply a thin layer of grease to prevent the seat post from seizing inside the frame. (For carbon frames, use carbon-specific assembly paste instead of grease.)
Requirement 4e — Fixing a Flat Tire
Flat tires happen to everyone. Being able to fix one on the side of the road is an essential cycling skill. Practice this at home until you can do it confidently.
Fixing a Flat
Step by step
- Remove the wheel from the bike. For rear wheels, shift to the smallest gear first to make removal easier.
- Deflate the tube completely by pressing the valve core.
- Insert tire levers under the tire bead (the edge that hooks onto the rim) and pry one side of the tire off the rim. Work around the wheel with the levers until one side of the tire is free.
- Pull the tube out of the tire.
- Inspect the inside of the tire by running your fingers carefully along the interior. Feel for the object that caused the flat (a thorn, piece of glass, or wire). Remove it so it doesn’t puncture your new tube.
- If patching: Find the hole by inflating the tube slightly and listening or feeling for escaping air. Rough up the area around the hole with sandpaper, apply rubber cement, wait for it to get tacky, and press the patch firmly in place.
- If replacing: Insert the new tube into the tire, starting at the valve. Tuck the tube neatly inside the tire all the way around.
- Push the tire bead back onto the rim using your hands. Avoid using tire levers for this step if possible — they can pinch and puncture the tube.
- Inflate the tire to the pressure listed on the sidewall. Check that the tire is seated evenly on the rim.
- Reinstall the wheel and confirm the brakes are working.
Requirement 4f — Meeting Local Laws
This ties back to what you learned in Requirement 2. Most local laws require:
- A working front brake and rear brake
- A white front light visible from 500 feet (for night riding)
- A red rear reflector or red rear light visible from 500 feet
- A bell or horn (in some cities)
- Reflectors on pedals and wheels (in some states)
Check your state and local regulations and make sure your bike meets every requirement before your counselor inspection.