Req 6b — Trail Biking Option
This page covers Option B — Trail or Mixed Surface Biking. If you prefer road riding, see Req 6a — Road Biking Option. You only need to complete one of the two options.
Requirement 6b.1 — Mountain Bike Handling Skills
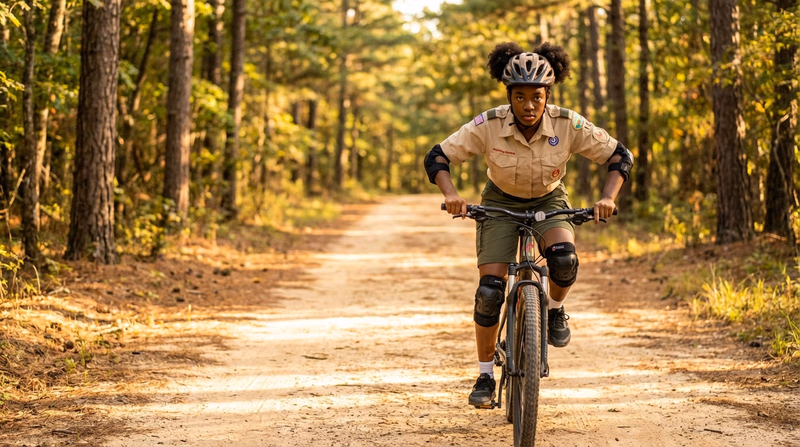
Trail riding demands a different set of skills than road riding. Your counselor will want to see that you can handle your bike safely on uneven, unpredictable surfaces.
6b.1.a — Body Positioning
Neutral position is your default riding posture on flat, easy terrain:
- Seated on the saddle
- Pedals level (3 o’clock and 9 o’clock)
- Elbows slightly bent, relaxed grip
- Eyes looking ahead, not at the front wheel
Ready position (also called “attack position”) is for technical terrain:
- Stand on the pedals with pedals level
- Knees and elbows bent — like a spring ready to absorb impacts
- Hips centered over the bottom bracket
- Head up, eyes scanning the trail ahead
Bike-body separation means moving your body independently of the bike:
- Side to side: Lean the bike under you while keeping your body upright — essential for weaving between obstacles.
- Forward and back: Shift your weight forward (for climbing) or backward (for steep descents) to keep traction on the right wheel.
Cornering position:
- Lean the bike into the turn while keeping your body more upright.
- Outside pedal down, inside pedal up.
- Weight on the outside pedal and outside hand.
- Look through the turn to where you want to exit.
6b.1.b — Shifting on Climbs and Obstacles
Trail shifting is different from road shifting because terrain changes happen suddenly.
Trail Shifting Tips
Keep your momentum
- Shift to an easier gear before you reach the climb — not on the climb itself. Shifting under heavy load can break chains and damage gears.
- On rolling terrain, anticipate the next change. If you see a hill coming after a descent, shift while you still have momentum.
- When approaching an obstacle (roots, rocks), keep the chain in a gear that gives you enough power to maintain speed without spinning out.
- If you stall on a climb, stop pedaling, hold both brakes, and shift to an easier gear while stationary. Then resume.
6b.1.c — Riding Hills
Climbing:
- Seated climbing (moderate grades): Stay seated, shift to an easier gear, and keep a steady cadence. Scoot forward on the saddle slightly to keep the front wheel weighted and prevent it from lifting.
- Standing climbing (steep grades): Stand on the pedals and shift your weight forward over the handlebars. Use a slightly harder gear than seated climbing to match the slower cadence.
- Crouched climbing (very steep, technical): A hybrid position — hover just above the saddle with your chest low. This keeps weight on both wheels and gives you the most traction.
Descending:
- Move into the ready position: stand on level pedals, bend knees and elbows, shift your weight back.
- The steeper the descent, the farther back your weight goes. On very steep drops, your rear end may be behind and below the saddle.
- Use both brakes, but be careful with the front brake on loose surfaces — locking the front wheel can send you over the bars.
- Keep your speed controlled. It is always easier to add speed than to scrub it off on rough terrain.
Requirement 6b.2 — Trail Safety Test
6b.2.a — Trail Etiquette
On shared-use trails, cyclists must yield to both hikers and horses. The standard right-of-way hierarchy is:
- Horses have the right-of-way over everyone.
- Hikers have the right-of-way over cyclists.
- Cyclists yield to both.
When approaching hikers or other trail users:
- Slow down and announce your presence (“On your left!” or a friendly bell ring).
- Pass at a walking pace.
- Say hello — a friendly greeting goes a long way toward keeping trails open to cyclists.
When encountering other cyclists:
- Uphill riders have the right-of-way over downhill riders. It is harder to stop and restart on a climb.
- If you are faster, pass on the left with a verbal warning and only when it is safe.
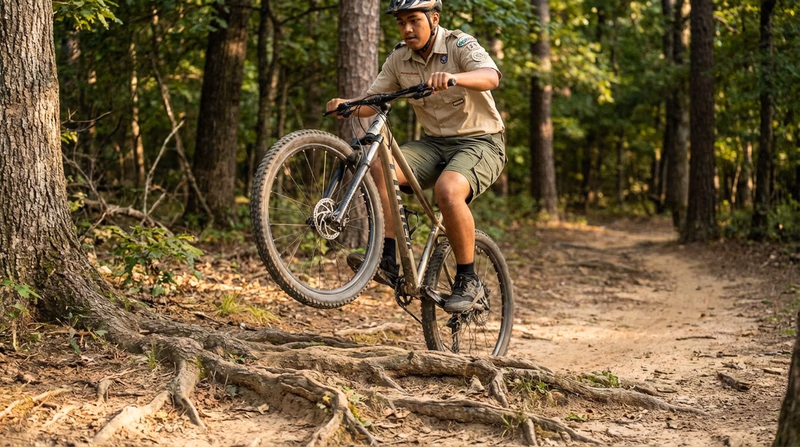
6b.2.b — Crossing Obstacles
Not every obstacle needs to be ridden over. Knowing when to ride and when to walk is a sign of a smart rider.
Riding over small obstacles (logs, rocks under 6 inches):
- Approach in the ready position at moderate speed.
- Just before the obstacle, pull up on the handlebars to lift the front wheel over.
- As the front wheel clears, shift your weight forward to unweight the rear wheel and let it roll over.
Dismounting for larger obstacles:
- Slow down and stop safely before the obstacle.
- Dismount on the uphill side.
- Carry or walk your bike over or around the obstacle.
- Remount and continue when the trail is clear.
6b.2.c — Rocks, Gravel, and Roots
Rocks: Stay in the ready position. Let the bike move beneath you while your body stays stable. Choose a line (path) through the rocks before you enter — don’t look down at individual rocks; look ahead to where you want to go. Maintain momentum; stopping in a rock garden usually means falling over.
Gravel: Reduce speed before entering gravel — don’t brake on loose surfaces. Keep a light, relaxed grip on the handlebars and let the front wheel find its own path. Avoid sudden turns or hard braking.
Roots: Cross roots as close to perpendicular as possible, just like railroad tracks. Wet roots are extremely slippery — reduce speed and avoid braking or turning while on them. Unweight your front wheel as you cross.
Requirement 6b.3 — Trail Rules
IMBA (International Mountain Bicycling Association) established the Rules of the Trail that every mountain biker should follow:
IMBA Rules of the Trail
Ride responsibly
- Ride on open trails only. Do not ride on trails closed to bikes — ever.
- Leave no trace. Don’t skid, don’t cut switchbacks, don’t widen trails, and pack out everything you bring in.
- Control your bicycle. Speed should always match conditions and your skill level.
- Yield appropriately. Yield to hikers and horses. Yield to uphill traffic.
- Never scare animals. Give wildlife a wide berth and slow down around horses.
- Plan ahead. Know your equipment, know the trail, and tell someone your plan.
When is a trail unsuitable for riding?
- Muddy conditions: Riding on wet, muddy trails causes ruts and erosion that can take years to repair. If you leave a rut deeper than one inch, the trail is too wet to ride.
- Closed or restricted trails: Some trails ban bikes entirely; others close seasonally. Always check before riding.
- Beyond your skill level: If a trail feature makes you feel unsafe, walk it. There is no shame in dismounting.
- Poorly maintained or hazardous trails: Fallen trees, washed-out sections, or cliffside trails with no runout should be avoided or approached with extreme caution.
Requirement 6b.4 — Building Your Trail Miles
Six rides totaling 30 miles of trail riding will build your off-road skills and confidence. Trail miles are harder than road miles — a 5-mile trail ride can be more demanding than a 15-mile road ride.
Ride Log| Ride Distance | What to Focus On |
|---|---|
| 2 miles (x2) | Get comfortable on the trail. Practice body position and basic skills. |
| 5 miles (x2) | Build endurance. Practice shifting on climbs and navigating obstacles. |
| 8 miles (x2) | Push your limits. Manage nutrition, hydration, and fatigue over longer rides. |
Keep a ride report for each outing that includes the date, trail name and location, distance, conditions, and things you observed. Note what went well and what you want to improve.
Requirement 6b.5 — The Capstone Ride
A 22-mile trail ride is a serious achievement. You may combine multiple trail systems or use connecting roads to reach your total distance — just stay off main highways.
22-Mile Ride Planning
Prepare for your biggest trail ride
- Study trail maps for your area. Identify trails that connect or are close enough to link with short road segments.
- Plan rest stops every 5–7 miles for water, food, and a break.
- Carry extra food, water, and a complete repair kit — you will be out for several hours.
- Start early to give yourself plenty of daylight.
- Share your detailed route and estimated return time with an adult.
- Get your counselor’s approval for the route before riding.