Req 14 — Teaching First Aid
Teaching is one of the most powerful ways to solidify your own knowledge. When you teach a first aid skill, you do not just pass on information — you deepen your own understanding and give others the ability to help in an emergency. This requirement asks you to plan and deliver a first aid lesson using the EDGE method.
The EDGE Method
EDGE is Scouting’s teaching framework. It stands for:
Explain
Tell your learners what the skill is and why it matters. Give them context before diving into the how-to.
- “Today I’m going to teach you how to apply a tourniquet. This skill can stop life-threatening bleeding in seconds. Here’s why it’s important…”
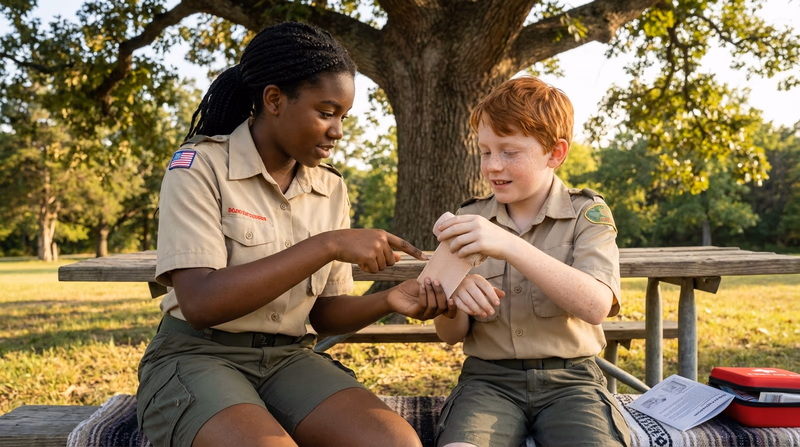
Demonstrate
Show the skill step by step while narrating what you are doing. Go slowly. Your learners should be watching, not doing — yet.
- “Watch me. First, I place the tourniquet high on the limb, above the wound…”
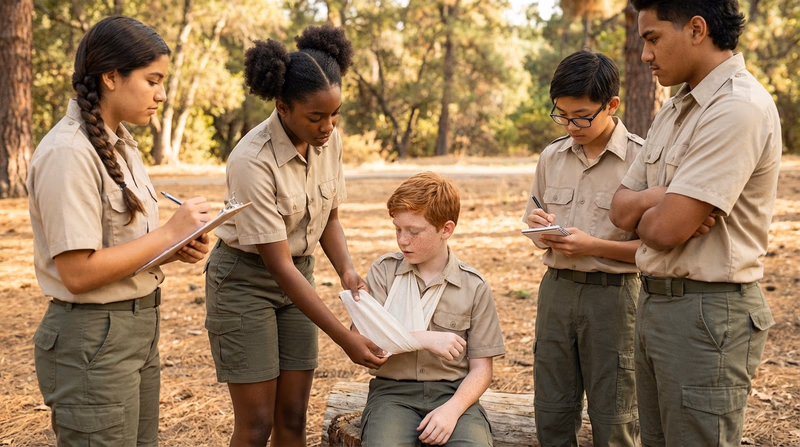
Guide
Now let them try it while you watch and coach. Give feedback in real time. Correct mistakes gently and encourage progress.
- “Great, now you try it. Remember — high and tight. Good. Now twist the windlass… that’s it. One more turn.”
Enable
Step back and let them practice independently. Check in, answer questions, but let them build confidence by doing it on their own.
- “Now do it again on your own, start to finish. I’ll be right here if you need me.”
Choosing Your Topic
Pick a skill that is:
- Practical and demonstrable — you can actually show the steps, not just talk about them
- Appropriate for your audience — match the complexity to who you are teaching
- Something you know well — you should be able to teach it confidently
Good First Aid Topics for EDGE Teaching
Topic Ideas
Skills that work well for EDGE teaching
- CPR (Hands-Only): High impact, easy to practice with demonstrations
- Tourniquet application: Timely, life-saving, straightforward steps
- Arm sling: Hands-on bandaging skill with clear steps
- Choking response (Heimlich maneuver): Practical and universally useful
- Wound cleaning and bandaging: Basic skill everyone should know
- Splinting a forearm: Uses improvised materials — engaging for Scouts
- Recovery position: Quick to learn, critical for unconscious victims
- Tick removal: Especially relevant for outdoor Scouts
- Blister prevention and treatment: Practical trail skill
- Treating for shock: Important and often misunderstood
Planning Your Lesson
Before you teach, plan your lesson. Here is a framework:
Lesson Plan Template
- Topic: What skill are you teaching?
- Audience: Who are you teaching? (Family members, younger Scouts, patrol members)
- Objective: What should learners be able to do after the lesson?
- Materials needed: What supplies do you need? (Bandages, splints, mannequin, etc.)
- EDGE steps:
- Explain (2–3 minutes): What is this skill? Why does it matter? When would you use it?
- Demonstrate (3–5 minutes): Show the complete skill step by step.
- Guide (5–10 minutes): Have each learner practice while you coach.
- Enable (5 minutes): Let learners practice independently. Assess their competence.
- Assessment: How will you know they learned the skill? (Can they demonstrate it correctly without prompts?)
Tips for Teaching Well
- Keep it short. A 15–20 minute focused lesson is better than a 45-minute lecture.
- Use real scenarios. “Imagine you’re hiking and your buddy trips and sprains their ankle. What do you do?”
- Let them practice. Hands-on time is where learning actually happens.
- Give constructive feedback. Be specific: “Try placing your hands a little higher on the chest” rather than “You’re doing it wrong.”
- Be patient. Not everyone learns at the same speed.
- Make it fun. Use a scenario, create a mini-competition, or set up a realistic practice station.
After You Teach
Discuss the experience with your counselor:
- What topic did you choose and why?
- How did the EDGE method work for you?
- What went well?
- What would you do differently next time?
- Did your learners achieve the objective?