Req 2b — First-Aid Kits
Using checklists provided in the First Aid merit badge pamphlet or ones approved by your counselor, do the following:
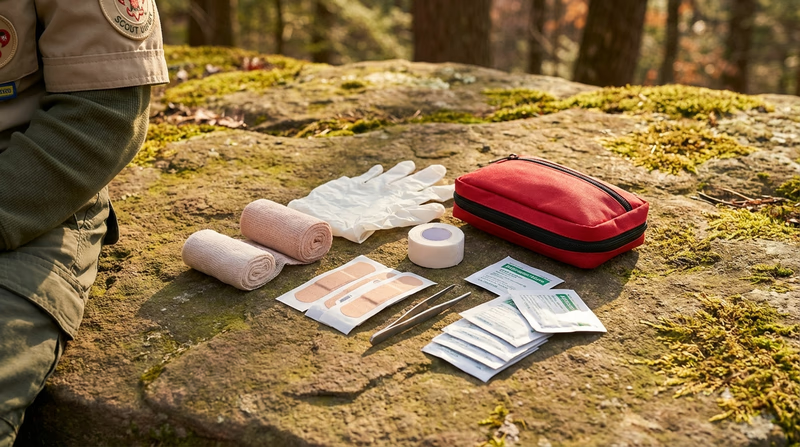
- Assemble a personal first-aid kit for hiking and backpacking. Demonstrate the proper use of each item in your first-aid kit to your counselor.
- With your counselor, inspect a unit, home, vehicle, or camp first-aid kit and discuss your findings.
A first-aid kit is only useful if it is stocked, organized, and ready to go when you need it. In this requirement, you will build your own personal kit for hiking and inspect a larger kit for a unit or home. The goal is not just to own the supplies — it is to know what each item does and how to use it.
Building Your Personal Hiking First-Aid Kit
Your personal kit should be lightweight, compact, and tailored to the conditions you expect to encounter. Think of it as your minimum essential supplies for treating common trail injuries.
What Goes in the Kit
Personal Hiking First-Aid Kit
Core supplies for day hikes and backpacking
- Nitrile gloves (2 pairs): Protect yourself from body fluids. Nitrile is latex-free.
- Adhesive bandages (assorted sizes): For small cuts, scrapes, and blisters.
- Gauze pads (3x3 or 4x4 inch, 4-6 pads): For larger wounds that need coverage and absorption.
- Roller gauze (1 roll): To hold gauze pads in place and wrap injuries.
- Adhesive tape (1 small roll): Secures bandages and gauze.
- Elastic bandage (1 roll, 3-inch): For wrapping sprains and strains (compression).
- Triangular bandage (1-2): For arm slings, head bandages, and securing splints.
- Antiseptic wipes (6-10): To clean wounds before bandaging.
- Antibiotic ointment packets (4-6): Apply to cleaned wounds to help prevent infection.
- Moleskin or blister-prevention patches: Essential for hikers — treat hot spots before they become blisters.
- Tweezers: For removing splinters, ticks, and debris from wounds.
- Scissors or trauma shears: For cutting tape, gauze, clothing, or moleskin.
- CPR breathing barrier: A pocket mask or face shield for rescue breathing.
- SAM splint or improvised splint material: A lightweight, moldable splint for fractures.
- Instant cold pack (1): For sprains, strains, and swelling.
- Hydrocortisone cream packets: For insect bites, rashes, and minor skin irritation.
- Diphenhydramine (Benadryl) or similar antihistamine: For allergic reactions (check with parents/guardian first).
- Ibuprofen or acetaminophen: For pain relief (check with parents/guardian first).
- Sunscreen (small tube, SPF 30+): Prevents sunburn.
- Emergency whistle: Three blasts signal distress.
- Medical information card: Your allergies, medications, emergency contacts.
Know Every Item
For your counselor demonstration, you need to explain what each item does and show how to use it properly. Practice these skills before your meeting:
- Open a bandage and apply it to a simulated wound
- Wrap an elastic bandage around an ankle (not too tight — check circulation)
- Tie a triangular bandage as an arm sling
- Use the CPR barrier on a training mannequin
- Remove a splinter with tweezers
- Apply moleskin to a blister or hot spot
Inspecting a Larger Kit
The second part of this requirement asks you to inspect a unit, home, vehicle, or camp first-aid kit with your counselor. Larger kits serve more people and a wider range of emergencies.
What to Look For During Inspection
Kit Inspection Checklist
Check these items during your review
- All supplies present: Compare the kit contents to its original checklist or a recommended list.
- Expiration dates checked: Medications, antiseptic wipes, ointments, and cold packs all expire. Remove and replace expired items.
- Packaging intact: Bandages and gauze should be in sealed, sterile packaging. If packaging is torn or open, the item is no longer sterile.
- Quantities sufficient: Are there enough supplies for the number of people the kit serves? A troop of 30 needs more gauze than a family of four.
- Organized and accessible: Can you find what you need in under 30 seconds? A disorganized kit wastes critical time.
- Container condition: Is the kit container waterproof? Clean? Clearly labeled?
- Gloves available: Multiple pairs in the correct size.
- Emergency information included: Emergency phone numbers, allergies of group members, directions to the nearest hospital.
Differences Between Kit Types
| Kit Type | Size | Special Items |
|---|---|---|
| Personal hiking | Small (fits in a pack pocket) | Moleskin, compact supplies |
| Unit/troop | Medium-large | More quantities, SAM splints, emergency blankets, epinephrine (if prescribed) |
| Home | Medium | Thermometer, medications, first aid manual |
| Vehicle | Medium | Reflective triangle, emergency blanket, seatbelt cutter |
| Camp | Large | Backboard, oxygen (if trained), communications equipment |

Keeping Your Kit Ready
A first-aid kit is not something you assemble once and forget. After every use, restock what you used. Check expiration dates every few months. Adjust the contents for the activity — a winter campout might need more cold-weather supplies, while a summer canoe trip needs waterproof containers.