Req 4d — Relief Printing Run
Relief printing lets you feel the roots of graphic arts in your hands. Instead of sending a file to a machine and letting the system hide the mechanics, you build the image physically. Raised areas take ink. Pressure transfers the image. Every step makes the printing idea visible.
The Core Idea
In relief printing, the image stands higher than the non-printing areas. Ink is rolled onto the raised surface, paper is pressed against it, and the printed image appears. This can happen with hand-set type, carved blocks, linoleum plates, or similar forms approved by your counselor.
That makes relief printing both simple in concept and demanding in practice. The design has to be prepared carefully, the plate or form must be assembled correctly, and pressure has to be controlled so the print is clear without being crushed.
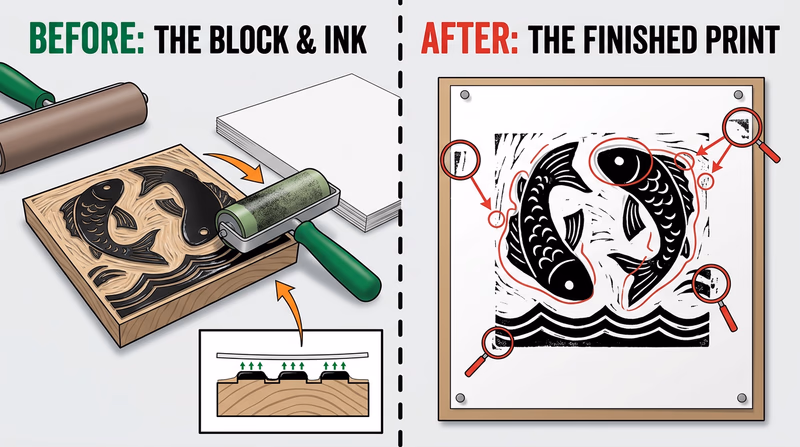
Main Tasks for This Option
Relief Printing Workflow
Think through the physical setup before beginning the run
- Prepare the layout: Decide what text or image will be printed and how it should be arranged.
- Set type or make the plate: Build the raised image surface your counselor approves.
- Lock up the form: Secure the type or plate so nothing shifts while printing.
- Ink and test: Print trial sheets and adjust pressure or alignment.
- Complete 50 copies: Once the result is clear and repeatable, run the full job.
Why Lock-Up Matters
If type or plates move even a little, the print can become crooked, uneven, or unreadable. Relief printing teaches that mechanical stability is part of design quality. A beautiful layout is useless if the form shifts during the run.
This option also shows why older print shops needed skilled craftspeople. Setting type, spacing letters, and balancing the press took patience. The process was slower than modern digital printing, but it trained printers to think carefully about every detail.
Watch for how the raised image surface is prepared and how pressure affects the finished print.
What Good Relief Prints Show
A strong relief print usually has:
- even ink on the raised areas
- clear text or image edges
- steady alignment from copy to copy
- no major slipping, ghosting, or smearing
- a result that matches the intended design
Some relief prints, especially artistic ones, may include slight variation. That does not always mean the print is bad. It may be part of the character of the process. Your counselor can help you tell the difference between acceptable handmade variation and poor setup.
Why This Option Matters
Relief printing makes printing feel real in a physical way. It also helps you appreciate how much of modern design still depends on old ideas: image areas, non-image areas, ink transfer, pressure, registration, and repeatability.
After producing your work, the next stage is what happens after the printing itself — cutting, trimming, drilling, padding, and binding. That is the focus of the next requirement.