Hiking Merit Badge — Complete Digital Resource Guide
https://merit-badge.university/merit-badges/hiking/guide/
Introduction & Overview
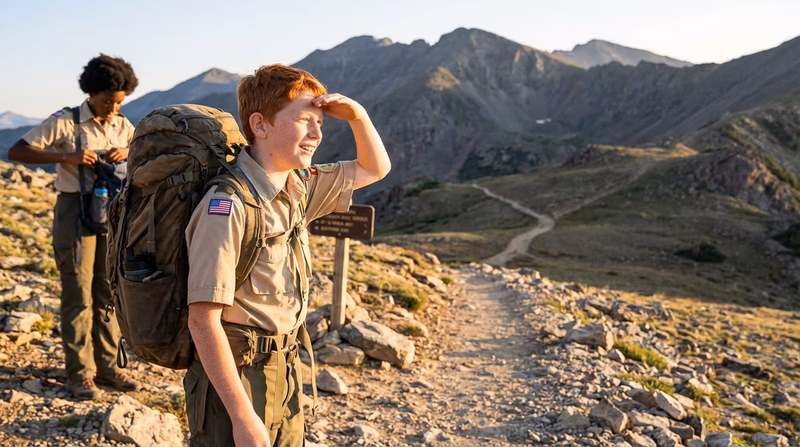
Every great adventure begins with a single step — and the Hiking merit badge is your invitation to take that step into the outdoors. Whether you are walking through a city park, trekking across desert sand, or climbing a mountain trail, hiking connects you to the world in a way nothing else can.
Hiking is one of the oldest human activities. It builds endurance, teaches self-reliance, and puts you face-to-face with the beauty and challenges of nature. This merit badge will prepare you to hike safely, hike responsibly, and hike with confidence — no matter where the trail takes you.
Then and Now
Then — The Hike of Necessity
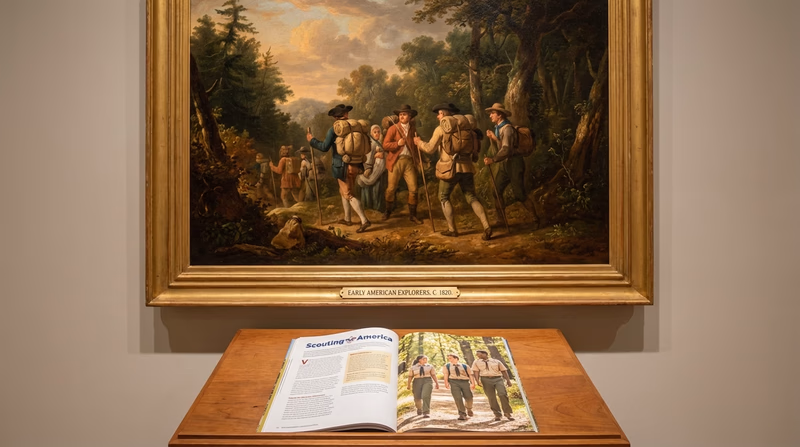
For most of human history, walking long distances was not a hobby — it was survival. People walked to find food, water, and shelter. Armies marched for days across mountains and deserts. Explorers like Lewis and Clark covered thousands of miles on foot to map a continent.
- Purpose: Travel, trade, exploration, survival
- Mindset: Get from here to there — no trail markers, no gear shops, no rescue teams
Now — The Hike of Choice
Today, hiking is something you choose to do for fun, fitness, and connection with nature. Millions of people hit the trails every year. Modern gear makes it safer and more comfortable than ever, but the core experience — putting one foot in front of the other through wild places — remains the same.
- Purpose: Recreation, fitness, adventure, mindfulness
- Mindset: Enjoy the journey, challenge yourself, and leave the trail better than you found it
Get Ready! The adventure of hiking awaits you. All you need is a good pair of shoes, a sense of curiosity, and the willingness to explore. Let’s go!
Kinds of Hiking
There are many ways to hike. Before you hit the trail, take a look at the variety of hiking styles you can explore.
Urban Hiking
You do not need a mountain to go hiking. Urban hiking takes you through neighborhoods, parks, waterfronts, and historic districts. It is a great way to explore a city on foot and discover places you would miss from a car window.
Back-Roads Hiking
Back-roads hiking follows unpaved country roads, farm lanes, and rural paths. You will often encounter open fields, rolling hills, and very few other people. This is hiking at its most peaceful.
Snow Hiking
Hiking through snow adds a new dimension to the experience. The landscape transforms — familiar trails look completely different under a blanket of white. Snowshoes or traction devices may be needed depending on depth and conditions.
Tundra Hiking
Tundra hiking takes you above the tree line — into alpine meadows and open, windswept terrain. The views are spectacular, but conditions can change fast. There are no trees for shelter if weather rolls in.
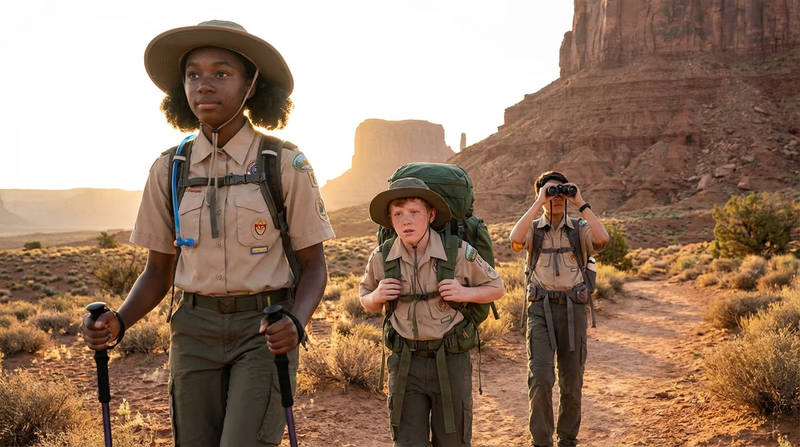
Desert Hiking
Desert hiking offers stunning landscapes — canyons, mesas, and wide-open skies. But the desert is unforgiving. Water is scarce, shade is rare, and temperatures can swing wildly between day and night.
Cross-Country Hiking
Cross-country (or off-trail) hiking means leaving marked trails and navigating through open terrain using a map and compass. It is challenging and rewarding, but requires strong navigation skills.
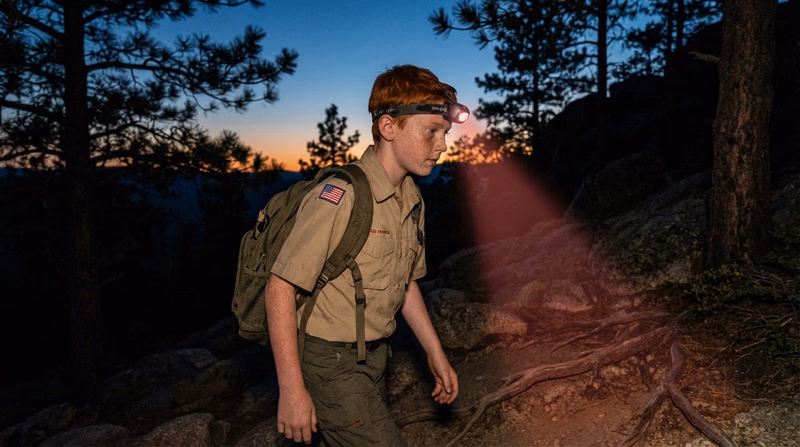
Night Hiking
Night hiking is exactly what it sounds like — hitting the trail after dark. The forest sounds different, the air feels different, and your other senses sharpen when your eyes cannot do all the work. It is a completely unique experience.
Trail Hiking
Trail hiking is the most common type. You follow a marked, maintained path through forests, mountains, or valleys. Trails are rated by difficulty, so you can find one that matches your experience level.
Now let’s explore the requirements for the Hiking Merit Badge!
Req 1a — Anticipate Hazards
Hey there, Scout! Before you lace up those boots and hit the trail, we need to talk about something every great hiker keeps at the front of their mind: safety. Hiking is one of the best ways to see the world, but the wilderness doesn’t have a “reset” button. Being prepared isn’t just a motto; it’s your best tool for making sure every hike is a great story to tell back at camp.
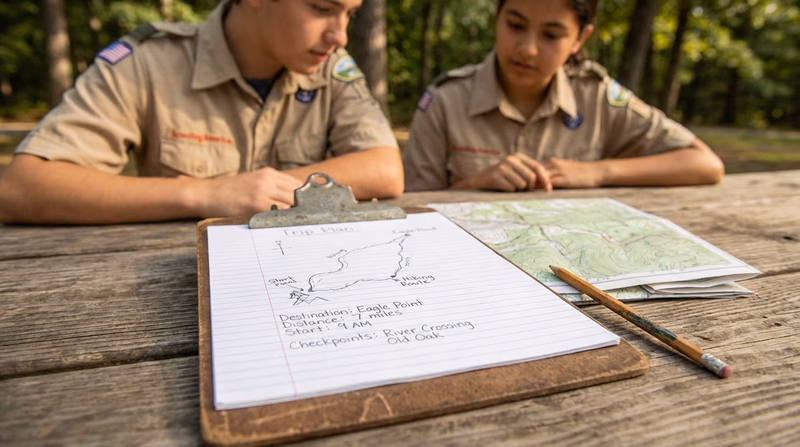
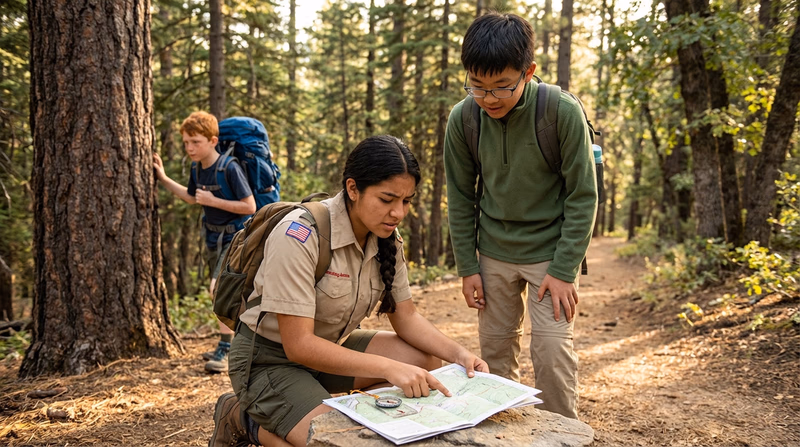
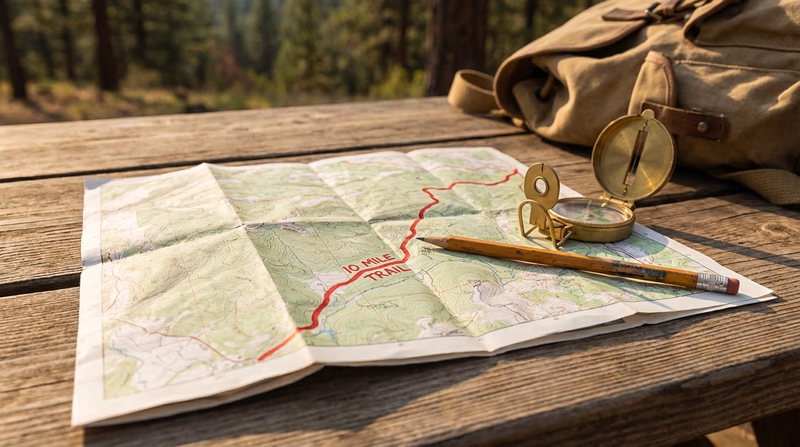
What’s Your Plan?
The best way to “anticipate” a hazard is to see it coming before you even leave your driveway. That’s where a Trip Plan comes in. Think of it like a map for your day that you leave with someone who isn’t going on the hike. If you don’t come back when you said you would, they know exactly where to send help.
We call these the Five W’s of a Trip Plan:
- Who: Who is in your group? Does everyone have the right experience for this trail?
- What: What are you doing? Is it a casual day hike, a steep mountain climb, or a multi-day trek?
- When: When are you leaving, and—most importantly—when do you expect to be back?
- Where: Where exactly are you going? Name the trailheads, the trails you’ll follow, and any planned stops.
- Why: What is the goal? Are you training for a bigger hike, or just enjoying the view?
By answering these five questions, you’ve already started preventing emergencies. You’ve checked if the hike is too hard for your group and you’ve given yourself a deadline.
The Gear That Keeps You Safe
Your backpack isn’t just for lunch; it’s a mobile survival kit. When we talk about “mitigating” hazards (which just means making a bad situation less severe), your gear is what does the heavy lifting.
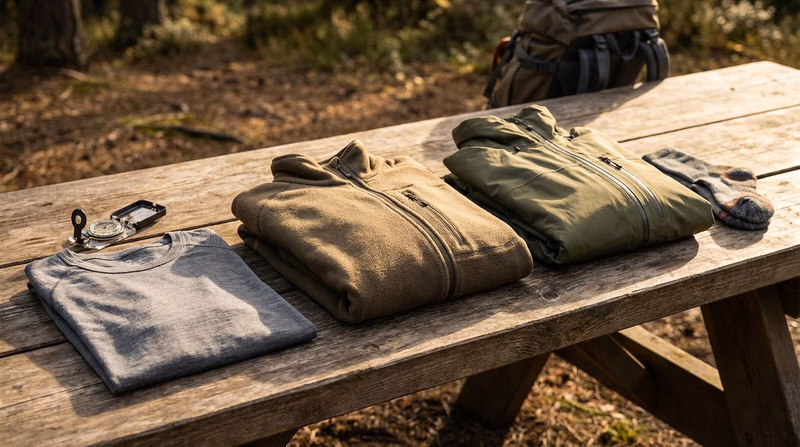
Scout Essentials
The ten things you should never leave without- Pocketknife: A versatile tool for gear repairs or preparing food (remember your Totin’ Chip!).
- First-aid kit: Essential for treating everything from small scratches to blisters.
- Extra clothes: Layers to stay warm if the weather changes.
- Water bottle: Dehydration is a major hazard; keep it full and drink often.
- Trail food: High-energy snacks keep your energy up so you don’t get tired and clumsy.
- Flashlight/headlamp: Crucial if your hike takes longer than expected and the sun goes down.
- Sun protection: Sunscreen, a hat, and sunglasses protect you from burns and heat exhaustion.
- Map and compass: These never run out of batteries; they are your primary navigation tools.
- Rain gear: A lightweight poncho or jacket keeps you dry, which is the key to staying warm.
- Whistle: Much louder than your voice and takes less energy to use if you need to signal for help.
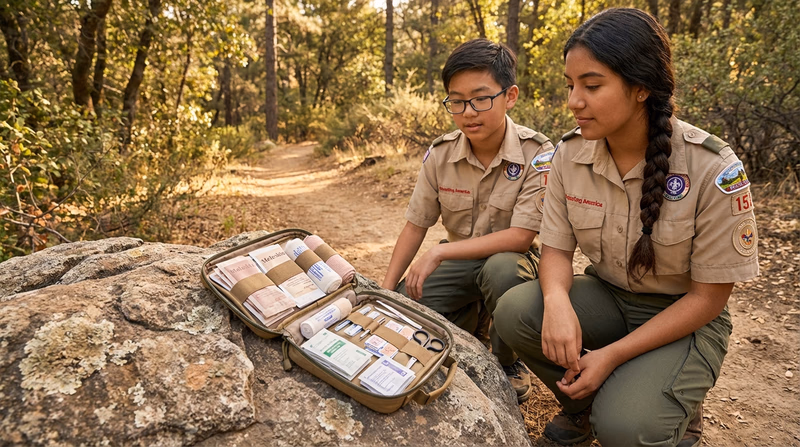
Personal First-Aid Kit
Must-haves for your individual kit- Adhesive bandages: For small cuts and scrapes.
- Gauze pads: To cover larger wounds.
- Adhesive tape: For securing gauze or supporting joints.
- Moleskin: The ultimate trail fix for hotspots and blisters.
- Antiseptic wipes: To clean wounds and prevent infection.
- Antibiotic ointment: To help heal minor cuts and keep them clean.
- Tweezers: For removing splinters, thorns, or ticks.
- Safety pins: To secure bandages or repair gear in a pinch.
- Nitrile gloves: To protect yourself and others when treating a wound.
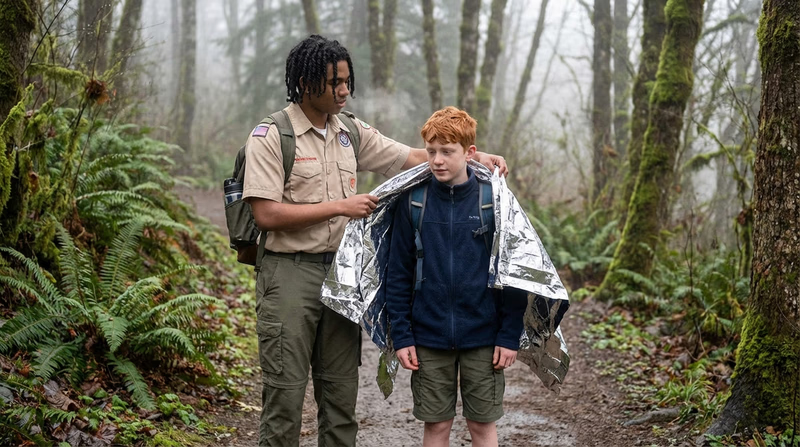
- Emergency blanket: A lightweight way to stay warm if you’re stuck overnight.
Dressing for Success
The “prevent” part of hiking safety often comes down to what you’re wearing. The right clothes protect you from the environment—whether that’s a blazing sun or a freezing wind.
Warm-Weather Clothing
Stay cool and protected- Lightweight shirt: Wicking fabrics (not cotton!) move sweat away from your skin.
- Shorts or convertible pants: Give you freedom of movement and help regulate temperature.
- Hiking socks: Synthetic or wool blends prevent blisters better than cotton.
- Sun hat: Protects your face, ears, and neck from the sun’s rays.
- Sunglasses: Protects your eyes from glare, especially on bright or snowy trails.
Cold-Weather Clothing
The layering system- Moisture-wicking base layer: Keeps your skin dry by moving sweat away.
- Insulating mid layer: A fleece or wool sweater that traps your body heat.
- Waterproof outer shell: Protects you from wind, rain, and snow.
- Warm hat: You lose a lot of heat through your head; keep it covered!
- Gloves: Keep your fingers nimble so you can use your gear and stay warm.
- Wool or synthetic socks: Even if they get wet, these will still keep your feet warm.
Accessories
Extra help on the trail- Trekking poles: Great for balance on uneven ground and saving your knees on the way down.
- Bandana: Can be a head covering, a sweat wiper, or even an emergency bandage.
- Insect repellent: Keeps the biters away so you can focus on the trail.
- Small notebook and pencil: For taking notes or leaving a message if you need to.
- Watch: Helps you keep track of your “When” and how much daylight you have left.
- Camera: To capture the memories without disturbing the wildlife!
Technology vs. Tradition
In today’s world, it’s tempting to rely entirely on your phone or a GPS device. These are amazing tools! They can show you exactly where you are on a satellite map and even track your pace. However, technology can fail. Batteries die in the cold, screens break when dropped on rocks, and many wilderness areas have no signal at all.
You should absolutely use hiking apps, but always carry a physical map and a compass as your backup. Learning to read a map is a skill that makes you a more confident and capable Scout.
Expect the Unexpected
Sometimes, despite your best planning, things go wrong. How you “respond” determines whether a hazard becomes a tragedy or just a tough part of the adventure.
Explore More Resources
To dive deeper into how to protect the wilderness while you’re out there, check out these resources:
Wilderness.net Find wilderness areas near you and learn about the rules for visiting these protected lands. Link: Wilderness.net — https://wilderness.net/visit-wilderness/find-a-wilderness.php Leave No Trace Learn the seven principles that every Scout should follow to keep the outdoors beautiful for everyone. Link: Leave No Trace — https://lnt.org/why/7-principles/ National Wildlife Federation — Respect Wildlife Learn how to safely observe and respect the wildlife you may encounter on the trail. Link: National Wildlife Federation — Respect Wildlife — https://www.nwf.org/Educational-Resources/Wildlife-GuideHiking Safety Video
Watch this video to see some of these safety tips in action and learn more about how to stay safe on your next trek.
🎬 Video: Hiking Safety Tips — https://youtu.be/YGQG0C0HBGw?si=aOL6J4mdZXt51LDC
Req 1b — First Aid
When you are miles away from the nearest trailhead, you are the first responder. Whether it is a small blister or a serious heat-related illness, knowing how to recognize symptoms and provide immediate care can make the difference between a successful hike and a dangerous emergency.
In the previous section (Requirement 1a), we discussed the environmental hazards you might face and the essential items for your first-aid kit. Now, let’s look at how to use those supplies and your knowledge to treat 13 common trail conditions.
Cold-Related Conditions
Even in the summer, temperatures can drop unexpectedly, especially at high altitudes or if you get wet.
Hypothermia
Hypothermia occurs when your body loses heat faster than it can produce it, causing your core temperature to drop to dangerous levels. It is often caused by a combination of “Cold, Wet, and Wind.”
- Signs and Symptoms: Look for the “umbles”—stumbling, mumbling, fumbling, and grumbling. The victim may shiver uncontrollably, seem confused, or become unusually quiet.
- First Aid: Get the person out of the wind and rain. Replace wet clothing with dry layers. Wrap them in blankets or a sleeping bag. Give them warm, non-caffeinated liquids if they are conscious and able to swallow.
Frostbite
Frostbite is the actual freezing of body tissue, usually affecting fingers, toes, the nose, or ears.
- Signs and Symptoms: The skin may look waxy, white, or grayish-yellow. It will feel very cold and numb. In severe cases, the skin may feel hard to the touch.
- First Aid: Move the person to a warm area. Do not rub the affected area, as this can damage the frozen tissue. Gently warm the area using skin-to-skin contact (like putting cold fingers in an armpit). If there is a risk of the area refreezing, do not attempt to thaw it until you reach medical help.
Heat-Related Conditions
On a hot day, your body works hard to stay cool. If it can’t keep up, you can quickly run into trouble.
Dehydration
Dehydration is simply not having enough water in your body to function properly. It is the most common “injury” on the trail.
- Signs and Symptoms: Increased thirst, dry mouth, fatigue, headache, and dark-colored urine.
- First Aid: Drink water slowly. Do not chug it all at once, as this can cause stomach cramps. If you have electrolyte powder in your first-aid kit, mix it with your water to help replace lost salts.
Heat Exhaustion
Heat exhaustion happens when your body overheats and can no longer cool itself effectively through sweating.
- Signs and Symptoms: Heavy sweating, pale skin, muscle cramps, tiredness, dizziness, and nausea. The person’s pulse might be fast but weak.
- First Aid: Move the person to a shady or cool area. Have them lie down and loosen their clothing. Apply cool, wet cloths to their skin and fan them. Give them small sips of water.
Heatstroke
Heatstroke is a true medical emergency. The body’s temperature control system has failed completely.
- Signs and Symptoms: The skin may be hot, red, and dry (sweating may have stopped). The person will be confused or may lose consciousness. They may have a very rapid, strong pulse.
- First Aid: Call for emergency help immediately. Move the person to shade and cool them down as fast as possible by any means available—dousing them with water, fanning, or applying ice packs to the neck, armpits, and groin.
Sunburn
Sunburn is a radiation burn to the skin caused by ultraviolet (UV) rays.
- Signs and Symptoms: Red, painful skin that is warm to the touch. In severe cases, blisters may form.
- First Aid: Move out of the sun. Apply cool compresses or aloe vera gel to the area. Do not pop any blisters, as this increases the risk of infection.
Breathing & Altitude
Changing elevation and physical exertion can affect how you breathe and how your body processes oxygen.
Hyperventilation
Hyperventilation is rapid or deep breathing, usually caused by anxiety, panic, or extreme overexertion.
- Signs and Symptoms: Fast breathing, a feeling of “air hunger,” chest tightness, and tingling in the fingers and toes.
- First Aid: Help the person remain calm. Have them sit down and focus on breathing slowly. Encourage them to breathe through their nose and exhale through pursed lips.
Altitude Sickness
Altitude sickness occurs when you travel to a high elevation (usually above 8,000 feet) too quickly and your body cannot adapt to the lower oxygen levels.
- Signs and Symptoms: Headache (most common), nausea, dizziness, fatigue, and loss of appetite. It often feels like a bad hangover.
- First Aid: The best treatment is to stop ascending. If symptoms do not improve within a few hours or if they get worse, you must descend to a lower elevation.
Trail Injuries
Even the most experienced hikers can take a wrong step or experience friction from their boots.
Sprained Ankle
A sprain is an injury to the ligaments (the tissues that connect bones) caused by twisting or rolling the ankle.
- Signs and Symptoms: Pain, swelling, bruising, and difficulty putting weight on the foot.
- First Aid: Use the R.I.C.E. method:
- Rest: Stop hiking and take weight off the ankle.
- Ice: Apply a cold pack (or a bandana soaked in a cold stream).
- Compression: Wrap the ankle firmly with an elastic bandage.
- Elevation: Keep the ankle raised above the level of the heart.

Blisters
Blisters are fluid-filled pockets caused by friction between your skin, your socks, and your boots.
- Signs and Symptoms: A “hot spot” (a red, tender area) followed by a bubble of fluid.
- First Aid: Treat “hot spots” immediately by applying moleskin or athletic tape to stop the friction. If a blister has already formed, do not pop it. Cover it with a donut-shaped piece of moleskin (the hole goes over the blister) to protect it.
Bites & Stings
You aren’t the only one using the trail! Insects and animals live there, and sometimes encounters can lead to injuries.
Insect Stings
Bees, wasps, and hornets are common on many trails.
- Signs and Symptoms: Immediate pain, redness, and swelling at the site. Watch closely for signs of a severe allergic reaction (hives, difficulty breathing, or swelling of the face).
- First Aid: If a stinger is left behind, scrape it away with the edge of a credit card or a dull knife—don’t use tweezers, as this can squeeze more venom into the skin. Wash the area and apply ice to reduce swelling.
Tick Bites
Ticks are small parasites that latch onto your skin to feed on blood. They can carry diseases like Lyme Disease.
- Signs and Symptoms: You will usually see the tick itself attached to the skin. There may be a small red bump after it is removed.
- First Aid: Use fine-tipped tweezers to grasp the tick as close to the skin as possible. Pull upward with steady, even pressure. Do not jerk or twist. Wash the area with soap and water.
Snakebite
Most snakes are harmless, but some are venomous. In North America, you should watch for rattlesnakes, copperheads, and water moccasins.
- Signs and Symptoms: Puncture marks, intense pain, swelling, and skin discoloration.
- First Aid: Keep the victim calm and still. This slows the spread of venom. Wash the bite area and keep the injured limb at or slightly below the level of the heart. Do not apply a tourniquet, do not use ice, and do not try to suck out the venom. Seek medical help immediately.
🎬 Video: Backpacking First Aid — https://youtu.be/nxExCQiWa_U?si=E-FC1vbHZYI0vxhb
Summary
By knowing these 13 conditions and their treatments, you are much better prepared for whatever the trail throws at you. Remember to check your first-aid kit before every hike to make sure your supplies haven’t expired and that you have everything you need to treat these injuries.
Req 2a — Hiking Practices
Hiking is one of the best ways to explore the great outdoors, but it isn’t just “walking in the woods.” To have a successful trek, you need to master the art of being a prepared, responsible, and safe hiker. Whether you are heading out for a two-mile stroll or a twenty-mile expedition, the way you treat the trail, the people you meet, and—most importantly—your own feet will determine how much fun you have.

The Foundation: Outdoor Ethics
Before you even lace up your boots, you need to understand the “rules of the road” for the wilderness. Outdoor ethics are essentially the moral compass of a hiker. They help us ensure that the beautiful places we visit stay beautiful for the next person.
The two main pillars of outdoor ethics are the Outdoor Code and the Leave No Trace (LNT) principles. While we will dive deep into these in Requirement 2b and Requirement 2c, the core idea is simple: be a guest in nature. You wouldn’t go to a friend’s house and leave trash on their floor or carve your name into their dining table; you shouldn’t do it in the forest either.
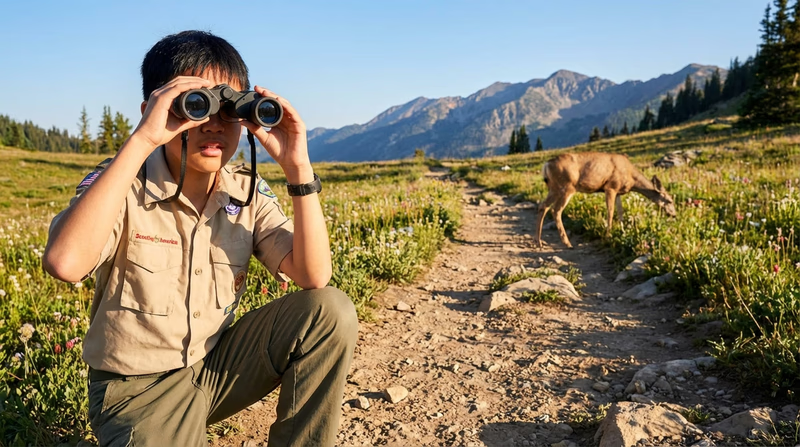
Good ethics also mean respecting wildlife. Observe animals from a distance and never feed them. Human food can make wild animals sick and teach them to associate humans with food, which often leads to dangerous encounters.
Hiking Safety: Daytime Practices
Most of your hiking will happen during the day, but daylight doesn’t mean you can ignore safety. Daytime safety starts with Trail Awareness. Always keep your eyes on the trail a few steps ahead of you. It is easy to get distracted by a cool bird or a beautiful view, but a hidden root or a loose rock can end your hike with a sprained ankle in a second.
Pacing is another critical skill. New hikers often make the mistake of starting too fast, only to burn out halfway through the climb. Use the “Talking Test”—if you are so out of breath that you can’t carry on a conversation, you are moving too fast. Slow, steady progress will get you to the summit much more reliably than sprinting and stopping every five minutes.
Finally, always hike as a group. In Scouting, we use the buddy system for a reason. Assign a “Lead” hiker to set the pace and a “Sweep” hiker at the back to make sure no one falls behind. The group should always move at the pace of its slowest member.
Hiking Safety: Moving in the Dark
Night hiking can be an incredible experience—the forest sounds different, the stars are brighter, and the air is cooler. However, it requires extra caution.
- Lighting: You must have a reliable light source. A headlamp is almost always better than a flashlight because it keeps your hands free for balance. Always carry spare batteries or a backup light source.
- Night Vision: If you are hiking by moonlight, try using a red light setting on your headlamp. Red light helps preserve your natural night vision, allowing you to see the shapes of the landscape better than a bright white beam would.
- Stay on the Trail: It is much easier to lose the trail at night. If the path becomes faint, stop immediately and verify your location. Look for reflective trail markers if they are present.
- Slow Down: Depth perception changes in the dark. Step carefully over logs and rocks, as shadows can make objects look deeper or taller than they actually are.
Trail Courtesy: Sharing the Path
You are rarely alone on the trail. Being a courteous hiker makes the experience better for everyone.
- Uphill Right-of-Way: Hikers going uphill have the right-of-way. It takes a lot of energy to get a heavy pack moving again after stopping on a steep incline, so if you are heading downhill, step aside and let the uphill climber pass.
- Yielding to Horses: If you encounter horses or pack animals, step off the trail on the downhill side. Horses can be easily spooked; by staying on the downhill side, you appear smaller and less threatening to them. Talk quietly to the rider so the horse recognizes you as a human.
- Bikes vs. Hikers: While mountain bikers are technically supposed to yield to hikers, it is often easier for a hiker to step aside for a fast-moving bike. Use your best judgment and communicate clearly.
- The “Sound of Silence”: Avoid loud music or shouting. Most people go to the woods to hear nature. If you must listen to music, use earbuds.
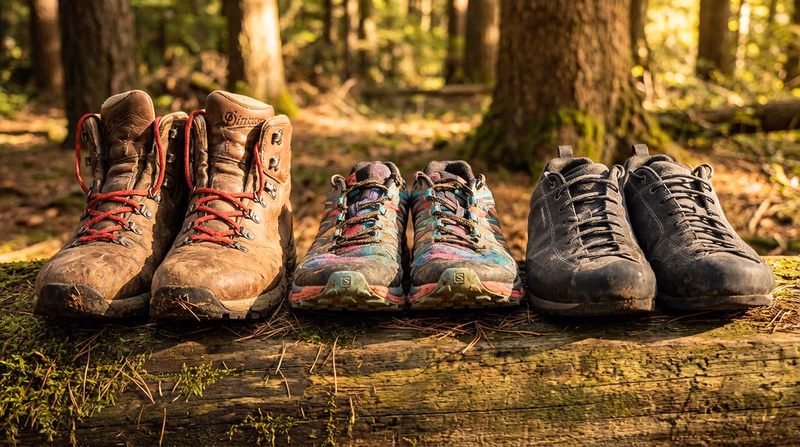
Choosing Your Footwear
Your feet are your most important piece of equipment. Choosing the right footwear depends on where you are going and what you are carrying.
- Hiking Boots: These offer the most ankle support and protection. They are best for rugged, rocky terrain or when you are carrying a heavy backpack.
- Trail Runners: These are essentially reinforced sneakers with “knobby” soles for traction. Many modern hikers prefer them because they are lightweight and dry quickly, though they offer less ankle support.
- Approach Shoes: These are a hybrid between a hiking shoe and a climbing shoe. They have sticky rubber soles, making them great for trails that involve a lot of rock scrambling.
When buying shoes, look for Fit above all else. Your toes should have room to wiggle, but your heel should not slide up and down when you walk. A sliding heel is a guaranteed recipe for blisters.
🎬 Video: Choosing Hiking Footwear — https://youtu.be/liJtac-GvZw?si=ToQQv90HyVEIqwe_
Foot Care and Maintenance
Even the best boots won’t help if you don’t take care of your feet. Foot care is a proactive job—you have to do it before it hurts.
Blister Prevention: Blisters are caused by three things: Heat, Moisture, and Friction.
- Socks: Never wear 100% cotton socks. Cotton absorbs sweat and stays wet, which softens your skin and leads to blisters. Use wool or synthetic blends.
- Breaking In: Never wear brand-new boots on a long hike. Wear them around your house and on short walks first to let the material soften and mold to your feet.
- Hot Spots: If you feel a burning sensation or a “hot spot” on your foot, STOP IMMEDIATELY. Do not wait. Apply moleskin, athletic tape, or a specialized blister bandage right away.
Hygiene: At the end of a long day, take your boots and socks off. Let your feet breathe and dry out. If you are on a multi-day trek, wash your feet (away from water sources!) and put on a fresh, dry pair of socks for sleeping. Keep your toenails trimmed short and straight across to prevent them from hitting the front of your boot on downhill sections.
REI: How to Prevent and Treat Blisters A comprehensive guide on keeping your feet healthy on the trail, including taping techniques and sock selection. Link: REI: How to Prevent and Treat Blisters — https://www.rei.com/learn/expert-advice/blisters.html American Hiking Society — Hiking 101 A beginner's guide to hiking basics from America's leading hiking advocacy organization. Link: American Hiking Society — Hiking 101 — https://americanhiking.org/resources/hiking-101/By mastering these practices, you aren’t just checking off a requirement—you are becoming a more competent outdoorsman. When you take care of the trail and your gear, you set yourself up for a lifetime of adventure.
Req 2b — Leave No Trace
When you step onto a trail, you are more than just a visitor; you are a steward of the land. The Leave No Trace Seven Principles provide a framework of outdoor ethics that helps us minimize our impact so the trails we love remain healthy for those who follow us. Think of Leave No Trace (LNT) as the “Golden Rule” of the outdoors—a mindset of respect for nature, wildlife, and other people.
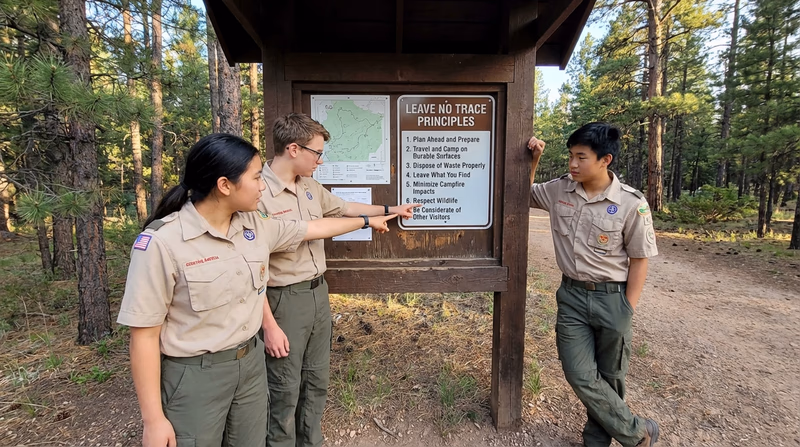
1. Plan Ahead and Prepare
Good stewardship starts before you tie your boots. When we don’t plan, we are more likely to make mistakes that hurt the environment or put ourselves in danger. Poor planning often leads to “survival mode” where you might cut corners on ethics just to stay safe.
When you plan, research your destination for specific regulations. Prepare for weather to avoid building emergency fires or seeking shelter in sensitive areas. Traveling in small groups is also key; large groups are louder and cause more physical damage to the trail.
Why it matters for hiking: Planning prevents emergencies that lead to ecological damage. If you get lost, search teams may have to trample sensitive vegetation to find you.
Scout Example: You check the weather and see rain in the forecast. You pack proper gear so you don’t have to scramble off-trail to find shelter, protecting delicate plants near the path.
2. Travel on Durable Surfaces
The goal is to keep the “wild” in wilderness. When we walk on plants, we crush them. Durable surfaces include established trails, rock, gravel, and dry grass. The most important rule is to stay on the trail. Even if the path is muddy, walk through the middle. Walking around puddles creates “social trails” that widen the path and cause erosion.
Why it matters for hiking: By staying on the “sacrificial” surface of the trail, we keep the surrounding forest or meadow untouched.
Scout Example: You come across a fallen log across the path. Instead of walking around it and trampling the wildflowers, you step over it or stay as close to the trail as possible.
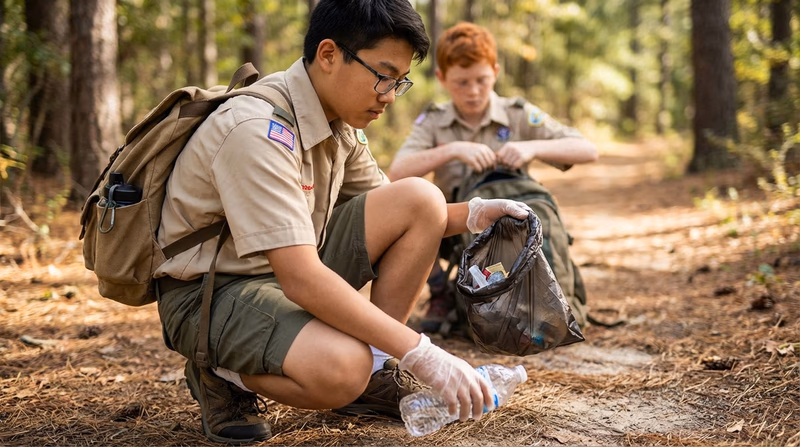
3. Dispose of Waste Properly
“Pack it in, pack it out” applies to everything—from granola bar wrappers to orange peels. Even organic waste like apple cores takes a long time to break down and can be harmful to animals. Human waste should be buried in a “cathole” 6 to 8 inches deep, at least 200 feet from water, trails, and campsites.
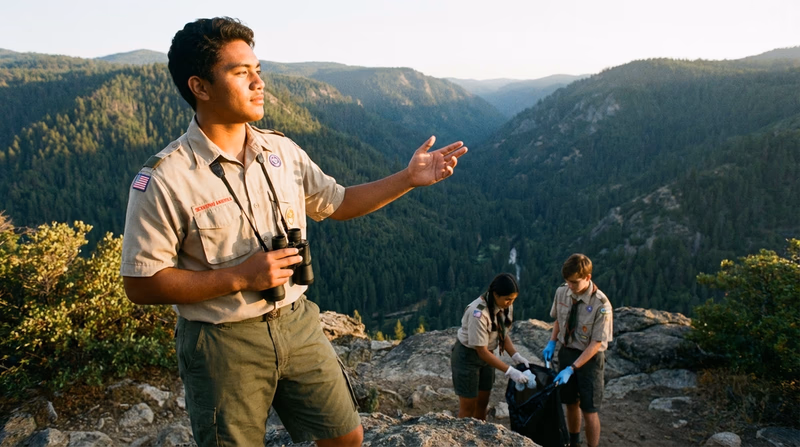
Why it matters for hiking: Trash is dangerous to animals and pollutes the water we drink. Picking up others’ trash is the hallmark of a great Scout.
Scout Example: You notice a plastic wrapper someone else left behind at a scenic overlook. You pick it up and pack it out, leaving the area cleaner than you found it.
4. Leave What You Find
Nature is full of treasures like beautiful stones or ancient artifacts. If every visitor took one rock, there would eventually be nothing left for others to see. This also means avoiding the urge to carve your initials into trees or build decorative rock stacks (cairns), which take away from the “wild” feeling.
Why it matters for hiking: Leaving things as they are allows the ecosystem to function naturally. Rocks provide homes for insects, and leaves provide nutrients for the soil.
Scout Example: You find an interesting arrowhead. Instead of taking it, you take a photo, note the location on your map, and share it with a park ranger later.
5. Minimize Campfire Impacts
Many hikers choose to camp as part of a multi-day trek. Fires can cause lasting damage to the ground and consume wood that animals need for shelter. Whenever possible, use a lightweight camp stove for cooking instead of building a fire. Stoves are faster, cleaner, and work even when wood is wet.
Why it matters for hiking: Wildfires are often started by poorly managed campfires. A single spark can destroy thousands of acres of hiking trails.
Scout Example: After a long hike, your patrol uses a backpacking stove for dinner. You have a hot meal in minutes and leave zero impact on the ground.
6. Respect Wildlife
We are the guests in the homes of animals. Respecting wildlife means giving them plenty of space. If an animal changes its behavior because of you—if it stops eating or moves away—you are too close. Never feed wild animals; it teaches them to depend on humans, which often leads to them becoming aggressive or sick.
Why it matters for hiking: Encounters with large animals like bears or moose can be dangerous. Keeping your distance keeps both you and the animal safe.
Scout Example: You see a marmot near the trail. Instead of tossing it a snack, you use binoculars to observe its natural behavior from a safe distance.
7. Be Considerate of Other Visitors
Most people hike to enjoy the peace of nature. Excessive noise and loud music ruin the experience for others. Yielding is another vital part of trail etiquette: generally, hikers going uphill have the right of way. Also, yield to horses by stepping off the trail to the downhill side and talking quietly to the rider.
Why it matters for hiking: The trail is a shared resource. Being polite ensures everyone has a better time and maintains Scouting’s good reputation.
Scout Example: You are hiking downhill and see a group laboring up toward you. You step off onto a durable rock and wait for them to pass, giving a friendly “hello” as they climb.
Learn More
To master the Leave No Trace principles, check out this video and the resources below.
🎬 Video: Principles of Leave No Trace — https://youtu.be/Rpq01rO9ZR0?si=hjjnThExBUjG0aIW
Req 2c — Outdoor Code
When you step onto a trail, you aren’t just a visitor; you are a guest in a massive, living home shared by thousands of species of plants and animals. Being a Scout means taking on the responsibility of stewardship—the idea that we must protect and care for the land so that others can enjoy it long after we are gone.
While the Leave No Trace principles you studied in Requirement 2b give us a detailed “how-to” manual for the trail, the Outdoor Code is our pledge of citizenship. It is a short, powerful promise that summarizes the heart of outdoor ethics.
The Outdoor Code
“As an American, I will do my best to — Be clean in my outdoor manners, Be careful with fire, Be considerate in the outdoors, and Be conservation-minded.”
For this requirement, you need to be able to say these words and, more importantly, explain exactly what they look like when you are wearing a pack and walking a trail. Let’s break down the four pledges of the Code with specific examples for your upcoming hikes.
1. Be Clean in My Outdoor Manners
Being “clean in your outdoor manners” means more than just not littering. It means having a high standard for how you treat the environment. On a hike, your “manners” are reflected in the condition of the trail after you pass by.
- Pack It In, Pack It Out: If you brought it with you, it must go home with you. This includes small items like granola bar wrappers, twist ties, and even “organic” litter like orange peels or apple cores. While these might eventually decompose, they take a long time to do so and can be harmful to local wildlife that isn’t used to eating them.
- Micro-trash Patrol: A great way to show clean manners is to pick up “micro-trash”—those tiny bits of plastic or paper that others might have missed.
- Campsite and Rest Stop Hygiene: When you stop for lunch or a break, check the area before you leave. Make sure no crumbs are left behind, as these can attract animals to high-traffic human areas.
2. Be Careful with Fire
Fire safety is one of the most critical responsibilities of any outdoorsperson. While many day hikes don’t involve building a fire, being careful with fire applies to every moment you spend outside.
- Prefer the Stove: For most hiking trips, a small backpacking stove is a much better choice than a wood fire. Stoves are faster, leave no scar on the ground, and are far less likely to start a wildfire.
- Know the Regulations: Before you head out, check the local fire risk. During dry seasons, many parks and forests have total fire bans. Being careful with fire means respecting these rules, even if you really wanted a campfire.
- The “Cold Out” Rule: If you do use an established fire ring, never leave it unattended. Before you head back down the trail, the ashes should be “cold to the touch.” This means dousing the fire with water, stirring the ashes, and dousing it again until you can safely put your hand in the pit.

3. Be Considerate in the Outdoors
This pledge is about your relationship with other people and the wildlife. The trail is a shared space, and your actions affect everyone else’s experience.
- Yielding the Trail: One of the best examples of consideration is trail etiquette. Generally, hikers going uphill have the right of way because they are working harder and have a narrower field of vision. Step aside and give them room to keep their rhythm. Also, always yield to horses or pack animals—they can be easily spooked by hikers.
- Voices and Electronics: People go to the woods to hear the wind in the trees and the sound of birds. Keep your voice at a conversational level. If you want to listen to music, use headphones so you don’t disturb the peace for others.
- Respect Wildlife: You are in their home. Observe animals from a distance and never feed them. Feeding wildlife changes their natural behavior and can make them dangerous to humans or unable to survive on their own.
4. Be Conservation-Minded
Being “conservation-minded” means thinking about the future. It’s about taking actions today that ensure the trail is still there for the next generation of Scouts.
- Stay on the Trail: It might be tempting to take a shortcut through a switchback, but doing so creates “social trails” that lead to massive soil erosion. Staying on the hardened path protects the root systems of trees and prevents the trail from washing away during rainstorms.
- Protect Water Sources: When you need to wash your hands or dishes, do it at least 200 feet away from any stream or lake. Even “biodegradable” soap can harm fish and insects if it goes directly into the water.
- Leave What You Find: Conservation means leaving rocks, plants, and historical artifacts where they are. Taking a “cool rock” might seem small, but if every hiker did it, the landscape would be stripped bare.
The Code and Leave No Trace: A Perfect Pair
You might notice that many of these examples sound like the Leave No Trace principles. That’s because they work together! The Outdoor Code is your internal compass—the set of values you carry in your heart. Leave No Trace provides the specific techniques to live out those values. When you recite the Code, you are promising to be the kind of person who respects nature so much that you’ll take the extra effort to follow the LNT principles every single time.
By following the Outdoor Code, you become a leader on the trail. Your example might inspire other hikers to pick up their trash or stay on the path, helping to keep our wild places wild.
Req 3 — Aerobic Activity
Hiking: The Ultimate Aerobic Adventure
When you think about getting in shape, you might imagine running laps around a track or swimming in a pool. But one of the most effective and enjoyable ways to boost your fitness is right under your feet: the hiking trail. Hiking isn’t just a way to see beautiful views or reach a summit; it is a powerful workout that challenges your body in unique ways.
Requirement 3 focuses on the science of hiking fitness and the importance of preparation. Before you set out to conquer your 10-mile and 20-mile hikes, you need to understand how your body handles the effort and how you can train it to go the distance.

What is Aerobic Activity?
The word “aerobic” literally means “with oxygen.” When you engage in aerobic exercise, your body uses a steady stream of oxygen to help turn the fuel you eat into the energy your muscles need to keep moving.
Imagine your body is like a high-performance engine. To keep that engine running for a long time, it needs a constant supply of both fuel and air. If you were to run a 50-yard sprint, you would be using “anaerobic” energy—a quick burst of power that doesn’t rely on immediate oxygen. You can’t sprint for 10 miles! But when you hike, you are relying on your aerobic system. It’s a slow-and-steady burn that allows you to keep moving for hours on end.
Why Hiking Qualifies as Aerobic
Hiking is a premier aerobic activity for several reasons:
- Sustained Effort: Aerobic exercise involves the rhythmic movement of large muscle groups—like your quads, hamstrings, and calves—over an extended period. A hike typically lasts several hours, forcing your body to settle into a sustainable rhythm.
- Elevated Heart Rate: As you walk, especially when you are carrying a backpack or climbing a steady incline, your heart has to work harder. Its job is to pump oxygen-rich blood from your lungs to your legs so they can keep pushing forward.
- Increased Respiration: You might find yourself breathing more deeply or more frequently on the trail. This is your respiratory system working to take in more oxygen to keep up with the demands of your “engine.”
By regularly participating in aerobic activities like hiking, you are actually training your heart and lungs to be more efficient. Over time, your resting heart rate may go down, and you’ll find that hills that once left you breathless are now much easier to climb.
Why Conditioning Matters
You wouldn’t show up to a championship soccer game or a track meet without practicing first. The same principle applies to hiking. A 10-mile hike is a significant physical undertaking, and a 20-mile hike is even more demanding.
Conditioning is the process of gradually getting your body used to the stress of the trail. If you jump straight into a 10-mile hike without any training, you are likely to experience extreme muscle soreness, painful blisters, or even injuries like strained tendons. Proper conditioning allows your muscles to get stronger, your joints to become more flexible, and your endurance to grow bit by bit.
🎬 Video: Planning and Training for a Hike — https://youtu.be/XRaT-02V6_Q?si=KWpuleheaJYZVlBd
Building Your Conditioning Plan
Requirement 3 asks you to develop your own plan. This is a personal schedule that you create based on your current fitness level and your goals. A good plan isn’t about doing as much as possible right away; it’s about making steady, safe progress. Here is a framework you can use to build a plan that works for you.
1. Establish Your Baseline
Where are you starting? If you haven’t done much hiking lately, your “Week 1” might involve 30-minute walks around your neighborhood. If you are already active in sports, you might start with a 3-mile hike on a local trail.
2. The 10% Rule
A common mistake is trying to double your distance from one week to the next. Instead, try to increase your total weekly mileage (or your longest hike) by about 10% each week. This “progressive overload” is the safest way to build endurance without getting hurt.
3. Frequency and Consistency
It is better to walk for 30 minutes three times a week than to do nothing all week and try to hike 10 miles on Saturday. Consistency tells your body that it needs to stay ready for activity. Aim for 3-4 days of activity every week.
4. Train with Your Gear
Don’t wait until the day of your 10-mile hike to wear your hiking boots and carry your pack!
- Break in your boots: Wear them on your neighborhood walks to prevent blisters later.
- Add weight gradually: Start with a light daypack, then slowly add your “Ten Essentials,” and eventually add extra weight (like water bottles) to simulate a full load.
🎬 Video: Training for Elevation Gain — https://youtu.be/wrAzopMgriU?si=POvk4jZLbzeTos5t
5. Mix it Up with Cross-Training
You don’t have to hike every single day to get better at hiking. Other aerobic activities help build your base:
- Cycling: Strengthens your legs and builds endurance with very little impact on your knees.
- Swimming: An excellent full-body workout that challenges your heart and lungs.
- Jogging: Great for building cardiovascular strength quickly.
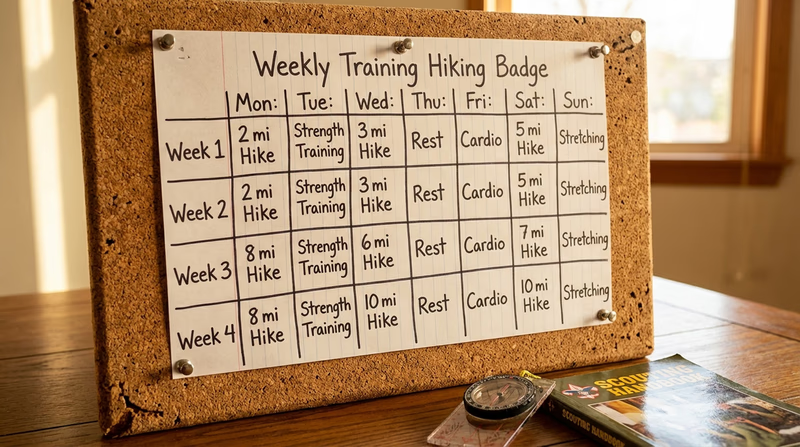
Sample Weekly Framework
This is just an example. Your actual plan should be written down in your notebook or on a calendar, customized for your life!
- Monday: Rest Day (let your muscles recover!).
- Tuesday: 30-minute brisk walk (wear your hiking boots!).
- Wednesday: 30-45 minutes of cross-training (bike ride or sports practice).
- Thursday: 30-minute walk with your daypack.
- Friday: Rest Day and stretching.
- Saturday: Training Hike day! Start with a distance that is challenging but doable, like 3 or 4 miles.
- Sunday: Light 15-minute recovery walk.
Increasing Fitness for Longer Hikes
Once you have mastered the 10-mile hike, you will need to step up your conditioning for the 15-mile and 20-mile treks. To increase your fitness further, you should focus on three main areas:
- Increased Mileage: Continue using the 10% rule to push your long Saturday hikes further.
- Increased Elevation: Seek out trails with more hills. Climbing builds the power in your glutes and calves that you will need for long days in the mountains.
- Back-to-Back Training: Occasionally, try doing a medium hike on Saturday and a short hike on Sunday. This teaches your body how to recover quickly and perform even when it’s already a little tired.
Nutrition and Hydration for Hikers
Your body is an engine, and an engine needs high-quality fuel. On a long hike, you are burning energy constantly, and you need to replace it.
- Pre-Hike Fueling: Eat a solid breakfast with complex carbohydrates (like oatmeal, whole-grain cereal, or a banana) about an hour or two before you start.
- On-Trail Snacking: Don’t wait until you’re starving to eat. Have small snacks every hour. A mix of nuts, dried fruit, and energy bars provides a good balance of quick energy and long-term fuel.
- Consistent Hydration: Take small sips of water throughout the day. If it’s hot or you’re working hard, you’ll lose a lot of water through sweat. For very long hikes, consider an electrolyte drink to replace the salts your body loses.
From Planning to Action
Developing a conditioning plan is the first step toward a successful hiking season. By understanding how your aerobic system works and giving your body the time it needs to adapt, you are setting yourself up for an incredible experience on the trail. Instead of struggling through the miles, you’ll have the energy to enjoy the scenery and the company of your fellow Scouts.
Now that you have a strategy for your physical fitness, it’s time to start planning the actual journeys you’ll take.
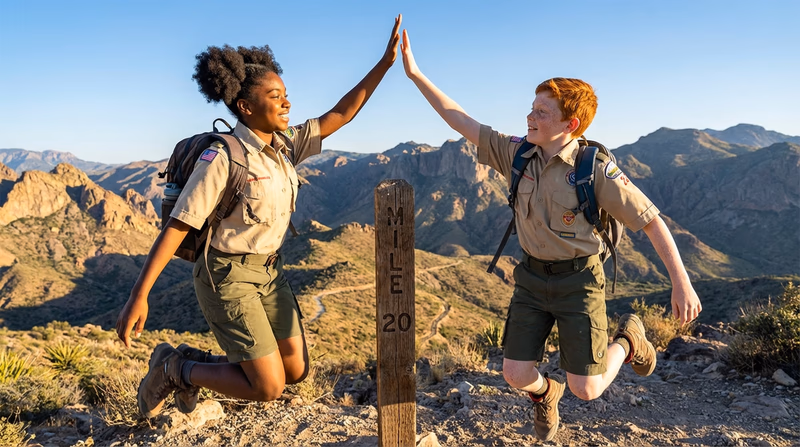
Req 4 — Your Hikes
This is it—the heart of the Hiking merit badge! After all your conditioning in Requirement 3, you are finally ready to “hit the trail” for the big miles. These five hikes are where your preparation meets the pavement (or the dirt, more likely).
A 10-mile hike is a significant undertaking, taking most hikers between four and six hours to complete. A 20-mile hike is a true “capstone” experience that will test your endurance and your gear. But don’t worry—if you’ve followed your conditioning plan and you prepare a solid hike plan, you’ll find that these miles are some of the most rewarding moments in Scouting.
Planning Your 10-Mile Hikes
You can’t just lace up your boots and walk out the door for a 10-mile trek. For this requirement, every single hike must have a written hike plan that is approved by your counselor or an adult leader before you start.
Think back to Requirement 1a where we discussed the Five W’s of a Trip Plan:
- Who: Who is going with you? (Remember: Never hike alone!)
- What: What are you doing? (A 10-mile hike on a specific trail.)
- Where: Where exactly are you going? (The specific route.)
- When: When are you leaving and when do you expect to be back?
- Why: To fulfill Hiking Merit Badge Requirement 4!
By writing these down, you ensure that someone at home knows where you are and when to expect you back. It also forces you to think through the logistics of the day.
What Goes in a Hike Plan?
A good hike plan isn’t just a note on a napkin. For this requirement, your counselor will want to see three specific things in your written document:
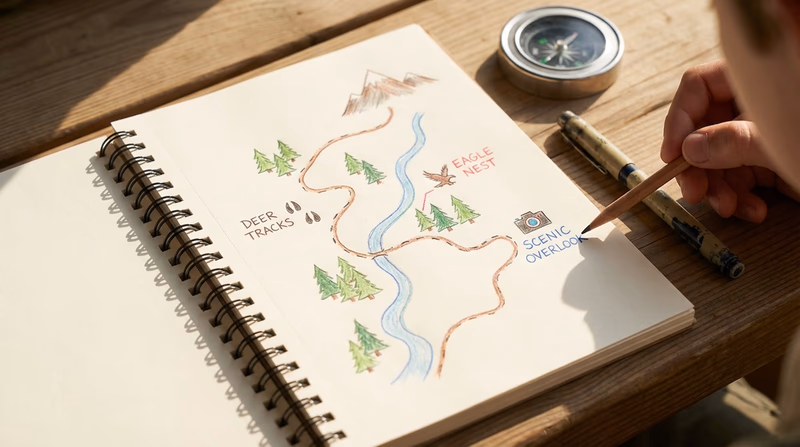
1. Map Routes
Don’t just name the trail. You should have a physical or digital map that shows exactly which turns you are taking. 10 miles can involve several different trail intersections. Knowing the “elevation profile”—how many hills you’ll be climbing—is also vital. A flat 10-mile hike is very different from one that climbs 2,000 feet!
2. Clothing and Equipment List
This is your chance to double-check your Scout Essentials. Your list should change based on the weather. If there is a 30% chance of rain, your plan better include rain gear! If it’s going to be 90 degrees, you’ll need extra water and sun protection. Refer back to the gear we discussed in Requirement 1a to make sure you aren’t forgetting anything like a first aid kit, whistle, or extra socks.
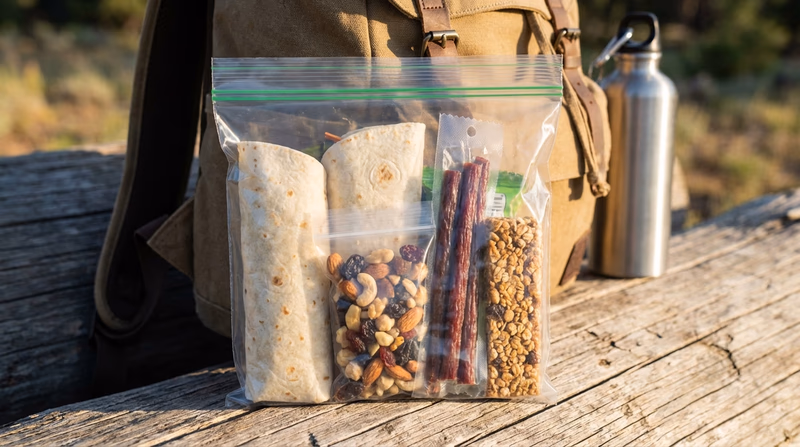
3. Trail Lunch Items
Since these hikes are “continuous” (meaning you do them all at once), you will be on the trail during a mealtime. You need to list exactly what you are bringing to eat. We’ll dive deeper into trail lunch planning in the next section.
Pre-Hike Planning Worksheet Print this worksheet to plan each of your five hikes. Covers the Five W's, route details, gear checklist, and trail lunch. Resource: Pre-Hike Planning Worksheet — /merit-badges/hiking/guide/hike-plan-worksheet/Trail Lunch Planning
When you are hiking 10 or 20 miles, your body is like a car driving at high speeds—it needs high-quality fuel. A soggy peanut butter sandwich might get you through a two-mile walk, but for a 20-miler, you need a mix of carbohydrates for quick energy and protein/fats for long-lasting endurance.
Good trail food should be:
- High Energy: Lots of calories to keep you moving.
- Lightweight: You have to carry it, so avoid heavy cans or glass jars.
- Non-Perishable: It needs to stay safe to eat even after sitting in a warm backpack for four hours.
- Easy to Eat: You don’t want to spend an hour “cooking” in the middle of a 20-mile hike.
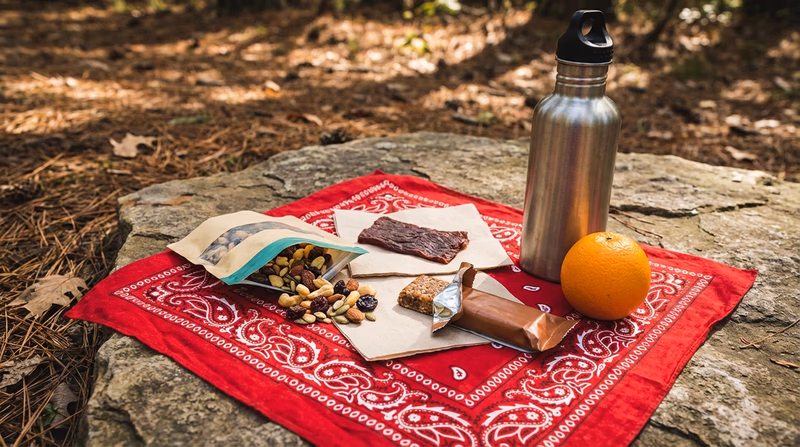
Trail Lunch Essentials
Pack these for a high-energy day on the trail- Trail Mix (GORP): A classic mix of nuts, raisins, and chocolate. The nuts provide fat/protein, while the fruit and chocolate give you a quick sugar boost.
- Beef or Turkey Jerky: Excellent lightweight protein that won’t spoil in the heat.
- Peanut Butter Wraps: Use tortillas instead of bread—they don’t get squashed in your pack and provide plenty of energy.
- Dried Fruit: Apricots, mangoes, or apples give you vitamins and natural sugars without the weight of water in fresh fruit.
- Energy Bars: Look for bars with at least 10 grams of protein and complex carbs (like oats).
- Tuna or Chicken Pouches: These come in foil pouches (no can opener needed!) and are great for a protein-heavy “main course.”
- Hard Cheese: Blocks of cheddar or parmesan stay fresh longer than soft cheeses and provide necessary salt and fats.
- Electrolyte Powder: Adding this to one of your water bottles helps replace the salt you lose through sweat.
Choosing Your Routes
Variety is the spice of life—and the secret to enjoying this merit badge! While you could walk the same 10-mile loop four times, it’s much better to explore different areas.
Try to find:
- Different Terrains: A forest trail one day, a coastal path another, and maybe a hilly ridge for the third.
- Different Seasons: If your schedule allows, seeing a trail in the fall colors versus the spring bloom is a totally different experience.
- Different Challenges: One hike might be flat and fast, while another might be rocky and technical.
Remember: Each hike must be on a different day. You cannot do 5 miles in the morning, 5 in the afternoon, and count it as a 10-mile hike. It must be a single, continuous effort.
Rest Stops and Pacing
The requirement says the miles must be “continuous.” This means you can’t hike 5 miles, go home for a nap, and come back for the other 5. However, it does not mean you can’t stop!
You are encouraged to take:
- Short rest periods: 5–10 minutes every hour to catch your breath and hydrate.
- One meal stop: A longer break (usually 30 minutes) to eat your trail lunch.
The key is to avoid “extended periods” like staying overnight. Think of it as a “day hike” on steroids. Keep your muscles warm by not sitting still for too long. If you sit for an hour, your legs will stiffen up, making the next mile feel twice as hard.
The 20-Mile Hike: Your Capstone
The 20-mile hike is the “final boss” of the Hiking merit badge. It is a long day—usually 8 to 10 hours of walking. While it might sound scary, remember that you’ve already completed four 10-mile hikes and a conditioning program by the time you reach this step. You are ready!
Strategies for the 20-Miler:
- Start Early: Be on the trail at sunrise. This gives you plenty of daylight and prevents you from having to finish in the dark.
- Mental Segments: Don’t think of it as 20 miles. Think of it as four 5-mile hikes. Reward yourself with a special snack at each 5-mile mark.
- Foot Care: This is the hike where blisters are most likely. Change your socks halfway through. It feels amazing and helps keep your feet dry.
- Hydration: You will likely need 3–4 liters of water. If there isn’t a water source on the trail, you may need to “cache” water (hide it) along the route beforehand or carry it all.
Find Hiking Trails Near You
Not sure where to find a 10-mile loop? These resources are great for scouting out your next adventure:
Hiking Project Find maps, trail descriptions, and ideas for hikes near you. Link: Hiking Project — https://www.hikingproject.com/ AllTrails Search for trails by location, difficulty, and length with reviews from other hikers. Link: AllTrails — https://www.alltrails.com/ National Park Service — Find a Park Explore trails and hiking opportunities in America's national parks. Link: National Park Service — Find a Park — https://www.nps.gov/findapark/index.htm USGS Topographic Maps Download free topographic maps from the U.S. Geological Survey to plan your route and study the terrain. Link: USGS Topographic Maps — https://www.usgs.gov/programs/national-geospatial-program/topographic-maps U.S. Forest Service — Recreation Find trails, campgrounds, and recreation areas in America's national forests and grasslands. Link: U.S. Forest Service — Recreation — https://www.fs.usda.gov/recreation Rails-to-Trails Conservancy — TrailLink Search for converted rail-trails — flat, well-maintained paths that are perfect for long-distance hiking. Link: Rails-to-Trails Conservancy — TrailLink — https://www.traillink.com/ Bureau of Land Management — Recreation Explore hiking opportunities on public lands managed by the BLM across the western United States. Link: Bureau of Land Management — Recreation — https://www.blm.gov/programs/recreationOnce you finish each of these hikes, your job isn’t quite done. You need to document what happened!
Req 5 — Hike Reports
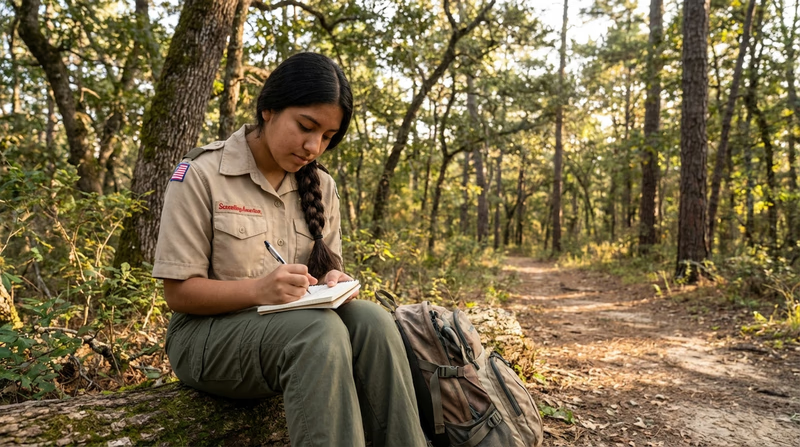
Why Write a Hike Report?
You have just finished five incredible hikes. You’ve climbed ridges, navigated through dense forests, and perhaps even trekked through a bit of mud or rain. But as time goes on, the specific details of those days can start to blur together. Which hike was the one where you saw the hawk? Which trail had that tricky stream crossing?
Writing a hike report is your way of “freezing” those moments in time. It isn’t just a piece of homework to hand to your counselor; it is a personal journal of your growth as a Scout and an outdoorsman. When you look back at these reports in a few years, you won’t just see a list of miles—you’ll see the story of how you became a stronger, more confident hiker. These reports help you reflect on your experiences, track your physical progress, and celebrate the small victories you achieved on the trail.
What to Include in Your Reports
Requirement 5 asks for specific details for each of your five hikes from Requirement 4. To make sure your reports are complete, walk through these five essential elements for every entry:
1. The Date and the Route
Start with the basics. When did you go? Was it a crisp autumn morning or a humid summer afternoon? For the route, you can write a description (e.g., “Started at the North Trailhead, took the Blue Loop to the summit, and returned via the Creek Path”) or you can attach a map. If you used a GPS app or a paper map, including a copy with your route highlighted is a fantastic way to document your path.
2. Weather Conditions
Weather plays a huge role in how a hike feels. Was it sunny and clear, providing views for miles? Or was it foggy and mysterious? Be sure to note if the weather changed during the hike. Maybe it started out warm but a sudden breeze made you glad you packed that extra layer. This helps you remember why certain gear choices were important.
3. Interesting Sights
This is the “color” of your report. Think about the wildlife you encountered, the types of trees or wildflowers you identified, or a particularly beautiful vista. Did you see any historic landmarks, interesting rock formations, or unique trail signs? These details make each hike stand out from the others.
4. Challenges and Solutions
Every hike has its hurdles. Maybe your boots started to rub, you ran out of water sooner than expected, or the trail was much steeper than the map suggested. The most important part of this section isn’t the challenge itself, but how you handled it. Did you stop to apply moleskin? Did you adjust your pace? Reflecting on how you overcame difficulties is how you build “trail smarts” for future adventures.
5. Personal Reflections
This is often the most rewarding part of the report. Ask yourself: What did I learn today? You might have learned that you’re better at navigating with a compass than you thought. You might have noticed how your patrol worked together to keep everyone’s spirits up during a long climb. Or maybe you simply realized how much you enjoy the quiet of the woods.
Tips for Writing a Great Report
The secret to a great hike report is capturing the details while they are still fresh. If you wait a week to write your report, you might forget the name of that cool bird you saw or exactly how you felt when you reached the halfway point.
Lewis and Clark Journals — National Archives Explore the real journals of Lewis and Clark to see how great explorers documented their adventures — the same tradition your hike reports continue. Link: Lewis and Clark Journals — National Archives — https://www.archives.gov/nhprc/projects/publishing/lewis-clarkTry to write your final report within 24 to 48 hours of returning home. Your muscles might be a little sore, but your memory will be sharp!
Finding Your Reporting Style
There is no single “right” way to format your report. Some Scouts prefer to write a narrative story, like a chapter in a book. Others prefer a structured approach using bullet points for each requirement. You could even create a “scrapbook” style report by combining your writing with photos you took or sketches of things you saw.

As long as you cover the required information—the date, route, weather, sights, challenges, and reflections—you can let your personality shine through. Remember, you need to produce a report for each of the hikes you completed. If you did a continuous trek, you can write your reports as daily entries in a trek journal.
Once you have completed all five reports, prepare to share them with your merit badge counselor. They will love seeing the trail through your eyes!
Hike Report Form Print this form to document each hike. Includes sections for route, weather, sights, challenges, and personal reflections. Resource: Hike Report Form — /merit-badges/hiking/guide/hike-report-form/Extended Learning
A. Introduction
You have completed the requirements for the Hiking merit badge — congratulations! But the trail does not end here. There is so much more to explore, from local paths to legendary long-distance trails that span the continent. Your journey as a hiker is just beginning.
B. Deep Dive: Choosing the Right Hiking Boots
Selecting the proper footwear is one of the most important decisions you will make as a hiker. Your feet are your primary mode of transportation, and keeping them comfortable, dry, and protected is essential for enjoying longer and more challenging treks. The right pair of boots will not only prevent blisters but also protect your joints and provide the traction needed for varying surfaces.
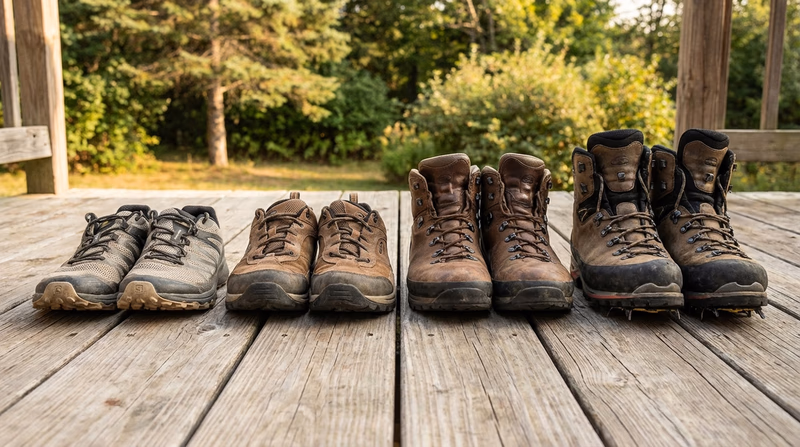
There are four primary categories of hiking footwear to consider:
- Trail Runners — lightweight, flexible, and offer excellent breathability. They are a fantastic choice for well-maintained trails, day hikes, and even long-distance treks where speed and weight are prioritized over ankle support. Many experienced thru-hikers prefer them because they dry quickly and reduce fatigue.
- Hiking Shoes — low-cut but built with tougher materials and more rigid soles than standard athletic shoes. They offer more support and durability than trail runners while remaining lighter than full boots, making them a great all-around choice for most Scouts on weekend trips.
- Hiking Boots — mid-to-high cut boots that provide significant ankle support and stability. They are designed for rough, uneven terrain and are the best choice when carrying a heavy multi-day pack. The extra stability helps prevent ankle rolls and provides confidence when navigating steep or rocky paths.
- Mountaineering Boots — specialized tools with extremely stiff soles and maximum support. They are designed for high-altitude environments, snow, ice, and technical terrain where you might need to attach crampons. While they are generally too heavy and stiff for standard hiking, they are necessary for serious alpine expeditions.
C. Multi-Day Hiking Experiences
Ready to spend more than one night under the stars? These legendary trails offer some of the most profound wilderness experiences in the world.
Appalachian Trail (AT)
Pacific Crest Trail (PCT)
John Muir Trail (JMT)
Continental Divide Trail (CDT)

D. Same-Day Hiking Experiences
You don’t need weeks of time to see incredible sights. These iconic day hikes offer world-class views and challenges that can be tackled in a single outing.
The Narrows — Zion National Park, UT
Angel's Landing — Zion National Park, UT
Half Dome — Yosemite National Park, CA
E. Urban Hiking Experiences
Hiking isn’t just for the deep woods. “Urban hiking” allows you to explore the history, architecture, and hidden green spaces of our greatest cities.
New York City Freedom Trail
San Francisco Urban Hike
Washington, D.C. National Mall
F. Organizations
Joining a hiking organization is a great way to meet fellow enthusiasts, find new trails, and give back through trail maintenance and conservation.
A nonprofit dedicated to preserving public lands and protecting hiking trails across the country.
Organization: American Hiking Society — https://americanhiking.org/
Grassroots environmental organization that explores, enjoys, and protects wild places.
Organization: Sierra Club — https://www.sierraclub.org/
Works to protect America’s wild places, including forests, rivers, deserts, and Arctic lands.
Organization: The Wilderness Society — https://www.wilderness.org/
Advocates for the protection and preservation of America’s national parks.
Organization: National Parks Conservation Association — https://www.npca.org/
Engages communities in the restoration and enhancement of America’s national forests and grasslands.
Organization: National Forest Foundation — https://www.nationalforests.org/