Req 2a — Yard Tool Tune-Up
A rusty shovel, sticky pruners, or a hoe with a loose handle is more than annoying. It is less effective, harder to control, and sometimes unsafe. This requirement teaches one of the most practical repair lessons in the whole badge: tools last longer and work better when you take care of them before they fail.
Choose the Right Tool to Recondition
A good yard tool for this requirement is one that clearly needs attention but is still worth saving. Common choices include shovels, rakes, hoes, trowels, pruning shears, loppers, and post-hole diggers.
Look for these common problems:
- Rust on metal parts
- Dirt or sap stuck on blades
- Dull cutting edges
- Loose screws, nuts, or bolts
- A rough or splintered wooden handle
- Poor storage that leaves the tool exposed to rain or soil
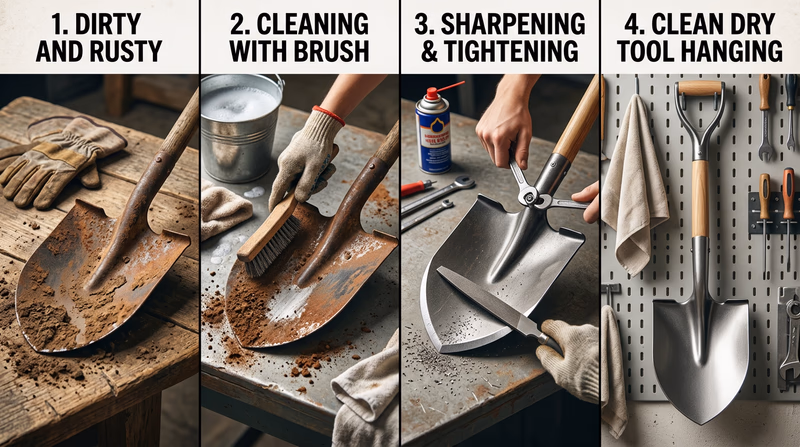
A Simple Reconditioning Process
1. Clean the Tool First
Brush off dirt, grass, and dried mud. A putty knife or stiff brush works well for packed-on debris. If needed, wash the tool and dry it completely so new rust does not form.
2. Remove Rust and Buildup
Light rust can often be removed with steel wool, sandpaper, or a wire brush. For cutting tools like pruners, remove sap and sticky residue carefully so the blades open and close smoothly.
3. Tighten and Inspect
Check all fasteners and moving parts. Tighten what needs tightening. If a handle is loose or cracked, show it to your supervising adult and decide whether that tool is still safe to use.
4. Sharpen if Appropriate
Some yard tools, such as shovels, hoes, and pruning tools, work better with a clean, maintained edge. Sharpen only if the tool is designed for it and you know the correct angle.
5. Protect and Store
Wipe metal surfaces clean and dry. Some adults use a light coat of oil to protect metal from moisture. Store tools off the ground if possible, with blades or sharp edges protected and handles supported.
This video is useful because it shows the full cycle: clean, inspect, sharpen, and protect. As you watch, notice how much easier sharpening and cleanup become when the tool is held steady and the work surface is organized.
Showing That You Know How to Store It
Proper storage is part of the requirement because poor storage causes many of the problems you just fixed.
Good storage means:
- The tool is clean and dry before being put away.
- Sharp or pointed parts are placed where people will not brush against them.
- The tool is stored off wet ground and out of standing water.
- Handles are supported so the tool does not warp, fall, or bend.
- Smaller tools are kept where they are easy to find instead of tossed into a heap.
A shovel leaned carelessly against a wall can slide and fall. Pruners left outdoors can rust shut. A rake left teeth-up in the yard becomes a classic accident. Storage is not an afterthought. It is part of safe tool ownership.
What to Explain to Your Counselor
Show the full story of the repair
- What condition the tool was in before you started
- What dirt, rust, looseness, or dullness you found
- What cleaning or sharpening steps you used
- What safety gear you wore and why
- How you now store the tool so it stays ready for the next job
In Req 1 — Safety Basics, you learned to inspect hazards before starting work. Tool maintenance is a perfect place to practice that habit because you notice problems before they become injuries.
Now move to weatherstripping, where the focus shifts from tool care to sealing a home against drafts and wasted energy.