Req 2b — Weatherstripping a Door or Window
If you have ever felt cold air sneaking past a closed door in winter or warm outdoor air leaking in during summer, you have already met the problem weatherstripping solves. It is one of the simplest home repairs in this badge, but it can make a room quieter, more comfortable, and less expensive to heat or cool.
What Weatherstripping Does
Weatherstripping seals the moving joints around doors and operable windows. Unlike caulk, which is usually used on fixed gaps, weatherstripping is designed for places that open and close.
Good weatherstripping should:
- Compress enough to seal a gap
- Spring back after the door or window moves
- Stay attached through repeated use
- Match the size of the gap without making the door or window hard to close
Choosing the Right Spot
A door or window is a good candidate for this requirement if it shows one or more of these signs:
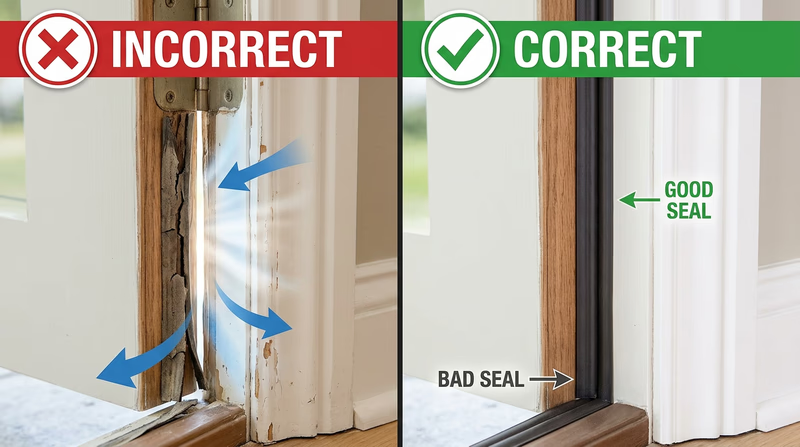
- You can feel a draft near the edges
- Light shows through around a closed door
- Existing weatherstripping is cracked, flattened, or missing
- The frame rattles on windy days
Watch how the installer measures first, cleans the surface, and checks the fit before pressing everything into place. Those steps are what keep the finished job neat and effective.
Steps for a Successful Repair
1. Inspect the Gap
Open and close the door or window. Notice where the gap is widest and where the seal has failed. If the frame itself is damaged or badly out of square, weatherstripping alone may not fully solve the problem.
2. Remove Old Material
Peel away worn weatherstripping and scrape off leftover adhesive if needed. A dirty or uneven surface makes new material fail early.
3. Measure Carefully
Measure each side you need to seal. Cut the new material to length, but do not cut so short that you leave a gap at the corners.
4. Test Before Final Attachment
Set the new strip in place loosely first. Close the door or window and check that it seals without binding.
5. Attach and Recheck
Press or fasten the material as directed, then test the opening again. You want a snug seal, not a forced one.
What You Learn From This Repair
This job teaches a bigger home-repair lesson: prevention saves money. A small air leak can let in moisture, dust, noise, and uncomfortable drafts. Fixing that leak early is much easier than dealing with warped trim, mold, or wasted utility bills later.
This repair also teaches neatness. A crooked or poorly cut strip may still seal for a while, but a clean installation lasts longer and shows that you paid attention to the details.
Next comes exterior caulking, which solves a similar problem on fixed joints that do not move.