Req 3f — Lacing and Stitching
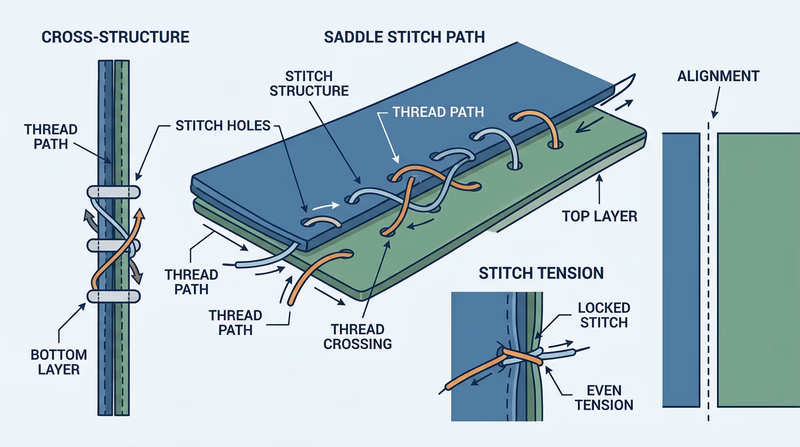
This is the step where separate pieces become one finished article. Good assembly is more than just getting the parts attached. It affects strength, appearance, flexibility, and how long the project survives real use.
🎬 Video: How to Punch Holes (for Sewing) in Leather (video) — https://youtu.be/GYnXLSGakYA?si=WJoxl-Dto6gmMres
🎬 Video: How to Choose the Right Thread and Needle Size for Hand-Sewing in Leather (video) — https://youtu.be/CepMYy3yra8?si=bpkV8Y0zoef-tBId
🎬 Video: The Most Common Stitches in Hand-Stitching for Leatherwork (video) — https://youtu.be/Hd103-7adK8?si=UnFoIJJ46SNdtwf7
🎬 Video: How to Start and End Hand-Swing Lines in Leather (video) — https://youtu.be/Eew734WXXzs?si=Jkc2U94RGO1eTfpY
Lacing vs. stitching
Lacing uses leather or synthetic lace threaded through larger holes. It can be decorative as well as structural and often gives projects a bold edge.
Stitching usually uses thread and needles through smaller, more closely spaced holes. It can look cleaner and more refined, especially on wallets, pouches, and notebook covers.
What strong assembly needs
Pieces must line up correctly before you start. Hole spacing should be consistent. Thread or lace should match the scale of the project. Tension should be firm enough to hold the pieces together but not so tight that the leather puckers.
Assembly checkpoints
Check these before calling the seam finished
- Edges line up the way you planned.
- Hole spacing looks even.
- Thread or lace fits the hole size.
- Beginning and ending stitches are secure.
- No loose loops, twists, or missed holes remain.
Stitching and lacing solve one type of assembly problem. Hardware solves another. Next comes snaps and rivets.