Req 9 — Nonbuoyant Aid Rescue
Real emergencies do not happen when you are already in your swimsuit at the pool. They happen when you are fully dressed — walking along a riverbank, hanging out at a dock, or standing beside a lake at a picnic. This requirement prepares you for that reality: getting out of heavy clothing fast, entering the water, and performing a rescue with nothing but a piece of cloth.
When to Remove Clothing
Heavy, waterlogged clothing can drown a rescuer. But removing clothes takes time, and time is something a drowning victim does not have much of. Here is the decision framework:
Remove clothing when:
- You are wearing heavy items: jeans, boots, a thick jacket, a hoodie
- The swim distance is significant (more than a few body lengths)
- You have a few seconds to spare — the victim is still at the surface
- The clothing will restrict your movement or weigh you down
Keep clothing on when:
- The victim is about to go under and every second counts
- Your clothing is lightweight (shorts and a T-shirt)
- Removing clothes would take longer than the swim itself
- You are in cold water and the clothing provides insulation
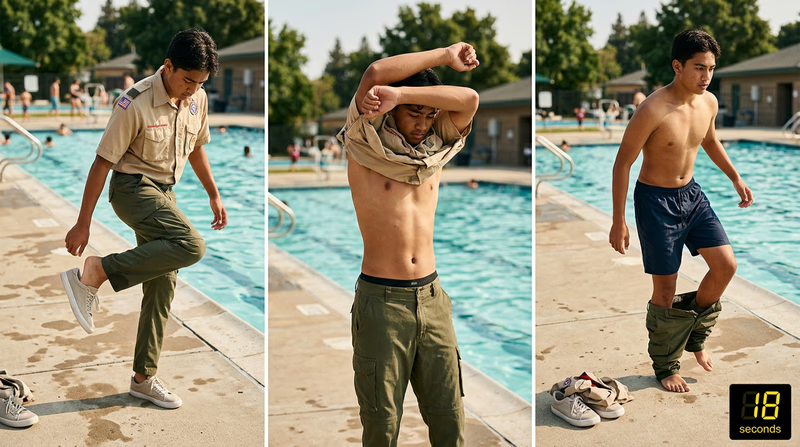
The 20-Second Strip
Here is a reliable sequence for removing street clothes quickly:
- Shoes first. Kick them off or step on the heel and pull your foot out. Do not bother with laces — just force them off. (2–4 seconds)
- Shirt next. Grab the back of the collar and pull over your head in one motion. If it is a button-down, do not unbutton — rip it open or pull it over your head. (3–5 seconds)
- Pants last. Unbutton, unzip, and push down. Step out of them. If wearing a belt, unbuckle it as you unzip. (4–6 seconds)
- Socks optional. If they come off easily, great. If not, leave them — they will not slow you down much.
Save your shirt or towel. You will use it as your rescue aid. Do not throw it aside with the rest of your clothes — hold onto it or drape it over your shoulder.
The Nonbuoyant Aid Tow
Once you are in the water with your shirt or towel, the rescue follows a similar pattern to the buoyant aid tow — but with a critical difference: the aid does not float. The victim must actively hold on, and you must tow without the benefit of buoyancy support.
Step by step:
- Enter the water with a stride jump, holding the shirt or towel.
- Swim to the victim using a strong approach stroke, eyes on the victim.
- Stop about 6 feet away and speak: “I have a shirt for you. Grab this end and hold tight.”
- Extend one end of the shirt or towel toward the victim. Keep a firm grip on your end.
- Wait for the victim to grab with both hands.
- Roll onto your side and begin towing with the sidestroke.
- Kick powerfully — you are pulling the victim’s weight without buoyancy help.
- Communicate throughout: “Keep holding on. Kick your feet if you can. Almost there.”
- Tow to shore and help the victim exit the water.
Why This Is Harder Than a Buoyant Aid Rescue
Challenges of Nonbuoyant Tows
What makes this rescue more demanding
- No flotation support — the victim’s weight pulls you down
- The fabric can slip or tear if the victim’s grip is weak
- You must swim harder to maintain forward progress
- The victim may swallow water since they have no float to rest on
- If the victim lets go, you must circle back and present the aid again
- Your own endurance is tested more severely
Making the Most of a Shirt or Towel
- Wet the fabric first if possible — a wet towel is heavier and provides a more secure grip.
- Twist it into a rope rather than leaving it flat. A twisted shirt is easier to grip.
- Hold your end with both hands if you are not actively swimming — switch to one hand only when stroking.
- Keep it short. The closer the victim is to you, the more efficiently you can tow. But maintain enough distance that they cannot grab you.