Req 3 — Hardening, Softening & Tempering
This requirement is where metal stops being an idea and starts becoming a physical lesson. You are not just hearing that metal can harden or soften—you are being asked to feel the difference in your hands. Pay attention to how much force is needed, what the bend line looks like, and how the metal responds after heating.
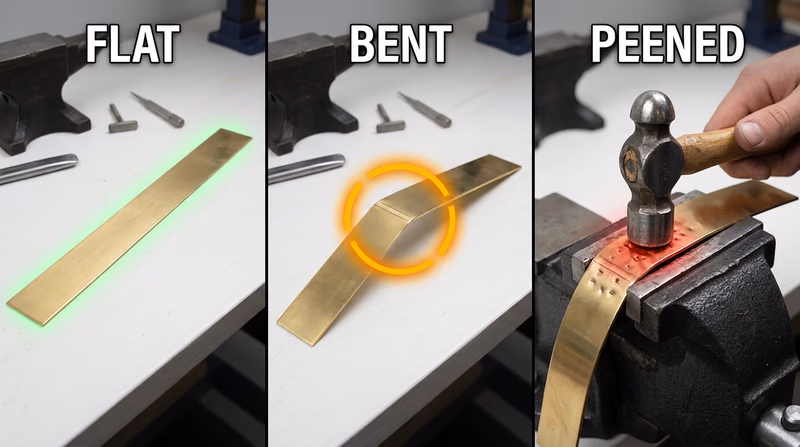
Requirement 3a: Work-Harden a Bend Line
Brass and copper are excellent teaching metals because they respond clearly to hammering and bending. When you peen along the bend line, you compress and deform the metal repeatedly. That extra work makes the bend area stiffer and less willing to move.
The key observation is the yield point—the moment where the metal stops springing back and actually begins to change shape. Before work-hardening, the metal reaches that point more easily. As you peen the bend line, it should take more effort to push it further.
Requirement 3b: Anneal and Compare
This step gives you the comparison that makes the lesson stick. After annealing, the same metal should become easier to move again. If 3a taught you that working metal can increase resistance, 3b shows that controlled heating can reduce that resistance.
The most important part is your observation. Did the bend move more easily? Did it feel smoother? Did the metal resist less before yielding? Those are the details your counselor wants to hear.
Requirement 3c: Temper Colors and a Center Punch
This part of the requirement moves from nonferrous sheet metal into steel heat treatment. When steel is heated carefully, thin oxide colors can appear on the surface. These temper colors help metalworkers judge temperature ranges during heat treatment.
A center punch is a practical shop tool used to make a small dent in metal before drilling. That tiny mark helps keep a drill bit from skating across the surface. Making one yourself teaches a powerful lesson: the tool’s usefulness depends on how its hardness and toughness are balanced.
Why Tempering Matters
If steel is only hardened and not tempered, it may be too brittle. If it is too soft, it may mash over instead of making a clean mark. Tempering helps move the steel toward a better balance for the job.
What to Notice in Req 3
These details make your discussion stronger
- Resistance: Did the metal take more or less force after each step?
- Location: Which area changed most—the bend line, the whole piece, or the tip of the tool?
- Purpose: Why do metalworkers sometimes want hardness and other times want softness?
- Result: How did heat treatment affect how the final tool behaved?
Metalwork is full of choices about hardness, toughness, and formability. This requirement teaches you that those properties are not fixed. A metalworker can change them on purpose.