Public Speaking Merit Badge — Complete Digital Resource Guide
https://merit-badge.university/merit-badges/public-speaking/guide/
Introduction & Overview
Stand up, open your mouth, and change the world. That might sound dramatic, but it is exactly what great public speakers do every day. The Public Speaking merit badge will teach you how to organize your thoughts, stand in front of a group, and deliver a message that people actually want to hear. Whether you are running for patrol leader, presenting a school project, or telling a story around the campfire, these skills will serve you for life.
Public speaking is consistently ranked as one of the top skills employers look for — and one of the top fears people have. This guide will help you turn that fear into confidence.
Then and Now
Then — The Power of the Spoken Word
Long before texting, email, or social media, the spoken word was the most powerful tool a person could master. In ancient Greece, students spent years studying rhetoric — the art of persuasive speaking. The philosopher Aristotle wrote an entire book on the subject around 330 BCE, and his ideas about how to persuade an audience are still taught today.
Great speakers have shaped history. In 1863, Abraham Lincoln delivered the Gettysburg Address in just over two minutes — 272 words that redefined the meaning of the Civil War. Dr. Martin Luther King Jr.’s “I Have a Dream” speech in 1963 moved a nation toward justice. These moments remind us that the right words, spoken with conviction, can change everything.
- Purpose: Persuasion, leadership, ceremony, storytelling
- Mindset: Speaking well was a mark of education and leadership — it was expected of anyone who wanted to lead
Now — Everyone Has a Stage
Today, public speaking is not just for politicians and preachers. YouTube creators, podcast hosts, TED Talk presenters, and even gamers livestreaming to thousands are all public speakers. The stages have changed, but the core skills — clear thinking, confident delivery, and connecting with your audience — are exactly the same.
- Purpose: Education, entertainment, advocacy, career success, everyday communication
- Mindset: Anyone can learn to speak well, and the opportunities to practice are everywhere
Get Ready! You are about to discover that speaking in front of others is not about being perfect — it is about being prepared, being yourself, and being willing to try. Every great speaker started exactly where you are right now.

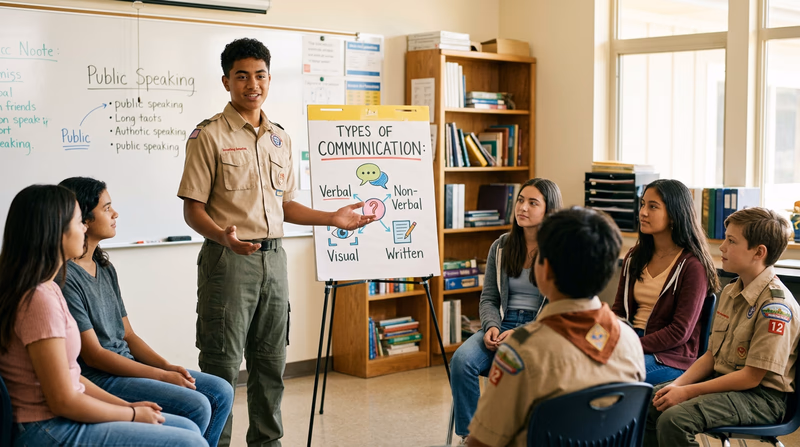
Kinds of Public Speaking
Public speaking is not one-size-fits-all. There are many different types, and each one uses a slightly different set of skills. Here are the main categories you will encounter — and you will practice several of them as you work through this merit badge.
Informative Speaking
The goal of informative speaking is to teach your audience something they did not know before. Think science fair presentations, how-to demonstrations, or a troop meeting where you explain how to set up a tent. Your job is to be clear, organized, and interesting.
Persuasive Speaking
Persuasive speakers want to change how the audience thinks, feels, or acts. Debate teams, campaign speeches, and even a Scout trying to convince the patrol to go canoeing instead of hiking all use persuasion. You need evidence, logic, and just the right amount of emotion.
Ceremonial Speaking
Ceremonial speeches mark special occasions — award presentations, graduation speeches, toasts, and tributes. These talks are usually shorter and more personal. The key is sincerity. Your audience wants to feel something, not just hear something.
Impromptu Speaking
Impromptu speaking means talking without preparation. Your teacher calls on you in class. Someone asks your opinion at a meeting. You are put on the spot, and you have to think fast. It sounds scary, but there are simple techniques that make it much easier — and you will learn them in Requirement 3.

Storytelling
Humans have been telling stories around fires for thousands of years, and it is still one of the most powerful forms of communication. A well-told story grabs attention, creates emotion, and makes your message stick. Whether you are sharing a personal experience or narrating a historical event, storytelling is a public speaking superpower.
Parliamentary Speaking
This is the formal, rules-based speaking used to run meetings. From the U.S. Congress to your troop’s patrol leaders’ council, parliamentary procedure keeps discussions organized and fair. You will dig into this in Requirement 5.
Now let’s start building your speaking skills — one requirement at a time.
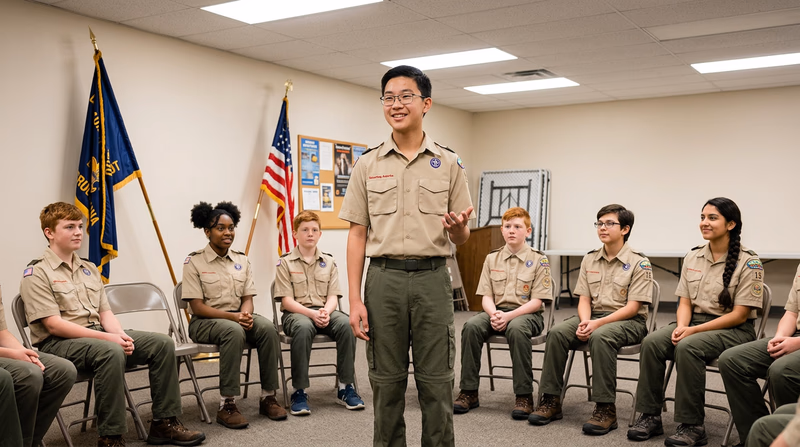
Req 1 — Your Self-Introduction
This is where your public speaking journey begins — and it starts with the topic you know best: yourself. A self-introduction might seem simple, but organizing your thoughts and delivering them clearly to a group is a real skill. This requirement is designed to get you comfortable standing up and speaking, using a subject where you are already the expert.
Why Self-Introductions Matter
You will introduce yourself hundreds of times throughout your life — at a new school, at a job interview, at the start of a team project, or when meeting new people at camp. A strong self-introduction creates a positive first impression and helps others connect with you. It is one of the most practical speaking skills you can develop.
Building Your Introduction
A three- to five-minute talk needs structure, or it will feel like rambling. Here is a simple framework that works every time:
Opening (30 seconds) — Start with something that grabs attention. This could be a fun fact about yourself, a short story, or even a question to the audience. Avoid starting with “Um, hi, my name is…” — that is forgettable. Instead, try something like:
- “Last summer, I ate a scorpion. On purpose. Let me explain…”
- “If you had to describe yourself in three words, what would they be? Mine are curious, outdoors, and hungry.”
- “I have been a Scout for four years, and in that time I have learned one important thing — always check your boots for spiders.”
Body (2–3 minutes) — This is the main part. Cover three or four topics about yourself. Think of these as “chapters” of your talk:
- Who you are: Your name, age, school, family — the basics
- What you care about: Hobbies, interests, passions, Scouting adventures
- A story: Share one short, specific story that shows who you are (a camping trip, a challenge you overcame, something funny that happened)
- A surprising fact: Something the audience would not guess about you
Closing (30 seconds) — End with something memorable. Circle back to your opening, share what you are looking forward to, or leave the audience with a thought. A strong closing makes people remember you.
Handling Nervousness
Almost everyone feels nervous before speaking. That is completely normal — even professional speakers get butterflies. The trick is not to eliminate the nervousness but to manage it.
Nerves Management Toolkit
Techniques to calm yourself before speaking- Breathe deeply: Take three slow, deep breaths before you stand up. Inhale for four counts, hold for four, exhale for four.
- Power pose: Stand tall with your shoulders back for two minutes before your talk. Research suggests this can boost your confidence.
- Prepare thoroughly: The number one cure for nervousness is knowing your material cold. Practice until you can deliver your talk without reading it.
- Arrive early: Get comfortable in the room before others arrive. Stand where you will speak. It will feel less unfamiliar when it is time to start.
- Focus on the message: Shift your attention from “everyone is watching me” to “I have something worth sharing.” That mental flip changes everything.
- Accept imperfection: You will stumble. You might lose your place. That is fine. Your audience wants you to succeed, and a small mistake makes you relatable.
Practice Makes Comfortable
You would not perform a skit at camp without rehearsing, and you should not give a speech without practicing either. Here is how to prepare:
- Write it out — Put your key points on paper. You do not need a word-for-word script, but having an outline helps you stay on track.
- Say it out loud — Practicing in your head is not the same as saying the words. Speak your introduction out loud, even if it is just to your bedroom wall.
- Time yourself — Set a timer. Three minutes is shorter than you think, and five minutes is longer than you think. Adjust until you are in the range.
- Practice in front of someone — A family member, a friend, even your pet. Getting used to having eyes on you is half the battle.
- Record yourself — Use your phone to record a practice run. Watching it back is uncomfortable but incredibly useful. You will notice habits you did not know you had.
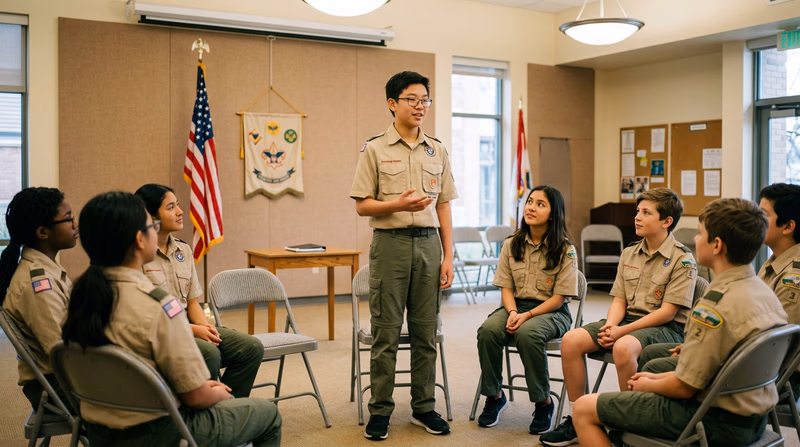
Choosing Your Audience
The requirement says “an audience such as your troop, class at school, or some other group.” Choose a group where you feel reasonably comfortable. Your troop is a great option because everyone there is rooting for you. A school class, a youth group, or a family gathering all work too. The key is that it is a real audience — not just your merit badge counselor one-on-one.
Explore More Resources
Toastmasters: Tips for New Speakers Practical advice from the world's largest public speaking organization, including tips on overcoming fear and structuring your first speech. Link: Toastmasters: Tips for New Speakers — https://www.toastmasters.org/resources/public-speaking-tips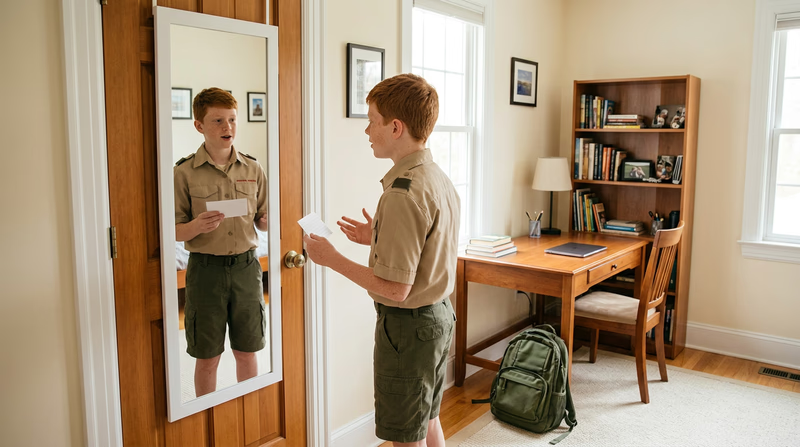
Req 2 — Prepared Talk with Visuals
In Requirement 1, you introduced yourself using just your words. Now it is time to level up. This requirement asks you to add two powerful tools to your speaking toolkit: body language and visual aids. When you combine strong words with confident body language and clear visuals, your message becomes much harder to forget.
What Is Body Language?
Body language is everything you communicate without words — your posture, your gestures, your facial expressions, and your eye contact. Research suggests that a huge portion of communication is nonverbal. Even if your words are perfect, slouching, fidgeting, or staring at the floor can undermine your entire message.
Here are the key body language skills to practice:
Eye Contact — Look at your audience, not at the ceiling, the floor, or your notes. You do not need to stare at one person the whole time. Instead, move your gaze around the room. Spend two to three seconds looking at one section of the audience, then shift to another. This makes everyone feel included.
Posture — Stand up straight with your feet about shoulder-width apart. Keep your weight balanced — do not rock back and forth or shift from foot to foot. Good posture projects confidence even when you do not feel confident.
Gestures — Use your hands to emphasize points. Open palms suggest honesty. Pointing at a visual aid directs attention. Counting on your fingers helps the audience follow a list. Avoid crossing your arms, putting your hands in your pockets, or fidgeting with a pen.
Facial Expressions — Your face should match your message. If you are talking about something exciting, look excited. If you are discussing a serious topic, look serious. A natural smile at the beginning and end of your talk puts the audience at ease.
Movement — You do not have to stand in one spot like a statue. Taking a step or two as you transition between points looks natural and keeps the audience engaged. Just avoid pacing back and forth — that signals nervousness.
Visual Aids That Work
A visual aid is anything your audience can see that supports your message — a poster, a slideshow, a physical object, a chart, or even a demonstration. The key word is “aid.” Your visual supports your speech; it does not replace it.
Types of Visual Aids
- Posters and charts — Great for showing diagrams, timelines, or key words. Make them big enough to see from the back of the room. Use bold colors and minimal text.
- Slideshows — Programs like Google Slides, PowerPoint, or Keynote let you display images, charts, and short text. Keep slides simple: one idea per slide, large fonts, and high-quality images.
- Physical objects (props) — Holding up a real object is one of the most effective visual aids. If you are talking about camping, bring a compass. If you are talking about cooking, bring a utensil. Props create a connection between your words and something tangible.
- Handouts — Printed sheets the audience can follow along with. These work well for data-heavy topics but can be distracting if people read ahead instead of listening to you.
- Demonstrations — Showing the audience how to do something (tying a knot, folding a flag, performing a first-aid technique) is the most engaging visual aid of all.
The Golden Rules of Visual Aids
Visual Aid Dos and Don'ts
Make your visuals help, not hurt- DO keep it simple: One main idea per visual. If your poster or slide is cluttered, the audience will read instead of listen.
- DO make it visible: Text should be large enough to read from the back row. If people are squinting, the visual is not working.
- DO practice with your visuals: Know when to show each one. Fumbling with a poster mid-sentence breaks your flow.
- DO face the audience: Talk to the people, not to your poster or screen. Glance at your visual, then turn back to the audience.
- DON’T read your slides: Slides should have key words or images — not paragraphs. You are the speaker; the slide is the backdrop.
- DON’T use too many visuals: Three to five visuals for a five-minute talk is plenty. More than that, and the audience will feel overwhelmed.
- DON’T rely on technology alone: Have a backup plan. If the projector dies, can you still give your talk? The answer should be yes.

Putting It All Together
For this requirement, you get to choose your topic. Pick something you genuinely care about — it is much easier to speak with energy and confidence about something that excites you. Here are a few ideas to get you thinking:
- A hobby or skill you are passionate about
- A place you have visited or want to visit
- A Scouting experience that changed your perspective
- An interesting animal, invention, or historical event
- A cause or issue you care about
Once you have your topic, plan your talk using the same Opening–Body–Closing structure from Requirement 1. Then add your body language focus areas and decide which visual aids will best support your points.
Explore More Resources
Presentation Zen — Slide Design Tips A popular resource on clean, effective slide design that helps your message stand out instead of drowning in bullet points. Link: Presentation Zen — Slide Design Tips — https://www.presentationzen.com/ Toastmasters: Body Language Quick tips from Toastmasters on how to use your body to reinforce your spoken message. Link: Toastmasters: Body Language — https://www.toastmasters.org/resources/body-languageReq 3 — Impromptu Speaking
So far, you have had time to plan, practice, and polish your speeches. Now the training wheels come off. Impromptu speaking means standing up and talking about a topic you did not know about in advance — no notes, no rehearsal, just you and your thoughts. This might sound terrifying, but it is actually a skill you already use every day. Every time you answer a question in class, explain something to a friend, or share your opinion at a patrol meeting, you are speaking impromptu.
Why Impromptu Speaking Matters
Real life rarely gives you time to prepare a speech. A teacher calls on you. A boss asks for your opinion in a meeting. A reporter sticks a microphone in your face. The ability to organize your thoughts quickly and express them clearly is one of the most valuable communication skills you can have. It shows people that you can think clearly under pressure — and that builds trust and respect.
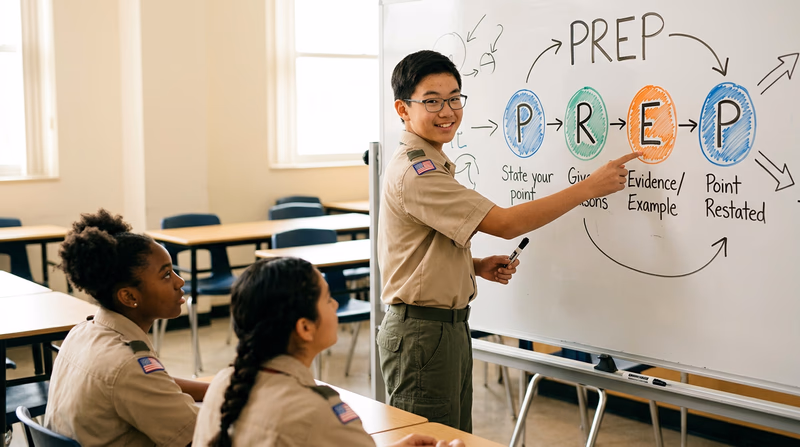
The PREP Method
When you have zero preparation time, you need a mental framework — a structure you can grab onto in the first few seconds. The most popular one is called PREP:
- P — Point: State your main idea right away. “I believe…” or “The most important thing about this topic is…”
- R — Reason: Explain why you hold that point. “Here’s why…” or “The reason is…”
- E — Example: Give a specific example, story, or piece of evidence. “For instance…” or “I experienced this when…”
- P — Point: Restate your main idea to close. “And that is why I believe…”
That is it. Four steps. You can use this framework for almost any topic, and it naturally fills about two minutes — exactly what this requirement asks for.
Other Frameworks for Quick Thinking
PREP is not the only option. Here are two more structures that work well:
Past–Present–Future
- Past: “In the past, this was…”
- Present: “Today, it is…”
- Future: “In the future, it could be…”
This works especially well for topics about change, technology, or trends. If your counselor gives you a topic like “space exploration” or “recycling,” this framework practically fills itself.
Problem–Solution
- Problem: “There is a challenge with…”
- Solution: “One way to address it is…”
- Benefit: “If we do this, the result would be…”
This is great for persuasive or opinion-based topics. It shows that you can identify issues and think critically about how to solve them.
What Your Counselor Will Do
Your counselor will choose a topic that is interesting to you — they know your hobbies, your Scouting experiences, and what you care about. They will not try to stump you with something you know nothing about. The point is not to test your knowledge but to see that you can organize your thoughts and speak clearly without preparation.
You might be asked to speak during a group discussion (like a patrol meeting or a roundtable) or directly to your counselor. Either way, the expectation is at least two minutes of coherent, on-topic speaking.
Tips for Impromptu Success
Impromptu Speaking Survival Guide
Quick tips for when you are put on the spot- Pause before you start: Take two or three seconds to collect your thoughts. A brief pause looks confident, not confused.
- Pick one main idea: Do not try to cover everything. Choose one angle and go deep on it.
- Use transition phrases: “Another reason is…” and “For example…” buy you thinking time while sounding polished.
- Speak slowly: When you are nervous, you speed up. Consciously slow down. It gives you time to think and makes you easier to understand.
- End on purpose: Do not trail off with “so… yeah…” Instead, circle back to your opening point and close with a clear final sentence.
- Smile: A genuine smile puts you and your audience at ease. It signals confidence even when your heart is racing.
Practice Makes Impromptu Feel Natural
The irony of impromptu speaking is that the best way to get good at it is to practice. Here are ways to build your skills before the big day:
- Table Topics: This is a Toastmasters exercise where someone names a topic and you speak for one to two minutes. Do this with friends or family at dinner.
- Question of the Day: Each morning, pick a random topic (use an app, a dictionary, or a news headline) and give a two-minute PREP response out loud.
- Debate a friend: Pick a silly topic (“Is cereal a soup?”) and each argue a side for two minutes. This builds your ability to think quickly and support a position.
- Volunteer in class: Every time a teacher asks a question, raise your hand. The more you practice speaking up in low-stakes situations, the easier it becomes in high-stakes ones.
Explore More Resources
Toastmasters: Table Topics Learn about the Toastmasters Table Topics exercise — the gold standard for practicing impromptu speaking in a supportive environment. Link: Toastmasters: Table Topics — https://www.toastmasters.org/membership/club-meeting-roles/table-topicsmaster National Speech and Debate Association The national organization for competitive speech and debate in middle and high schools. A great way to take your speaking skills to the next level. Link: National Speech and Debate Association — https://www.speechanddebate.org/Req 4 — Researched Speech
This is it — the centerpiece of the Public Speaking merit badge. Everything you have learned so far — structuring your thoughts, using body language, thinking on your feet — comes together in this requirement. You will research a topic, organize your ideas, write a full speech, rehearse it, and deliver it to a real audience. Eight to ten minutes is a serious speech, and completing it is something to be proud of.
Step 1: Choose Your Topic
The requirement says to pick a topic “of interest to your audience.” This is an important detail — it is not just about what interests you, but about what your listeners will care about. The best topics sit at the intersection of what you know and what your audience wants to hear.
Ask yourself these questions:
- Who is my audience? Your troop? A class? A community group? What do they care about?
- What do I already know well? Starting with a topic you understand gives you a head start.
- Can I find reliable information? You need facts, examples, and details to fill eight to ten minutes.
- Is it focused enough? “Space” is too broad. “How NASA is planning to land humans on Mars” is focused and interesting.
Step 2: Research and Collect Information
Good speeches are built on good information. You need facts, stories, examples, and maybe a quote or two. Here is how to gather what you need:
- Start with what you know. Write down everything you already know about the topic. This gives you a foundation.
- Use reliable sources. Libraries, government websites (.gov), educational sites (.edu), and established organizations are your best bets. Be cautious with random blogs and social media posts.
- Take notes by category. As you research, sort your notes into groups: facts, stories, statistics, quotes, examples. This makes organizing much easier later.
- Find a “wow” moment. Look for one surprising fact or story that will grab your audience’s attention. This is your hook.
Step 3: Build Your Outline
An outline is the skeleton of your speech. It keeps you organized and ensures your talk has a clear beginning, middle, and end. Here is a proven structure for an eight- to ten-minute speech:
I. Opening (1 minute)
- Hook: A story, question, surprising fact, or quote that grabs attention
- Topic statement: Tell the audience what you will be talking about
- Preview: Briefly mention the main points you will cover
II. Body (6–7 minutes)
- Main Point 1 — Your strongest or most important idea
- Supporting evidence (fact, example, or story)
- Transition to next point
- Main Point 2 — Your second key idea
- Supporting evidence
- Transition
- Main Point 3 — Your third key idea (optional but recommended)
- Supporting evidence
- Transition to closing
III. Closing (1–2 minutes)
- Summary: Briefly restate your main points
- Call to action or final thought: What do you want the audience to think, feel, or do?
- Memorable closing line: Circle back to your opening hook for a satisfying finish

Step 4: Write Your Speech
With your outline ready, it is time to write the full speech. Here are the keys to writing a speech that sounds natural when spoken:
Write for the ear, not the eye. A speech is not an essay. Use short sentences. Use contractions (“don’t” instead of “do not” when it sounds natural). Repeat key phrases for emphasis. Read every sentence out loud as you write it — if it sounds awkward to say, rewrite it.
Use conversational language. The requirement specifically says to deliver it “in a conversational way.” Imagine you are explaining your topic to a friend. You would not say, “It is imperative that one considers the ramifications.” You would say, “Here is why this matters.”
Build in transitions. Smooth transitions between your main points keep the audience from getting lost. Phrases like “Now that we have covered X, let’s look at Y” or “But here is where it gets really interesting” act as signposts.
Include stories and examples. Facts inform, but stories connect. For every statistic you share, try to pair it with a real example or a brief story that brings it to life.
Step 5: Practice, Practice, Practice
The difference between a good speech and a great one is practice. Here is a rehearsal plan:
- Read-through (Day 1): Read your speech out loud from start to finish. Do not worry about delivery — just get comfortable with the words.
- Standing practice (Day 2–3): Stand up, hold your outline (not the full script), and deliver the speech. Focus on eye contact and gestures.
- Timed run (Day 3–4): Time yourself and adjust. Practice your transitions and make sure you hit the eight- to ten-minute window.
- Audience practice (Day 4–5): Deliver the speech to a family member or friend. Ask them what was clear, what was confusing, and what was most interesting.
- Final rehearsal (Day before): One last full run-through. Then stop. Over-practicing the night before can make you sound robotic.
Delivery Day Checklist
Final preparations before you speak- Review your outline one last time (but do not try to memorize new material).
- Arrive early and check the room setup.
- Test any technology (projector, microphone) if you are using it.
- Bring water — a dry mouth makes speaking harder.
- Take three deep breaths before you begin.
- Make eye contact with a friendly face in the audience to settle your nerves.
- Speak slowly. You will always feel like you are going slower than you actually are.
Delivering It “Conversationally”
The requirement emphasizes delivering your speech “in a conversational way.” This does not mean being casual or sloppy — it means sounding like a real person talking, not like someone reading from a textbook. Here are the keys:
- Do not memorize word-for-word. Know your main points and your transitions, but let the exact words come naturally each time. This is why you practice with an outline, not a script.
- React to your audience. If they laugh, pause and let them enjoy it. If they look confused, slow down and explain. A conversation is two-way, even in a speech.
- Vary your pace and volume. Speed up when you are excited. Slow down for important points. Get quieter when you want the audience to lean in. These changes keep your delivery dynamic.
- Pause with purpose. A well-placed pause after a key point gives the audience time to absorb it — and makes you look confident.

Explore More Resources
TED Talks: The Secret Structure of Great Talks A TED playlist on what makes presentations powerful — structure, storytelling, and delivery techniques from the world's best speakers. Link: TED Talks: The Secret Structure of Great Talks — https://www.ted.com/playlists/574/how_to_make_a_great_presentation ReadWriteThink: Speech Writing Educational resources from the National Council of Teachers of English, including tools for organizing and writing speeches. Link: ReadWriteThink: Speech Writing — https://www.readwritethink.org/Speech Planning Worksheet
Back to Requirement 4Speech Planning Worksheet
Public Speaking Merit Badge — Requirement 4
Topic Selection
Research Sources
| Source | Key Information | How I'll Use It |
|---|---|---|
Speech Outline
I. Opening (1 minute)
II. Body (6–7 minutes)
III. Closing (1–2 minutes)
Practice Log
| Date | Time | Audience | Notes / Adjustments |
|---|---|---|---|
Counselor Approval
Req 5 — Parliamentary Procedure
Public speaking is not only about standing in front of a crowd and giving a speech. It is also about leading productive conversations, keeping meetings on track, and making sure every voice in the room gets heard. That is what parliamentary procedure is all about — and it is a skill that will serve you in Scouting, school, and far beyond.
What Is Parliamentary Procedure?
Parliamentary procedure is a set of rules for running meetings fairly and efficiently. The most widely used set of rules is called Robert’s Rules of Order, written by Henry Martyn Robert in 1876. Robert was a U.S. Army officer who attended a church meeting that turned into chaos because nobody agreed on how to run it. He decided to write a guidebook, and it has been the standard ever since.
The core idea behind parliamentary procedure is simple: every member of a group deserves a fair chance to speak, propose ideas, and vote — and no one person should dominate the conversation.
Key Roles in a Meeting
Every formal meeting has specific roles. Understanding who does what is the first step to running a meeting well.
- Chair (or Presiding Officer): The person who runs the meeting. The chair calls the meeting to order, recognizes speakers, keeps the discussion on track, and calls for votes. The chair stays neutral during debate.
- Secretary: Takes notes (called “minutes”) on what happens during the meeting. The minutes include what was discussed, what was decided, and any votes taken.
- Members: Everyone else in the meeting. Members can propose ideas (motions), discuss them, and vote on them.
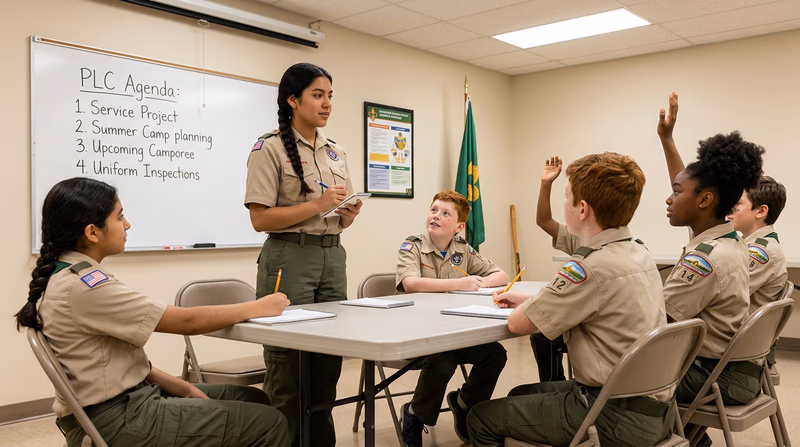
The Flow of a Meeting
A formal meeting follows a set order, called an agenda. Here is a typical structure:
- Call to Order — The chair says, “The meeting will come to order.”
- Reading of Minutes — The secretary reads the notes from the last meeting. Members approve them or suggest corrections.
- Reports — Officers or committees share updates.
- Old Business — Unfinished items from previous meetings.
- New Business — New items for discussion and decision.
- Announcements — General information for members.
- Adjournment — The chair officially ends the meeting.
How Motions Work
A motion is a formal proposal for the group to do something. Motions are the engine of parliamentary procedure — they are how decisions get made. Here is how the process works:
The Life of a Motion
Six steps from idea to decision- A member makes a motion: “I move that we hold our next campout at Lake Wilson.”
- Another member seconds the motion: “I second the motion.” (This shows that at least two people think the idea is worth discussing.)
- The chair states the motion: “It has been moved and seconded that we hold our next campout at Lake Wilson. Is there any discussion?”
- Members discuss: Anyone who wants to speak raises their hand. The chair recognizes them one at a time. Speakers should address the chair, not each other.
- The chair calls for a vote: “All those in favor, say ‘aye.’ All opposed, say ’no.’”
- The chair announces the result: “The motion carries” (passed) or “The motion fails” (did not pass).
Types of Motions You Should Know
Not all motions are created equal. Some motions take priority over others. Here are the most important ones:
Main Motion — Introduces a new topic for the group to consider. This is the most common type. “I move that we buy new troop T-shirts.”
Amendment — Changes a motion that is already on the table. “I move to amend the motion to specify blue T-shirts instead of red.” The amendment is voted on first, then the original motion (as amended, if the amendment passes).
Motion to Table — Temporarily sets aside a motion to deal with something more urgent. “I move to table this motion until next month’s meeting.”
Motion to Adjourn — Ends the meeting. “I move that we adjourn.” This motion requires a second and a vote.
Point of Order — A member believes a rule is being broken and asks the chair to correct it. “Point of order — we have not had a second on this motion.” The chair rules on it immediately.
Point of Information — A member asks a factual question. “Point of information — how much money is in the treasury?” This does not require a vote.
Running the Meeting Yourself
For this requirement, you may either lead a discussion or meeting using parliamentary procedure, or answer your counselor’s questions about the rules. If you choose to lead a meeting, here is how to prepare:
Meeting Leader Preparation
Get ready to chair a meeting- Write an agenda: List the items to be discussed in the correct order (call to order, minutes, reports, old business, new business, announcements, adjournment).
- Assign a secretary: Someone needs to take minutes. Ask a fellow Scout before the meeting starts.
- Prepare at least one item for new business: Have a motion ready so the group has something to practice with.
- Review the motion process: Know the six steps from memory so you can guide the group through them.
- Stay neutral: As chair, you do not take sides during debate. Your job is to make sure everyone gets a fair chance to speak.
- Keep it moving: If discussion drags on, you can say, “Is there any further discussion?” and then call for a vote.

Common Mistakes to Avoid
Explore More Resources
Robert's Rules of Order — Official Website The official resource for Robert's Rules, including a simplified guide, FAQs, and a summary of the most commonly used rules. Link: Robert's Rules of Order — Official Website — https://robertsrules.com/ National Association of Parliamentarians An organization dedicated to teaching and promoting parliamentary procedure. Includes educational resources and youth programs. Link: National Association of Parliamentarians — https://www.parliamentarians.org/Extended Learning
A. Introduction
You have completed every requirement for the Public Speaking merit badge — congratulations! You have introduced yourself, delivered a prepared talk with visuals, spoken on the spot without preparation, written and delivered a full-length speech, and navigated the world of parliamentary procedure. These are skills that many adults wish they had, and you have built them before you even graduated high school. What comes next is entirely up to you.
B. Deep Dive: The Art of Storytelling in Speeches
Every great speaker is, at heart, a great storyteller. Stories are the oldest form of communication, and they remain the most effective. When you share a fact, your audience processes it with the analytical part of their brain. When you tell a story, their brain lights up as if they are experiencing the events themselves. That difference is what makes stories unforgettable.
The best speech stories follow a simple arc: character, conflict, resolution. You introduce someone (often yourself), describe a challenge they faced, and explain how they overcame it. The key is specificity — do not say “I went camping and it was hard.” Say “At 2 a.m. on my first night at Philmont, my tent collapsed in a thunderstorm, and I had to rebuild it in the dark while my tentmate held a flashlight with shaking hands.”
Here are four types of stories that work in almost any speech:
- Personal experience stories — The most powerful because they are uniquely yours. Share a moment that changed your perspective, taught you a lesson, or made you laugh.
- “I was there” stories — Describe an event you witnessed or participated in. These put the audience in the moment with vivid sensory details.
- Historical stories — Connect your topic to a real event from history. These add authority and context to your message.
- Hypothetical stories — “Imagine you are standing at the edge of the Grand Canyon…” These invite the audience to picture themselves in a scenario, creating instant engagement.
To practice, try the “60-second story challenge.” Pick a random moment from your life — a camping trip, a school event, a family dinner — and tell the story in exactly 60 seconds. Focus on one moment, one emotion, and one lesson. Do this daily, and within a month you will have a library of stories ready to drop into any speech.

C. Deep Dive: Overcoming the Fear for Good
You have already spoken in front of people multiple times for this merit badge, so you know the fear is survivable. But how do you move beyond surviving to actually enjoying public speaking? The answer lies in understanding what your brain is doing — and retraining it.
When you stand in front of a group, your brain detects a potential threat (all those eyes!) and triggers the fight-or-flight response. Your heart races, your palms sweat, and your mouth goes dry. This is the exact same response your ancestors had when they spotted a predator. The good news is that this response is manageable, and with repeated exposure, it fades dramatically.
Professional speakers use a technique called cognitive reframing — deliberately changing how you interpret the situation. Instead of thinking “everyone is judging me,” think “everyone chose to be here and wants to hear what I have to say.” Instead of “I might mess up,” think “even if I stumble, the audience will not care as much as I think.” These are not tricks — they are accurate descriptions of reality that your anxious brain tends to ignore.
Another powerful technique is pre-performance routines. Athletes use them before every game, and speakers can do the same. Develop a consistent routine you follow before every speech: listen to a favorite song, do ten jumping jacks, review your first three lines, take five deep breaths, and walk to the stage. The routine signals your brain that what follows is familiar and safe, which reduces anxiety significantly.
Finally, seek more opportunities to speak, not fewer. Join your school’s speech or debate team. Volunteer to give announcements at troop meetings. Offer to present at church, at a community event, or in class. Every time you speak and survive (which you will, every time), your brain recalibrates. The fear shrinks. Eventually, the butterflies do not go away — but they start flying in formation.
D. Deep Dive: Speaking in the Digital Age
Public speaking no longer means standing behind a podium in a room full of chairs. Today, millions of people speak to audiences through screens — on YouTube, in podcasts, on live streams, and in virtual meetings. If you want to be an effective communicator in the modern world, you need to understand how digital speaking works.
Video presentations require you to look at the camera lens, not at the screen. This feels unnatural at first, but it creates the illusion of eye contact with every viewer. Keep your background clean and well-lit. Speak slightly slower than normal because audio compression can make fast speech harder to understand.
Podcasting removes the visual element entirely. Your voice does all the work. Vary your tone, pace, and volume even more than you would in person. Avoid long pauses (they feel much longer without visuals) and use vivid descriptions so listeners can “see” what you are talking about.
Virtual meetings (Zoom, Teams, Google Meet) blend elements of both. You need to look at the camera, but you also need to manage chat questions, mute/unmute dynamics, and screen sharing. The best virtual speakers keep their energy high because screens naturally flatten your presence — what feels like normal energy in person looks flat and bored on camera.
The fundamental skills — clear thinking, strong structure, audience awareness, and confident delivery — are exactly the same whether you are in a conference hall or a bedroom recording studio. The medium changes, but the principles you learned in this merit badge apply everywhere.

E. Real-World Speaking Experiences
Ready to put your skills to work? These opportunities will challenge you and help you grow as a speaker.
Toastmasters Youth Leadership Program
National Speech and Debate Tournaments
Scout Sunday / Scout Sabbath Talks
Eagle Scout Project Presentations
Community Service Presentations
F. Organizations
These organizations can help you continue developing your speaking and communication skills long after you earn this badge.
The world’s largest organization dedicated to helping people become better public speakers and leaders. Many clubs welcome youth participants.
Organization: Toastmasters International — https://www.toastmasters.org/
The largest interscholastic speech and debate organization in the United States, serving middle and high school students with competitions, resources, and community.
Organization: National Speech and Debate Association — https://www.speechanddebate.org/
The honor society of the National Speech and Debate Association, recognizing outstanding achievement in speech, debate, and congressional debate.
Organization: National Forensic League — https://www.speechanddebate.org/nfl/
Dedicated to teaching and promoting parliamentary procedure. Offers educational materials, certification programs, and youth resources.
Organization: National Association of Parliamentarians — https://www.parliamentarians.org/
A program that helps students discover, develop, and share their ideas in the form of short TED-style talks, with support from teachers and mentors.
Organization: TED-Ed Student Talks — https://ed.ted.com/student-talks