Req 2 — Prepared Talk with Visuals
In Requirement 1, you introduced yourself using just your words. Now it is time to level up. This requirement asks you to add two powerful tools to your speaking toolkit: body language and visual aids. When you combine strong words with confident body language and clear visuals, your message becomes much harder to forget.
What Is Body Language?
Body language is everything you communicate without words — your posture, your gestures, your facial expressions, and your eye contact. Research suggests that a huge portion of communication is nonverbal. Even if your words are perfect, slouching, fidgeting, or staring at the floor can undermine your entire message.
Here are the key body language skills to practice:
Eye Contact — Look at your audience, not at the ceiling, the floor, or your notes. You do not need to stare at one person the whole time. Instead, move your gaze around the room. Spend two to three seconds looking at one section of the audience, then shift to another. This makes everyone feel included.
Posture — Stand up straight with your feet about shoulder-width apart. Keep your weight balanced — do not rock back and forth or shift from foot to foot. Good posture projects confidence even when you do not feel confident.
Gestures — Use your hands to emphasize points. Open palms suggest honesty. Pointing at a visual aid directs attention. Counting on your fingers helps the audience follow a list. Avoid crossing your arms, putting your hands in your pockets, or fidgeting with a pen.
Facial Expressions — Your face should match your message. If you are talking about something exciting, look excited. If you are discussing a serious topic, look serious. A natural smile at the beginning and end of your talk puts the audience at ease.
Movement — You do not have to stand in one spot like a statue. Taking a step or two as you transition between points looks natural and keeps the audience engaged. Just avoid pacing back and forth — that signals nervousness.
Visual Aids That Work
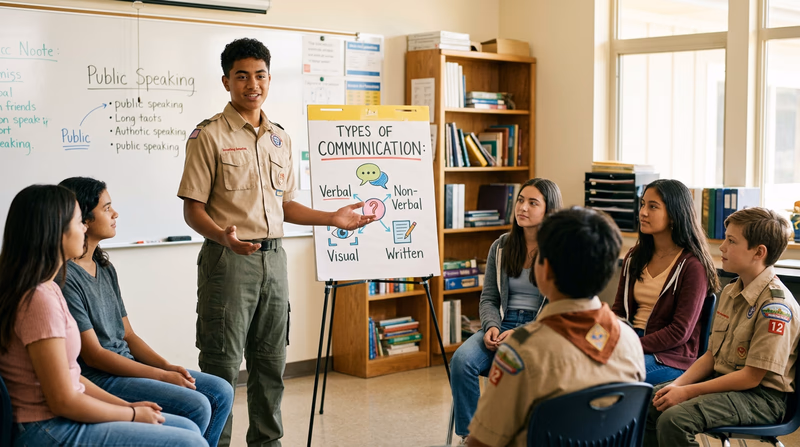
A visual aid is anything your audience can see that supports your message — a poster, a slideshow, a physical object, a chart, or even a demonstration. The key word is “aid.” Your visual supports your speech; it does not replace it.
Types of Visual Aids
- Posters and charts — Great for showing diagrams, timelines, or key words. Make them big enough to see from the back of the room. Use bold colors and minimal text.
- Slideshows — Programs like Google Slides, PowerPoint, or Keynote let you display images, charts, and short text. Keep slides simple: one idea per slide, large fonts, and high-quality images.
- Physical objects (props) — Holding up a real object is one of the most effective visual aids. If you are talking about camping, bring a compass. If you are talking about cooking, bring a utensil. Props create a connection between your words and something tangible.
- Handouts — Printed sheets the audience can follow along with. These work well for data-heavy topics but can be distracting if people read ahead instead of listening to you.
- Demonstrations — Showing the audience how to do something (tying a knot, folding a flag, performing a first-aid technique) is the most engaging visual aid of all.
The Golden Rules of Visual Aids
Visual Aid Dos and Don'ts
Make your visuals help, not hurt
- DO keep it simple: One main idea per visual. If your poster or slide is cluttered, the audience will read instead of listen.
- DO make it visible: Text should be large enough to read from the back row. If people are squinting, the visual is not working.
- DO practice with your visuals: Know when to show each one. Fumbling with a poster mid-sentence breaks your flow.
- DO face the audience: Talk to the people, not to your poster or screen. Glance at your visual, then turn back to the audience.
- DON’T read your slides: Slides should have key words or images — not paragraphs. You are the speaker; the slide is the backdrop.
- DON’T use too many visuals: Three to five visuals for a five-minute talk is plenty. More than that, and the audience will feel overwhelmed.
- DON’T rely on technology alone: Have a backup plan. If the projector dies, can you still give your talk? The answer should be yes.

Putting It All Together
For this requirement, you get to choose your topic. Pick something you genuinely care about — it is much easier to speak with energy and confidence about something that excites you. Here are a few ideas to get you thinking:
- A hobby or skill you are passionate about
- A place you have visited or want to visit
- A Scouting experience that changed your perspective
- An interesting animal, invention, or historical event
- A cause or issue you care about
Once you have your topic, plan your talk using the same Opening–Body–Closing structure from Requirement 1. Then add your body language focus areas and decide which visual aids will best support your points.