Theater Merit Badge — Complete Digital Resource Guide
https://merit-badge.university/merit-badges/theater/guide/
Introduction & Overview
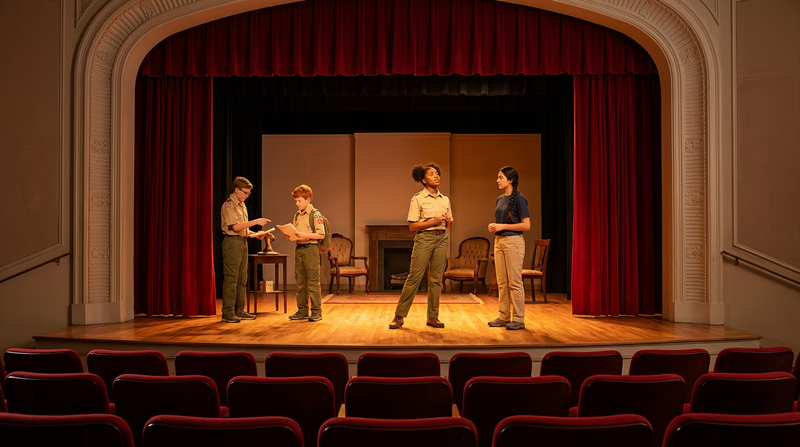
The lights dim. The audience goes quiet. A single spotlight hits the stage — and a whole new world comes to life. That is the magic of theater, and it has been captivating people for thousands of years. The Theater merit badge invites you to step into that world, whether you want to perform under the lights, build the sets behind the scenes, or write the story that brings everyone together.
Theater is one of the few art forms where everything happens live, right in front of you. There are no second takes, no editing, no filters. It takes teamwork, creativity, and courage — qualities that make you a better Scout and a better person.
Then and Now
Then — The Birth of Drama
Theater began over 2,500 years ago in ancient Greece. It started as part of religious festivals honoring the god Dionysus, where choruses sang and danced to tell stories of gods and heroes. Around 534 BCE, an actor named Thespis stepped out of the chorus and spoke as a character — becoming the world’s first actor. (That is why actors are still called “thespians” today.)
The Greeks built massive open-air amphitheaters that could seat 15,000 people. Actors wore large masks to show emotion and project their voices. Greek playwrights like Sophocles and Euripides wrote tragedies and comedies that people still perform today.
- Roman theater adapted Greek traditions and added spectacle, including elaborate stage machinery
- Medieval mystery plays told Bible stories on wheeled carts that traveled from town to town
- Shakespeare’s Globe Theatre (1599) brought drama to everyday Londoners standing in the open air
Now — Theater for Everyone
Today, theater is everywhere. Broadway in New York City is the heart of American professional theater, but community theaters, school auditoriums, and outdoor festivals bring live performance to every corner of the country. Modern technology has added incredible tools — computerized lighting, wireless microphones, digital projections — but the core experience remains the same: real people telling real stories to a live audience.
- Broadway produces large-scale musicals and plays seen by millions each year
- Community theater gives people of all ages and backgrounds a chance to perform
- School productions are often a Scout’s first introduction to the stage
- Immersive theater breaks the fourth wall and puts the audience inside the story
Get Ready! Whether you dream of standing in the spotlight, designing a dazzling set, or writing a story that moves people to tears, theater has a place for you. Every role matters — from the lead actor to the person running the sound board. Let’s raise the curtain and get started!
Kinds of Theater
Musical Theater
Musical theater combines acting, singing, and dancing to tell a story. From classics like The Sound of Music to modern hits like Hamilton, musicals use songs to express emotions and move the plot forward. If you love music and performance, this genre lets you do it all at once.
Dramatic Theater (Plays)
Plays rely on dialogue, action, and stagecraft to tell their stories — no singing required. Dramas can be serious (A Raisin in the Sun), comedic (The Importance of Being Earnest), or somewhere in between. This is the oldest form of theater, stretching back to those Greek amphitheaters.
Comedy and Improvisation
Comedy theater is built to make you laugh, from scripted farces to completely unscripted improv shows where performers make everything up on the spot based on audience suggestions. Improv builds quick thinking, teamwork, and confidence — skills that help far beyond the stage.
Community and School Theater
You do not need a professional stage to make great theater. Community theaters and school drama programs are where most people discover their love of performing. These productions bring neighbors and classmates together to create something special, and they welcome newcomers at every level of experience.
Experimental and Immersive Theater
Some theater breaks all the rules. Experimental theater might use unusual staging, audience participation, or non-traditional storytelling. Immersive theater puts the audience right inside the action — you might walk through rooms, follow characters, or even become part of the story yourself.
Req 1 — Watching & Reviewing Plays
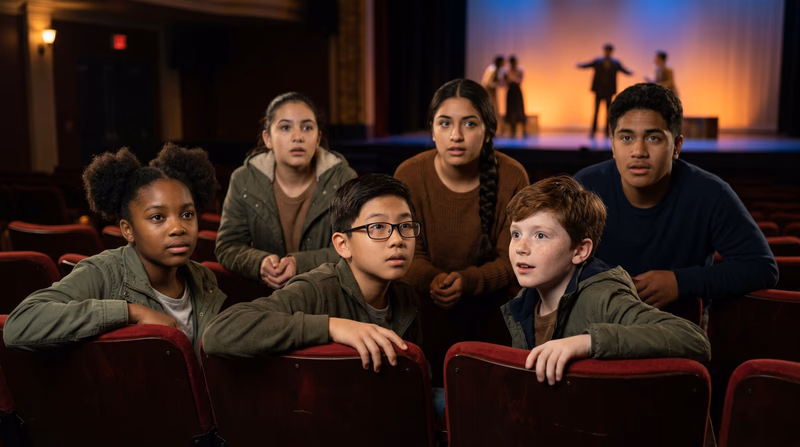
Before you can create theater, you need to experience it. This requirement asks you to see or read three full-length plays — and then think critically about what you experienced. You are not just watching for fun (although it should be fun). You are learning to be an informed audience member who can recognize good storytelling, strong acting, and effective staging.
Finding Plays to See or Read
Seeing live theater is the best option. Here are places to look:
- School productions — Your school or a nearby school likely puts on at least one play a year
- Community theaters — Nearly every town has one, and tickets are usually affordable
- Regional and professional theaters — Larger cities have professional companies with seasons of shows
- Outdoor festivals — Shakespeare in the Park and similar events are often free
If live performances are not available near you, you can read plays instead. Your local library will have collections of plays. Here are some great choices for Scouts:
- Our Town by Thornton Wilder — A classic about small-town life
- The Phantom Tollbooth adapted by Susan Nanus — A fantasy adventure based on the beloved novel
- Twelve Angry Jurors adapted by Sherman L. Sergel — A gripping courtroom drama about justice
- You Can’t Take It with You by Kaufman and Hart — A hilarious comedy about an eccentric family
How to Watch a Play Like a Critic
Being a good audience member is more than sitting quietly. When you watch a play with a critical eye, you are paying attention to several layers at the same time.
The Story (Plot)
Every play has a plot — the sequence of events that makes up the story. As you watch or read, ask yourself:
- What is the main conflict? Who wants what, and what stands in their way?
- How does the tension build? When do you feel the most suspense or excitement?
- How does it end? Was the resolution satisfying? Surprising?
- What is the theme — the bigger idea the playwright is exploring?
The Acting
If you are watching a live performance, the actors bring the story to life. Consider:
- Did you believe the characters were real people with real emotions?
- Could you hear and understand the actors clearly?
- How did the actors use their bodies, faces, and voices to show what their characters were feeling?
- Was there chemistry between the actors — did their relationships feel genuine?
The Staging
Staging includes everything you see and hear beyond the actors themselves:
- Set design — Did the set help you understand where and when the story takes place?
- Lighting — Did the lights create mood? Draw your attention to important moments?
- Costumes — Did the costumes tell you something about the characters?
- Sound — Was there music or sound effects? Did they add to the experience?
Writing a Play Review
A good review is not just “I liked it” or “It was boring.” It is a thoughtful response that shows you understood what the play was trying to do and how well it did it.
Play Review Outline
Include these elements in each of your three reviews- Title and playwright: Name the play and who wrote it.
- Brief plot summary: Describe the story in 3–4 sentences without giving away the ending.
- Main characters: Who are the most important characters? What do they want?
- Your reaction to the story: What themes did you notice? Did the plot hold your attention?
- Acting observations: If you saw it live, how did the performances affect you?
- Staging observations: If you saw it live, what did you notice about the set, lights, costumes, and sound?
- Your honest opinion: What worked well? What could have been better? Would you recommend it?
Preparing for Your Counselor Discussion
Your counselor will want to hear you talk about the plot of each play. If you watched the plays live, they will also ask about the acting and staging. Here are some strong discussion starters:
- “The main conflict was between ___ and ___, and it made me feel ___.”
- “The actor playing ___ was especially convincing because ___.”
- “The set design helped me understand ___ about the story.”
- “I noticed the lighting changed when ___, which created a mood of ___.”
Explore More Resources
TDF — Theatre Development Fund A nonprofit that makes theater accessible and affordable, with discount ticket programs and educational resources. Link: TDF — Theatre Development Fund — https://www.tdf.org/ Playscripts, Inc. Browse thousands of plays for reading or production, with synopses and samples to help you choose. Link: Playscripts, Inc. — https://www.playscripts.com/
Req 2 — Writing a One-Act Play
Now it is your turn to create. Writing a play is different from writing a story or an essay — everything has to come through what people say and do on stage. There is no narrator telling the audience what a character is thinking. You have to show it through dialogue, action, and the choices your characters make.
Do not worry if you have never written a play before. This guide will walk you through the three essential ingredients the requirement asks for: a main character, a conflict, and a climax.
The Three Essential Ingredients
1. A Main Character (Protagonist)
Your main character is the person the audience follows through the story. They should want something — this desire is what drives your entire play. The want does not have to be dramatic. It could be as simple as wanting to win a cooking contest, impress a new friend, or find a lost dog.
Make your main character someone the audience can root for. Give them a personality, a way of speaking, and at least one trait that makes them feel real. You do not need a huge cast — many great one-act plays have just two or three characters.
2. A Conflict
Conflict is what stands between your character and what they want. Without conflict, there is no drama — just people having a nice time. Conflict can come from several places:
- Person vs. Person — Another character actively opposes your protagonist (a rival, an authority figure, a friend who disagrees)
- Person vs. Self — Your character struggles with their own fears, doubts, or choices
- Person vs. Situation — Circumstances create obstacles (a storm, a deadline, a rule)
The best plays often combine more than one type. A Scout trying to earn a cooking award (person vs. situation) might also have to deal with a competitive teammate (person vs. person) and their own self-doubt (person vs. self).
3. A Climax
The climax is the turning point — the moment of highest tension when the conflict comes to a head and something has to change. Everything in your play should build toward this moment. After the climax, the story wraps up quickly.
Think of the climax as the moment when the audience leans forward in their seats. Does the character succeed or fail? Do they make a choice that changes everything?

Formatting Your Script
A play script looks different from a regular story. Here is the standard format:
Character names are written in capital letters, followed by a colon or period, then their dialogue:
MAYA. I told you we should have left earlier. Now we are going to miss the whole thing.
JORDAN. Relax. The show does not start for twenty minutes.
MAYA. (checking her watch) It started ten minutes ago.
Stage directions go in italics or parentheses. They tell the actors what to do physically:
(JORDAN drops the map and stares at MAYA.)
JORDAN. You are kidding me.
Building Your Play Step by Step
Here is a practical process to get from a blank page to a finished script:
Step 1: Start with “What If?”
Every good play starts with a question. What if a Scout got locked in a museum overnight? What if two best friends both wanted the same role in the school play? What if someone found a mysterious letter hidden in an old book?
Step 2: Sketch Your Characters
Write a short description of each character — their name, age, personality, and what they want. Two or three characters are plenty for a one-act play.
Step 3: Map the Arc
Draw a simple diagram:
- Beginning — Introduce your character and their world
- Inciting incident — Something happens that sets the conflict in motion
- Rising action — Tension builds as the character tries to solve the problem
- Climax — The moment of greatest tension and decision
- Resolution — The aftermath (keep it short)
Step 4: Write the First Draft
Do not aim for perfection. Get the story down. You can fix awkward lines later.
Step 5: Read It Aloud
Grab some friends and read through the script together. Time it — remember, it needs to be at least 10 minutes. A good rule of thumb: one page of script equals roughly one minute of stage time.
Step 6: Revise
Cut lines that do not move the story forward. Add moments where the audience can laugh, gasp, or feel something. Make sure every character sounds like a distinct person, not just the same voice with different names.
How Long Is 10 Minutes?
Ten minutes of stage time is roughly 8–12 pages of script, depending on how much action versus dialogue your play contains. Here is a rough breakdown:
- Pages 1–2: Setup — introduce your character and their world
- Pages 3–4: Inciting incident — the conflict kicks in
- Pages 5–8: Rising action — obstacles pile up, tension builds
- Pages 9–10: Climax and resolution — the big moment and its aftermath
One-Act Play Checklist
Make sure your script has all of these before sharing it with your counselor- A clear main character with a specific want or goal.
- A conflict that creates obstacles for the main character.
- A climax where the tension peaks and something changes.
- Dialogue that sounds natural when read aloud.
- Stage directions that help actors know what to do.
- A running time of at least 10 minutes (approximately 8+ pages).
Explore More Resources
Young Playwrights Inc. A national organization that supports young writers in creating original plays, with contests and workshops. Link: Young Playwrights Inc. — https://youngplaywrights.org/ Playwriting 101 — The Basics Free online tutorials covering script format, character development, and story structure for beginning playwrights. Link: Playwriting 101 — The Basics — https://www.playwriting101.com/
Req 3 — Theater Safety
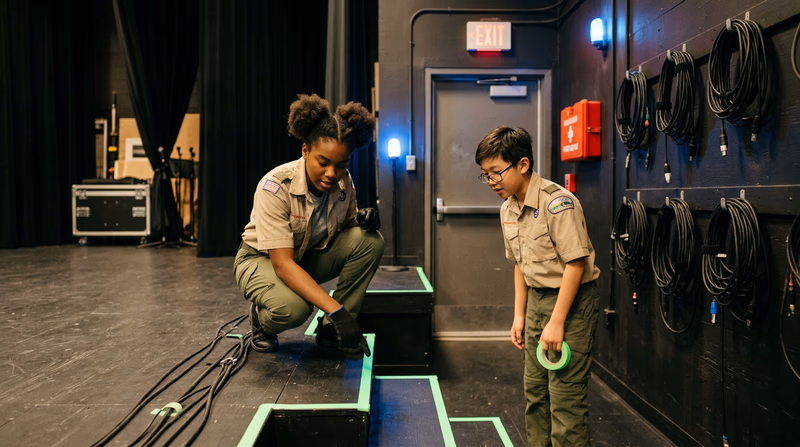
A theater is an exciting place, but it is also a workspace full of potential hazards. Heavy scenery, electrical equipment, elevated platforms, power tools, and dark backstage areas all require careful attention to safety. Before you dive into any of the hands-on options in Requirement 3, you need to understand how to keep yourself and everyone around you safe.
Common Theater Hazards
Falls and Trips
Backstage areas are often dark, cluttered with props, and crisscrossed with cables. Stages may have trapdoors, elevated platforms, or stairs without railings. Falling is the most common theater injury.
- Always use a work light when moving backstage
- Never run on stage or backstage
- Keep walkways and emergency exits clear of props and equipment
- Use glow tape on step edges and obstacles in dark areas
Electrical Hazards
Theaters use a huge amount of electrical equipment — lighting instruments, sound systems, power tools, and fog machines all draw significant power.
- Never handle electrical connections with wet hands
- Report frayed cables, sparking connections, or burning smells immediately
- Only qualified people should work on electrical panels and circuits
- Keep water and liquids away from all electrical equipment
Falling Objects
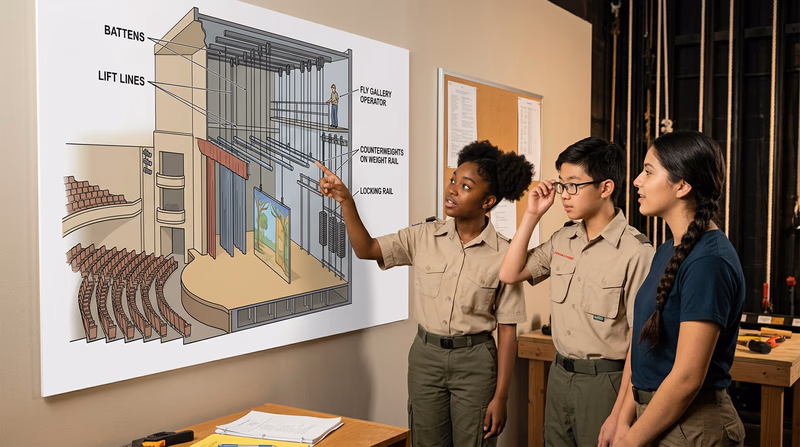
Scenery pieces, lighting instruments, and tools are often suspended above the stage. The fly system (used to raise and lower scenery) involves heavy counterweights.
- Never stand directly under scenery being raised or lowered
- Always call out “heads!” before lowering anything from above
- Secure all tools and hardware when working at height
- Wear a hard hat when working below active rigging
Tool and Construction Safety
Building scenery involves power saws, drills, paint, and other shop tools.
- Wear safety glasses when cutting, drilling, or painting overhead
- Use hearing protection around loud power tools
- Keep your workspace clean and organized
- Never use a tool you have not been trained on — ask for instruction first
Theater Safety Basics
Know these before you start any theater work- Location of all emergency exits and fire extinguishers.
- Location of the first-aid kit.
- Who is the designated safety supervisor for this production.
- How to call for help in an emergency.
- Where the main electrical shutoff is located.
- The meaning of common backstage calls (“Heads!”, “Clear!”, “Hold!”).
Choose Your THREE Options
For this requirement, you will choose three of the following ten options. Each option represents a different role in a theater production. Take a moment to read through all of them before deciding which three interest you most. Click through to each page to learn what is involved and how to prepare.
Performance Roles:
- Req 3a — Acting — Perform a major role in a full-length play or parts in three one-act plays
- Req 3b — Directing — Direct, cast, rehearse, and stage a play of at least 10 minutes
- Req 3j — Musical Direction — Serve as musical director for a musical theater production
Design Roles:
- Req 3c — Set Design — Design and build a model of a set
- Req 3d — Costume Design — Design costumes for five characters in a historical production
- Req 3e — Hair & Makeup — Create a character look using hair and makeup techniques
Technical Roles:
- Req 3f — Scenery Building — Help build and paint scenery for a production
- Req 3g — Lighting Design — Design or help operate lighting for a production
- Req 3h — Sound Design — Help install and operate sound for a production
- Req 3i — Stage Management — Serve as stage manager and maintain a calling script
Explore More Resources
OSHA — Theater Safety The federal Occupational Safety and Health Administration's guidelines for performing arts workplaces. Link: OSHA — Theater Safety — https://www.osha.gov/performing-arts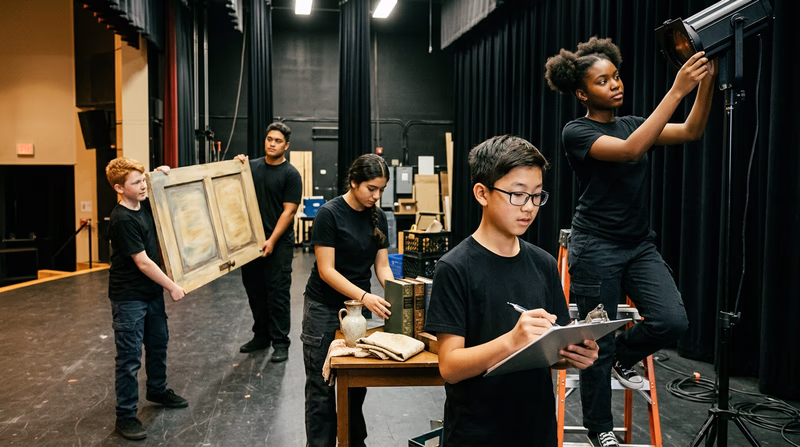
Req 3a — Acting
Standing on stage in front of a live audience is one of the most thrilling things you can do. Acting is not about pretending — it is about truthfully living as another person in imagined circumstances. Whether you are playing a king, a detective, or a talking animal, your job is to make the audience believe.
This requirement gives you two paths: a major role in one full-length play, or parts in three shorter one-act plays. Either way, you will go through the full process of preparing, rehearsing, and performing.
Getting the Part: Auditions
Most productions start with auditions, where the director sees what each actor can do. Here is how to prepare:
- Read the play first. Know the story and the characters before you walk in. If scripts are available, read the whole thing, not just the parts you want.
- Prepare a monologue if the audition calls for one. Choose something age-appropriate that shows range — comedy and drama are both good.
- Be ready to cold read. The director may hand you a scene you have never seen and ask you to perform it. Stay calm, read the stage directions, and make bold choices.
- Be yourself. Directors are looking for someone who brings something unique to a role. Do not try to imitate a famous actor.
Building Your Character
Once you have been cast, your real work begins. Building a character means understanding who this person is beyond what is written in the script.
Ask yourself these questions about your character:
- What do they want? Every character in every scene wants something. This is called your “objective.”
- What is in their way? The obstacle creates the drama.
- How do they talk? Fast or slow? Formal or casual? Do they have a catchphrase or a habit?
- How do they move? Do they stand tall or slouch? Rush around or move carefully?
- What happened to them before the play starts? Their backstory affects how they react to everything in the script.
The Rehearsal Process
Rehearsals are where you transform from someone reading lines into a living character. Here is what the process typically looks like:
- Table read — The whole cast sits around a table and reads the script aloud together for the first time
- Blocking rehearsals — The director tells you where to move on stage (your “blocking”) and you write it in your script
- Working rehearsals — You dig deeper into scenes, experiment with choices, and refine your performance
- Off-book deadline — The day you must have your lines memorized (no more scripts on stage)
- Run-throughs — You perform the entire play without stopping
- Tech rehearsals — Lights, sound, and set changes are added
- Dress rehearsal — A full performance with costumes, makeup, and everything — the final practice before opening night

Memorizing Your Lines
Learning your lines is not optional — it is essential. Here are proven techniques:
- Write them out by hand. The physical act of writing helps your brain retain the words.
- Record your cue lines (the lines other characters say right before yours) and practice responding.
- Run lines with a partner. Have a friend read the other characters while you practice yours.
- Learn them in small chunks. Master one page at a time rather than trying to swallow the whole script at once.
- Connect the lines to the action. If you understand why your character says something, the words stick better.
Performance Tips
When opening night arrives, remember these essentials:
Performance Night Checklist
Set yourself up for a great show- Arrive early and complete your pre-show routine (warm-ups, costume, makeup).
- Stay in character from the moment you step on stage until you exit.
- Project your voice to the back row — do not shout, but support your voice with your breath.
- Listen to your scene partners. Reacting honestly is as important as delivering your own lines.
- If something goes wrong (a missed line, a prop that breaks), stay in character and adapt.
- Save your celebration for after the curtain call.
Explore More Resources
Educational Theatre Association The leading organization for theater education, with resources for student actors, teachers, and school programs. Link: Educational Theatre Association — https://www.schooltheatre.org/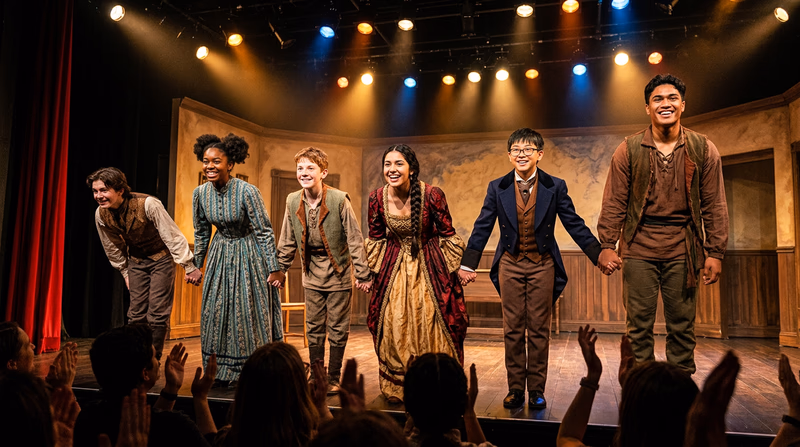
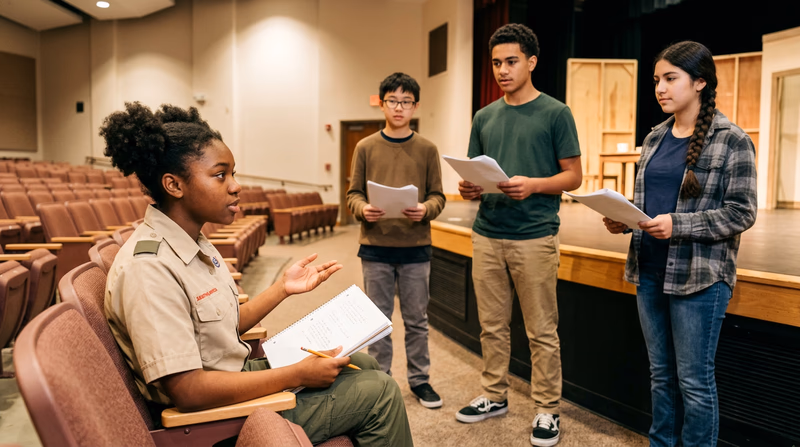
Req 3b — Directing
A director is the person who holds the whole vision of a production in their head. They choose the play, cast the actors, guide the rehearsals, and make hundreds of creative decisions that shape what the audience ultimately sees. If acting is about becoming one character, directing is about understanding every character, every scene, and every moment in the entire play.
This is a big responsibility — and an incredibly rewarding one.
Choosing Your Play
Your play needs to be at least 10 minutes long. You can use the play you wrote for Requirement 2, find a published one-act play, or choose a scene from a longer work. Consider these factors:
- Cast size — How many actors do you have available? Choose a play that matches your resources.
- Complexity — For your first time directing, a simpler play with a clear story will let you focus on learning the craft.
- Your actors’ strengths — Think about what your performers can do well.
- Space — What kind of performance space do you have? A classroom, a stage, an outdoor area?
Casting Your Actors
Casting is about finding the right actor for each role. Hold a simple audition where you:
- Have actors read scenes from the play
- Try different combinations of actors in scenes together to see their chemistry
- Consider each actor’s strengths, not just who “looks” the part
Be clear and kind when announcing casting decisions. Everyone who auditioned took a risk, and they deserve respect regardless of the outcome.
Planning Your Rehearsal Schedule
A well-organized rehearsal schedule keeps your production on track. Plan backwards from your performance date:
Rehearsal Timeline
A sample schedule working backward from performance day- Week 1: Table read and initial blocking (where actors move on stage).
- Week 2: Work through each scene in detail, refining choices.
- Week 3: Run-throughs of the full play; actors should be off-book (lines memorized).
- Final days: Polish, add any technical elements (lights, sound, props), and do at least one full dress rehearsal.
Blocking: Putting Actors in Motion
Blocking is the director’s plan for where actors stand, sit, move, and exit throughout the play. Good blocking:
- Makes the story visually clear to the audience
- Creates interesting stage pictures (not everyone in a straight line)
- Uses movement to show relationships and emotions
- Keeps important moments visible to every seat in the house
Use simple shorthand in your script to record blocking: “X DSR” means “cross to downstage right.” You will learn more about these stage directions in Requirement 5.
Working with Actors
The most important skill a director has is communication. You need to help actors understand what their characters want, how they relate to each other, and what each scene is about — without doing the acting for them.
Effective directing techniques:
- Ask questions instead of giving orders. “What do you think your character is afraid of in this moment?” is more helpful than “Look scared.”
- Give specific, actionable notes. “Try picking up the pace in the middle of that speech” is better than “That was not very good.”
- Praise what works. When an actor does something great, tell them so they can do it again.
- Be patient. Not every actor learns at the same speed. Good directors adjust their approach.
Staging Your Production
On performance day, the director’s job shifts. You are no longer the person making creative changes — you are the calm leader who keeps everything running smoothly.
- Make sure all actors and crew arrive on time
- Run a brief warm-up to settle everyone’s nerves
- Give a final pep talk — keep it short and encouraging
- Step back and let the show happen (resist the urge to mouth the lines from the wings)
- After the show, give the cast and crew your genuine thanks
Explore More Resources
Stage Directions Magazine Practical articles on directing, stage management, and technical theater for community and school productions. Link: Stage Directions Magazine — https://www.stage-directions.com/
Req 3c — Set Design
When the curtain opens, the set is the first thing the audience sees — before a single word is spoken. A great set design instantly tells the audience where and when the story takes place, and it sets the emotional tone for everything that follows. Is the play set in a cozy kitchen? A spooky forest? A king’s palace? The set designer makes that world real.
For this requirement, you will design a set and then build a physical scale model of it.
What Does a Set Designer Do?
A set designer works closely with the director to create the physical environment of the play. Their job includes:
- Reading the script carefully to understand every location, every entrance and exit, and every piece of furniture or prop the story requires
- Researching the time period and setting to make the design accurate and believable
- Creating sketches and renderings that show what the finished set will look like
- Drawing a ground plan (a bird’s-eye view showing where everything sits on stage)
- Building a scale model so the director and crew can see the set in three dimensions before construction begins
Starting Your Design
Step 1: Read the Play
Go through the entire script and make a list of everything the set needs to include:
- How many locations are there? (One room? Multiple scenes?)
- What entrances and exits do the characters use?
- What furniture is mentioned in the script or stage directions?
- Are there any special requirements? (A window to look through, a door that slams, stairs)
Step 2: Research and Gather Inspiration
If the play is set in a specific time period or place, look at photographs, paintings, and other references. What did rooms look like in that era? What materials and colors were common?
Step 3: Sketch Your Ideas
Start with rough sketches — quick drawings that explore different arrangements. Do not worry about artistic skill; these are thinking tools. Try at least three different layouts before settling on one.
Consider these design principles:
- Sightlines — Can every audience member see the important action? (You will learn more about sightlines in Requirement 5.)
- Flow — Can actors enter, exit, and move around naturally?
- Focus — Where does the audience’s eye go first? Make sure the most important areas are prominent.
- Practicality — Can this set actually be built with the time, space, and budget available?
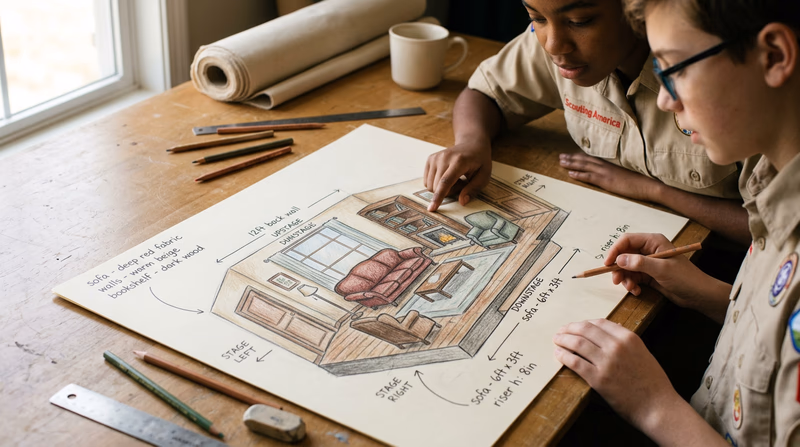
Building Your Model
Your model brings your flat sketches into three dimensions. Here is how to build one:
Materials you will need:
- Foam board or cardboard for walls and platforms
- A ruler and pencil for measuring
- A craft knife or scissors (with adult supervision for sharp tools)
- Glue (white glue or hot glue)
- Paint or colored paper for decoration
- Small items for furniture (you can make these from cardboard, clay, or found objects)
Building steps:
- Make a base — Cut a piece of foam board to represent your stage floor. Mark the front edge (where the audience sits) and the back wall.
- Add walls — Cut and glue walls at the back and sides. Include openings for doors and windows.
- Add platforms and levels — If your set has stairs, raised areas, or different levels, build these up with stacked foam board.
- Add furniture — Build miniature versions of tables, chairs, beds, or whatever your set requires.
- Paint and detail — Add color, texture, and small details that bring the model to life. Wallpaper patterns, wood grain, and even tiny picture frames make a difference.
The Ground Plan
In addition to your model, create a simple ground plan — a top-down view of the stage showing where every piece of scenery sits. Label the walls, doors, furniture, and any important props. Use the stage direction terms you will learn in Requirement 5 (stage right, stage left, upstage, downstage) to orient your plan.
Explore More Resources
United States Institute for Theatre Technology (USITT) The national association for theater design and technology professionals, with student resources and design competitions. Link: United States Institute for Theatre Technology (USITT) — https://www.usitt.org/ Set Design Resources — TheatreLinks A curated collection of set design tutorials, inspiration galleries, and professional examples. Link: Set Design Resources — TheatreLinks — https://www.theatrelinks.com/set-design/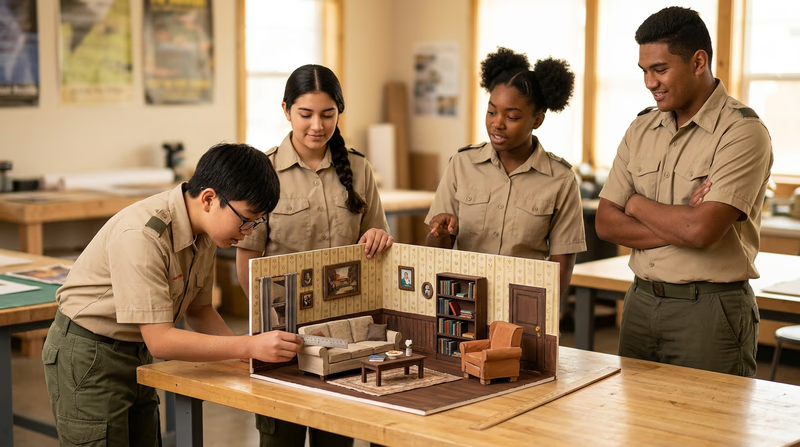
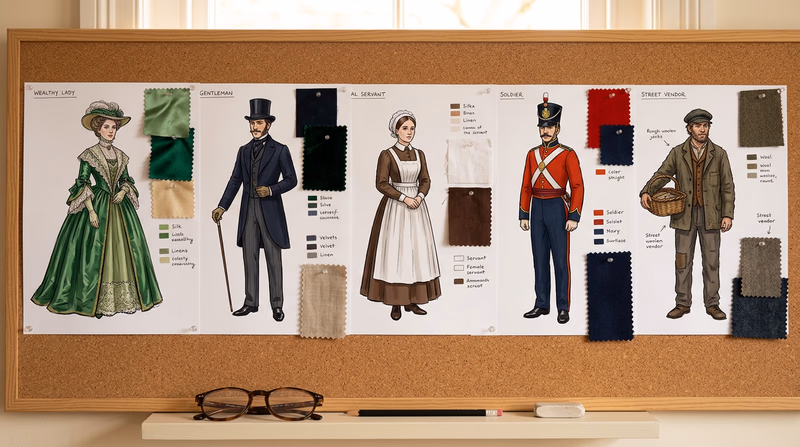
Req 3d — Costume Design
Costumes do far more than just dress an actor. They are visual storytelling tools that instantly communicate who a character is — their social status, personality, occupation, and even their emotional state. When an audience sees a character walk on stage, their costume is the first clue about who that person is before they say a single word.
For this requirement, you will design costumes for five characters in a production set in a historical time period. This means you need to research what people actually wore during that era and then make creative choices about how to use that information to tell your story.
The Costume Design Process
Step 1: Read the Script and Talk to the Director
Start by understanding what the play needs. Look for:
- What time period is the play set in?
- What clues does the script give about each character’s appearance?
- Are there costume changes? (Does a character need to change quickly between scenes?)
- Are there practical requirements? (Does a character dance, fight, or get wet?)
Step 2: Research the Historical Period
This is where the real fun begins. Your costumes need to look believable for the time period. Head to the library or search online for images of clothing from that era. Look at:
- Paintings and portraits from the period
- Museum collections and fashion history books
- Photographs (for more recent historical periods)
- Film and TV adaptations set in the same era (for inspiration, not copying)
What to Include in Your Designs
For each of your five characters, create a costume design that includes:
Costume Design Elements
Include these for each character- A sketch or illustration of the full costume (front view at minimum, side or back view if helpful).
- Color choices with specific reasoning (Why this color for this character?).
- Fabric suggestions (What textures and materials would be used?).
- Accessories (Hats, jewelry, gloves, shoes, bags, weapons — whatever fits the character and era).
- Notes on how the costume reflects the character’s personality, status, or role in the story.
Using Color and Texture Intentionally
Professional costume designers use color theory to help tell the story:
- Warm colors (red, orange, yellow) can suggest passion, power, or danger
- Cool colors (blue, green, purple) can suggest calm, mystery, or sadness
- Neutrals (brown, gray, beige) can suggest everyday life, poverty, or simplicity
- Black often signals authority, villainy, or mourning
- White can suggest innocence, purity, or wealth (historically, white fabric was expensive to keep clean)
Think about how your five characters relate to each other. If two characters are allies, their color palettes might be similar. If they are rivals, contrasting colors can make that tension visible.
Practical Considerations
Theater costumes are not museum pieces — they need to work under stage conditions:
- Quick changes — If a character needs to change costumes between scenes, design for speed. Velcro, snaps, and breakaway seams are common tricks.
- Durability — Costumes get worn, washed, and handled night after night. Choose materials that can take the abuse.
- Movement — Actors need to move freely. A beautiful gown that an actor cannot walk in is a failed design.
- Visibility — Stage lighting can change how colors look. Bright white can be blinding under stage lights, and some colors “wash out” entirely.
- Budget — Professional-looking costumes can be assembled from thrift stores, costume rental houses, and creative alterations of existing clothing. You do not need to sew everything from scratch.
Historical Periods to Consider
If you do not already have a production in mind, here are some popular historical periods for theater:
- Ancient Greece or Rome — Togas, draped fabric, sandals, laurel wreaths
- Medieval Europe — Tunics, cloaks, armor, simple dresses
- Elizabethan England (1558–1603) — Ruffs, doublets, elaborate gowns, rich fabrics
- American Colonial era (1600s–1700s) — Breeches, waistcoats, bonnets, aprons
- Victorian era (1837–1901) — Top hats, corsets, bustles, long coats
- American Civil War (1861–1865) — Uniforms, hoop skirts, suspenders
- Roaring Twenties (1920s) — Flapper dresses, fedoras, suits with wide lapels
Explore More Resources
Costume Designer's Guild The professional organization for costume designers in entertainment, with galleries of professional work and career resources. Link: Costume Designer's Guild — https://costumedesignersguild.com/ The Metropolitan Museum of Art — Costume Institute Explore thousands of real historical garments from the Met's world-class collection. Link: The Metropolitan Museum of Art — Costume Institute — https://www.metmuseum.org/about-the-met/collection-areas/the-costume-institute
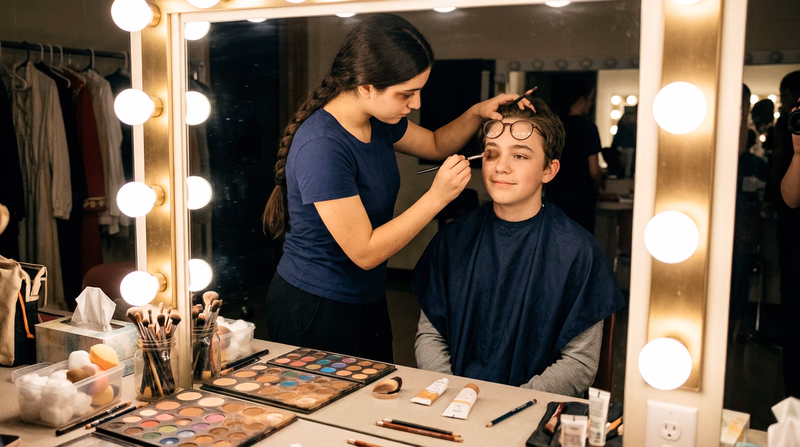
Req 3e — Hair & Makeup
Stage makeup is an essential part of theater — and it is very different from everyday cosmetics. Under bright stage lights, an actor’s natural features can wash out and become invisible to the audience. Makeup restores those features, adds character details, and can even transform a young person into an elderly one or a human into a creature.
For this requirement, your counselor will direct you to create one of four looks: a historical figure, a clown, an extraterrestrial, or a monster. Each one uses different techniques, but the fundamentals are the same.
Stage Makeup Basics
Before you tackle a character look, you need to understand the basics that apply to every stage makeup application.
The Foundation
Foundation evens out skin tone and provides a base for everything else. Stage foundation is thicker and more pigmented than everyday foundation because it needs to be visible from a distance.
- Apply with a sponge or brush, blending outward from the center of the face
- Choose a shade that matches the subject’s skin tone (or the character’s intended skin tone)
- Blend carefully at the jawline and hairline — no visible edges
Highlight and Shadow
This is the core technique of stage makeup. By applying lighter colors (highlights) and darker colors (shadows), you can reshape the appearance of facial features:
- Highlight makes areas appear to come forward (bridge of the nose, cheekbones, brow bone)
- Shadow makes areas appear to recede (under the cheekbones, sides of the nose, eye sockets)
Eyes and Brows
Eyes are where the audience looks most. Define them with:
- Eyeliner to outline and enlarge the eye shape
- Eye shadow to add depth and color
- Brow pencil to darken and shape eyebrows (crucial for visibility from the audience)
Lips
Use lip liner and lipstick to define the mouth. On stage, lips need to be defined enough to be visible but not so dramatic that they distract from the character (unless that is the intent).
The Four Character Types
Historical Figure
Research your chosen figure thoroughly. Look for portraits, photographs, and descriptions. Key features to capture:
- Distinctive facial features (a prominent nose, bushy eyebrows, a specific beard style)
- Hairstyle (wigs or hair styling may be needed)
- Age (use highlight and shadow to add or reduce apparent age)
- Skin tone appropriate to the historical person
Clown
Clown makeup uses bold, exaggerated shapes and bright colors. The classic clown face starts with a white base and adds features in red, black, and blue. Key elements include:
- An oversized mouth painted well beyond the natural lip line
- Exaggerated eyebrows or eye shapes
- A red nose (painted or a foam nose)
- Each clown traditionally has a unique face design — no two are exactly alike
Extraterrestrial
Alien makeup lets your imagination run wild. Think about:
- Unusual skin colors (green, blue, silver, purple)
- Modified facial features (enlarged eyes, altered nose shape, pointed ears)
- Texture effects (scales, ridges, metallic sheen)
- Prosthetic additions if available (foam latex pieces for brow ridges, cheekbones, or chin)
Monster
Monster makeup uses shadow, texture, and sometimes prosthetics to create a frightening appearance:
- Deep shadows around the eyes and cheekbones for a skull-like effect
- Scars and wounds created with liquid latex and tissue paper
- Altered skin color (pale for a vampire, green for Frankenstein’s monster)
- Teeth and contact lenses (if available and safe to use)
Hair Design
Hair is part of the total look. Depending on your character, you may need:
- Styling — Curling, straightening, pinning up, or parting the hair differently
- Wigs — For dramatic changes in length, color, or style
- Hair pieces — Clip-on braids, buns, or extensions for added volume or length
- Products — Hairspray, gel, and temporary color spray for quick transformations
Makeup Kit Essentials
Basic supplies for theater makeup- Foundation in several shades.
- Highlight and shadow colors (cream-based for stage work).
- Eyeliner pencils (black and brown).
- Eye shadow palette.
- Lip liner and lipstick.
- Setting powder and a powder brush.
- Makeup sponges and brushes of various sizes.
- Makeup remover and cleansing cloths.
- A lighted mirror.
- Reference photos of your character.
Explore More Resources
Stage Makeup Online Tutorials and product guides specifically designed for theater makeup applications. Link: Stage Makeup Online — https://www.stagemakeup.com/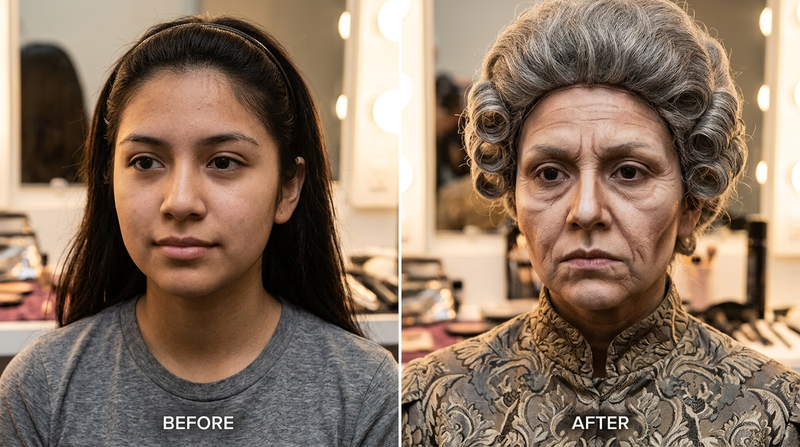
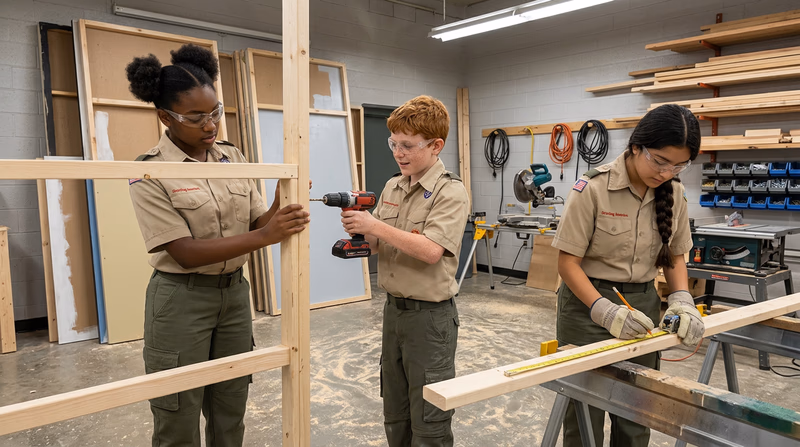
Req 3f — Scenery Building
Every set starts as a design on paper — but somebody has to actually build it. Scenery builders are the carpenters, painters, and craftspeople who turn sketches and models into the full-size, three-dimensional world the audience sees on stage. This is hands-on work that combines construction skills, artistic ability, and creative problem-solving.
For this requirement, you will help build and paint scenery for an actual production. Work with your merit badge counselor to find a school play, community theater, or other production that needs help in the scene shop.
What Scenery Builders Do
A scene shop (the workspace where scenery is built) looks a lot like a woodworking shop. Scenery builders:
- Construct flats (lightweight wall units made of wood frames covered with fabric or plywood)
- Build platforms and risers to create different stage levels
- Assemble door units, window units, and stair units
- Create special pieces like trees, rocks, or architectural details
- Paint everything to look realistic — or intentionally stylized
Basic Construction: The Flat
The most common piece of stage scenery is the flat — a lightweight frame covered with muslin (a type of fabric) or thin plywood. Flats are used to create walls, building exteriors, and backdrops.
A standard flat is built from 1x3 lumber (pine or poplar) and assembled with butt joints, corner blocks, and keystones (small plywood reinforcing pieces). The frame is then covered with muslin that is stretched, stapled, and sealed with a base coat of paint.
Scenic Painting
Painting scenery is very different from painting a bedroom wall. Scenic painters use special techniques to create the illusion of texture, depth, and age on flat surfaces.
Key techniques:
- Base coat — A solid first layer of color applied to the entire surface
- Spattering — Flicking paint from a brush to create a textured, aged look
- Dry brushing — Lightly dragging a nearly dry brush across the surface to create highlights and wood grain
- Sponging — Dabbing paint with a sponge for stone or stucco textures
- Trompe l’oeil — “Fool the eye” painting that creates the illusion of three-dimensional details (molding, bricks, wood paneling) on a flat surface
Tools of the Trade
Here are the basic tools you will encounter in a scene shop:
Scene Shop Tools
Common tools used in scenery construction- Tape measure: For accurate measurements (measure twice, cut once).
- Speed square: For marking straight lines and right angles.
- Cordless drill/driver: The most-used tool in the shop — for driving screws.
- Circular saw or miter saw: For cutting lumber to length (adult supervision required).
- Staple gun: For attaching muslin to flat frames.
- Clamps: For holding pieces together while glue dries or screws are driven.
- Paintbrushes: Various sizes from 1-inch trim brushes to 4-inch wall brushes.
- Paint rollers: For covering large areas with base coats quickly.
- Bamboo extensions: Long sticks that hold brushes for painting while standing.
Working as Part of a Crew
Scenery building is teamwork. You will be part of a crew working under the direction of a technical director or master carpenter. Here is how to be a great crew member:
- Show up on time. Build calls (scheduled work sessions) are planned around deadlines.
- Ask questions. It is always better to ask how to do something than to guess and waste materials.
- Follow instructions carefully. Measurements matter — a flat that is half an inch too wide will not fit on stage.
- Clean as you go. Sweep sawdust, pick up scraps, and put tools back where they belong.
- Volunteer for tasks. Even if a job seems boring (like priming a wall for the third time), it all contributes to the final product.
Explore More Resources
USITT — Scenic Design & Technology The United States Institute for Theatre Technology offers resources on scenic construction, painting, and design for students and professionals. Link: USITT — Scenic Design & Technology — https://www.usitt.org/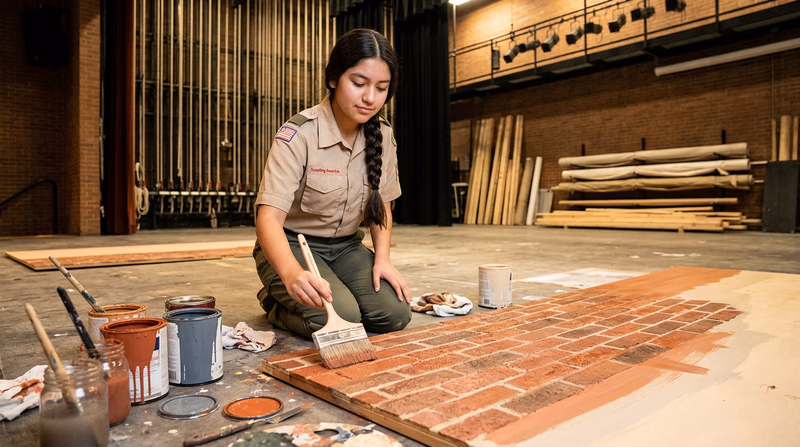
Req 3g — Lighting Design
Lighting is one of the most powerful tools in theater. It tells the audience where to look, what time of day it is, what the mood should be, and how to feel. A scene lit in warm golden tones feels completely different from the same scene lit in cold blue — even though nothing else on stage has changed. Lighting designers and operators work behind the scenes to create this invisible magic.
This requirement gives you two paths: design the lighting for a play, or help with the hands-on technical work of installing and operating the lighting for a production. Either way, you will learn how light shapes the theater experience.
What Lighting Does in Theater
Lighting serves four essential functions:
- Visibility — The audience needs to see the actors. This is the most basic job of stage lighting.
- Focus — Light draws the eye. A spotlight on one actor tells the audience exactly who to watch.
- Mood — Color, intensity, and angle all create emotional atmosphere. Bright, warm light feels happy. Dim, cool light feels mysterious or sad.
- Time and Place — Lighting can suggest morning sunlight through a window, a moonlit night, or a stormy sky.
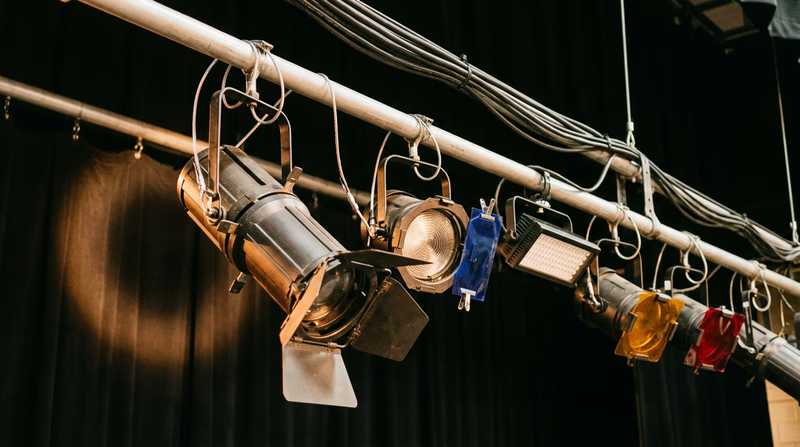
Types of Stage Lighting Instruments
Stage lights (called “instruments”) come in several types, each designed for a specific purpose. You will learn more about spotlights, floodlights, and the lighting control board in Requirement 5, but here is a practical overview:
- Ellipsoidal (ERS or Leko) — The workhorse of theater lighting. Produces a sharp, focused beam that can be shaped with shutters. Used for front lighting, specials, and gobos (metal patterns that project shapes).
- Fresnel — Produces a soft-edged wash of light. Named after the Fresnel lens inside it. Good for general stage washes and blending areas together.
- PAR can — Produces a powerful, slightly oval beam. Simple, affordable, and bright. Common in school theaters.
- LED fixtures — Modern instruments that can change color electronically without gels. Energy-efficient and increasingly common.
- Follow spot — A powerful, manually operated spotlight that follows a performer around the stage. Often used in musicals.
The Hands-On Work
If you choose the technical path, here is what the work involves:
Hanging and Circuiting
Lighting instruments are mounted on metal pipes (called “battens” or “pipes”) above and around the stage. Hanging involves clamping each instrument to the pipe and connecting its power cable to a dimmer circuit.
Focusing
Focusing means aiming each instrument at its assigned area of the stage and adjusting its beam. One person stands on a ladder at the instrument while another stands on stage as a “body” (a stand-in the designer uses to check the light’s position). The designer calls out adjustments: “Pan left,” “Tilt down,” “Sharpen the edge.”
Coloring (Gelling)
Color is added to instruments using thin sheets of heat-resistant colored plastic called “gels” (or “color media”). Gels slide into a frame on the front of the instrument. Combining different colors on different instruments creates the overall color palette for each scene.
Programming
Modern theaters use computerized lighting control boards to save and recall lighting states called “cues.” Each cue stores the intensity of every light in the system. Programming involves:
- Building each cue by adjusting individual lights
- Setting fade times (how fast lights transition between cues)
- Recording cues in sequence to match the show
Operating
During performances, the lighting operator sits at the control board and executes cues on command from the stage manager. When the stage manager says “Go,” the operator presses a button to trigger the next cue. Timing and focus are critical.
Designing a Light Plot
If you take the design path, you will create a light plot — a scale drawing showing where every instrument hangs, what direction it points, what color it uses, and what circuit it connects to. A light plot includes:
- A plan view (top-down) of the stage and lighting positions
- Symbols for each type of instrument
- Channel numbers, colors, and focus areas labeled
- A color key and instrument schedule
Explore More Resources
USITT — Lighting Design Resources for student and professional lighting designers from the United States Institute for Theatre Technology. Link: USITT — Lighting Design — https://www.usitt.org/ ETC Learning Center ETC is a leading manufacturer of stage lighting equipment and offers free training resources and tutorials. Link: ETC Learning Center — https://www.etcconnect.com/Support/Training/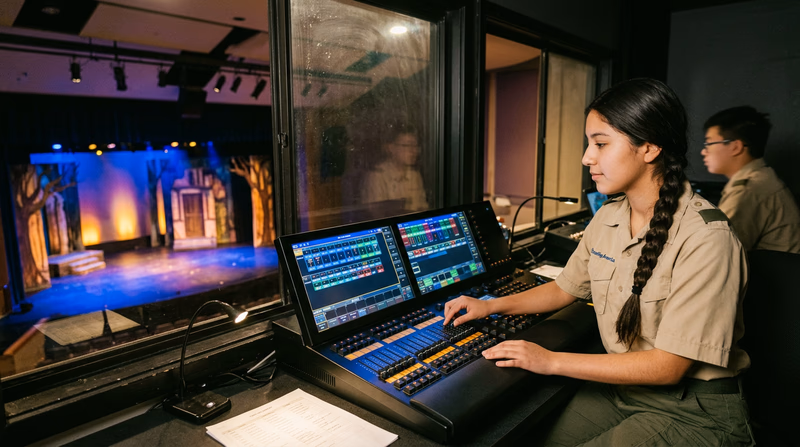
Req 3h — Sound Design
Sound design is the invisible art of theater. When it is done well, the audience does not even think about it — they just feel the thunder rumble through the seats, hear every word the actors say clearly, and get swept away by the music. When it is done poorly, it can ruin an otherwise great production. Sound designers and operators are the people who make sure every audience member hears exactly what they need to hear.
For this requirement, you will get hands-on experience with the full sound process: installing equipment, focusing speakers, equalizing the system, programming cues, and operating sound during a live performance.
What Sound Designers Handle
Sound in theater falls into three categories:
Reinforcement — Making the actors’ voices louder so every audience member can hear them clearly. This involves microphones, amplifiers, and speakers. Some theaters rely on natural acoustics without reinforcement, but most modern productions (especially musicals) use wireless microphones.
Sound Effects — Creating or playing recorded sounds that support the story: a doorbell, a thunderstorm, a car horn, a gunshot, birds singing at dawn. These can be pre-recorded or produced live.
Music — Playing pre-show music, scene change music, underscoring (background music during scenes), and curtain call music. In a musical, this also involves amplifying the orchestra or band.
The Equipment
Microphones
- Wireless lavalier (lav) mics — Tiny microphones clipped near an actor’s hairline or hidden in their costume. Each actor gets their own mic and wireless transmitter pack.
- Handheld microphones — Used for special moments like a character singing a solo.
- Area microphones — Microphones placed along the front edge of the stage to pick up general sound from the cast.
- Condenser microphones — Used to capture orchestra or band instruments.
Speakers
Speakers are placed carefully around the theater so sound reaches every seat evenly. Main speakers typically hang above or beside the stage, with additional speakers along the walls or ceiling for surround effects.
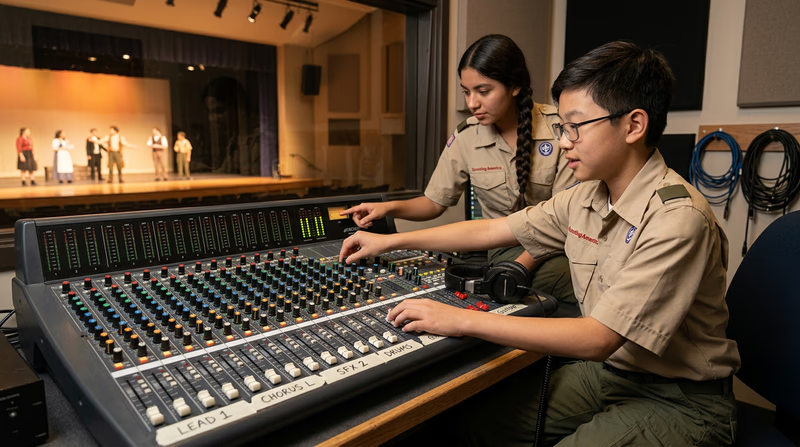
The Sound Mixing Desk
The mixing desk (or mixing board) is the nerve center of the sound system. Each microphone and sound source has its own channel with controls for volume, tone, and effects. The sound operator monitors all channels simultaneously during the show.
The Technical Process
Installing
Installation means setting up all the sound equipment for a production:
- Hanging and positioning speakers
- Running cables from microphones and speakers to the mixing desk
- Setting up wireless microphone systems and checking frequencies
- Testing every connection for signal and clarity
Focusing
Focusing speakers means aiming them so sound covers the audience area evenly. Walk through the house (audience seating) while playing test tones or music, listening for dead spots (areas that are too quiet) and hot spots (areas that are too loud).
Equalizing (EQ)
Equalization adjusts the tone of the sound system. Every room has its own acoustic characteristics — some rooms boost bass frequencies, others make voices sound harsh. An equalizer lets you cut or boost specific frequency ranges so the system sounds natural and clear in that specific space.
Programming
Sound cues are programmed into playback software on a computer connected to the mixing desk. Each cue has:
- A cue number matching the stage manager’s calling script
- The audio file or effect to be played
- Volume level
- Fade-in and fade-out times
- Which speakers the sound plays through
Operating
During the show, the sound operator:
- Monitors all microphone levels in real time, adjusting as actors move around the stage
- Fires sound effect cues on the stage manager’s call
- Manages music playback and volume
- Troubleshoots problems instantly (a dead microphone, feedback, a missed cue)
Common Sound Challenges
Explore More Resources
Theatrical Sound Designers and Composers Association The professional organization for theatrical sound designers, with resources on techniques and career paths in theater sound. Link: Theatrical Sound Designers and Composers Association — https://www.tsdca.org/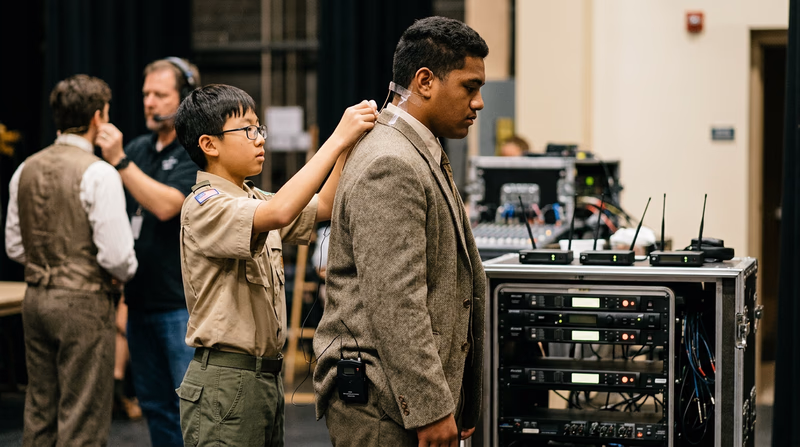
Req 3i — Stage Management
If the director is the architect of a production, the stage manager is the general contractor who makes everything actually happen. The stage manager is the most organized person in the building — they track every detail, manage every rehearsal, coordinate every department, and during performances, they call every single cue. Without a good stage manager, even the most talented cast and crew would be lost.
This is one of the most challenging and rewarding roles in theater. If you are detail-oriented, organized, and good under pressure, stage management might be your calling.
What a Stage Manager Does
Before Rehearsals Begin:
- Create a contact sheet with everyone’s information
- Prepare a rehearsal schedule and distribute it to the cast and crew
- Set up the rehearsal space (tape out the set on the floor, arrange furniture)
- Prepare a prompt book (your master copy of the script with room for notes)
During Rehearsals:
- Take attendance and manage sign-in sheets
- Record all blocking (actor movements) in the prompt book
- Track props — what is needed, where it goes, and who carries it
- Note any changes the director makes
- Keep rehearsals running on time
- Communicate director’s decisions to designers and crew
During Technical Rehearsals:
- Coordinate lighting, sound, and set change cues with the technical crew
- Write every cue into your calling script with exact timing
- Run “cue-to-cue” rehearsals where you practice transitions without the full performance in between
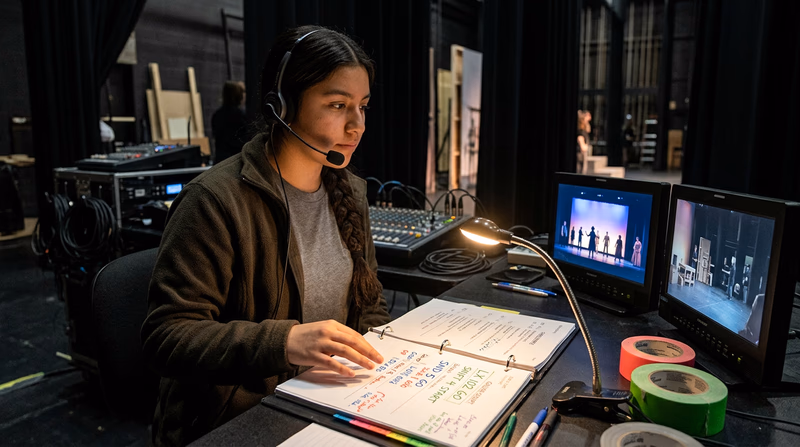
During Performances:
- Call every cue over headset (“Standby lights cue 12… Lights cue 12, go.”)
- Manage backstage traffic — actors and crew moving in darkness
- Handle emergencies calmly and decisively
- Ensure the show runs identically every night
The Calling Script
The calling script (also called the prompt book) is the stage manager’s most important tool. It is a copy of the script with every technical cue written in the margins. Here is how to build one:
Set Up Your Book:
- Print the script single-sided with wide margins
- Place each page in a three-ring binder
- Add blank facing pages for notes, blocking diagrams, and cue lists
Recording Cues:
For each cue, note:
- Cue type — LX (lights), SND (sound), FLY (fly system), SPOT (follow spot)
- Cue number — Sequential within each department (LX 1, LX 2, SND 1, SND 2)
- Warning — Mark where you will call “standby” (usually half a page before the cue)
- Go point — The exact word, action, or moment when you say “go”
A typical cue sequence in your script margin might look like:
WARN LX 15, SND 8
(Actor crosses to the window)
LX 15 GO (on “I never thought I’d see you again”)
SND 8 GO (on door slam)
Calling Cues: The Language
Stage managers use a precise verbal protocol when calling cues. This ensures that operators know exactly what is coming and when:
- Warning: “Warning, lights cue 15 and sound cue 8.” (Operators prepare.)
- Standby: “Standby, lights cue 15 and sound cue 8.” (Operators hover over their buttons.)
- Go: “Lights cue 15… go.” (Operator executes.)
Staying Organized
Stage Manager's Toolkit
Items to keep in your kit at all times- Prompt book with calling script.
- Multiple pencils and a good eraser (everything is written in pencil so it can change).
- Spike tape in several colors (for marking actor positions and furniture placement on the stage floor).
- A stopwatch or timer (for tracking scene lengths and intermission).
- A flashlight with a blue gel (blue light is invisible to the audience but lets you see backstage).
- First-aid kit location memorized.
- Emergency procedures posted and reviewed.
- Contact list for all cast and crew.
The Stage Manager’s Mindset
Great stage managers share certain qualities:
- Calm under pressure — When things go wrong (and they will), you are the person everyone looks to. Stay calm, assess the situation, and make a decision.
- Detail-oriented — You track hundreds of details. Nothing is too small to notice.
- Diplomatic — You work with every department and every personality. Tact and professionalism matter.
- Prepared for everything — Have backup plans. What if an actor is late? What if a prop breaks? What if a cue is missed?
Explore More Resources
Stage Managers Association A professional network for stage managers with resources, mentorship programs, and career guidance. Link: Stage Managers Association — https://www.stagemanagers.org/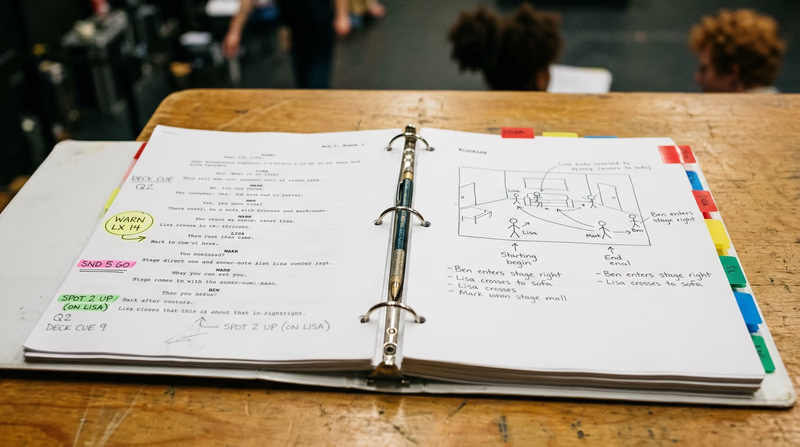
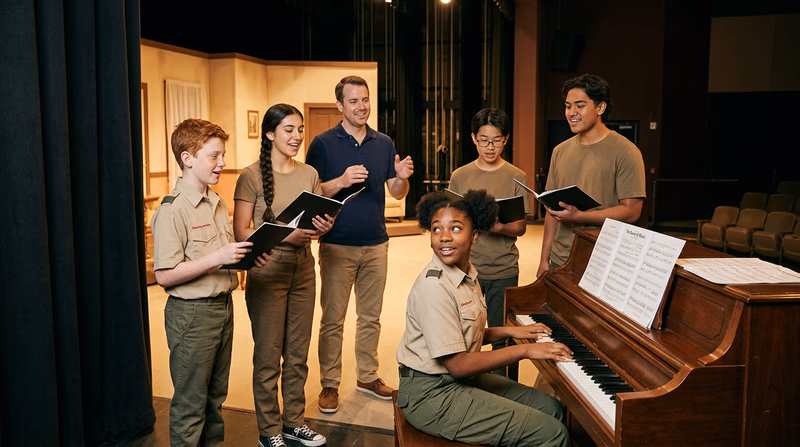
Req 3j — Musical Direction
The musical director is the person responsible for everything the audience hears musically in a production — from the opening overture to the final curtain call. They teach the cast their songs, lead the orchestra or band, and ensure the music and the dramatic action work together seamlessly. If you play an instrument, sing, or have a strong ear for music, this role lets you combine your musical skills with the excitement of live theater.
What a Musical Director Does
The musical director wears many hats throughout a production:
Pre-Production:
- Study the entire score (the written music for the show)
- Work with the director to understand the dramatic intent behind each musical number
- Plan the rehearsal schedule for music learning
- Recruit and audition musicians for the orchestra or band (if applicable)
Rehearsals:
- Teach songs to the cast, including melody, harmony, rhythm, and lyrics
- Work on vocal blend and balance in group numbers
- Rehearse the orchestra or band separately, then with the cast
- Collaborate with the choreographer to ensure music and movement align
Performances:
- Conduct the orchestra or band during the show
- Set tempos and dynamics for each number
- Keep the music synchronized with the action on stage
- Watch for problems (a singer losing pitch, an instrument out of tune) and address them between shows
Teaching Music to a Cast
Not every actor reads music, and many cast members may be more comfortable acting than singing. Your job is to make everyone sound their best. Here is a practical approach:
- Start with the melody. Teach the tune first, without lyrics, using “la” or “da” sounds. This lets singers focus on the notes without worrying about words.
- Add lyrics gradually. Once the melody is secure, layer in the words.
- Work in sections. Break songs into manageable chunks — verse, chorus, bridge — rather than trying to learn the whole song at once.
- Teach parts separately. In songs with harmony, teach each vocal part (soprano, alto, tenor, bass) on its own before combining them.
- Use a piano or keyboard. Playing the melody while singers learn it gives them a pitch reference and confidence.
Working with Musicians
If your production has a live pit orchestra or band, you will also need to:
- Hold separate music rehearsals with the musicians before combining them with the cast
- Create a rehearsal schedule that respects everyone’s time
- Mark the score with tempo changes, fermatas (holds), cuts, and repeats specific to your production
- Conduct clearly so musicians can follow your beat, especially during transitions between dialogue and music
Key Musical Terms to Know
Musical Director's Vocabulary
Terms you will use frequently- Score: The complete written music for a show, including all vocal and instrumental parts.
- Vocal score: A version of the score showing just the vocal parts with piano accompaniment.
- Overture: The instrumental music played before the show begins, usually a medley of the show’s songs.
- Vamp: A short musical passage repeated until the conductor signals the next section (used to accommodate stage action).
- Button: A sharp musical ending that signals applause.
- Underscoring: Background music played softly under dialogue.
- Reprise: A shorter repeat of a song heard earlier in the show, often with different emotional context.
- Cut-off: A hand signal from the conductor that tells musicians and singers when to stop on a held note.
Collaborating with the Director and Choreographer
A musical is a three-way collaboration between the director (dramatic storytelling), the choreographer (movement and dance), and the musical director (music). These three must work closely together to create a unified vision.
- Tempo decisions are often shared — the choreographer may need a song faster or slower to match the dance
- Dramatic moments may require the music to pause, stretch, or accelerate to match the actors’ emotional beats
- Transitions between spoken scenes and musical numbers need to be smooth and natural
Explore More Resources
Music Theatre International (MTI) One of the largest licensors of musicals for schools and community theaters, with educational resources and show guides. Link: Music Theatre International (MTI) — https://www.mtishows.com/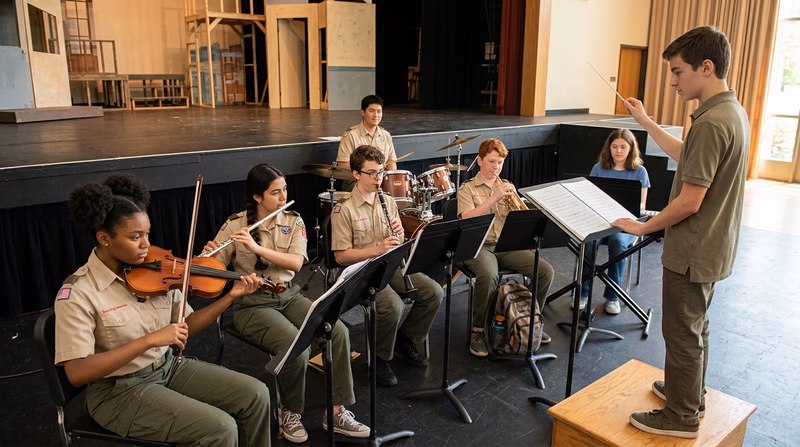
Req 4 — Mime & Pantomime
Mime and pantomime are the art of telling a story using only your body — no words, no props, no set. Everything the audience “sees” is created by your movements, gestures, facial expressions, and physical illusions. It is one of the purest forms of acting because you cannot rely on dialogue to communicate. Your body has to do all the work.
Your counselor will choose one of the following six scenarios for you to perform. Since you will not know which one they will pick, you should prepare for all of them.
The Six Scenarios
a. You have come into a large room. It is full of pictures, furniture, and other things of interest.
This scenario is about discovery and reaction. The audience should “see” the room through your eyes. Key physical skills:
- Open the door (use the “mime wall” technique — press your hand flat against an imaginary surface)
- React to the size of the room (step back slightly, widen your eyes, look up and around)
- Examine objects at different heights and distances
- Show different emotions for different objects (curiosity, surprise, delight, confusion)
b. As you are getting on a bus, your books fall into a puddle. By the time you pick them up, the bus has driven off.
This scenario tells a small story with a clear beginning, middle, and end. Key moments:
- Show the weight and size of the books you are carrying
- Establish the bus arriving (look down the street, check time, step toward the curb)
- The drop — react with shock and dismay
- Picking up wet books — show the weight of waterlogged pages, the unpleasant texture
- The bus leaving — look up, reach out, slump in defeat
c. You have failed a school test. You are talking with your teacher, who does not buy your story.
This is a two-character scene performed solo. You need to shift between your character and the implied teacher. Key techniques:
- Show nervousness before the conversation begins
- Use different body positions for talking vs. listening
- React to the teacher’s unseen responses (deflating as your excuses fail)
- Show the emotional arc: hope → effort → defeat
d. You are at camp with a new Scout. You try to help them pass a cooking test. The Scout learns very slowly.
This scenario is about patience and frustration. Physical comedy works well here:
- Demonstrate a cooking action clearly, then react as the new Scout gets it wrong
- Show increasing frustration through body language while maintaining a helpful attitude
- Use specific, recognizable cooking actions (stirring, flipping, tasting)
- End with either success or humorous resignation
e. You are at a banquet. The meat is good. You don’t like the vegetable. The dessert is ice cream.
This scenario is all about contrasting reactions to food. Key skills:
- Establish the formal setting (sit down, unfold a napkin, look around the table)
- Show genuine enjoyment of the meat (savor it, take another bite)
- Show disgust at the vegetable (try to hide your reaction, push it around the plate)
- Show pure delight at the ice cream (eyes light up, eat eagerly)
f. You are a circus performer such as a juggler, high-wire artist, or lion tamer doing a routine.
This is the most physically demanding option and lets you be creative:
- Juggler: Show the weight and trajectory of invisible objects, building from two to three or more
- High-wire artist: Establish the height (look down nervously), show the balance and tension in your body, include a near-fall and recovery
- Lion tamer: Show the power and danger of the invisible animal, use a chair and whip (mimed), demonstrate bravery mixed with fear

Fundamental Mime Techniques
No matter which scenario your counselor picks, these core techniques will help you perform convincingly:
The Fixed Point
This is the most important mime technique. When you touch an imaginary object (a wall, a table, a door handle), your hand must stay in that exact spot in space. If your hand drifts, the illusion breaks. Practice by placing your palm on a real wall, then removing the wall — keep your hand exactly where it was.
Weight and Resistance
Real objects have weight and texture. A mimed suitcase should make your arm strain. A mimed glass of water should tilt carefully. A mimed rope should pull against you. Show the effort that interacting with real objects would require.
Isolation
Isolation means moving one part of your body while keeping everything else still. This creates the illusion that external forces are acting on you. For example, when “pushing” against a wall, your hands stay fixed while your body leans forward — it looks like the wall is resisting you.
Facial Expression
Your face is your most powerful tool. Every emotion — surprise, disgust, joy, frustration, fear — must be readable from the back row. Practice exaggerating your expressions in a mirror until they feel slightly “too big.” On stage, that will be just right.
Preparing for the Unknown
Since your counselor chooses the scenario, you should practice all six. But more importantly, practice the fundamental techniques — fixed point, weight, isolation, and facial expression. If you have those skills down, you can adapt to any scenario your counselor selects.
Mime Performance Prep
Get ready for your counselor meeting- Practice each of the six scenarios at least twice.
- Rehearse in front of a mirror to check your facial expressions and hand positions.
- Perform for a friend or family member and get feedback.
- Time each scenario — aim for 1–3 minutes of clear, unhurried storytelling.
- Wear simple, dark clothing that does not distract from your movements.
- Warm up your body before performing — stretch, loosen your shoulders, shake out your hands.
Explore More Resources
International Mime Association Resources about the art of mime, including history, technique, and profiles of famous mime artists. Link: International Mime Association — https://www.mimeassociation.org/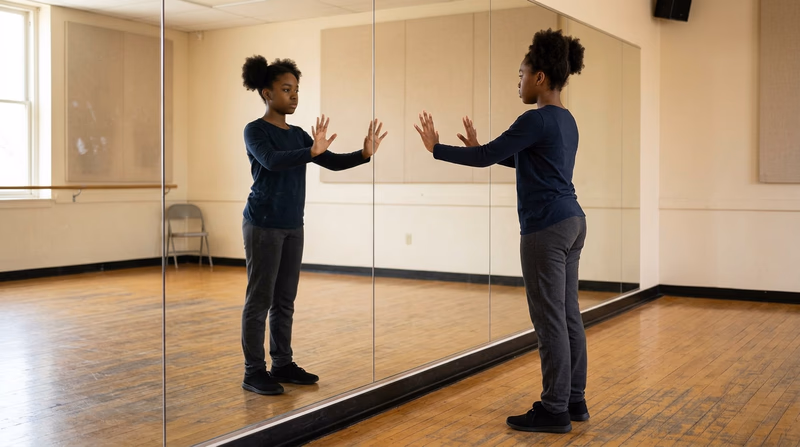
Req 5 — Theater Terminology
Every profession has its own vocabulary, and theater is no exception. Knowing these terms is essential for communicating clearly with directors, designers, and crew members. When someone says “cross downstage left,” everyone in the room needs to know exactly what that means — no confusion, no wasted time.
This requirement asks you to explain a specific list of theater terms. Let’s go through each one.
Stage Types
Proscenium Arch
The proscenium arch is the most common type of theater stage. It is the frame — like a picture frame — that separates the stage from the audience. The audience sits on one side and looks through the arch at the performance. Think of it as looking through a window into another world. Most school auditoriums and Broadway theaters use proscenium staging.
The arch creates a clear front to the stage, which makes it easy for the audience to focus and for designers to create illusions (since they only need to worry about one viewing angle).
Central or Arena Staging
In arena staging (also called “theater in the round”), the audience sits on all four sides of the performance space. The stage is in the center, like a boxing ring or a basketball court. There are no large set pieces because they would block someone’s view. Arena staging creates an intimate, immersive experience where the audience feels very close to the action.
Thrust Staging
A thrust stage extends out into the audience, with seating on three sides. The back of the stage connects to a backstage area (sometimes with a proscenium arch behind it). Thrust stages are the oldest form of staging — Shakespeare’s Globe Theatre used a thrust. They give the audience a closer connection to the actors than a proscenium while still allowing some scenic elements at the back.

Stage Directions
Stage directions are always given from the actor’s perspective — as if you are standing on stage, facing the audience.
Center Stage — The exact middle of the performance area. The strongest position on stage because every audience member can see you clearly.
Stage Right — The actor’s right side (the audience’s left). When a director says “cross stage right,” you walk to your right.
Stage Left — The actor’s left side (the audience’s right).
Downstage — The area closest to the audience. In older theaters, the stage was actually sloped (raked) downward toward the audience, which is where the term comes from.
Upstage — The area farthest from the audience (the back of the stage). The stage sloped upward away from the audience.
Backstage and Scenic Elements
Stage Crew
The stage crew includes all the people who work behind the scenes to make a production happen. This includes stagehands who move scenery, prop runners, fly operators, dressers who help actors with quick costume changes, and anyone else working backstage during a performance. The stage crew wears all black so they are invisible to the audience when they move set pieces during scene changes.
Flies (Fly System)
The fly system is the rigging above the stage used to raise and lower scenery, curtains, and lighting pipes. It consists of pipes (battens), cables, pulleys, and counterweights. When a piece of scenery needs to appear or disappear, it is “flown in” (lowered from above) or “flown out” (raised up out of sight). The area above the stage where the fly system operates is called the “fly loft” or “fly space.”
Portal
A portal is a frame or opening at the front of the stage, just behind the proscenium arch. Portals can be adjusted to make the stage opening smaller or to create a specific visual frame for the production. Some theaters use multiple portals at different depths to create a sense of perspective.
Cyclorama (Cyc)
A cyclorama (usually called a “cyc,” pronounced “sike”) is a large, smooth, curved curtain or wall at the very back of the stage. It is usually white or light gray and is used as a surface for lighting effects — a blue wash to suggest sky, an orange glow for sunset, or projections of clouds, stars, or other images. When lit properly, a cyc creates the illusion of infinite depth.
Stage Brace
A stage brace is a device used to hold up flat scenery pieces. It is an adjustable metal or wooden support that attaches to the back of a flat at the top and anchors to the stage floor with a stage weight or stage screw. Without braces, flats would fall over.
Lighting Equipment
Spotlight
A spotlight produces a focused, controllable beam of light that can be aimed at a specific actor or area. Spotlights can be sharpened to a tight circle or softened to a wider pool. The most common type in theater is the ellipsoidal reflector spotlight (ERS), which has shutters that let you shape the beam precisely. You worked with spotlights if you chose the lighting design option in Requirement 3.
Floodlight
A floodlight produces a broad, even wash of light that covers a wide area. Unlike a spotlight, a floodlight cannot be focused to a tight beam. Floodlights are used to light backdrops, cycloramas, and large sections of the stage with general illumination. They provide the “base layer” of light that spots and specials add detail to.
Lighting Control Board
The lighting control board (also called a “light board” or “console”) is the computer or device that controls every lighting instrument in the theater. Each instrument is assigned a channel number, and the operator can set the brightness of each channel from 0 to 100 percent. Lighting cues (pre-programmed combinations of channels and levels) are stored in the board and recalled during the show, allowing complex lighting changes to happen with a single button press.
Sound Equipment
Sound Mixing Desk
The sound mixing desk (or mixing board, mixer, or console) is the control center for all audio in a production. Every microphone, sound effect, and music source has its own channel on the board. The operator adjusts volume, tone (equalization), and effects for each channel independently, blending them all together into what the audience hears through the speakers. During a musical, the sound operator might manage 20 or more open microphones simultaneously. You explored the mixing desk in detail in Requirement 3h.
Planning Tools
Ground Plans
A ground plan is a bird’s-eye-view scale drawing of the stage showing where every piece of scenery, furniture, and major prop is placed. Ground plans are drawn to a specific scale (typically 1/2 inch = 1 foot) and include the outline of the stage, the proscenium arch, sightlines, and all scenic elements. Directors use ground plans to plan blocking, and technical directors use them to build and place scenery. You created a ground plan if you chose set design in Requirement 3.
Sightlines
Sightlines are the imaginary lines drawn from the audience’s seats to the stage, representing what each audience member can see. Good sightlines mean every seat in the house has a clear view of the important action. Designers check sightlines from the worst seats (the far sides and the very back) to make sure nothing is blocked. If a piece of scenery obstructs a sightline, it needs to be moved or redesigned.
Putting It All Together
All of these terms describe pieces of the same puzzle. The stage type determines the audience’s relationship to the performance. The stage directions give everyone a common language for movement. The scenic elements and equipment create the world the audience sees and hears. And the planning tools ensure everything works together before opening night.
Study Guide
Organize these terms by category to help you remember them- Stage types: proscenium arch, central/arena staging, thrust staging.
- Stage directions: center stage, stage right, stage left, downstage, upstage.
- People: stage crew.
- Scenic elements: flies, portal, cyclorama, stage brace.
- Lighting: spotlight, floodlight, lighting control board.
- Sound: sound mixing desk.
- Planning: ground plans, sightlines.
Explore More Resources
TheatreLinks — Glossary of Theater Terms A comprehensive glossary of hundreds of theater terms with clear definitions and illustrations. Link: TheatreLinks — Glossary of Theater Terms — https://www.theatrelinks.com/theater-glossary/ USITT — Resources for Students The United States Institute for Theatre Technology provides learning resources for students interested in all aspects of theater technology and design. Link: USITT — Resources for Students — https://www.usitt.org/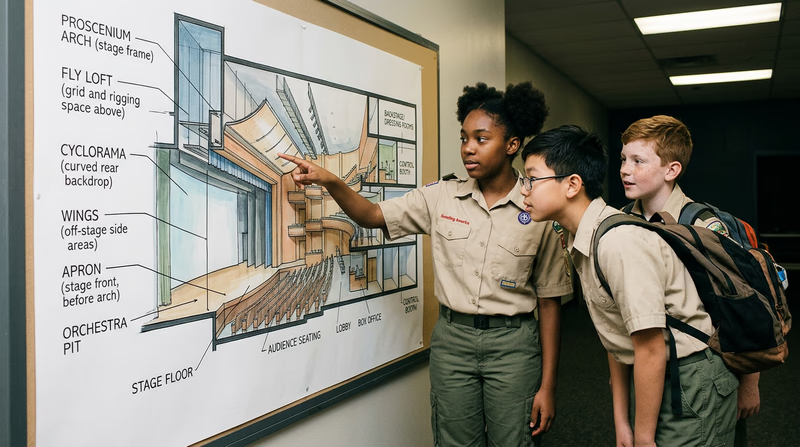
Extended Learning
A. Introduction
Congratulations — you have explored the full world of theater, from writing and performing to building, designing, and managing a production. But the curtain does not have to come down here. Theater is a lifelong pursuit with endless opportunities to learn, create, and connect with others. Whether you want to pursue theater as a career or simply keep it as a rewarding hobby, the skills you have built — creativity, teamwork, communication, and problem-solving — will serve you in every area of your life.
B. Deep Dive: The Art of Improvisation
Improvisation (“improv”) is performing without a script — making up scenes, characters, and dialogue on the spot. It is one of the best ways to build confidence, quick thinking, and stage presence. Many professional actors, including some of the most famous comedians in the world, got their start doing improv.
The foundation of improv is the principle of “Yes, and…” — accepting whatever your scene partner offers and building on it. If someone says “Look, a dragon!” you do not say “No, that is a dog.” You say “Yes, and it looks hungry — quick, offer it a sandwich!” This keeps the scene moving forward and builds trust between performers.
There are many improv formats to try. Short-form games like “Freeze Tag” and “Scenes from a Hat” are quick, fun, and great for beginners. Long-form improv creates entire scenes and stories that can run for twenty minutes or more, building characters and relationships in real time. Many cities have improv theaters that offer classes specifically for teenagers.
Improv is also a powerful tool for rehearsing scripted work. Many directors use improv exercises to help actors discover their characters. “Hot seat” exercises, where an actor answers questions as their character, build depth that shows up in performance. If you ever feel stuck in a role, try improvising a scene that is not in the play — a conversation your character might have at breakfast, or how they would react to getting lost. These discoveries translate directly to stronger scripted performances.
C. Deep Dive: Theater Technology and Innovation
Theater has always been at the forefront of technology. The ancient Greeks invented the deus ex machina — a crane that lowered actors playing gods onto the stage. Today, technology in theater has evolved into something those Greek engineers could never have imagined.
Projection design is one of the fastest-growing fields in theater. Instead of painting scenery, designers project digital images and video onto screens, scrims, and even moving set pieces. A single projection system can transform a bare stage into a forest, a city skyline, or the surface of another planet in seconds. Shows like Dear Evan Hansen and Hadestown use projections as a central storytelling tool.
Automation uses computer-controlled motors to move scenery, turntables, and even actors. The rotating turntable in Hamilton is a famous example — it moves continuously during the show, driven by a motor programmed to hit exact positions at exact moments. Flying systems have also gone digital, with computerized winches that can move actors and scenery along precise three-dimensional paths.
LED and intelligent lighting has revolutionized how designers work with light. Modern LED fixtures can change color instantly, be programmed for complex sequences, and consume a fraction of the electricity of traditional instruments. Moving lights (intelligent fixtures) can pan, tilt, change color, project patterns, and create effects that would have required dozens of conventional instruments.
Immersive and interactive theater uses technology to blur the line between performer and audience. Some productions use smartphone apps that guide audience members through a space. Others use sensors, RFID wristbands, or augmented reality to create personalized experiences. This growing field combines theater skills with game design, software development, and interactive storytelling.
D. Deep Dive: Careers in Theater
Theater is not just about being on stage. The performing arts industry employs hundreds of thousands of people in a wide range of careers, many of which you have already explored through this merit badge.
Performance careers include actors, singers, dancers, and voice-over artists. These paths require ongoing training, auditions, and resilience. Many performers work in multiple areas — acting in plays, performing in commercials, doing voice work for animation, and teaching classes.
Design careers include scenic designers, costume designers, lighting designers, sound designers, projection designers, and hair and makeup artists. Designers typically study their craft in college theater programs and build portfolios through school, community, and regional theater work.
Technical careers include master carpenters, master electricians, audio engineers, prop artisans, scenic painters, and automation technicians. These roles combine artistic skill with practical trade skills — woodworking, electrical work, metalworking, and computer programming.
Management and administrative careers include stage managers, production managers, company managers, casting directors, and theater administrators. These professionals keep the business side of theater running, from budgets and schedules to contracts and audience development.
Many of the skills you develop in theater translate directly to other fields. Public speaking, project management, creative problem-solving, teamwork under pressure, and technical proficiency are valued in business, education, law, medicine, and technology. Theater experience on a resume tells an employer you can think on your feet and collaborate with others.
E. Real-World Experiences
Ready to take your theater skills beyond the classroom? Here are experiences to seek out:
Attend a Professional Production
Theater Summer Camp or Workshop
Community Theater Volunteering
Shakespeare Festival
Backstage Tour
F. Organizations
These organizations support theater education, offer resources for young theater makers, and connect you with the wider theater community:
The national organization for theater education, running the International Thespian Society for high school students and hosting festivals, workshops, and competitions.
Organization: Educational Theatre Association (EdTA) — https://www.schooltheatre.org/
The honor society for high school theater students, with over 5,000 active troupes across the country. Membership provides access to festivals, scholarships, and a community of peers.
Organization: International Thespian Society — https://www.schooltheatre.org/programs/thespians
A national network connecting theater artists, educators, and scholars who work with young people in theater.
Organization: American Alliance for Theatre & Education (AATE) — https://www.aate.com/
The national organization for professional nonprofit theaters, offering publications, research, and grants that support the American theater industry.
Organization: Theatre Communications Group (TCG) — https://www.tcg.org/
The national association for design and technology professionals in the performing arts, with student chapters and design competitions.
Organization: United States Institute for Theatre Technology (USITT) — https://www.usitt.org/