Req 5 — Process Selection and Setup
This requirement connects theory to shop action. First you compare welding processes and the equipment each one needs. Then you pick one process and build a safe, ready-to-inspect setup for the welds in Req 6.
Requirement 5a
A good comparison does more than name the process. It shows that you understand what parts make the process work and what shop situations each process handles well.
Example comparison: Stick vs. MIG
Stick welding (SMAW)
Typical equipment components:
- Power source
- Electrode holder (stinger)
- Work clamp and ground lead
- Welding leads/cables
- Covered electrodes
- Helmet, gloves, and protective clothing
- Chipping hammer and wire brush for slag cleanup
Advantage: Stick welding is portable, versatile, and works well outdoors.
Limitation: It creates slag that must be cleaned, and changing electrodes slows the work.
MIG welding (GMAW)
Typical equipment components:
- Power source
- Wire feeder or built-in feed system
- Welding gun
- Work clamp and cable
- Spool of wire electrode
- Shielding gas cylinder
- Regulator/flowmeter
- Contact tips and nozzle
- Helmet, gloves, and protective clothing
Advantage: MIG is often easier for beginners to learn and makes fast, continuous welds.
Limitation: Wind can disrupt the shielding gas, so it is less forgiving outdoors.
Other processes you might compare
You could also compare TIG and oxy-fuel, or stick and TIG, depending on what your counselor uses. What matters is that you can connect the process to its equipment and tradeoffs.
What makes a strong process comparison
Use this structure when talking with your counselor
- Name the process and what creates the heat.
- List the equipment parts needed to run it safely.
- Explain one advantage in a real shop situation.
- Explain one limitation that affects where or how it is used.
🎬 Video: 4 Types of Welding Explained: MIG vs TIG vs Stick vs Flux Core (video) — https://youtu.be/y-OKi8oSNQ4?si=sTy6oV_X2gC7tqr3
Requirement 5b
This is a setup requirement, not a speed requirement. Your goal is to create a clean, safe, organized station that your counselor can inspect with confidence before you begin welding.
Start with the big decision
Pick the process your counselor wants you to use for the hands-on welds in Req 6. That process determines which parts of the setup matter most. For example:
- Stick uses cables, holder, work clamp, and the correct electrode selection.
- MIG adds wire feed, shielding gas, regulator/flowmeter, and polarity settings.
- TIG adds tungsten setup, shielding gas, and often a foot pedal or fingertip control.
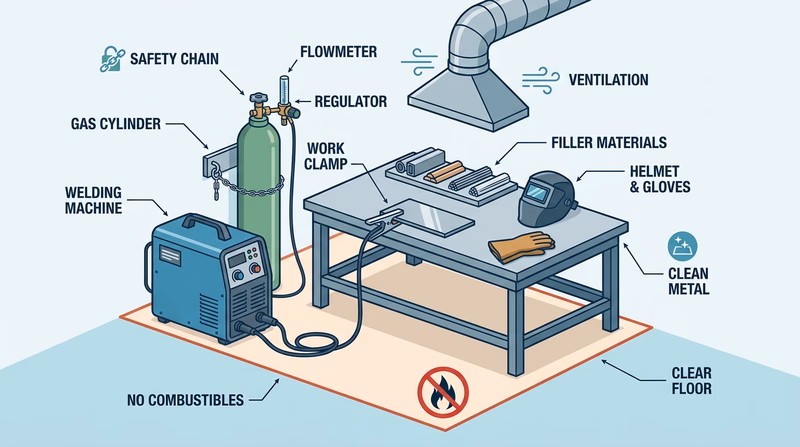
What to include in your setup discussion
Gas regulators
If your chosen process uses shielding gas, the regulator and flow control must be attached correctly and handled with care. Gas cylinders should be upright and secured. You should know which gas the process uses and why.
Work clamps and cables
The work clamp must connect to clean metal so current flows properly. Cables should be routed where they will not be cut, tripped over, pinched, or overheated. Loose or damaged connections can lead to poor arc performance and safety problems.
Filler materials
Use the correct electrode, wire, or filler rod for the process and the metal you are welding. The wrong filler can make the weld weaker, harder to run, or unsuitable for the joint.
Equipment settings
Voltage, amperage, polarity, wire-feed speed, and gas flow all affect weld quality. You do not need to guess them from memory alone. Your counselor, machine chart, and shop procedure should guide the initial settings.
Why counselor inspection matters
The inspection is not just a rule to slow you down. It is a chance to catch unsafe routing, bad grounding, missing PPE, wrong consumables, or poor gas setup before those problems become sparks, porosity, or injuries.
If you can explain your station clearly — what process it is, what each component does, and why the area is safe — you are in great shape for the practical welds that come next.