Req 7c — Ground-to-Air Signals
Pilots and aerial rescue teams are trained to recognize specific ground signals. If you’re stranded and aircraft is searching, the symbols and patterns you create on the ground communicate your status. These signals are standardized—the same signals work worldwide for rescue.
The Five Core Ground-to-Air Signals
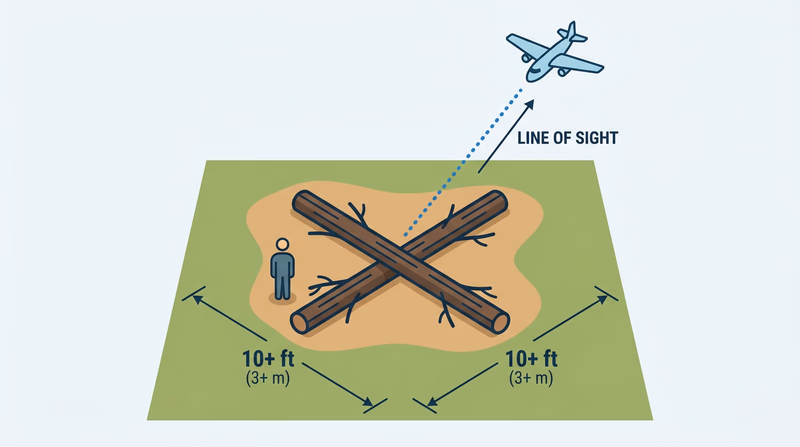
Signal 1: X (Distress / Need Help)
Pattern: Large X made from rocks, logs, or bright material on the ground
What it means: “We are in distress and need immediate assistance”
Size: Make it large—30-40 feet per arm. Pilots scanning from hundreds of feet up need to see it clearly.
How to make it:
- Lay two long logs or rock lines crossing each other
- Or arrange rocks/logs in an X pattern
- Use contrasting colors (white cloth on dark ground, dark rocks on light sand)
- Make it visible from multiple angles (don’t position in a narrow clearing)
When to use it: If you’re injured, equipment is damaged, or you need rescue. This is the “I’m in trouble” signal.
Recognition: Every pilot knows X means distress. It’s unambiguous.
Signal 2: V (Need Assistance)
Pattern: Large V shape on the ground, pointing upward
What it means: “We need assistance but not immediate distress”
Size: 30-40 feet tall, proportional width
How to make it:
- Arrange rocks or logs in a V shape
- Can use bright cloth to make it visible
- Point upward (toward the sky/rescue)
When to use it: If you need help but aren’t in immediate danger. Examples: minor injury, equipment issue, lost but safe.
Recognition: V is standard aviation signal for “assistance needed.”
Signal 3: → (Arrow Pointing Direction)
Pattern: Large arrow made from rocks or logs pointing in a specific direction
What it means: “Go in this direction” or “Safe landing area is in this direction”
Size: 40-50 feet long, clearly visible
How to make it:
- Create arrow shaft from rocks/logs
- Add arrowhead at both ends if possible
- Make it obviously point in a specific direction
When to use it:
- To point toward an injured person’s location if you’re signaling from a different spot
- To show the direction of shelter or water
- To indicate a safe landing zone (point toward flat, open terrain)
Recognition: Arrows are universal direction signals. Pilots understand “arrow points this way, go there.”
Signal 4: F (Need Food and Water)
Pattern: Large F letter shaped from rocks or logs on the ground
What it means: “We need food and water”
Size: 30-40 feet tall
How to make it:
- Arrange rocks/logs in the shape of the letter F
- Make it clear and readable from above
When to use it: If you’re stranded for an extended period and supplies are critical. This tells rescuers what to prioritize dropping.
Recognition: Standard aviation signal. Pilots recognize F and can relay this to rescue coordinators.
Signal 5: ✓ (All Well / OK)
Pattern: Large checkmark or “✓” symbol on the ground
What it means: “All well, we don’t need immediate assistance” or “We received your message and understand”
Size: 30-40 feet, clearly visible
How to make it:
- Arrange rocks/logs in a checkmark pattern
- Make the pattern obvious and readable
When to use it:
- If rescuers drop supplies and you’ve received them safely
- If you’re injured but stable and not in immediate danger
- To acknowledge that you’ve seen the aircraft
Recognition: Checkmark is universal “OK” signal. Pilots understand this means “situation is managed.”
Other Common Ground-to-Air Signals
SOS (Morse Code Distress)
Pattern: Three dots (·), three dashes (—), three dots (·) in large letters
What it means: “I am in distress, need help”
Representation on ground:
- Use rocks/logs in line for dashes (longer)
- Use rocks/logs in line for dots (shorter)
- Space patterns clearly apart
Recognition: Pilots know SOS is the ultimate distress signal. However, X is simpler and just as understood.
N (Not Understood / Repeat)
Pattern: Large N on the ground
What it means: “I don’t understand your signal, please repeat”
When to use it: If rescuers drop supplies or try to communicate and you need clarification.
Y (Yes) and LL (All Well)
Pattern: Y or two tall lines (LL)
What it means:
- Y = “Yes” or affirmative
- LL = “All well, no assistance needed”
When to use it: In response to aerial signals or questions.
Making Signals Visible and Permanent
Contrast is Everything
On grass or green ground:
- Use white or light cloth
- Arrange light-colored rocks
- Create white sand or dirt patterns
On sand or light ground:
- Use dark rocks
- Arrange dark cloth
- Create black earth or charcoal patterns
In snow:
- Use dark logs or rocks
- Trample snow to create dark patterns
- Use evergreen branches for contrast
Durability
Short-term signals (hours):
- Cloth or blankets (easy to remove if rescue doesn’t come)
- Temporary rock arrangements
Medium-term signals (days):
- Rock cairns or arrangements (don’t blow away)
- Trampled snow patterns
- Logs arranged in patterns
Permanent markers:
- Rock cairns (won’t blow away)
- Large log arrangements (visible for months)
- Charcoal or ash patterns
Visibility from Distance
From ground:
- 50-100 feet away: Letters and symbols readable
From helicopter (300 feet):
- 30-40 foot signals clearly visible
- Smaller signals may not be readable
From fixed-wing aircraft (1000+ feet):
- 40-50 foot signals needed for clarity
- Larger is better
Rule of thumb: Make signals at least 30 feet across. Bigger signals are visible from farther away.
Multiple Signals Strategy
Best practice: Create multiple signals simultaneously:
- Ground symbol (X, V, or arrow) — large and permanent (rocks/logs)
- Bright cloth — for daytime visibility
- Fire/smoke — if possible (additional visibility)
- Mirror signals — active signaling when you see aircraft
- Whistle — for ground rescue teams
A Scout using all five signals is far more likely to be found than one relying on a single method.
Scenario: Creating Ground-to-Air Signals
You’re stranded after an injury and expect aerial search:
Choose your location: Open, visible area away from dense forest.
Assess supplies: You have rocks and a bright emergency blanket.
Create X:
- Arrange rocks in two crossing lines, 30-40 feet per arm
- Make it level and readable from above
- Take 2-3 hours
Create additional marker:
- Spread bright emergency blanket in center of X
- This adds visibility and color contrast
Create arrow:
- If your location isn’t ideal, create arrow pointing to your actual camp
- Allows rescuers to find you exactly
Maintain signals:
- Check and repair after wind or rain
- Keep them visible throughout the day
Combine with active signals:
- Keep mirror ready for when aircraft appears
- Signal with whistle every 10 minutes (ground rescue might arrive)
Communicating with Rescuers
If aircraft acknowledges your signal:
- They may waggle wings or circle back
- This means “we see you, help is coming”
- Continue showing your position clearly
- Stay visible and in the same location
If rescuers drop supplies:
- Create a checkmark (✓) to signal receipt
- Clear the drop zone of people for safety
- They may drop more supplies if you’re still visible
If multiple signals are needed:
- Show X first (distress)
- If they ask for clarification, show F (food needed) or other specific signal
- Use additional signals sequentially, not simultaneously
Ground-to-Air Signal Checklist
Five Required Signals (Memorize These):
- X = Distress, need help immediately
- V = Need assistance (not emergent)
- → = Direction or arrow (go this way)
- F = Need food and water
- ✓ = All well / OK / understood
Bonus Signals (Optional):
- SOS = International distress
- N = Not understood, repeat
- Y = Yes / affirmative
- LL = All well, no assistance needed
Making Signals Visible:
- Size: 30-40 feet minimum
- Contrast: Use color difference (light on dark, dark on light)
- Durability: Rocks/logs for permanence
- Multiple angles: Visible from any aircraft direction
- Combination: Use symbols + bright cloth + mirror for maximum visibility