Woodwork Merit Badge — Complete Digital Resource Guide
https://merit-badge.university/merit-badges/woodwork/guide/
Introduction & Overview
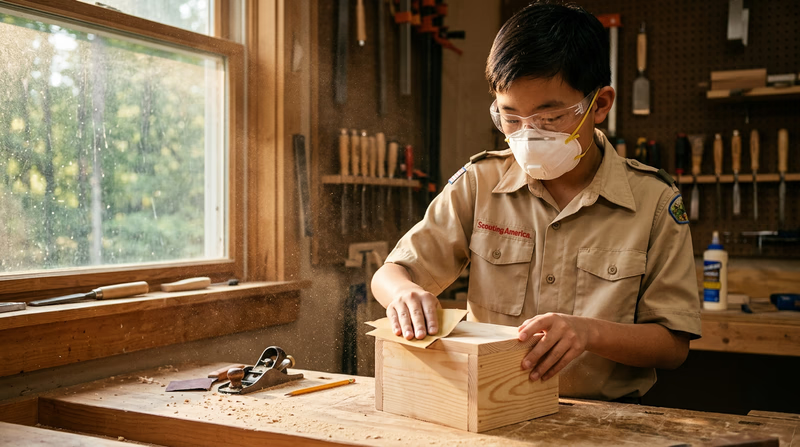
There is something deeply satisfying about taking a rough piece of wood and turning it into something useful and beautiful with your own hands. Woodworking is one of the oldest crafts in human history, and it is just as relevant today as it was thousands of years ago. Whether you are building a birdhouse, crafting a bookshelf, or carving a decorative bowl, woodwork teaches you to plan carefully, measure precisely, and solve problems creatively.
The Woodwork merit badge introduces you to the full journey of wood — from a living tree in the forest to a finished project in your hands. Along the way, you will learn to use hand tools safely, understand different species of wood, and design and build projects of your own.
Then and Now
Then — Building a World from Trees
For thousands of years, wood was the most important building material on Earth. Ancient Egyptians built river boats from cedar. Medieval carpenters raised the soaring timber frames of cathedrals without a single nail — using only hand-cut joints. Colonial Americans built entire homes, barns, and furniture using hand saws, planes, and chisels. A skilled woodworker was one of the most valued members of any community.
- Purpose: Shelter, tools, transportation, furniture — survival itself
- Mindset: Master the craft or go without
Now — The Maker’s Revival
Today, woodworking is experiencing a massive revival. The “maker movement” has inspired a new generation to pick up hand tools and learn traditional techniques. At the same time, modern technology like CNC routers, laser cutters, and 3D design software lets woodworkers push the boundaries of what is possible. Whether you prefer the quiet rhythm of a hand plane or the precision of a digital design, there has never been a better time to learn woodwork.
- Purpose: Creative expression, practical skills, career paths, personal satisfaction
- Mindset: Build something real — something you designed, measured, cut, and finished yourself
Get Ready! You are about to learn a craft that people have practiced for millennia. By the end of this badge, you will have the skills to walk into a workshop, pick up your tools, and build something you are proud of. Let’s get started.
Kinds of Woodwork
Carpentry
Carpentry is the large-scale side of woodwork — framing houses, building decks, and constructing structures. Carpenters work with dimensional lumber (like 2x4s) and use tools like framing squares, circular saws, and levels. If you have ever watched a house go up, you have seen carpenters at work.
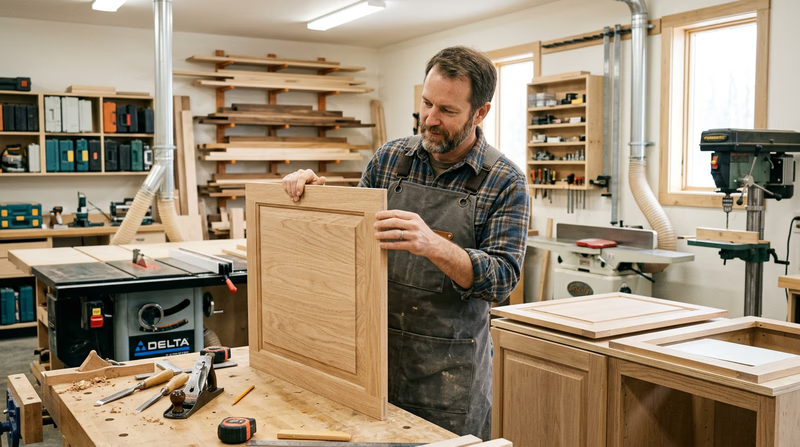
Cabinetmaking
Cabinetmakers build furniture, cabinets, and fine storage pieces. This branch of woodwork demands precision — doors must close perfectly, drawers must slide smoothly, and joints must be tight. Cabinetmakers often work with hardwoods like oak, maple, and cherry.
Wood Carving
Wood carving transforms a solid block of wood into a three-dimensional object using chisels, gouges, and knives. Carvers create everything from wildlife sculptures to decorative architectural details. It is one of the most artistic branches of woodwork.
Woodturning
Woodturning uses a lathe — a machine that spins the wood while you shape it with special cutting tools. Turners create bowls, pens, table legs, and candlesticks. The lathe lets you produce perfectly round, symmetrical shapes that would be nearly impossible by hand.
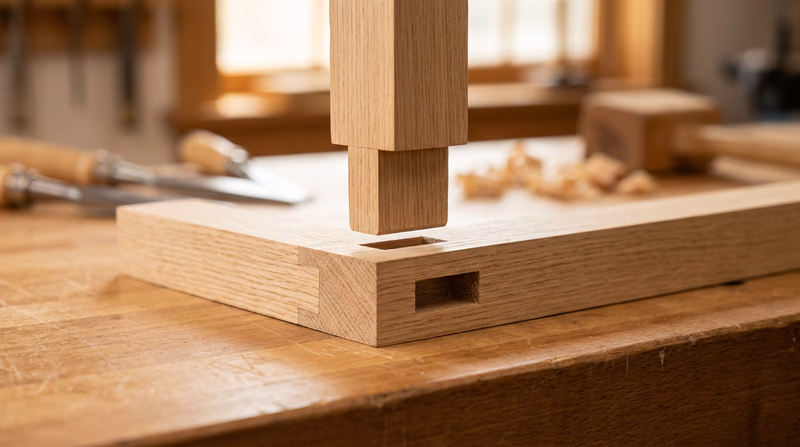
Joinery
Joinery is the art of connecting pieces of wood without nails or screws. Traditional joints like dovetails, mortise and tenon, and finger joints rely on precise cutting and the natural strength of wood. A well-made joint can last for centuries.
Req 1a — Workshop Hazards
A woodworking shop is a place where sharp tools, heavy materials, and powerful machines come together. Understanding the hazards before you start working is what separates a prepared woodworker from a careless one. Every experienced woodworker will tell you: the most dangerous tool in the shop is a person who does not respect safety.
Common Workshop Hazards
Cuts and Lacerations
Sharp tools are everywhere in a workshop — saws, chisels, planes, knives, and even the edges of freshly cut wood. Cuts are the most common woodworking injury.
How to prevent them:
- Always cut away from your body, never toward it
- Keep tools sharp — a dull tool requires more force and is more likely to slip
- Use clamps or a vise to hold your work instead of your hands
- Never reach across a spinning blade or moving tool
Splinters
Wood splinters range from minor annoyances to serious puncture wounds. Rough lumber, broken edges, and unsanded surfaces are common sources.
How to prevent them:
- Wear work gloves when handling rough lumber
- Sand or plane rough edges before extensive handling
- Inspect wood for cracks and splits before working with it
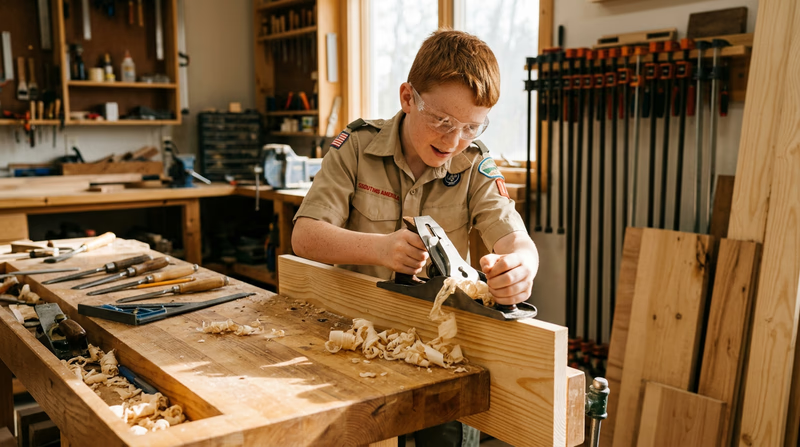
Flying Debris
Sawing, planing, and chiseling all send small chips and particles into the air. A wood chip in the eye can cause serious injury.
How to prevent them:
- Always wear safety glasses or goggles — every time, no exceptions
- Make sure bystanders are also wearing eye protection or standing at a safe distance

Falling Objects
Lumber is heavy. A board sliding off a workbench or a tool falling from a shelf can cause bruises, broken toes, or worse.
How to prevent them:
- Store heavy lumber flat and supported, never leaning at steep angles
- Keep tools in designated places — not balanced on the edge of a bench
- Wear closed-toe shoes (preferably with reinforced toes) in the workshop
Noise
Power tools like routers, planers, and table saws produce noise levels that can permanently damage your hearing over time.
How to prevent hearing damage:
- Wear hearing protection (earmuffs or earplugs) when using power tools
- Limit exposure time to loud machinery
Dust and Fumes
Fine sawdust is more than just messy — it can irritate your lungs and, with some wood species, cause allergic reactions. Finishes, stains, and glues release chemical fumes.
How to prevent respiratory problems:
- Wear a dust mask or respirator when sanding or cutting
- Work in well-ventilated areas
- Use dust collection systems when available
- Know which wood species cause allergic reactions (like cedar, walnut, and exotic hardwoods)
Tool Safety Precautions
General Tool Safety Rules
Follow these every time you work- Inspect tools before use: Check for loose handles, cracked blades, or damaged parts.
- Use the right tool for the job: Do not use a chisel as a screwdriver or a wrench as a hammer.
- Maintain a clean workspace: Sawdust, scraps, and clutter cause trips and hide hazards.
- Secure your workpiece: Use clamps, a vise, or a bench hook — never hold the piece with one hand while cutting with the other.
- Focus on your work: Never use tools when you are tired, distracted, or rushing.
- Work alone cautiously: If working alone, make sure someone knows where you are and what you are doing.
Anticipate, Prevent, Mitigate, Respond
Your counselor will want to hear you think through hazards using this four-step framework:
- Anticipate — Before starting, ask yourself: “What could go wrong here?” Look at the tool, the material, and your surroundings.
- Prevent — Take steps to eliminate the hazard. Wear PPE, secure the workpiece, clear the area.
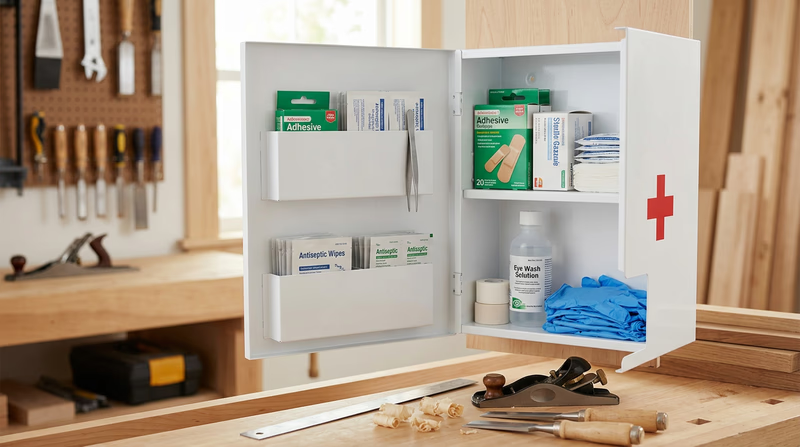
- Mitigate — Reduce the impact if something does go wrong. Keep a first aid kit nearby. Know where the fire extinguisher is.
- Respond — Know what to do when an injury happens. Stop the bleeding, get help, report the incident.
Req 1b — First Aid & Protection
Knowing how to respond to injuries is just as important as knowing how to prevent them. In a woodworking shop, even small injuries need proper attention, and knowing how to handle a serious cut could save someone’s life.
First Aid for Woodworking Injuries
Splinters
Splinters are the most frequent woodworking injury. Most are minor, but deep or large splinters need careful removal.
- Wash your hands and the area around the splinter with soap and water.
- Sterilize tweezers with rubbing alcohol.
- Grip the splinter as close to the skin as possible and pull it out at the same angle it went in.
- Clean the wound again and apply an adhesive bandage.
- If the splinter is deep, embedded under a nail, or you cannot remove it completely, seek medical attention.
Scratches and Minor Cuts
Small cuts and scratches from sharp edges, rough wood, or tool slips are common.
- Apply gentle pressure with a clean cloth or gauze to stop bleeding.
- Clean the wound with soap and running water.
- Apply antibiotic ointment if available.
- Cover with an adhesive bandage or sterile gauze pad.
- Watch for signs of infection over the next few days — redness, swelling, warmth, or pus.
Serious Cuts
A deep cut from a saw, chisel, or plane requires immediate, decisive action.
- Apply direct pressure with a clean cloth, towel, or gauze. Press firmly and do not lift the cloth to check — this disrupts clot formation.
- Elevate the injured area above the heart if possible.
- If blood soaks through the first cloth, add more material on top — do not remove the original layer.
- Call 911 or have someone drive to an emergency room if bleeding does not stop within 10 minutes, the wound is deep, or you can see bone or tendon.
Severe Bleeding and Shock
Severe bleeding can lead to shock — a life-threatening condition where the body’s organs do not get enough blood flow.
Signs of shock:
- Pale, cool, clammy skin
- Rapid, weak pulse
- Shallow, rapid breathing
- Confusion or dizziness
- Nausea
How to respond:
- Call 911 immediately.
- Have the person lie down and elevate their legs about 12 inches (unless the injury is to the head, neck, or spine).
- Keep them warm with a blanket or jacket.
- Continue applying direct pressure to any bleeding wound.
- Do not give them food or water.
- Stay with them and keep them calm until help arrives.
Protecting Your Eyes
Your eyesight is irreplaceable. Woodworking produces flying chips, sawdust, and splashing finishes that can all damage your eyes.
Eye Protection Rules
Non-negotiable workshop habits- Wear safety glasses or goggles every time you use a tool — hand tools and power tools alike.
- Choose glasses that meet ANSI Z87.1 safety standards (look for the Z87 marking on the lens or frame).
- Use goggles (not just glasses) when working overhead or when debris could enter from the sides.
- Keep an eye wash station or bottle in the shop for emergencies.
- If something gets in your eye, do not rub it — flush with clean water and seek medical attention if irritation continues.
Protecting Your Hearing
Prolonged exposure to noise above 85 decibels causes permanent hearing loss. Many power tools exceed this level:
| Tool | Approximate Noise Level |
|---|---|
| Hand saw | 70–80 dB |
| Jigsaw | 85–95 dB |
| Circular saw | 95–105 dB |
| Router | 95–110 dB |
| Planer | 100–110 dB |
Wear earmuffs or foam earplugs whenever you use power tools. Even brief, unprotected exposure to sounds above 100 dB can cause damage.
When and Why to Use a Dust Mask
Fine wood dust is invisible to the naked eye, but it settles deep in your lungs. Over time, regular exposure causes respiratory problems. Some wood species are especially hazardous:
- Western red cedar can cause asthma-like reactions
- Walnut dust causes skin and respiratory irritation
- Exotic hardwoods (like cocobolo and rosewood) can cause severe allergic reactions
When to wear a dust mask:
- Sanding (especially power sanding)
- Sawing, especially with power saws that produce fine dust
- Routing or planing
- Sweeping up sawdust
- Applying finishes, stains, or chemical strippers (use a respirator with chemical cartridges, not just a dust mask)
A basic N95 dust mask filters out most wood dust particles. For finishing work with chemical fumes, you need a half-face respirator with organic vapor cartridges.
Req 1c — Totin' Chip
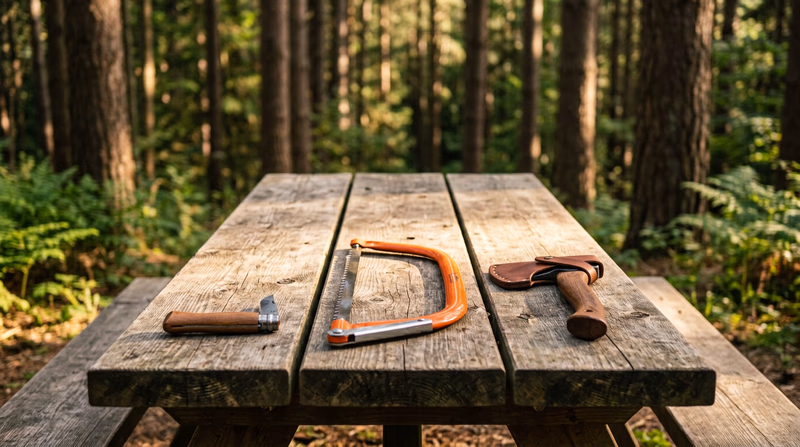
The Totin’ Chip is Scouting America’s certification that you have learned to safely handle and care for woods tools. Think of it as your “license” to use saws, axes, and knives. You cannot complete the Woodwork merit badge without it.
What Is the Totin’ Chip?
The Totin’ Chip is a recognition that proves you understand the safe use, care, and storage of woods tools including:
- Pocketknives and fixed-blade knives
- Hand saws (bow saws, crosscut saws, coping saws)
- Axes and hatchets
To earn it, you must demonstrate safe handling techniques and recite the Outdoor Code. Your Scoutmaster, assistant Scoutmaster, or another qualified leader will test you and sign off.
What You Need to Know
The Pledge
When you earn your Totin’ Chip, you agree to follow these rules:
- I will treat my knife, ax, and saw as I would a close friend — never misuse or abuse them.
- I will keep my knife, ax, and saw sharp, clean, and ready for use.
- I will follow the safety rules for each tool.
- I will follow the Outdoor Code.
Safe Knife Use
- Always cut away from your body.
- Close a folding knife when passing it to someone. Hand a fixed-blade knife handle-first.
- Establish a “blood circle” — extend your arm fully with the knife and rotate. No one should be within that circle while you are cutting.
- Never walk or run with an open knife.
- Use a cutting board or flat surface, not your lap or hand.
Safe Saw Use
- Wear safety glasses.
- Secure the wood with a clamp or have a partner hold it (with hands well clear of the cut line).
- Start the cut with a few gentle pull strokes to establish a groove.
- Let the saw do the work — do not force it.
- When nearly through a cut, slow down to prevent the wood from splintering or the saw from jerking.
Safe Ax and Hatchet Use
- Always check overhead and behind you for obstructions before swinging.
- Maintain a clear “ax yard” — at least two full arm-and-ax lengths in every direction.
- Chop at a 45-degree angle, not straight down.
- Never use an ax with a loose head.
- When carrying an ax, grip it just below the head with the blade facing away from you.
How to Earn It
Talk to your Scoutmaster about scheduling a Totin’ Chip training session. Many troops cover this during campouts or troop meetings. The process typically involves:
- Learning the safety rules for each tool category.
- Demonstrating proper use of a knife, saw, and ax under supervision.
- Showing how to clean, sharpen, and store each tool.
- Reciting the Outdoor Code.
Req 2a — From Tree to Lumber
Every piece of lumber in your workshop started as a living tree. Understanding how wood goes from forest to workbench helps you choose the right materials and appreciate the natural resource you are working with.
How Timber Is Grown
Trees used for lumber are grown in two main ways:
Natural forests contain a mix of species that grow on their own over decades or centuries. Hardwoods like oak, walnut, and cherry often come from managed natural forests where foresters selectively harvest mature trees while leaving younger ones to grow.
Tree plantations (also called tree farms) grow a single species in rows, much like a crop. Softwoods like pine, spruce, and Douglas fir are commonly plantation-grown because they mature relatively quickly — a pine tree can be ready for harvest in 25 to 30 years, while a hardwood like oak may take 60 to 100 years.
Harvesting Timber
When trees reach maturity, professional loggers harvest them using several methods:
- Selective cutting removes only mature or specific trees, leaving the rest of the forest intact. This is common for high-value hardwoods.
- Clear-cutting removes all trees in a defined area. It is used for plantation-grown softwoods and is followed by replanting.
- Shelterwood cutting removes trees in stages over several years, allowing natural seedlings to grow under the shelter of remaining trees.
After felling, logs are “bucked” (cut to manageable lengths), loaded onto trucks, and transported to a sawmill.

Milling Lumber
At the sawmill, logs are transformed into usable lumber through a series of steps:
- Debarking — The bark is stripped off using rotating blades or high-pressure water.
- Primary breakdown — A large bandsaw or circular saw cuts the log into thick slabs called “cants.”
- Resawing — Cants are cut into boards of standard thicknesses.
- Edging — Rough, irregular edges are trimmed to create straight-sided boards.
- Trimming — Boards are cut to standard lengths.
The sawyer (the person operating the main saw) makes critical decisions about how to cut each log to maximize the amount of usable lumber and minimize waste.
Plain-Sawn vs. Quarter-Sawn
The angle at which a log is cut affects the appearance, strength, and stability of the resulting boards:
- Plain-sawn (also called flat-sawn) is the most common and economical method. The log is cut in parallel slices, producing boards with cathedral-shaped grain patterns. These boards are more likely to warp and cup as they dry.
- Quarter-sawn cuts the log into quarters first, then slices each quarter perpendicular to the growth rings. This produces straight, parallel grain lines and boards that are more stable and resistant to warping — but more expensive because the process wastes more wood.
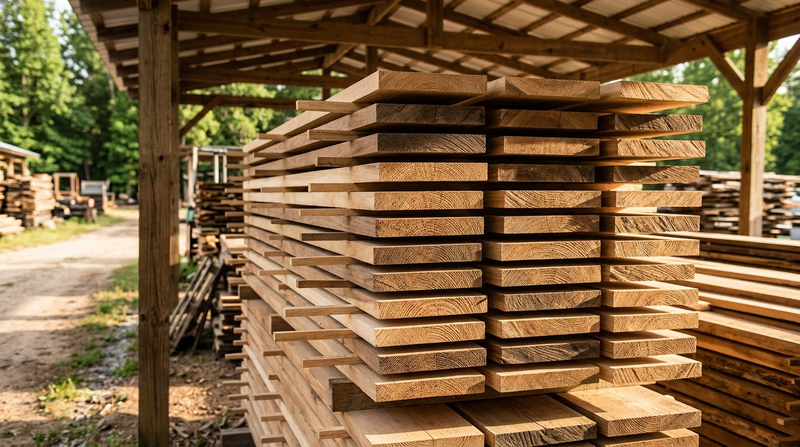
Curing and Seasoning Lumber
Freshly cut wood (called “green” wood) contains a large amount of water — sometimes more than half its weight. Before it can be used in woodworking, this moisture must be removed through a process called seasoning or curing.
Air Drying
Boards are stacked outdoors with spacers (called “stickers”) between each layer to allow air to circulate. Air drying is slow — it can take one year per inch of board thickness — but it is gentle on the wood and produces excellent results.
Kiln Drying
Lumber is placed inside a large oven (a kiln) where temperature and humidity are carefully controlled. Kiln drying takes days to weeks instead of months to years. Most commercially available lumber is kiln-dried.
The target moisture content for indoor furniture and cabinetwork is typically 6 to 8 percent. For outdoor projects, 12 to 15 percent is acceptable.
Grading Lumber
Lumber is graded by quality. Hardwood and softwood use different grading systems.
Hardwood Grades (National Hardwood Lumber Association)
| Grade | Description |
|---|---|
| FAS (First and Seconds) | Highest quality. Long, wide boards with very few defects. |
| Select | One good face, minor defects on the back. |
| #1 Common | Shorter clear sections. Good for smaller projects. |
| #2 Common | More knots and defects. Suitable for rustic projects. |
Softwood Grades
Softwood is typically graded as Select (A through D, with A being nearly perfect) or Common (#1 through #5, with #1 being the best).
Sizing Lumber
Lumber sizes are expressed in nominal dimensions, which are the rough-cut size before the wood is planed smooth. The actual size is smaller:
| Nominal Size | Actual Size |
|---|---|
| 1 × 4 | ¾" × 3½" |
| 1 × 6 | ¾" × 5½" |
| 2 × 4 | 1½" × 3½" |
| 2 × 6 | 1½" × 5½" |
| 4 × 4 | 3½" × 3½" |
Hardwood lumber is sold by thickness in quarter-inch increments: 4/4 (four-quarter, meaning 1 inch rough), 5/4 (1¼ inch), 6/4 (1½ inch), 8/4 (2 inches), and so on. After planing, a 4/4 board ends up about 13/16 inch thick.
U.S. Forest Service — Forest Inventory and Analysis Data and reports on the status and trends of American forests, including timber growth and harvest statistics. Link: U.S. Forest Service — Forest Inventory and Analysis — https://www.fs.usda.gov/research/programs/fiaReq 2b — Wood Identification
Different woods have different personalities. Some are hard and strong, perfect for furniture that will last generations. Others are soft and easy to carve, ideal for a beginner’s first project. Learning to identify wood species by sight, touch, and even smell is a fundamental woodworking skill.
Hardwoods vs. Softwoods
Before diving into specific species, understand the two main categories:
Hardwoods come from deciduous trees (trees that lose their leaves in fall). Examples: oak, maple, walnut, cherry. They are generally denser, more durable, and more expensive. They are the go-to choice for furniture and cabinetry.
Softwoods come from coniferous trees (evergreens with needles and cones). Examples: pine, cedar, spruce, Douglas fir. They are lighter, easier to work with hand tools, and more affordable. They are widely used for construction, outdoor projects, and learning.
Six Woods Worth Knowing
Here are six species that are widely available, commonly used in woodworking, and good candidates for your wood block collection. You are not limited to these — your counselor may suggest other species that are locally available.
1. White Oak
Category: Hardwood Color: Light tan to medium brown Grain: Prominent, with distinctive ray flecks in quarter-sawn boards Key qualities: Very strong, rot-resistant, heavy, and durable. Takes stain and finishes beautifully. Best uses: Furniture, flooring, outdoor projects, boat building, barrel making (whiskey and wine barrels are traditionally made from white oak) Working notes: Hard on tool edges. Pre-drill for screws to prevent splitting.
2. Hard Maple (Sugar Maple)
Category: Hardwood Color: Creamy white to light golden Grain: Fine and even, sometimes with “bird’s eye” or “curly” figure Key qualities: Extremely hard and dense. Resists denting and wear. Finishes to a smooth, almost glass-like surface. Best uses: Cutting boards, butcher blocks, workbenches, flooring, bowling alleys, musical instruments Working notes: Dulls tools quickly. Glues well. Does not absorb stain evenly (use gel stain or clear finish to show off the natural color).
3. Black Walnut
Category: Hardwood Color: Rich dark chocolate brown heartwood with lighter sapwood Grain: Straight to slightly wavy, with a luxurious natural luster Key qualities: Moderately hard. Naturally beautiful without stain. Machines and carves well for a hardwood. Naturally resistant to decay. Best uses: Fine furniture, gun stocks, decorative boxes, turned bowls, cutting boards (often paired with maple for contrast) Working notes: Dust can cause skin and respiratory irritation — always wear a dust mask when sanding walnut.
4. Eastern White Pine
Category: Softwood Color: Creamy white to light yellow Grain: Straight and even, with small tight knots Key qualities: Very soft, lightweight, and easy to work with hand tools. Affordable and widely available. Takes paint well. Best uses: Shelving, trim, boxes, beginner projects, painted furniture, carving Working notes: Dents easily. Not great for tabletops or surfaces that take abuse. Can be “gummy” — pine pitch can clog saw teeth.
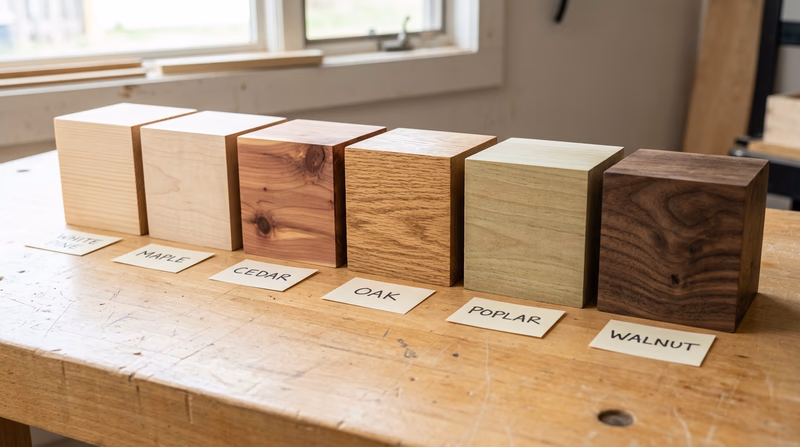
5. Western Red Cedar
Category: Softwood Color: Reddish-brown to pinkish Grain: Straight and even Key qualities: Lightweight, naturally rot-resistant, and insect-resistant. Has a distinctive pleasant aroma. Very dimensionally stable (resists warping and swelling). Best uses: Outdoor furniture, deck boards, fence posts, garden beds, closet lining, shingles Working notes: Very soft — scratches and dents easily. Cedar dust can cause respiratory irritation in some people.
6. Poplar (Tulip Poplar)
Category: Hardwood Color: Pale cream to greenish-yellow (heartwood sometimes has purple or dark green streaks) Grain: Straight and uniform Key qualities: One of the softest hardwoods — easy to work with both hand and power tools. Inexpensive. Takes paint exceptionally well. Glues and screws easily. Best uses: Painted furniture, drawer sides, interior trim, jigs and shop fixtures, practice projects Working notes: Not attractive enough for clear-finished fine furniture (the green tint is unusual). But it is one of the best learning woods because it is cheap, forgiving, and available everywhere.
How to Build Your Collection
Wood Block Collection Tips
Getting your six samples ready- Visit a local lumberyard or hardwood dealer: Many will give or sell you offcuts and scraps perfect for a collection.
- Ask a local woodworker: Experienced woodworkers often have scrap bins full of labeled species.
- Cut blocks to a consistent size: 3" × 5" × ¾" works well — big enough to see grain detail, small enough to carry.
- Sand one face smooth and leave one face rough: This shows both the working surface and the raw texture.
- Label each block clearly: Include the species name, whether it is a hardwood or softwood, and one or two key uses.
- Apply a clear finish to one end: This shows how the wood looks when finished versus raw.

Req 3a — Tool Care & Storage
Good tools, properly maintained, can last a lifetime — or even multiple lifetimes. Many woodworkers use hand planes and chisels that are 50 to 100 years old. The key is knowing how to care for them, use them correctly, and store them so they stay sharp and rust-free.
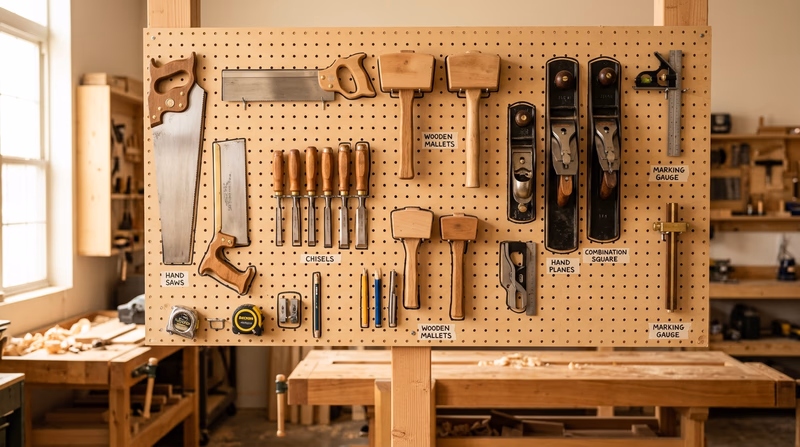
Essential Hand Tools
Here are the core hand tools you will use for this merit badge and how to care for each one.
Hand Saws
Types you may use: crosscut saw, rip saw, coping saw, back saw, dovetail saw
Proper use:
- Match the saw to the task — crosscut saws cut across the grain, rip saws cut along the grain.
- Start cuts with a few light pull strokes to establish a groove (called a “kerf”).
- Use the full length of the blade with long, smooth strokes.
- Let the saw do the work — do not force it.
Care and storage:
- Wipe the blade with a light coat of oil (camellia oil or paste wax) after use to prevent rust.
- Hang saws on pegs or in a saw till — never toss them into a toolbox where the teeth can be damaged.
- If teeth become dull, have them professionally sharpened or learn to sharpen them yourself with a saw file.
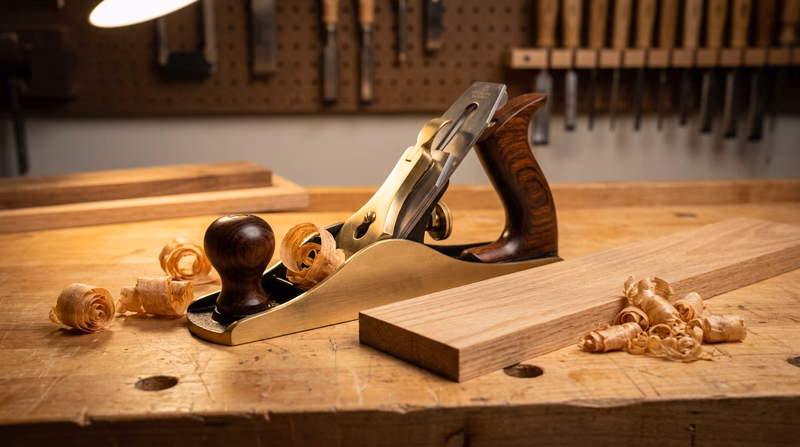
Planes
Types you may use: block plane, jack plane, smoothing plane
Proper use:
- Adjust the blade depth so it takes thin, even shavings — not thick chunks.
- Plane in the direction of the grain (look at the edge of the board to see which way the grain runs).
- Apply even downward pressure with both hands.
Care and storage:
- Retract the blade before setting the plane down.
- Never place a plane sole-down on a metal bench — lay it on its side.
- Wipe the sole and blade with oil to prevent rust.
- Store in a dry location, preferably in a plane till or on a shelf with the blade retracted.
Chisels
Types you may use: bench chisels (¼", ½", ¾", 1")
Proper use:
- Always chisel away from your body.
- Use a mallet (wooden or rubber) to drive the chisel — never a metal hammer, which damages the handle.
- Make light cuts, removing small amounts of material at a time.
- Keep your free hand behind the cutting edge at all times.
Care and storage:
- Protect the cutting edge with blade guards or a chisel roll.
- Wipe blades with oil after use.
- Never use chisels as pry bars, scrapers, or screwdrivers.
Hammers and Mallets
Proper use:
- Grip near the end of the handle for maximum control and power.
- Strike squarely — glancing blows bend nails and can send a hammer head flying.
- Use a nail set to drive finish nails below the wood surface without denting the surrounding area.
Care and storage:
- Check that the head is tight on the handle before every use. A loose head is extremely dangerous.
- Store hanging on a rack or standing upright — never lying on a bench where it can roll off.
Brace and Bit
A brace is a hand-powered drill that uses a cranking motion. Bits are the cutting attachments.
Proper use:
- Secure the workpiece in a vise or with clamps.
- Start slowly to establish the hole, then crank with steady, even pressure.
- When drilling through, place a scrap board underneath to prevent blowout on the exit side.
Care and storage:
- Keep bits in a roll or indexed case — loose bits in a drawer get dull and damaged.
- Oil the chuck mechanism periodically.
- Wipe bits with oil to prevent rust.
Measuring and Marking Tools
Accurate projects start with accurate measurements. These tools do not cut wood, but they are just as important as those that do.
- Tape measure — For rough measurements. Keep the blade clean and the spring mechanism free of sawdust.
- Combination square — For marking 90° and 45° angles and checking surfaces for square. Keep the blade and stock free of debris.
- Marking gauge — For scribing parallel lines along a board’s edge. Keep the pin or blade sharp.
- Pencil — A sharp #2 pencil is one of the most important tools in the shop. Keep several on hand.
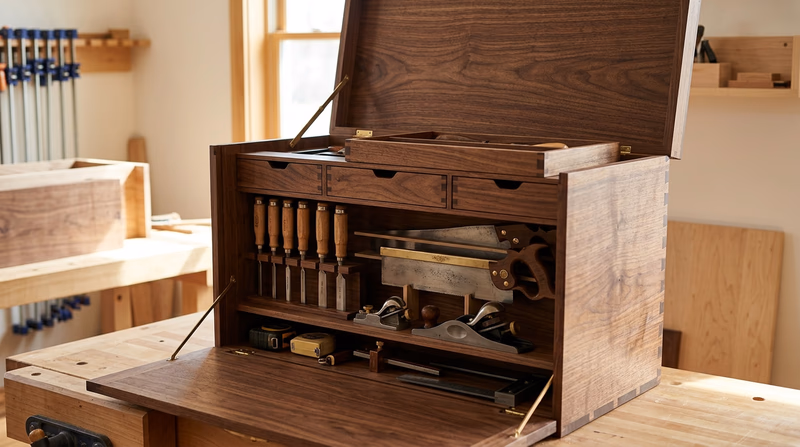
General Storage Principles
Tool Storage Best Practices
Keep your tools ready for the next project- Store tools in a dry environment: Moisture is the enemy — it causes rust on metal and mildew on wooden handles.
- Give every tool a home: Pegboard, tool racks, drawer organizers, or a tool chest. When you know where a tool belongs, you will notice immediately if it is missing.
- Protect cutting edges: Use blade guards, sheaths, or chisel rolls. Cutting edges that bump against each other in a drawer get dull fast.
- Oil metal surfaces: A thin coat of paste wax, camellia oil, or light machine oil prevents rust.
- Keep tools clean: Wipe sawdust, pitch, and glue off tools at the end of each session.
Req 3b — Sharpening
A sharp tool cuts cleanly, requires less effort, and is actually safer to use than a dull one. Sharpening is a skill that every woodworker must learn, and once you get the feel for it, you will find it surprisingly satisfying.
Why Sharp Matters
A dull chisel or plane blade tears wood fibers instead of slicing them cleanly. The result is rough surfaces, splintered edges, and a lot of frustration. Worse, a dull tool requires more force to push through wood, which makes slips more likely.
A sharp edge, by contrast, glides through wood with minimal effort. The shavings curl away in thin ribbons, the surface left behind is smooth, and you have far more control.
Sharpening Methods
There are several ways to sharpen woodworking tools. You do not need expensive equipment to get a razor-sharp edge.
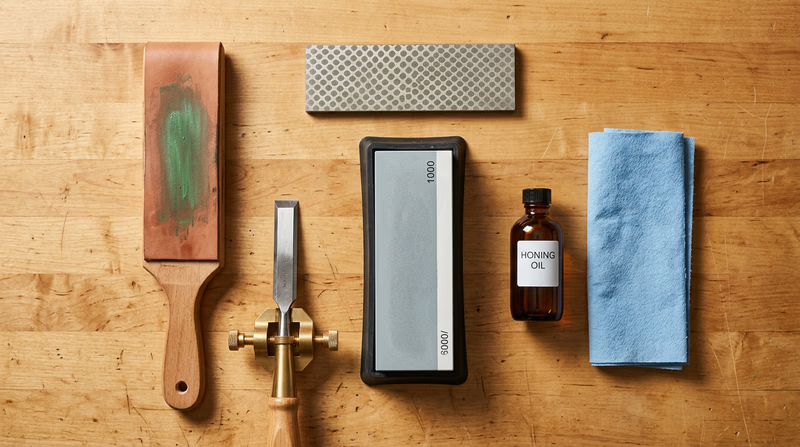
Sharpening Stones (Whetstones)
Sharpening stones are the most traditional method. They come in several types:
- Oil stones (Arkansas stones, India stones) — Use with honing oil. Slow-cutting but long-lasting.
- Water stones (Japanese water stones) — Use with water. Cut faster than oil stones but wear down more quickly and need periodic flattening.
- Diamond stones — Metal plates embedded with industrial diamonds. Never need flattening. Cut very fast.
Each type comes in multiple grits. You start with a coarser grit to establish the edge and progress to finer grits to polish it.
| Grit | Purpose |
|---|---|
| 220–400 | Repairing damaged or very dull edges |
| 800–1000 | Shaping and refining the edge (medium) |
| 3000–6000 | Honing to a fine, sharp edge |
| 8000+ | Polishing to a mirror finish (optional) |
Sandpaper Method
Tape sheets of wet/dry sandpaper to a flat surface (like a piece of glass or granite tile). This is an inexpensive way to get started:
- Start with 220-grit to flatten the back of the blade.
- Progress through 400, 800, 1000, and 1500 grit.
- Finish with 2000-grit for a polished edge.
The key advantage of this method is cost — a few sheets of sandpaper and a flat surface are all you need.
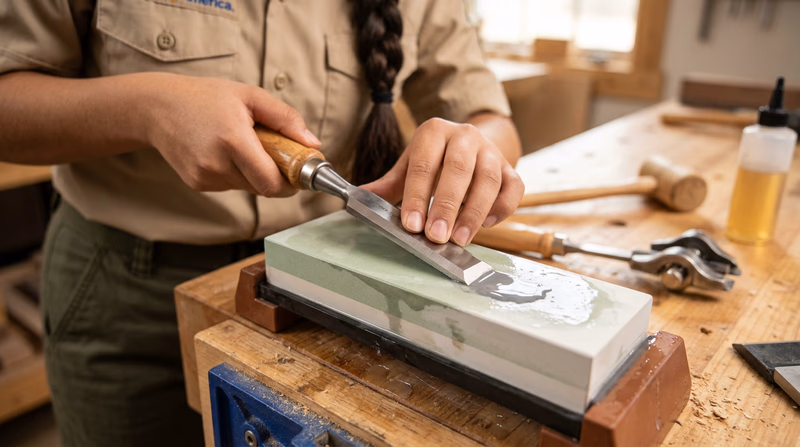
How to Sharpen a Chisel
This step-by-step process works for bench chisels and plane blades:
Step 1: Flatten the Back
The back (flat side) of the blade must be perfectly flat. Place the blade flat on your stone or sandpaper and rub it back and forth with even pressure. You only need to do this once — after the back is flat, it stays flat.
Step 2: Set the Bevel Angle
Most bench chisels have a bevel angle of 25 degrees. Hold the chisel bevel-down on the stone at this angle. You can use a honing guide (a small jig that clamps the blade at a consistent angle) or learn to hold the angle freehand.
Step 3: Sharpen the Bevel
With the bevel flat on the stone, push the blade forward along the stone in smooth, even strokes. Apply moderate pressure on the forward stroke and light pressure on the return. Work through progressively finer grits.
Step 4: Remove the Burr
Sharpening creates a tiny curl of metal (a “burr” or “wire edge”) on the flat side. Flip the blade over, lay it flat on the stone, and take a few light strokes to remove it.
Step 5: Test the Edge
A sharp edge will:
- Slice cleanly through a piece of paper or the edge of a sheet of newsprint
- Shave hair off your arm (be careful)
- Catch on your thumbnail when you lightly drag it across the edge
How to Sharpen a Hand Plane Blade
The process is nearly identical to sharpening a chisel:
- Remove the blade from the plane (note how it is assembled so you can put it back).
- Flatten the back on your finest stone (if not already done).
- Sharpen the bevel at 25 degrees (the primary bevel).
- Optionally, add a “micro-bevel” at 30 degrees — just a few strokes on the finest stone at a slightly steeper angle. This creates a tiny secondary edge that is extremely sharp and quick to touch up.
- Remove the burr.
- Reassemble the blade in the plane and test on a piece of scrap wood.
Maintaining the Edge
Once your tools are sharp, keep them that way:
- Strop frequently — A leather strop (or even a piece of cardboard loaded with honing compound) realigns the microscopic edge between sharpenings. A few passes on a strop can keep a blade sharp for much longer between full sharpening sessions.
- Sharpen at the first sign of dullness — Do not wait until a tool is completely dull. A few passes on a fine stone is all it takes to restore a slightly dulled edge. Waiting means starting over from coarser grits.
- Protect edges during storage — Use blade guards and never let cutting edges contact other metal tools.
Req 4 — Build with Basic Tools
This is where everything you have learned comes together. You will take raw lumber, square it up, cut it to size, drill holes, and assemble a finished project — all using hand tools. No power tools needed.
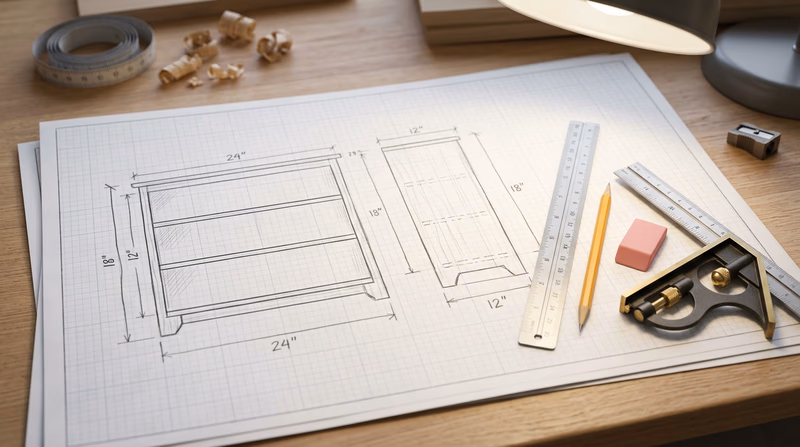
Understanding Working Drawings
Before you cut a single piece of wood, you need a plan. Working drawings are the blueprints for your project. They show every part, every measurement, and how the pieces fit together.
A basic working drawing includes:
- Front view — What the project looks like from the front
- Side view — What it looks like from the side
- Top view (plan view) — What it looks like from above
- Dimensions — Every measurement labeled in inches or fractions of inches
- Materials list (also called a “bill of materials” or “cut list”) — A table listing every part, its dimensions, quantity, and the species of wood
You do not need to be an artist. Neat, accurate drawings on graph paper work perfectly. Use a ruler and a pencil, and label everything clearly.
Squaring Lumber
“Squaring” means making a piece of lumber flat, straight, and with edges at exactly 90 degrees. This is the foundation of accurate woodworking. If your lumber is not square, nothing you build from it will fit together properly.
The Squaring Process
- Choose a face — Pick the flattest, best-looking face of the board.
- Plane it flat — Use a jack plane with long, overlapping strokes along the grain. Check with a straightedge laid across the width and along the length. When light no longer passes underneath, the face is flat.
- Plane the edge — With the flat face against the fence of your plane (or held against a shooting board), plane one edge straight and square to the face. Check with a combination square.
- Mark the width — Using a marking gauge set to your desired width, scribe a line along the length of the board from the planed edge.
- Plane to the line — Plane the opposite edge down to the scribed line.
- Mark the thickness — Set the marking gauge to your desired thickness and scribe a line around all four sides.
- Plane to thickness — Flip the board and plane the second face down to the scribed lines.
Cutting to Size
With your lumber squared, transfer measurements from your working drawings to the wood:
- Measure from a squared end and mark with a pencil and combination square.
- Mark a clear, straight cut line across the board using a square.
- Mark an “X” on the waste side (the piece you are cutting off) so you know which side of the line to cut on.
- Secure the board in a vise or on sawhorses with clamps.
- Cut on the waste side of the line — the saw kerf (the width of the cut) should fall entirely in the waste material.
Drilling with a Brace and Bit
The brace and bit is a hand-powered drill that gives you excellent control over hole placement and depth.
- Mark the hole location with an awl or nail punch (this gives the bit a starting point).
- Clamp the workpiece securely.
- Position the bit point on the mark and hold the brace vertical.
- Crank the handle with steady, even pressure.
- To prevent blowout on the exit side, either drill from both sides (stop when the point breaks through, flip the board, and finish from the other side) or place a scrap board underneath.
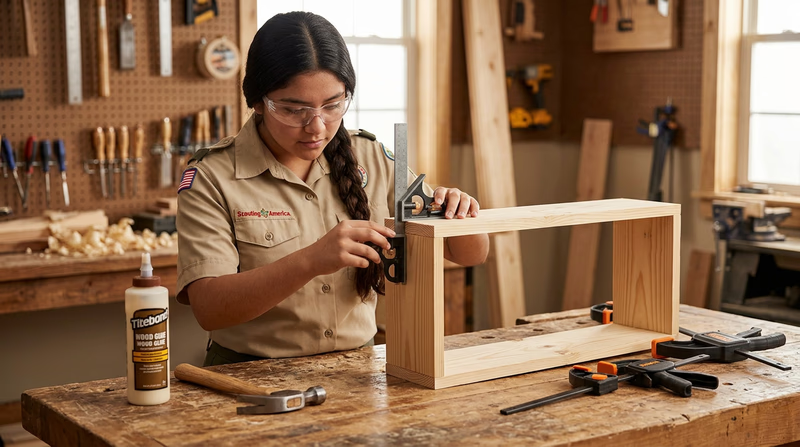
Assembly
With all parts cut and drilled, dry-fit everything first — assemble without glue or fasteners to check that everything fits.
Assembly Checklist
Before committing to glue or nails- All parts are cut to correct length: Check measurements against your working drawings.
- Joints fit snugly: Parts should come together without forcing or large gaps.
- The project sits flat and square: Check with a combination square and on a known-flat surface.
- You have all needed supplies ready: Glue, nails, clamps, damp cloth for glue squeeze-out.
When you are satisfied with the dry fit:
- Apply wood glue to mating surfaces (a thin, even coat on both surfaces).
- Assemble the parts and clamp firmly.
- Check for square before the glue sets.
- Wipe away any glue that squeezes out with a damp cloth — dried glue does not accept stain.
- If using nails, drive them carefully and set the heads below the surface with a nail set.
Project Ideas
Your counselor may suggest a project, or you can choose your own. Here are some ideas that use all five required tools (saw, plane, hammer, brace and bit):
- Simple bookshelf — Two sides, a top, a bottom, and one or two shelves
- Tool tote — An open-top box with a handle, great for carrying garden tools
- Step stool — A small stool with legs, stretchers, and a top
- Birdhouse — Sized to attract a specific local species
- Magazine rack — A standing rack with angled sides
Req 5 — Design Your Own Project
This is the most creative requirement in the Woodwork merit badge. Instead of following someone else’s plan, you are the designer. You will imagine something useful, draw it out, estimate the cost, build it, and track every hour and dollar along the way.
Choosing Your Project
Start by asking yourself a simple question: What do I need? The best projects solve a real problem or fill a real need. Look around your home, your room, your troop’s meeting space, or your school.
Some questions to spark ideas:
- Is there something I wish I had a place to store?
- Does my family need something for the house or yard?
- Could I build a gift for someone?
- Is there a piece of furniture that would be useful in my room?
- Could my troop use something for their meeting space or campouts?
Creating Working Drawings
Your working drawings are the blueprint for your project. They need to be detailed enough that someone else could build the project from your drawings alone.
What to Include
- Three-view drawing — Front, side, and top views. Each view shows different details about the shape and dimensions.
- Dimensions — Every measurement labeled clearly. Use fractions (like 3½") rather than decimals.
- Detail views — Close-up drawings of joints, hardware placement, or other complex areas.
- Materials notes — Label what species of wood each part uses.
- Scale — Write the scale on the drawing (e.g., “1 square = 1 inch”).
Drawing Tips
- Use graph paper and a straightedge for clean, accurate lines.
- Draw to scale so proportions look right.
- Use standard drafting conventions: solid lines for visible edges, dashed lines for hidden edges.
- Erase mistakes cleanly — a confusing drawing leads to confusing cuts.
Materials List
Create a table listing every piece of wood and hardware you need:
| Part | Qty | Species | Dimensions | Cost |
|---|---|---|---|---|
| Side panel | 2 | Pine | ¾" × 10" × 30" | $8.50 |
| Shelf | 3 | Pine | ¾" × 9¼" × 24" | $9.00 |
| Back panel | 1 | Plywood | ¼" × 24" × 30" | $5.00 |
| Wood screws | 12 | — | #8 × 1¼" | $3.50 |
| Wood glue | 1 | — | 8 oz bottle | $4.00 |
| Sandpaper | 3 | — | 120, 150, 220 grit | $3.00 |
Add a subtotal at the bottom. Include everything — lumber, fasteners, glue, sandpaper, finish.
Tracking Time and Cost
Keep a simple log throughout your project. This teaches you to estimate future projects and understand the real cost of handmade goods.
Time Log Example
| Date | Activity | Hours |
|---|---|---|
| Mar 1 | Drew plans, made materials list | 1.5 |
| Mar 3 | Bought lumber, rough-cut parts | 2.0 |
| Mar 5 | Squared and planed all parts | 3.0 |
| Mar 8 | Cut joinery, dry fit | 2.5 |
| Mar 10 | Glue-up and assembly | 2.0 |
| Mar 12 | Sanding and finishing | 2.5 |
| Total | 13.5 |
Cost Tracking
Record the actual price you paid for each material. Save receipts. At the end, calculate your total materials cost and compare it to your original estimate.
The Build Process
With your drawings done and materials purchased, follow these steps:
- Rough-cut all parts slightly oversize (leave about ¼" extra on length and width).
- Square and dimension each part to final size using your plane, saw, and measuring tools.
- Cut joinery — any dadoes, rabbets, or notches your design requires.
- Dry-fit — Assemble everything without glue to check fit.
- Sand all parts before assembly (it is much easier to sand individual pieces than an assembled project).
- Assemble — Glue, clamp, and check for square.
- Final sanding — Sand any areas that need it after assembly.
- Apply finish — Paint, stain, polyurethane, or oil depending on your design.
Before You Call It Done
Final quality check- All joints are tight with no visible gaps.
- Surfaces are smooth to the touch — no rough spots, splinters, or tool marks.
- The project sits flat and does not wobble.
- All edges are slightly broken (sanded with a quick pass to remove sharpness).
- Finish is even with no drips, runs, or bare spots.
- The project matches your working drawings.

Req 6 — Advanced Projects
This requirement pushes your skills further. You will choose two of the five options below, each involving a different advanced technique. Read through all five before deciding — pick the two that excite you the most or that stretch your abilities in new directions.
Option A: Beveled or Rounded Edges
A bevel is an angled cut along an edge — instead of a sharp 90-degree corner, the edge slopes at an angle (commonly 30° or 45°). A rounded edge (also called a “roundover”) turns a sharp corner into a smooth curve.
Tools for Bevels and Roundovers
- Block plane set at an angle for small bevels
- Hand plane with a tilted fence for consistent bevel angles
- Spokeshave for rounded edges and curves
- Rasp and file for shaping curves, followed by sanding
- Router with a roundover bit (if power tools are available)
Project Ideas
- A cutting board with beveled edges for a comfortable grip
- A picture frame with a decorative beveled profile
- A serving tray with rounded edges for safe handling
- A wall shelf with a bullnose (fully rounded) front edge
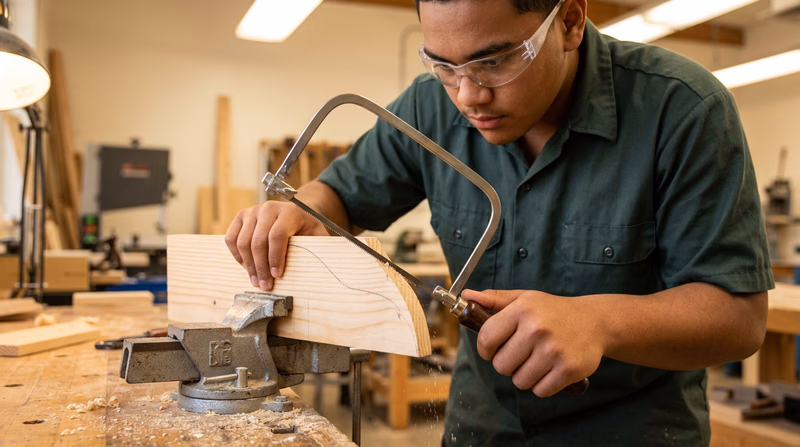
Option B: Curved or Incised Cuttings
Curved cutting means shaping wood along a curved line — think of the graceful legs of a chair or the arched top of a mirror frame. Incised cutting means carving a design into the surface of the wood without cutting all the way through.
Tools for Curves and Incising
- Coping saw — The go-to hand tool for cutting curves. Its thin, narrow blade can follow tight radius curves.
- Bow saw — For larger, gentler curves in thicker stock
- Chisels and gouges — For incised (carved) designs
- Rasp, file, and sandpaper — For smoothing curves after cutting
- Scroll saw (if power tools are available) — For intricate curved cuts
How to Cut a Curve
- Draw your curve on the wood (use a flexible ruler, French curve, or trace around a round object).
- Secure the workpiece in a vise.
- Cut on the waste side of the line with a coping saw, rotating the blade to follow the curve.
- Smooth the cut edge with a rasp, then a file, then sandpaper.
Project Ideas
- A decorative wall bracket with curved scrollwork
- A nameplate with incised lettering
- A small shelf with an arched front rail
- A bread board with curved handles cut into the ends
Option C: Miter, Dowel, or Mortise and Tenon Joints
These joints are the building blocks of fine woodworking. Each serves a different purpose and tests a different skill.
Miter Joints
A miter is a joint where two pieces meet at an angle — most commonly 45 degrees, forming a 90-degree corner. Picture frames are the classic example.
- Cut miters with a back saw and a miter box for accuracy.
- Miters look elegant but are weak on their own. Strengthen them with glue plus splines, dowels, or nails.
Dowel Joints
Dowel joints use round wooden pegs (dowels) inserted into matching holes in both pieces. They are strong, hidden from view, and relatively easy to make.
- Use a brace and bit or drill press to bore holes.
- Mark hole locations precisely using dowel centers (small metal points that transfer the mark from one piece to the other).
- Use fluted dowels — the grooves allow glue and air to escape.
Mortise and Tenon Joints
The mortise and tenon is one of the oldest and strongest joints in woodworking. A rectangular projection (the tenon) on one piece fits into a matching rectangular hole (the mortise) in the other.
- Cut the tenon with a back saw — saw the cheeks (sides) and shoulders.
- Cut the mortise by drilling out most of the waste with a brace and bit, then chiseling the sides flat and square.
- A well-fitted mortise and tenon should slide together snugly with hand pressure.
Project Ideas
- A picture frame (miter joints)
- A small table or stool (mortise and tenon)
- A box with dowel-joined corners
- A wall-mounted coat rack with doweled hooks
Option D: Hinged Cabinet or Box
Inset hinges (also called “mortised hinges”) sit flush with the surface of the wood instead of being screwed to the face. Installing them requires careful chisel work to cut a shallow recess (a “hinge mortise”) in both the door and the frame.
Installing Inset Hinges
- Position the hinge on the door edge and trace around it with a sharp pencil or marking knife.
- Set a marking gauge to the thickness of the hinge leaf and scribe a depth line.
- Use a sharp chisel to carefully remove wood within the traced outline to the scribed depth.
- Test-fit the hinge — it should sit perfectly flush with the surface.
- Mark and drill pilot holes for the screws.
- Repeat on the cabinet frame or box.
- Attach the hinges and test the door swing.
Project Ideas
- A keepsake or jewelry box with a hinged lid
- A small wall cabinet for a bathroom or workshop
- A storage chest or blanket box
- A desktop organizer with a hinged compartment
Option E: Service Project
This option combines your woodworking skills with service to others. Many organizations coordinate toy-building drives, and your skills can bring real joy to children who need it.
Toy-Building Tips
- Choose simple, safe designs with no small parts (choking hazard for young children).
- Sand all surfaces and edges until they are completely smooth — no splinters or sharp corners.
- Use non-toxic finishes only (food-safe mineral oil, beeswax, or non-toxic paint).
- Classic toy designs include: cars and trucks, pull toys, building blocks, puzzles, and animal figures.
Other Service Project Ideas
- Build shelving or storage for a food bank or clothing closet
- Construct raised garden beds for a community garden
- Build Little Free Libraries for neighborhood book exchanges
- Make birdhouses or bat boxes for a nature preserve

Req 7 — Woodworking Careers
Woodworking is not just a hobby — it is a career path with real demand, good pay, and deep personal satisfaction. Talking with a professional gives you a window into what working with wood every day actually looks like.
Finding Someone to Talk To
You need to find a cabinetmaker or finish carpenter willing to spend some time with you. Here are some ways to find one:
- Ask your merit badge counselor — they may know someone personally.
- Search online for local custom cabinet shops, furniture makers, or millwork companies.
- Visit a local lumberyard or hardwood dealer and ask who they sell to.
- Check with your school — shop teachers often have industry contacts.
- Look for woodworking guilds or clubs in your area — members are usually happy to talk with a young person interested in the craft.
Career Paths in Woodworking
Finish Carpenter
Finish carpenters install the visible woodwork in buildings — trim, molding, doors, windows, staircases, and built-in cabinets. Their work requires precision because every joint and surface is visible in the finished space.
- Training: Many start as general carpenter apprentices and specialize over time.
- Work environment: Construction sites (new homes and renovations), sometimes a shop for custom millwork.
- Skills needed: Precision measuring, miter cutting, coping joints, reading blueprints, patience.
Cabinetmaker
Cabinetmakers design and build cabinets, vanities, shelving systems, and custom furniture. They work primarily in a shop, using both hand tools and power machinery.
- Training: Apprenticeships, trade school programs, or on-the-job training under an experienced maker.
- Work environment: A dedicated woodworking shop with stationary power tools (table saw, jointer, planer, drill press).
- Skills needed: Design, joinery, finishing, machine operation, client communication.
Furniture Maker
Furniture makers create one-of-a-kind or small-batch pieces — tables, chairs, desks, beds. Some focus on traditional handcraft, others on modern design.
- Training: Craft schools (like the Center for Furniture Craftsmanship in Maine), apprenticeships, or self-taught through years of practice.
- Work environment: Personal shop or small studio.
- Skills needed: Design, hand tool mastery, wood selection, finishing, business management.
Woodworking Instructor
Teaching woodworking — at schools, community colleges, maker spaces, or private workshops — is a growing field as more people discover the satisfaction of working with their hands.
Questions to Ask
When you meet with a cabinetmaker or finish carpenter, use these questions as a starting point:
Interview Questions
Topics to cover in your conversation- How did you get started in woodworking? What was your training path?
- Did you go through a formal apprenticeship? How long was it?
- What does a typical workday look like for you?
- What are your usual work hours? Do you work weekends?
- What is the pay range for someone starting out versus someone with experience?
- Are woodworkers in this area part of a union? What are the benefits of union membership?
- What do you enjoy most about your work?
- What is the most challenging part of the job?
- What advice would you give someone my age who is interested in woodworking as a career?
- How has technology (CNC machines, CAD software) changed your work?
What You Might Learn
Training and Apprenticeships
Most professional woodworkers learn through some combination of formal education and hands-on apprenticeship. Trade schools and community colleges offer programs in cabinetmaking, carpentry, and woodworking technology. Apprenticeships typically last 3 to 4 years and combine classroom instruction with paid on-the-job training under an experienced craftsperson.
Pay Rates
According to the U.S. Bureau of Labor Statistics, median annual wages for woodworkers and cabinetmakers range from approximately $35,000 to $55,000, with experienced specialists and shop owners earning more. Finish carpenters with union membership often earn at the higher end of this range.
Union Organization
In many areas, carpenters (including finish carpenters) are represented by the United Brotherhood of Carpenters and Joiners of America (UBC). Union membership typically provides:
- Negotiated wage scales
- Health insurance and retirement benefits
- Access to apprenticeship programs
- Job placement assistance

Extended Learning
A. Congratulations
You have earned the Woodwork merit badge — and more importantly, you have gained a skill that will serve you for the rest of your life. You can now identify wood species, sharpen and maintain tools, read and create working drawings, and build projects from raw lumber. That is a foundation many adults wish they had. What follows are ways to keep growing as a woodworker long after the badge is complete.
B. Wood Finishing — The Final Touch
A well-built project deserves a great finish. The finish you choose affects how your project looks, feels, and holds up over time.
Types of Finishes
Penetrating finishes soak into the wood fibers rather than sitting on the surface. They are the easiest to apply and repair.
- Danish oil — A blend of oil and varnish. Apply with a rag, wipe off the excess, let it cure. Gives wood a warm, natural look with moderate protection. Great for furniture and cutting boards.
- Boiled linseed oil — A traditional finish that darkens wood slightly and brings out the grain. Takes longer to cure (24 to 48 hours between coats) but produces a beautiful hand-rubbed look.
- Tung oil — Extracted from the seeds of the tung tree. Dries harder than linseed oil and provides better water resistance. Excellent for tabletops.
Film finishes build up a protective layer on the surface of the wood. They provide more protection but are harder to repair if damaged.
- Polyurethane — Very durable, available in water-based (dries fast, stays clear) and oil-based (more durable, slight amber tone). Apply with a brush or wipe-on.
- Shellac — Made from lac insect secretions dissolved in alcohol. Dries extremely fast, polishes to a beautiful sheen, easy to repair. Not resistant to water or alcohol.
- Lacquer — Professional-grade finish sprayed on in thin coats. Very durable and beautiful but requires proper ventilation and spray equipment.
Application Tips
- Sand to at least 220-grit before applying any finish.
- Remove all dust with a tack cloth or damp rag before finishing.
- Apply thin coats — multiple thin coats look and perform better than one thick coat.
- Sand lightly between coats with 320-grit sandpaper for the smoothest result.
- Always work in a well-ventilated area and follow the finish manufacturer’s safety instructions.

C. Hand-Cut Joinery — The Heart of the Craft
Machine-cut joints are precise and efficient, but hand-cut joints connect you to centuries of woodworking tradition. Learning to cut joints by hand develops your tool skills, your patience, and your understanding of how wood works.
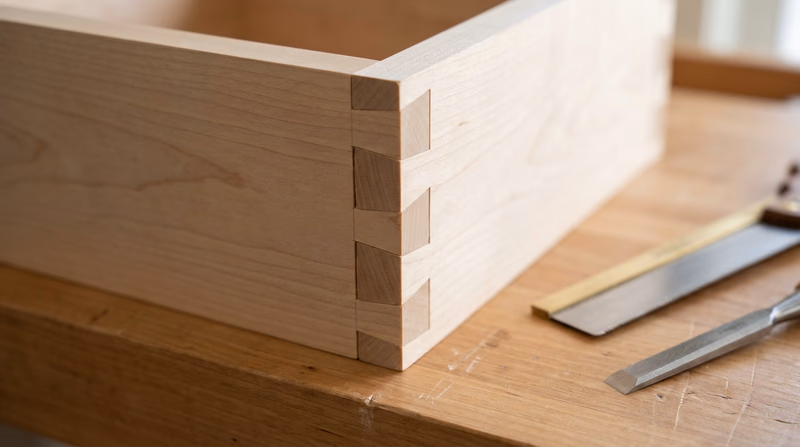
Dovetail Joints
The dovetail is the hallmark of a skilled woodworker. Its interlocking fan-shaped “tails” and “pins” create a joint that is both mechanically strong and visually stunning. Dovetails are the traditional joint for drawer construction.
To cut a dovetail by hand, you need:
- A dovetail saw (a small back saw with fine teeth)
- A sharp chisel (¼" and ½")
- A marking gauge
- A dovetail marker or sliding bevel set to the correct angle (1:6 for softwoods, 1:8 for hardwoods)
The process takes patience and practice. Your first dovetails may have gaps — that is normal. Keep at it. By your fifth or sixth attempt, you will see dramatic improvement.
Box Joints (Finger Joints)
Box joints look like interlocking fingers. They are simpler to cut than dovetails and provide excellent glue surface area. A well-fitted box joint is very strong and has a distinctive, modern appearance.
Half-Lap Joints
Two pieces overlap each other, each with half its thickness removed where they cross. Half-laps are easy to cut, surprisingly strong when glued, and useful for face frames and furniture construction.
D. Woodworking in the Digital Age
Modern technology has expanded what woodworkers can do without replacing the fundamentals you have learned.
Computer-Aided Design (CAD)
Free software like SketchUp, Fusion 360, and FreeCAD lets you design projects in 3D on your computer. You can rotate your design, check dimensions, and even simulate how joints fit together before cutting a single piece of wood. Many professional shops now design exclusively in CAD.
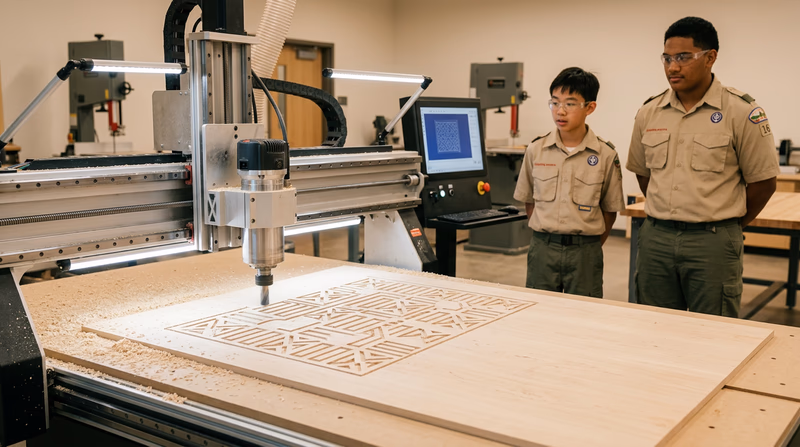
CNC Routers
Computer Numerical Control (CNC) routers follow digital toolpaths to cut, carve, and shape wood with extreme precision. Community maker spaces often have CNC machines available for members to use. A CNC router can cut complex curves, carve signs, and produce identical parts in large quantities.
Laser Cutters and Engravers
Laser cutters can cut thin wood (up to about ¼ inch) along intricate paths, and laser engravers burn detailed designs into wood surfaces. These tools are increasingly available at libraries, maker spaces, and school fab labs.
E. Real-World Experiences
Here are ways to keep building your woodworking skills beyond the merit badge:
Local Maker Spaces Find a maker space near you with shared woodworking tools, CNC machines, and laser cutters. Many offer classes and open shop hours for members. Link: Local Maker Spaces — https://www.makerspaces.com/makerspace-directory/ Habitat for Humanity Volunteer to build homes with Habitat for Humanity. You will gain real-world carpentry experience while helping families in need. Link: Habitat for Humanity — https://www.habitat.org/volunteer Woodworking Shows and Competitions Attend regional and national woodworking shows to see demonstrations by master craftspeople, try new tools, and get inspired by competition entries. Link: Woodworking Shows and Competitions — https://www.woodworkingnetwork.com/events State and County Fairs Many state and county fairs have woodworking competitions. Enter a project you have built and get feedback from experienced judges. Link: State and County Fairs — https://www.fairsandexpos.com/ Scout Woodworking Service Projects Plan a woodworking-focused Eagle Scout service project — build Little Free Libraries, park benches, or storage systems for a community organization. Link: Scout Woodworking Service Projects — https://www.scouting.org/awards/service-project/