Req 4 — Build with Basic Tools
This is where everything you have learned comes together. You will take raw lumber, square it up, cut it to size, drill holes, and assemble a finished project — all using hand tools. No power tools needed.
Understanding Working Drawings
Before you cut a single piece of wood, you need a plan. Working drawings are the blueprints for your project. They show every part, every measurement, and how the pieces fit together.
A basic working drawing includes:
- Front view — What the project looks like from the front
- Side view — What it looks like from the side
- Top view (plan view) — What it looks like from above
- Dimensions — Every measurement labeled in inches or fractions of inches
- Materials list (also called a “bill of materials” or “cut list”) — A table listing every part, its dimensions, quantity, and the species of wood
You do not need to be an artist. Neat, accurate drawings on graph paper work perfectly. Use a ruler and a pencil, and label everything clearly.
Squaring Lumber
“Squaring” means making a piece of lumber flat, straight, and with edges at exactly 90 degrees. This is the foundation of accurate woodworking. If your lumber is not square, nothing you build from it will fit together properly.
The Squaring Process
- Choose a face — Pick the flattest, best-looking face of the board.
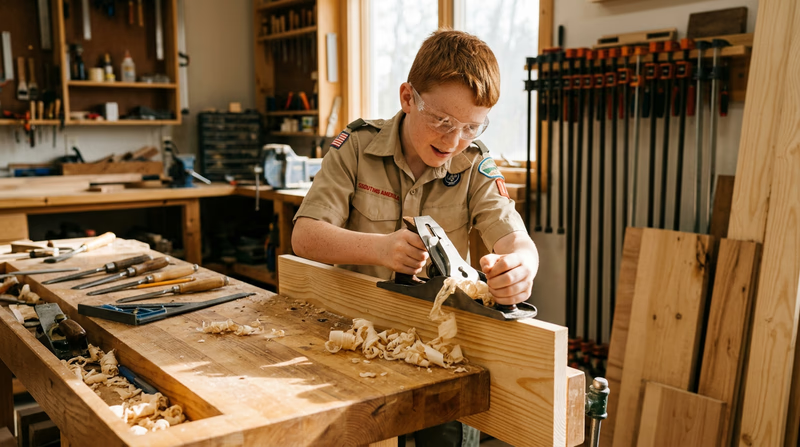
- Plane it flat — Use a jack plane with long, overlapping strokes along the grain. Check with a straightedge laid across the width and along the length. When light no longer passes underneath, the face is flat.
- Plane the edge — With the flat face against the fence of your plane (or held against a shooting board), plane one edge straight and square to the face. Check with a combination square.
- Mark the width — Using a marking gauge set to your desired width, scribe a line along the length of the board from the planed edge.
- Plane to the line — Plane the opposite edge down to the scribed line.
- Mark the thickness — Set the marking gauge to your desired thickness and scribe a line around all four sides.
- Plane to thickness — Flip the board and plane the second face down to the scribed lines.
Cutting to Size
With your lumber squared, transfer measurements from your working drawings to the wood:
- Measure from a squared end and mark with a pencil and combination square.
- Mark a clear, straight cut line across the board using a square.
- Mark an “X” on the waste side (the piece you are cutting off) so you know which side of the line to cut on.
- Secure the board in a vise or on sawhorses with clamps.
- Cut on the waste side of the line — the saw kerf (the width of the cut) should fall entirely in the waste material.
Drilling with a Brace and Bit
The brace and bit is a hand-powered drill that gives you excellent control over hole placement and depth.
- Mark the hole location with an awl or nail punch (this gives the bit a starting point).
- Clamp the workpiece securely.
- Position the bit point on the mark and hold the brace vertical.
- Crank the handle with steady, even pressure.
- To prevent blowout on the exit side, either drill from both sides (stop when the point breaks through, flip the board, and finish from the other side) or place a scrap board underneath.
Assembly
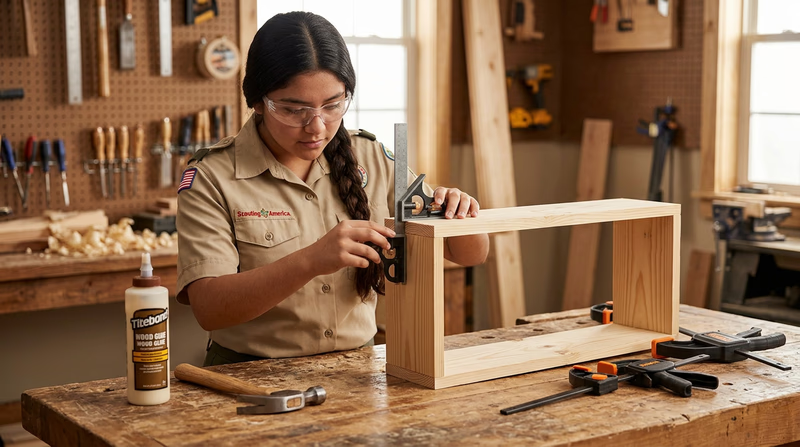
With all parts cut and drilled, dry-fit everything first — assemble without glue or fasteners to check that everything fits.
Assembly Checklist
Before committing to glue or nails
- All parts are cut to correct length: Check measurements against your working drawings.
- Joints fit snugly: Parts should come together without forcing or large gaps.
- The project sits flat and square: Check with a combination square and on a known-flat surface.
- You have all needed supplies ready: Glue, nails, clamps, damp cloth for glue squeeze-out.
When you are satisfied with the dry fit:
- Apply wood glue to mating surfaces (a thin, even coat on both surfaces).
- Assemble the parts and clamp firmly.
- Check for square before the glue sets.
- Wipe away any glue that squeezes out with a damp cloth — dried glue does not accept stain.
- If using nails, drive them carefully and set the heads below the surface with a nail set.
Project Ideas
Your counselor may suggest a project, or you can choose your own. Here are some ideas that use all five required tools (saw, plane, hammer, brace and bit):
- Simple bookshelf — Two sides, a top, a bottom, and one or two shelves
- Tool tote — An open-top box with a handle, great for carrying garden tools
- Step stool — A small stool with legs, stretchers, and a top
- Birdhouse — Sized to attract a specific local species
- Magazine rack — A standing rack with angled sides