Req 5 — Design Your Own Project
This is the most creative requirement in the Woodwork merit badge. Instead of following someone else’s plan, you are the designer. You will imagine something useful, draw it out, estimate the cost, build it, and track every hour and dollar along the way.
Choosing Your Project
Start by asking yourself a simple question: What do I need? The best projects solve a real problem or fill a real need. Look around your home, your room, your troop’s meeting space, or your school.
Some questions to spark ideas:
- Is there something I wish I had a place to store?
- Does my family need something for the house or yard?
- Could I build a gift for someone?
- Is there a piece of furniture that would be useful in my room?
- Could my troop use something for their meeting space or campouts?
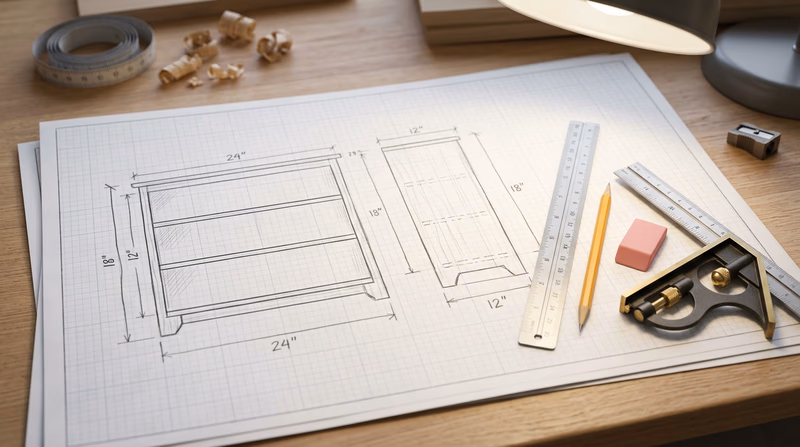
Creating Working Drawings
Your working drawings are the blueprint for your project. They need to be detailed enough that someone else could build the project from your drawings alone.
What to Include
- Three-view drawing — Front, side, and top views. Each view shows different details about the shape and dimensions.
- Dimensions — Every measurement labeled clearly. Use fractions (like 3½") rather than decimals.
- Detail views — Close-up drawings of joints, hardware placement, or other complex areas.
- Materials notes — Label what species of wood each part uses.
- Scale — Write the scale on the drawing (e.g., “1 square = 1 inch”).
Drawing Tips
- Use graph paper and a straightedge for clean, accurate lines.
- Draw to scale so proportions look right.
- Use standard drafting conventions: solid lines for visible edges, dashed lines for hidden edges.
- Erase mistakes cleanly — a confusing drawing leads to confusing cuts.
Materials List
Create a table listing every piece of wood and hardware you need:
| Part | Qty | Species | Dimensions | Cost |
|---|---|---|---|---|
| Side panel | 2 | Pine | ¾" × 10" × 30" | $8.50 |
| Shelf | 3 | Pine | ¾" × 9¼" × 24" | $9.00 |
| Back panel | 1 | Plywood | ¼" × 24" × 30" | $5.00 |
| Wood screws | 12 | — | #8 × 1¼" | $3.50 |
| Wood glue | 1 | — | 8 oz bottle | $4.00 |
| Sandpaper | 3 | — | 120, 150, 220 grit | $3.00 |
Add a subtotal at the bottom. Include everything — lumber, fasteners, glue, sandpaper, finish.
Tracking Time and Cost
Keep a simple log throughout your project. This teaches you to estimate future projects and understand the real cost of handmade goods.
Time Log Example
| Date | Activity | Hours |
|---|---|---|
| Mar 1 | Drew plans, made materials list | 1.5 |
| Mar 3 | Bought lumber, rough-cut parts | 2.0 |
| Mar 5 | Squared and planed all parts | 3.0 |
| Mar 8 | Cut joinery, dry fit | 2.5 |
| Mar 10 | Glue-up and assembly | 2.0 |
| Mar 12 | Sanding and finishing | 2.5 |
| Total | 13.5 |
Cost Tracking
Record the actual price you paid for each material. Save receipts. At the end, calculate your total materials cost and compare it to your original estimate.
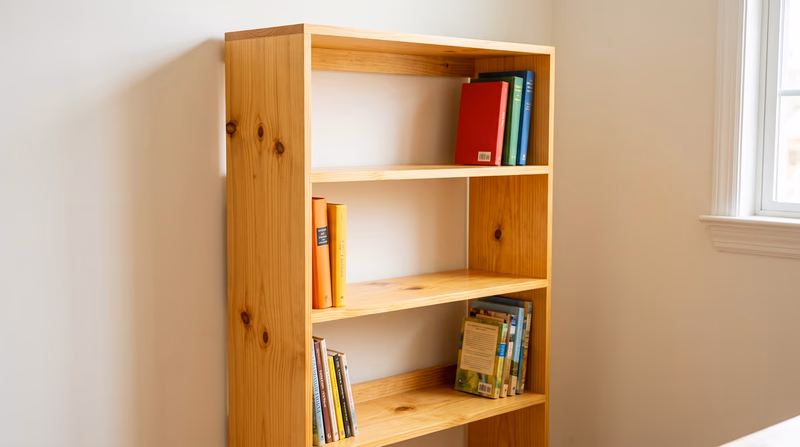
The Build Process
With your drawings done and materials purchased, follow these steps:
- Rough-cut all parts slightly oversize (leave about ¼" extra on length and width).
- Square and dimension each part to final size using your plane, saw, and measuring tools.
- Cut joinery — any dadoes, rabbets, or notches your design requires.
- Dry-fit — Assemble everything without glue to check fit.
- Sand all parts before assembly (it is much easier to sand individual pieces than an assembled project).
- Assemble — Glue, clamp, and check for square.
- Final sanding — Sand any areas that need it after assembly.
- Apply finish — Paint, stain, polyurethane, or oil depending on your design.
Before You Call It Done
Final quality check
- All joints are tight with no visible gaps.
- Surfaces are smooth to the touch — no rough spots, splinters, or tool marks.
- The project sits flat and does not wobble.
- All edges are slightly broken (sanded with a quick pass to remove sharpness).
- Finish is even with no drips, runs, or bare spots.
- The project matches your working drawings.